Key Takeaways:
- Master this hatch chile chicken pasta in 30 minutes with detailed beginner steps
- Perfect smoky heat balance using authentic New Mexico hatch chiles
- Serves 4 people with restaurant-quality creamy sauce techniques
- Foolproof instructions prevent common pasta sauce mistakes
Introduction
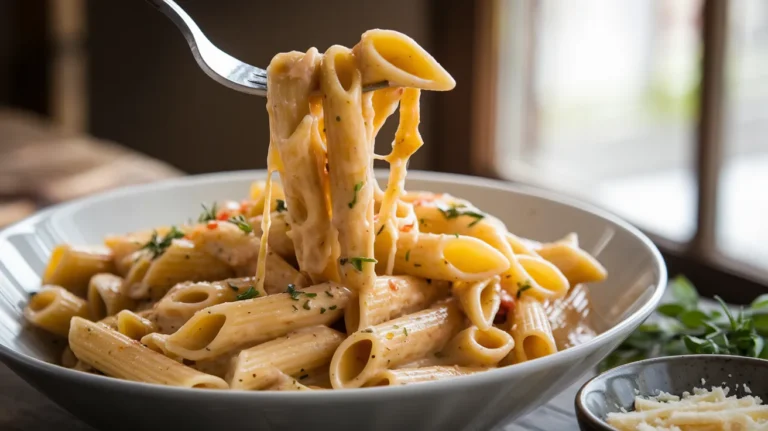
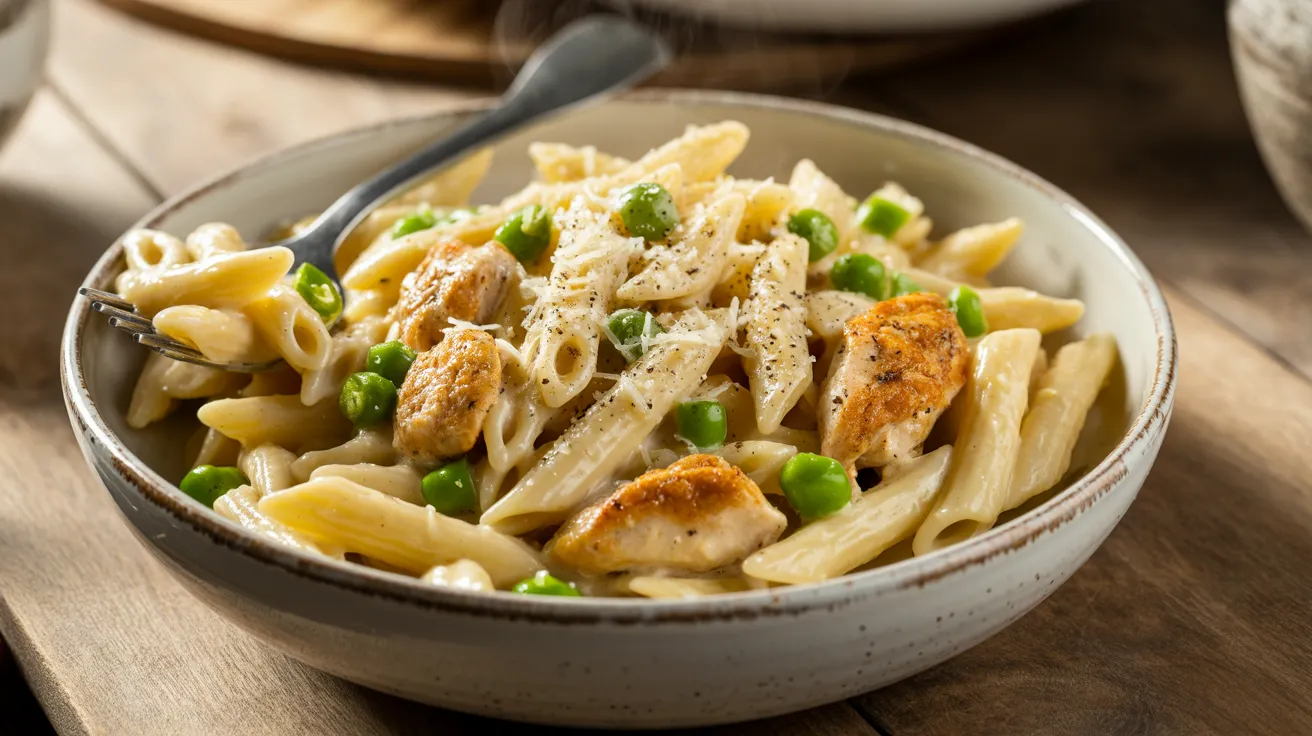
Struggling to create restaurant-quality pasta at home? This hatch chile chicken pasta recipe breaks down every single step so beginners can achieve perfect results every time. The smoky, earthy flavor of roasted hatch chiles transforms ordinary chicken pasta into something extraordinary.
I developed this detailed approach after teaching my teenage daughter to cook. She needed every step explained clearly, and now she makes this hatch chile chicken pasta better than most restaurants. The secret lies in understanding timing, temperature, and technique – all explained in beginner-friendly detail below.
Prep Time: 15 minutes
Cook Time: 15 minutes
Total Time: 30 minutes
Serves: 4 people
Nutrition Comparison (Per Serving)
| Nutrient | Amount | % Daily Value |
|---|---|---|
| Calories | 485 | 24% |
| Protein | 32g | 64% |
| Carbs | 52g | 17% |
| Fat | 14g | 18% |
| Fiber | 3g | 11% |
| Sodium | 620mg | 27% |
Equipment & Ingredients
Kitchen Tools Needed
| Tool | Purpose | Alternative |
|---|---|---|
| Large skillet (12-inch) | Cooking chicken & sauce | Heavy-bottomed pan |
| Large pot (6+ quarts) | Boiling pasta | Any deep pot |
| Long-handled tongs | Flipping chicken safely | Fork and large spoon |
| Sharp chef’s knife | Chopping ingredients | 8-inch knife minimum |
| Large cutting board | Prep workspace | 12×18 inch preferred |
| Measuring cups | Accurate portions | Essential for beginners |
| Meat thermometer | Food safety | Digital instant-read |
Complete Hatch Chile Chicken Pasta Ingredients
| Ingredient | Amount | Beginner Notes |
|---|---|---|
| Penne pasta | 1 pound | Choose ridged pasta to hold sauce |
| Chicken breasts | 1.5 pounds | Look for similar-sized pieces |
| Fresh hatch chiles | 6 medium | Or 1 cup roasted, chopped |
| Heavy cream | 1 cup | Must be room temperature |
| Low-sodium chicken broth | 1/2 cup | Prevents over-salting |
| Fresh garlic cloves | 4 large | Avoid pre-minced for best flavor |
| Yellow onion | 1 medium | Sweet onions work too |
| Extra virgin olive oil | 3 tablespoons | Good quality makes a difference |
| Unsalted butter | 2 tablespoons | Helps control salt levels |
| Fresh Parmesan cheese | 1 cup grated | Never use pre-shredded |
| Kosher salt | To taste | Start with 1 teaspoon |
| Fresh black pepper | 1/2 teaspoon | Grind fresh for best flavor |
| Smoked paprika | 1 teaspoon | Regular paprika works too |
Substitution Guide for Beginners
Heat Level Adjustments:
- Mild: Use poblano peppers instead of hatch chiles
- Medium: Mix half hatch chiles, half bell peppers
- Hot: Add 1 jalapeño with the hatch chiles
Dietary Modifications:
- Dairy-free: Replace cream with full-fat coconut milk
- Gluten-free: Use certified GF pasta, same cooking method
- Lower fat: Use half-and-half instead of heavy cream
Detailed Step-by-Step Hatch Chile Chicken Pasta Instructions
Phase 1: Setting Up Your Kitchen (5 minutes)
Step 1: Organize Your Workspace Clear your counters completely. Set out all ingredients where you can see them. Place your cutting board near the stove. Fill a small bowl with water for rinsing your hands between tasks.
Beginner tip: This prevents scrambling for ingredients while cooking.
Step 2: Start the Pasta Water Fill your largest pot with water until it’s 3/4 full. Place on your largest burner and turn heat to high. Add 1 tablespoon of kosher salt – the water should taste slightly salty like mild seawater.
Why this matters: Salted water seasons the pasta from the inside out.
Step 3: Prepare Your Chicken Safely Wash your hands thoroughly. Place chicken breasts on the cutting board. Using your sharp knife, slice each breast horizontally into 2 thinner pieces, then cut into 1-inch cubes. Each piece should be roughly the same size so they cook evenly.
Food safety note: Wash the cutting board and knife immediately after cutting raw chicken.
Phase 2: Vegetable Preparation (5 minutes)
Step 4: Prep Your Aromatics Peel the onion and cut off both ends. Slice in half from top to bottom, then lay flat and dice into small, uniform pieces about 1/4-inch. Place in a small bowl.
Beginner tip: Uniform pieces cook at the same rate, preventing burnt or raw spots.
Step 5: Prepare the Garlic Smash each garlic clove with the flat side of your knife to loosen the skin. Peel off the papery skin. Mince the garlic finely – pieces should be smaller than rice grains.
Pro tip: Minced garlic burns quickly, so keep pieces tiny and uniform.
Step 6: Handle the Hatch Chiles If using fresh chiles, put on gloves to protect your hands. Remove stems and seeds (seeds add heat). Chop into 1/2-inch pieces. If using pre-roasted, simply chop them.
Safety warning: Never touch your eyes after handling chiles, even with gloves.
Phase 3: Seasoning and Cooking Chicken (8 minutes)
Step 7: Season the Chicken Properly Pat each chicken piece completely dry with paper towels – this is crucial for browning. Place chicken in a large bowl. Sprinkle with 1 teaspoon salt, 1/2 teaspoon black pepper, and 1 teaspoon smoked paprika. Toss with your hands until every piece is coated.
Why pat dry: Moisture prevents browning and creates steam instead of searing.
Step 8: Heat Your Pan Correctly Place your large skillet over medium-high heat. Add 2 tablespoons olive oil. The oil is ready when it shimmers and moves easily around the pan – this takes about 2 minutes.
Temperature test: A drop of water should sizzle immediately when the pan is ready.
Step 9: Cook Chicken in Batches Add half the seasoned chicken to the hot oil in a single layer. Don’t move the pieces for 3-4 minutes – you should hear steady sizzling. The chicken will release easily when properly browned.
Common mistake: Overcrowding the pan steams the chicken instead of browning it.
Step 10: Flip and Finish Chicken Using tongs, flip each piece. Cook another 2-3 minutes until the internal temperature reaches 165°F on your meat thermometer. Transfer cooked chicken to a clean plate. Repeat with remaining chicken.
Food safety: Always check temperature – undercooked chicken is dangerous.
Phase 4: Cooking the Pasta (10 minutes)
Step 11: Add Pasta to Boiling Water Your water should be at a rolling boil by now. Add the entire pound of pasta all at once, stirring immediately to prevent sticking. Set a timer for 1 minute less than the package directions state.
Timing tip: Undercook slightly – the pasta finishes cooking in the sauce.
Step 12: Reserve Pasta Water About 2 minutes before the pasta is done, use a measuring cup to scoop out 1 cup of the starchy pasta water. Set aside – this liquid will help create your creamy sauce.
Critical step: You cannot recreate this starchy water once the pasta is drained.
Phase 5: Building the Hatch Chile Chicken Pasta Sauce (8 minutes)
Step 13: Start the Sauce Base In the same skillet where you cooked chicken (don’t clean it – those brown bits add flavor), reduce heat to medium. Add 1 tablespoon butter and the diced onion.
Technique note: The butter prevents the onion from burning while it softens.
Step 14: Cook Onions Properly Stir the onions constantly for 2-3 minutes until they become translucent and soft. They should not brown – if they start to, lower your heat immediately.
Visual cue: Translucent means you can almost see through the onion pieces.
Step 15: Add Garlic Carefully Add the minced garlic and stir constantly for exactly 30 seconds. You’ll smell the aroma immediately. Remove from heat if the garlic starts to brown.
Timing is everything: Burnt garlic tastes bitter and will ruin your sauce.
Step 16: Deglaze with Broth Pour in the chicken broth and scrape the bottom of the pan with a wooden spoon to loosen any browned bits. These bits are pure flavor – don’t leave them stuck to the pan.
Technique: The liquid will bubble vigorously at first, then calm down.
Phase 6: Combining Everything (5 minutes)
Step 17: Add Hatch Chiles Stir in the chopped hatch chiles and cook for 1 minute, stirring constantly. This releases their smoky flavor into the oil and creates the signature taste of this dish.
Flavor development: Don’t skip this step – raw chiles taste completely different.
Step 18: Create the Cream Sauce Remove the pan from heat completely. Slowly pour in the room-temperature heavy cream while stirring constantly with a whisk or spoon. This prevents the cream from curdling.
Temperature control: Hot pan + cold cream = broken sauce. Always remove from heat first.
Step 19: Combine Pasta and Sauce Drain the pasta (remember, it should be slightly undercooked). Add the hot pasta directly to the cream sauce along with the cooked chicken. Return pan to low heat.
Why low heat: High heat will break the cream sauce and make it grainy.
Step 20: Finish the Hatch Chile Chicken Pasta Toss everything together using tongs for 1-2 minutes. Gradually add the reserved pasta water, 2 tablespoons at a time, until the sauce coats every piece of pasta like silk.
Consistency goal: The sauce should cling to the pasta without pooling in the bottom of the pan.
Step 21: Add Cheese and Season Remove from all heat. Add half the grated Parmesan cheese and toss until melted. Taste and add salt and pepper as needed. The cheese adds saltiness, so taste before adding more salt.
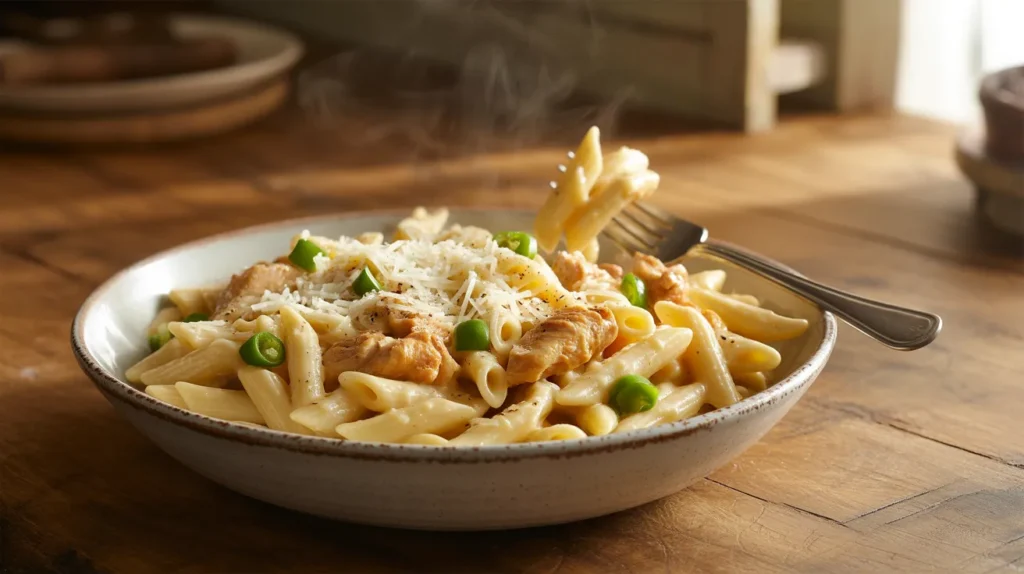
Final check: The pasta should be tender, chicken fully cooked, and sauce creamy without being thick.
Troubleshooting Your Hatch Chile Chicken Pasta
Problem: Sauce is too thick Solution: Add reserved pasta water 1 tablespoon at a time while tossing
Problem: Sauce won’t stick to pasta Solution: You need more starchy pasta water – add gradually while mixing
Problem: Cream sauce looks broken or grainy Solution: Remove from heat immediately, add 1 tablespoon cold butter, whisk vigorously
Problem: Chicken is dry Solution: Next time, don’t overcook – remove at 160°F as it continues cooking in sauce
Problem: Not enough spice Solution: Add pinch of cayenne pepper or red pepper flakes to taste
Problem: Pasta is mushy Solution: Next time, cook pasta 2 minutes less than package directions
Creative Variations for Your Hatch Chile Chicken Pasta
Southwest Style: Add corn kernels, black beans, and finish with lime juice and cilantro
Bacon Lover’s Version: Cook 4 strips bacon first, use fat to cook chicken, crumble bacon on top
Vegetable-Packed: Add bell peppers, zucchini, or mushrooms with the onions
Lighter Option: Use half-and-half instead of cream and add extra pasta water for consistency
For seafood lovers, try this halibut pasta that uses similar cream sauce techniques with a different protein.
Storage and Reheating Guide
Refrigerator Storage: Cool completely, store in airtight containers up to 3 days
Reheating Instructions: Add 2-3 tablespoons milk or broth, heat gently over low heat, stirring constantly
Make-Ahead Tips: Cook and season chicken ahead, prep all vegetables, combine fresh for best texture
Freezing Note: Don’t freeze – cream sauces separate when frozen and thawed
Essential Safety Tips for Beginners
Raw Chicken Safety:
- Wash hands before and after handling
- Use separate cutting board for meat
- Cook to exactly 165°F internal temperature
- Never rinse raw chicken (spreads bacteria)
Chile Handling:
- Always wear gloves when handling hot peppers
- Don’t touch face or eyes
- Wash all surfaces that touched chiles
Hot Oil Safety:
- Never add wet ingredients to hot oil
- Keep pot handles turned inward
- Have a lid nearby to smother oil fires
For another beginner-friendly pasta option, this healthy tomato zucchini pasta offers excellent practice with basic sauce techniques.
Pasta Water Tips:
- Always salt the water generously
- Save pasta water before draining
- Use immediately – it doesn’t keep
This comprehensive hatch chile chicken pasta recipe gives beginners the confidence to create restaurant-quality results at home. The detailed instructions eliminate guesswork and ensure perfect results every time. Master these techniques, and you’ll have the foundation for countless pasta variations. The smoky heat of hatch chiles combined with tender chicken and creamy sauce creates a memorable meal that’ll become your new weeknight favorite.