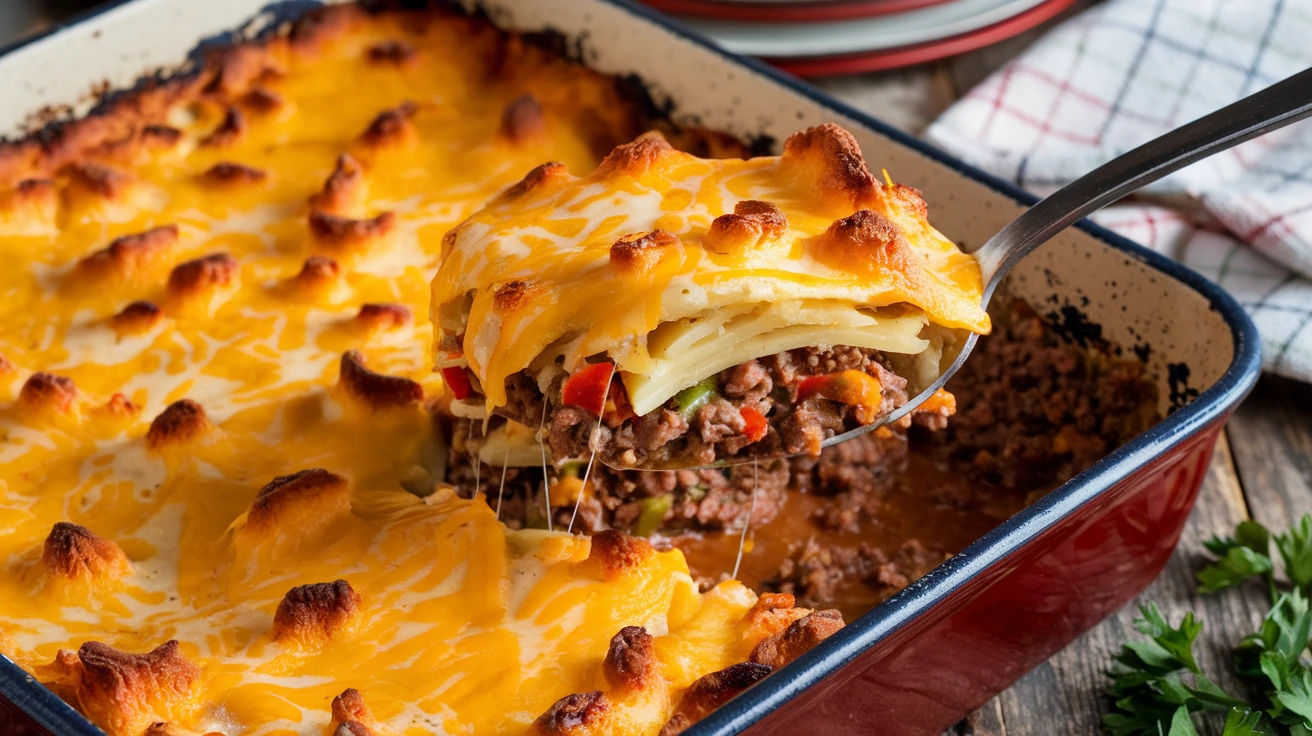
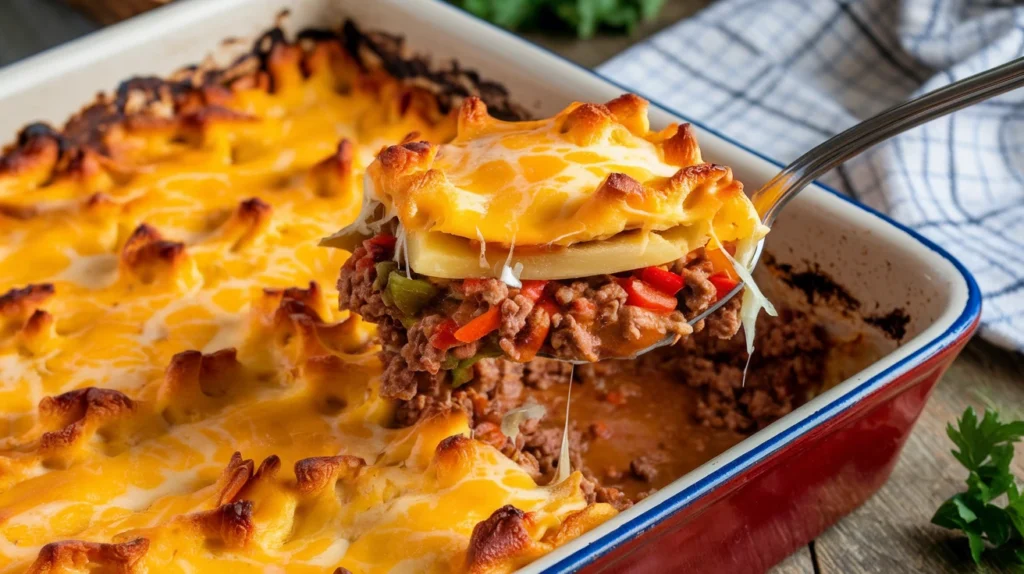
- Comfort food champion: This Hobo Casserole Rustic Ground Beef And Potato Bake will warm your soul
- Budget-friendly: Feeds a family of four for under $15
- Make-ahead magic: Can be prepped a day in advance
- Leftovers heaven: Tastes even better the next day
The Ultimate Hobo Casserole Rustic Ground Beef And Potato Bake
Ever had one of those days when you need something hearty and satisfying but don’t have the energy for complicated cooking? We’ve all been there. You want a meal that feels like a warm hug but won’t break the bank or take all evening.
This Hobo Casserole Rustic Ground Beef And Potato Bake is your answer. It combines layers of seasoned ground beef, crispy-edged potatoes, and melty cheese in a rustic bake that’s both nostalgic and delicious. Best of all? It’s simple enough for even beginner cooks to master.
What makes this Hobo Casserole Rustic Ground Beef And Potato Bake special is how the flavors meld together as it bakes. The beef juices seep into the potatoes, while the top gets beautifully golden and crispy. Unlike fancy casseroles with complicated ingredients, this one relies on simple, affordable staples.
The Hobo Casserole Rustic Ground Beef And Potato Bake works for picky eaters and food enthusiasts alike. It’s humble enough for everyday meals but can be dressed up for company with a few simple additions.
Ready to try it yourself? Let’s get cooking!
Nutrition Breakdown for Hobo Casserole Rustic Ground Beef And Potato Bake
| Nutrient | Amount per Serving | % Daily Value |
|---|---|---|
| Calories | 425 | – |
| Protein | 30g | 60% |
| Carbohydrates | 35g | 12% |
| Fat | 20g | 31% |
| Fiber | 5g | 20% |
| Sodium | 650mg | 27% |
| Potassium | 1050mg | 30% |
| Iron | 4.5mg | 25% |
Based on a 2,000 calorie diet. Serving size: approximately 2 cups.
What You’ll Need for the Hobo Casserole Rustic Ground Beef And Potato Bake
Ingredients List
| Ingredient | Amount | Notes |
|---|---|---|
| Ground beef (80/20) | 1.5 pounds | For best flavor |
| Russet potatoes | 2 pounds (about 4 medium) | Thinly sliced ¼-inch |
| Yellow onion | 1 large | Diced |
| Garlic | 4 cloves | Minced |
| Bell pepper | 1 medium | Any color, diced |
| Carrots | 2 medium | Diced |
| Olive oil | 2 tablespoons | Divided |
| Beef broth | 1 cup | Low sodium |
| Tomato paste | 2 tablespoons | |
| Worcestershire sauce | 1 tablespoon | |
| Paprika | 1 teaspoon | |
| Dried thyme | 1 teaspoon | |
| Salt | 1.5 teaspoons | Or to taste |
| Black pepper | ¾ teaspoon | Freshly ground |
| Cheddar cheese | 1.5 cups | Shredded, divided |
| Fresh parsley | 2 tablespoons | Chopped, for garnish |
Kitchen Tools
| Tool | Purpose |
|---|---|
| 9×13 baking dish | Main cooking vessel |
| Large skillet | For cooking beef and vegetables |
| Sharp knife | For prep work |
| Cutting board | For prep work |
| Vegetable peeler | For peeling potatoes |
| Measuring spoons/cups | For accurate seasoning |
| Wooden spoon | For stirring |
| Aluminum foil | For covering casserole |
| Mandoline (optional) | For slicing potatoes evenly |
| Timer | To track cooking time |
| Oven mitts | For handling hot dish |
| Small bowl | For mixing seasonings |
Possible Substitutions
- Ground turkey can replace beef for a leaner option
- Sweet potatoes work instead of russet for a nutrition boost
- Chicken broth can substitute for beef broth
- Red onion can replace yellow for a sharper flavor
- Dried parsley (1 teaspoon) can substitute for fresh
- Mozzarella or Monterey Jack can replace cheddar
Detailed Step-by-Step Instructions for Hobo Casserole Rustic Ground Beef And Potato Bake
Prep Time: 25 minutes
Cook Time: 55 minutes
Total Time: 1 hour 20 minutes
Servings: 4 people
Preparation Phase
- Preheat your oven:
- Set your oven to 375°F (190°C)
- Place the rack in the middle position
- Allow at least 15 minutes for the oven to fully preheat
- Prepare your workspace:
- Clear and clean your counter
- Set up your cutting board and knife
- Take out all ingredients from the refrigerator and pantry
- Let the ground beef sit at room temperature for 10 minutes (this helps it cook more evenly)
- Get your 9×13 baking dish ready (no need to grease it)
- Prep the potatoes:
- Fill a large bowl with cold water
- Hold each potato firmly in your non-dominant hand
- Using the vegetable peeler in your dominant hand, peel the potatoes completely
- Rinse the peeled potatoes under cold water to remove any dirt
- Using a sharp knife or mandoline (for more even slices):
- Cut the potatoes into thin slices, about ¼-inch thick
- If using a knife, try to keep the thickness consistent
- If using a mandoline, be very careful and use the hand guard
- Place the sliced potatoes in the bowl of cold water as you go
- This prevents them from browning and removes excess starch
- When all potatoes are sliced, let them soak while you prepare other ingredients
- Prep the vegetables:
- For the onion:
- Cut off both ends and peel off the outer layer
- Cut in half from top to bottom
- Place flat-side down and make vertical cuts ¼-inch apart
- Turn 90 degrees and cut crosswise to create ¼-inch dice
- Set aside in a small bowl
- For the garlic:
- Separate the cloves from the head
- Place a clove on the cutting board
- Lay the flat side of your knife on top of the clove
- Carefully press down with the heel of your hand to crush the clove
- Remove the papery skin
- Mince the garlic by making multiple cuts in different directions until finely chopped
- Set aside in a separate small bowl
- For the bell pepper:
- Cut off the top and bottom
- Stand the pepper up and slice down the sides to remove the core and seeds
- Lay each piece flat and cut into ¼-inch strips
- Turn the strips and cut crosswise into ¼-inch dices
- Set aside with the onions
- For the carrots:
- Peel the carrots using a vegetable peeler
- Cut off both ends
- Cut in half lengthwise
- Place flat-side down and cut into thin half-moon slices
- Set aside with the onions and peppers
- For the onion:
- Prepare the seasonings:
- Take a small bowl
- Add 1 teaspoon paprika
- Add 1 teaspoon dried thyme
- Add 1.5 teaspoons salt
- Add ¾ teaspoon black pepper
- Mix with a spoon to combine evenly
- Set aside for easy access during cooking
- Final potato prep:
- Drain the potato slices in a colander
- Rinse under cold water one more time
- Spread them on clean kitchen towels or paper towels
- Pat them dry completely (important: wet potatoes won’t brown properly)
Cooking Phase
- Cook the beef and vegetables:
- Place your large skillet on the stove
- Turn the heat to medium-high
- Add 1 tablespoon olive oil to the skillet
- Let the oil heat until it shimmers (about 30 seconds)
- Add the diced onions, bell peppers, and carrots to the hot oil
- Stir occasionally with your wooden spoon for 5 minutes until the vegetables soften
- Add the minced garlic
- Stir continuously for 30 seconds (be careful not to burn the garlic)
- Add the ground beef to the skillet
- Break it up into small pieces with your wooden spoon
- Spread the beef evenly across the pan
- Cook for 8-10 minutes, stirring occasionally and breaking up any large chunks
- The beef should be completely browned with no pink remaining
- Season the beef mixture:
- Sprinkle the prepared seasoning mixture evenly over the beef and vegetables
- Stir well to coat everything evenly
- Add 2 tablespoons tomato paste
- Stir to distribute the tomato paste throughout the mixture
- Pour in 1 tablespoon Worcestershire sauce
- Pour in ½ cup of the beef broth (save the other ½ cup for later)
- Using your wooden spoon, scrape the bottom of the pan to release any browned bits
- Simmer for 3-4 minutes until the liquid reduces slightly
- The mixture should be moist but not overly soupy
- Taste and adjust seasonings if needed
- Remove from heat
Assembly Phase
- Layer the casserole:
- Take your 9×13 baking dish
- Start with a thin layer of the beef mixture on the bottom (about ⅓ of the total)
- Spread it evenly with your wooden spoon or spatula
- Arrange a single layer of potato slices, slightly overlapping them
- They should cover the beef completely but not be stacked
- Sprinkle ½ cup of shredded cheese over the potatoes
- Add another layer of beef mixture (another ⅓)
- Add another layer of overlapping potato slices
- Pour the remaining ½ cup of beef broth evenly over the potatoes
- This helps them cook properly and prevents drying out
- Top with the final ⅓ of the beef mixture
- Spread it evenly across the top
- Sprinkle the remaining 1 cup of cheese over everything
- Prepare for baking:
- Cover the baking dish tightly with aluminum foil
- Make sure the foil doesn’t touch the cheese (tent it slightly if needed)
- This prevents the cheese from sticking to the foil
- If planning to bake later, you can refrigerate at this point for up to 24 hours
Baking Phase
- Bake the casserole:
- Place the covered baking dish in the preheated oven
- Bake covered for 35 minutes
- Carefully remove the foil (watch out for hot steam)
- Return to the oven uncovered
- Bake for an additional 20 minutes
- The top should become golden brown and bubbling
- The potatoes should be fork-tender
- To test: insert a knife into the center—it should go through the potatoes easily
- Final touches and serving:
- Remove the baking dish from the oven using oven mitts
- Place on a heat-safe surface
- Let the Hobo Casserole Rustic Ground Beef And Potato Bake rest for 10 minutes
- This is important to let it set and for the flavors to meld
- Sprinkle with 2 tablespoons chopped fresh parsley
- Using a serving spoon, cut into portions and serve
- Serve hot, each portion should be about 2 cups
Troubleshooting Your Hobo Casserole Rustic Ground Beef And Potato Bake
Common Issues and Solutions
Potatoes still hard: If your potatoes aren’t tender after the full baking time:
- Cover the dish with foil again
- Return to the oven for an additional 15 minutes
- Check tenderness again with a knife
- Make sure your potato slices weren’t too thick (they should be about ¼-inch)
Too much liquid: If your casserole seems too watery after baking:
- Remove from the oven
- Let it stand uncovered for 15-20 minutes before serving
- The starches in the potatoes will help absorb some excess liquid
- For future batches, use less broth or pre-cook the potatoes slightly
Dry casserole: If your casserole seems too dry:
- Next time, add an additional ¼ cup of broth before baking
- Make sure your foil seal was tight during the covered baking phase
- Check that your oven temperature isn’t running hot
Cheese burned but potatoes not done: If the top is burning before the potatoes are cooked:
- Cover with foil again for the remainder of the cooking time
- Lower your oven temperature by 25 degrees for future batches
- Place the rack in a lower position in the oven
Flavors seem flat: If your dish needs more flavor:
- Add an extra ½ teaspoon of Worcestershire sauce to the beef mixture
- Increase the herbs and spices by 25%
- Add ½ teaspoon of garlic powder to the seasoning mix
- Try using a stronger-flavored cheese like sharp cheddar or pepper jack
Variations & Substitutions for Your Hobo Casserole Rustic Ground Beef And Potato Bake
Make It Your Own
Mexican-Inspired: Transform your Hobo Casserole into a south-of-the-border treat:
- Add 1 tablespoon taco seasoning to the beef mixture
- Include 1 can of drained black beans and 1 cup of corn
- Use pepper jack cheese instead of cheddar
- Top with diced avocado, sour cream, and cilantro before serving
This flavor profile would pair wonderfully with our Mexican Picadillo Recipe for a complete themed dinner week.
Italian Version: Give your Hobo Casserole an Italian twist:
- Use 1 tablespoon Italian seasoning instead of thyme
- Add ½ cup diced bell peppers to the beef mixture
- Include ¼ cup sliced black olives
- Add 1 cup of marinara sauce to the beef mixture
- Use mozzarella and Parmesan cheese instead of cheddar
- Garnish with fresh basil instead of parsley
Loaded Baked Potato Style: Make your Hobo Casserole extra indulgent:
- Cook 6 strips of bacon until crisp, then crumble
- Mix half the bacon into the beef mixture
- Sprinkle the rest on top with the cheese
- Add ¼ cup sliced green onions before serving
- Top individual servings with a dollop of sour cream
Vegetarian Option: Create a meat-free version:
- Replace beef with 2 cups of chopped mushrooms (portobello or cremini work well)
- Add 1 cup cooked lentils for protein
- Use vegetable broth instead of beef broth
- Add 1 teaspoon smoked paprika for a deeper flavor
- Consider adding 1 cup of cauliflower florets for extra texture
Shepherd’s Pie Style: For a twist on the classic:
- Add ½ cup frozen peas and ½ cup corn to the beef mixture
- Use mashed potatoes instead of sliced (spread on top as the final layer)
- Add a dash of Worcestershire sauce to the beef mixture
- Top with cheese for the last 10 minutes of baking
Storage & Reheating Your Hobo Casserole Rustic Ground Beef And Potato Bake
Keep It Fresh
Refrigerator:
- Allow the Hobo Casserole to cool completely
- Cover the baking dish with plastic wrap or transfer portions to airtight containers
- Store in the refrigerator for up to 4 days
- For best quality, place a paper towel on top to absorb excess moisture
Freezer: The Hobo Casserole freezes well for up to 3 months.
- Cool the dish completely
- Portion into individual meal-sized containers or wrap well in foil
- Place in freezer-safe bags or containers
- Label with the date and contents
- Freeze for up to 3 months
- For best results, thaw in refrigerator before reheating
Reheating From Refrigerator:
- Microwave Method:
- Place a portion in a microwave-safe dish
- Cover with a damp paper towel to maintain moisture
- Heat on medium power (70%) for 2 minutes
- Stir if possible or rotate the dish
- Heat for another 1-2 minutes until heated through (165°F)
- Let stand for 1 minute before eating
- Oven Method (Best for maintaining texture):
- Preheat oven to 350°F
- Place the casserole in an oven-safe dish
- Add 1-2 tablespoons of beef broth to maintain moisture
- Cover with aluminum foil
- Heat for 20-25 minutes until warmed through
- Remove foil for the last 5 minutes to re-crisp the top
Reheating From Frozen:
- Thaw Method (Recommended):
- Transfer from freezer to refrigerator the night before
- Once thawed, reheat using any method above
- Direct Reheat Method:
- Oven: Cover with foil and heat at 325°F for 45-50 minutes
- Remove foil for the last 10 minutes
If you enjoy make-ahead meals like this, you might also like our Cheesy Garlic Butter Linguine with Savory Ground Beef which also reheats beautifully.
Safety Notes & Tips for Your Hobo Casserole Rustic Ground Beef And Potato Bake
Kitchen Wisdom
Food Safety:
- Always wash hands with soap and warm water for 20 seconds before and after handling raw meat
- Use a separate cutting board for meat and vegetables
- Cook ground beef to an internal temperature of 160°F
- Don’t leave the finished Hobo Casserole at room temperature for more than 2 hours
- Refrigerate leftovers promptly in shallow containers for quick cooling
Pro Tips for Perfect Hobo Casserole:
- Potato trick: Soaking sliced potatoes in cold water removes excess starch and prevents discoloration. Dry them thoroughly before using.
- Even slicing: Try to slice potatoes to a consistent thickness so they cook evenly. A mandoline is perfect for this, but be extremely careful with your fingers.
- Layering strategy: Don’t make your layers too thick. Multiple thinner layers work better than fewer thick layers.
- Cheese selection: For the best melty top, use freshly grated cheese rather than pre-shredded (which contains anti-caking agents).
- Rest period: Don’t skip the 10-minute rest after baking. It allows the casserole to set up properly and makes serving much easier.
- Time saver: You can assemble this casserole up to 24 hours ahead and refrigerate it. Add an extra 10-15 minutes to the cooking time if baking straight from the refrigerator.
Kid-Friendly Adjustments:
- Reduce or omit black pepper for sensitive palates
- Finely dice vegetables so they blend in more with the beef
- If your kids don’t like visible onions, you can grate them instead of dicing
- Add a layer of their favorite cheese in the middle
- Let them help arrange the potato slices for a fun cooking activity
Dietary Considerations:
- Gluten-free: This Hobo Casserole is naturally gluten-free, but double-check your Worcestershire sauce brand as some contain gluten.
- Dairy-free: Omit the cheese or use a non-dairy cheese alternative.
- Lower-sodium: Use low-sodium broth, reduce added salt to ¾ teaspoon, and select low-sodium cheese.
- Lower-fat: Use 90/10 ground beef or substitute ground turkey, and reduce cheese by half.
Special Warning for Beginners:
- The baking dish will be VERY hot coming out of the oven. Always use proper oven mitts and place on a heat-safe surface.
- When removing foil mid-baking, lift away from you to avoid steam burns.
- Let children know the dish is hot and needs to cool before serving.
For more hearty ground beef recipes that will please the whole family, check out our Beef Queso Mac and Cheese – another comfort food favorite!
Remember, the magic of this Hobo Casserole Rustic Ground Beef And Potato Bake is in the layers – take your time arranging them for the best results. The extra few minutes of care during assembly will reward you with a perfect comfort food dinner.
Happy cooking!