Prep Time: 30 minutes | Cook Time: 25 minutes | Total Time: 55 minutes | Servings: 4 people
Key Takeaways
- This homemade KFC chicken recipe captures that signature crunch and 11-spice flavor perfectly.
- The double-dredging technique creates the extra-crispy crust KFC is famous for.
- Making KFC chicken at home cuts sodium by more than half compared to the original.
- You can prep ahead and reheat without losing that mouth-watering crispiness.
Introduction
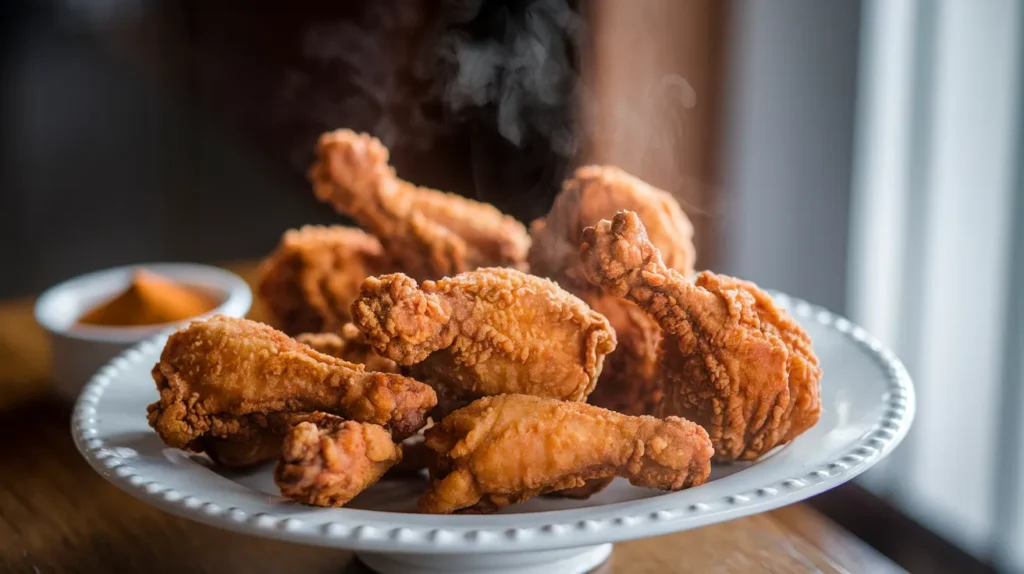
Craving that iconic KFC flavor but want to skip the drive-thru? This homemade KFC chicken recipe is your answer.
Making homemade KFC chicken might seem like a challenge, but with the right spice blend and technique, you’ll create chicken that rivals the Colonel’s secret recipe. This version gives you that signature juicy meat with a crunchy, craggly crust that KFC fans crave.
The magic behind homemade KFC chicken is in the authentic double-dredging process and precise spice mix that replicates those famous 11 herbs and spices. Once you master this method, you might never need to visit the drive-thru again!
What makes this homemade KFC chicken special is that you control the ingredients – less sodium, no preservatives, and you can customize the spice level to your family’s taste. Ready to bring the Colonel’s kitchen to yours? Let’s get cooking!
Nutrition Comparison
| Nutrient | Homemade KFC Chicken (1 piece) | KFC Original Recipe (1 piece) |
|---|---|---|
| Calories | 320 | 390 |
| Total Fat | 18g | 21g |
| Saturated Fat | 4g | 5g |
| Cholesterol | 90mg | 105mg |
| Sodium | 550mg | 1150mg |
| Carbohydrates | 11g | 15g |
| Protein | 28g | 27g |
Equipment & Ingredients
Kitchen Tools
| Tool | Purpose |
|---|---|
| Large Dutch oven or fryer | For deep frying the chicken |
| Meat thermometer | Ensures chicken is safely cooked |
| Kitchen tongs | For handling hot chicken |
| Wire rack | Draining excess oil |
| 2 large bowls | For dredging stations |
| Measuring spoons/cups | Precise spice measurements |
| Paper towels | Absorbing excess oil |
| Candy/oil thermometer | Monitoring oil temperature |
Ingredients List
| Ingredient | Amount | Purpose |
|---|---|---|
| Chicken parts (mix of thighs, drumsticks, wings) | 3 lbs (8-10 pieces) | Main protein |
| All-purpose flour | 2 cups | Coating base |
| Cornstarch | 1/4 cup | Creates extra crispiness |
| Buttermilk | 2 cups | Tenderizes chicken |
| Eggs | 2 | Helps coating adhere |
| White pepper | 2 teaspoons | Signature KFC flavor |
| Paprika | 1 tablespoon | Color and mild spice |
| Dried oregano | 1 teaspoon | Herbal notes |
| Dried basil | 1 teaspoon | Herbal complexity |
| Dried thyme | 1 teaspoon | Earthy flavor |
| Garlic powder | 2 teaspoons | Savory depth |
| Onion powder | 2 teaspoons | Savory sweetness |
| Salt | 2 tablespoons | Flavor enhancement |
| MSG (optional) | 1 teaspoon | Authentic umami |
| Celery salt | 1 teaspoon | Signature flavor note |
| Ground ginger | 1/2 teaspoon | Subtle warmth |
| Mustard powder | 1/2 teaspoon | Tangy note |
| Black pepper | 1 teaspoon | Spice balance |
| Vegetable oil for frying | 6-8 cups | Cooking medium |
Optional Substitutions
- Buttermilk: Mix 2 cups milk with 2 tablespoons vinegar or lemon juice, let stand 5 minutes.
- MSG: Omit if desired or replace with 1/2 teaspoon mushroom powder.
- Cornstarch: Replace with potato starch for similar crispiness.
- Oil: Peanut oil provides authentic flavor but any high-heat neutral oil works.
- Chicken parts: If you love how I make sticky honey chicken with boneless pieces, you can use boneless thighs here too for easier eating.
Detailed Step-by-Step Instructions for Beginners
Preparation Phase (30 minutes)
- Gather all ingredients and tools:
- Set out all ingredients on your counter.
- Check that you have all necessary tools from the tools section.
- Read through all instructions first to understand the process.
- Beginner tip: This “everything in place” approach prevents mid-cooking confusion.
- Prepare the chicken:
- Take chicken pieces out of refrigerator 30 minutes before cooking.
- Why? Room temperature chicken cooks more evenly than cold chicken.
- Place chicken pieces on a clean cutting board.
- Using paper towels, pat each piece completely dry on all sides.
- Important! Moisture is the enemy of crispy chicken. The drier the chicken, the better your coating will stick.
- If chicken pieces are very large, cut them into smaller portions using a sharp knife.
- Look for and trim any loose pieces of skin or excess fat pockets with kitchen scissors.
- Measure and mix the spice blend:
- Find a small mixing bowl for your spices.
- Carefully measure each spice using proper measuring spoons:
- 2 teaspoons white pepper
- 1 tablespoon paprika
- 1 teaspoon dried oregano
- 1 teaspoon dried basil
- 1 teaspoon dried thyme
- 2 teaspoons garlic powder
- 2 teaspoons onion powder
- 2 tablespoons salt
- 1 teaspoon MSG (if using)
- 1 teaspoon celery salt
- 1/2 teaspoon ground ginger
- 1/2 teaspoon mustard powder
- 1 teaspoon black pepper
- Use a small whisk or fork to combine all spices until mixture looks uniform in color.
- Important: Remove 1 tablespoon of this spice mix and set aside for the flour mixture.
- Tip: If spices are clumpy, use the back of a spoon to crush them before mixing.
- Set up your dredging stations:
- Find a work area with enough space for two large bowls side by side, plus room for plates.
- Station 1 (Wet Station):
- Take a large bowl and crack 2 eggs into it.
- Pour 2 cups of buttermilk into the same bowl.
- Whisk together until completely combined and smooth.
- Station 2 (Dry Station):
- In another large bowl, measure 2 cups all-purpose flour.
- Add 1/4 cup cornstarch to the flour.
- Add the 1 tablespoon of reserved spice mixture.
- Use a fork or whisk to mix thoroughly.
- Place these stations side by side, with wet station (eggs/buttermilk) on the left and dry station (flour mixture) on the right.
- Place a clean plate at the far right to hold your coated chicken.
- Season the chicken directly:
- Take half of your remaining spice mix.
- Sprinkle it evenly over all sides of the chicken pieces.
- Using clean hands or a spoon, rub the spices into the chicken to ensure even coverage.
- Let the chicken rest with these spices for 15 minutes.
- Why? This direct seasoning step ensures flavor gets into the meat, not just the coating.
- If you’re wondering how this compares to chicken nanban, that Japanese preparation has a tangy marinade rather than a dry spice rub.
- Prepare for frying:
- While chicken is resting, place Dutch oven or deep fryer on the stove.
- Add vegetable oil, filling approximately 2-3 inches deep.
- Safety tip: Never fill more than halfway with oil to prevent overflow.
- Clip candy/oil thermometer to the side of the pot. Ensure the tip is in the oil but not touching the bottom.
- Turn heat to medium-high.
- Begin heating oil to exactly 350°F (175°C).
- Beginner tip: Getting oil temperature right is crucial. Too hot and chicken burns; too cool and it gets greasy.
- While oil heats, line a baking sheet with several layers of paper towels.
- Place a wire cooling rack on top of the paper towels.
- This setup allows excess oil to drain while keeping chicken crispy.
Coating & Cooking Phase (25 minutes)
- First dredging step:
- Once chicken has rested with spices and oil is heating, begin the coating process.
- Take one piece of chicken and fully submerge it in the buttermilk-egg mixture (Station 1).
- Lift it out, holding above the bowl for 5 seconds to let excess liquid drip off.
- Move the chicken to the flour mixture (Station 2).
- Technique tip: Use one hand for wet ingredients and the other hand for dry to prevent “breading fingers.”
- Place the chicken in the flour and use your dry hand to cover it completely.
- Gently press the flour onto the chicken to help it adhere.
- Shake off any loose flour.
- Second dredging step (crucial for KFC-style crust):
- Take the same piece of chicken, now coated in flour, and dip it back into the buttermilk-egg mixture.
- Again, let excess liquid drip off for 5 seconds.
- Return the chicken to the flour mixture for a second coating.
- This time, use your fingers to create a shaggy coating by gently pinching some of the flour mixture onto the chicken.
- Why? These little flour “bits” create the extra-crispy, craggly texture that makes homemade KFC chicken special.
- Place the double-coated chicken piece on your clean plate.
- Repeat steps 7 and 8 with each piece of chicken.
- Once all pieces are coated, let them rest for 5 minutes.
- Important! This resting time allows the coating to adhere better and prevents it from falling off during frying.
- Check oil temperature:
- Before adding chicken, make sure oil has reached exactly 350°F (175°C).
- If too hot (above 360°F), reduce heat slightly or remove pot from heat briefly.
- If not hot enough, wait until it reaches temperature.
- Never add chicken to oil that isn’t hot enough – this causes greasy, soggy chicken.
- Begin frying process:
- Make sure you have your tongs ready and nearby.
- Check that your wire rack setup is ready for finished chicken.
- Use your tongs to carefully pick up one piece of chicken.
- Slowly lower it into the hot oil, away from you to prevent splashing.
- Critical safety tip: Never drop chicken into hot oil from a height – this causes dangerous splashing.
- Add 2-3 more pieces, one at a time, with space between each.
- For beginners: Start with just 3 pieces for your first batch regardless of pot size.
- Maintain space between pieces so they cook evenly.
- Immediately check your oil temperature – it will drop when chicken is added.
- Adjust heat as needed to maintain between 325-350°F (163-175°C).
- Monitor and flip during frying:
- Set a timer for 7 minutes for the first side.
- Keep a constant eye on your chicken and oil temperature.
- After 7 minutes, use tongs to carefully turn each piece over.
- If chicken is sticking to the bottom of pot, don’t force it – it should release naturally when the crust is formed.
- Cook for another 5-8 minutes on the second side.
- How to check doneness for beginners:
- Look for a golden brown, crispy coating.
- Larger pieces like thighs will take longer than wings.
- Insert meat thermometer into the thickest part of each piece, avoiding bone.
- Chicken is done when internal temperature reaches exactly 165°F (74°C).
- If chicken is browning too fast but internal temperature is too low, reduce heat slightly.
- Safe removal and draining:
- Once chicken reaches 165°F internal temperature, it’s done.
- Use tongs to carefully lift each piece out of the oil.
- Hold it above the oil for 5 seconds to let excess oil drip back into the pot.
- Place chicken on prepared wire rack over paper towels.
- While still hot, sprinkle each piece with a tiny pinch of your remaining spice mix.
- Why? Adding spices to hot chicken helps them stick and enhances flavor.
- Repeat process with remaining chicken:
- Allow oil to return to 350°F before adding next batch.
- Between batches, use a slotted spoon to remove any loose bits of coating from oil.
- These can burn and make oil taste bitter.
- Repeat the frying process until all chicken is cooked.
- Tip for beginners: If oil becomes too dark or starts smoking, it’s best to start with fresh oil.
- Resting period:
- Once all chicken is cooked, let it rest on the wire rack for 5-10 minutes.
- Why? This resting period allows juices to redistribute through the meat.
- It also allows the crust to set and become even crispier.
- Do not cover the chicken while resting or it will steam and lose crispiness.
- Serving suggestions:
- Transfer chicken to a serving platter.
- Classic sides include mashed potatoes with gravy, coleslaw, and biscuits.
- For a complete meal experience, serve with sweet corn and macaroni and cheese.
- Garnish with a sprinkle of the remaining spice mix if desired.
- Pro tip: While this chicken is wonderful on its own, the techniques used here are similar to those in my guide on how to cook a turkey – both benefit from proper temperature control and resting time.
Troubleshooting Section
Common Issues and Solutions
Problem: Coating falls off during frying
- Solution: Make sure chicken is completely dry before coating. Let coated chicken rest 5 minutes before frying to help coating adhere. Also, don’t flip chicken too early – wait until a crust forms.
Problem: Outside burns before inside cooks
- Solution: Oil temperature too high. Lower to 325°F. If chicken is browning too quickly, finish cooking in a 350°F oven for 5-10 minutes after initial frying.
Problem: Homemade KFC chicken not crispy enough
- Solution: Double-dredging is essential. Check oil temperature – if below 325°F, coating absorbs oil and becomes soggy. Make sure chicken pieces aren’t overcrowded in the pot.
Problem: Oil smoking or burning smell
- Solution: Your oil is too hot or has reached its smoke point. Immediately turn off heat and carefully move pot to a cool burner. Let cool before resuming with fresh oil.
Problem: Bland flavor despite using spices
- Solution: Season chicken directly with spices before dredging. Make sure to season each layer – the chicken, the flour mix, and a final sprinkle after frying.
Problem: Center of chicken still pink or raw
- Solution: Always check internal temperature with a meat thermometer. If coating is perfect but chicken isn’t done, finish in a 350°F oven for 5-10 minutes.
Variations & Substitutions
Spicy Homemade KFC Chicken
Add 1-2 tablespoons cayenne pepper to your spice mix and 1 teaspoon hot sauce to the buttermilk mixture. For extra kick, add 1/2 teaspoon crushed red pepper flakes.
Gluten-Free Option
Replace all-purpose flour with gluten-free flour blend plus 1/2 teaspoon xanthan gum for proper binding. Check that all spices are certified gluten-free as some may contain trace gluten.
Healthier Baked Version
- Prepare and coat chicken exactly as directed.
- Spray coated chicken generously with cooking oil spray.
- Bake at 425°F (220°C) for 35-40 minutes on a wire rack over a baking sheet.
- Turn halfway through cooking.
- Finish with 2-3 minutes under broiler for extra crispiness.
Keto-Friendly
Substitute flour with 1 cup almond flour and 1 cup crushed pork rinds. Use heavy cream instead of buttermilk and add 1 tablespoon vinegar for tang.
Air Fryer Method
- Coat chicken as directed.
- Spray air fryer basket with oil spray.
- Cook at 390°F for 12 minutes.
- Flip chicken, spray with more oil, cook 10-12 more minutes.
- Work in small batches for best results.
Storage & Reheating
Proper Storage
- Cooling: Allow chicken to cool completely before storing (about 30 minutes).
- Refrigerator: Place in airtight container with paper towels between layers to absorb moisture. Keep for up to 3 days.
- Freezer: Wrap cooled pieces individually in plastic wrap, then place in freezer bags with air squeezed out. Label with date and freeze up to 3 months.
Best Reheating Methods
For Maximum Crispiness (Oven Method):
- Take chicken out of refrigerator 15 minutes before reheating.
- Preheat oven to 400°F (200°C).
- Place chicken on wire rack over baking sheet.
- Lightly spray with cooking oil spray for extra crispiness.
- Reheat for 15-20 minutes until internal temperature reaches 165°F again.
Quick Microwave Method (when in a hurry):
- Place chicken on microwave-safe plate.
- Cover with slightly damp paper towel.
- Heat at 70% power for 1 minute, then in 30-second intervals until warmed through.
- Note: This method sacrifices crispiness for speed.
- Optional finishing step: Place in toaster oven at high heat for 2-3 minutes to re-crisp coating.
Air Fryer Reheating (best quick method):
- Preheat air fryer to 375°F (190°C).
- Spray basket lightly with oil.
- Place chicken pieces in single layer without touching.
- Heat for 3-4 minutes until crispy and hot.
- Check internal temperature reaches 165°F.
From Frozen:
- Thaw in refrigerator overnight (preferred method).
- For same-day reheating, use oven method but extend cooking time to 25-30 minutes.
- Check that internal temperature reaches 165°F.
Safety Notes & Tips
Food Safety
- Chicken must reach internal temperature of 165°F (74°C) to be safe.
- Always wash hands after handling raw chicken.
- Use separate cutting boards for chicken and other ingredients.
- Never place cooked chicken on same plate that held raw chicken.
- Refrigerate leftovers within 2 hours of cooking.
- Reheat leftovers to 165°F internal temperature.
Frying Safety
- Keep a kitchen fire extinguisher nearby – oil fires can happen quickly.
- Never leave hot oil unattended.
- Keep pot handle turned inward so it can’t be bumped.
- Keep a pot lid nearby – if oil catches fire, slide lid over pot to smother flames.
- Never put water on an oil fire – it causes explosive spreading.
- Keep children and pets away from cooking area when frying.
- Wear long sleeves to protect arms from oil splatter.
Pro Tips
- For authentic KFC texture: Let chicken pieces sit at room temperature 30 minutes before cooking.
- For extra juicy chicken: Brine chicken overnight in solution of 4 cups water, 1/4 cup salt, and 2 tablespoons sugar.
- For maximum flavor: Prepare spice mix a day ahead to allow flavors to meld.
- Oil management: After cooking, let oil cool completely. Strain through coffee filter into original container. Can be reused 2-3 times for frying.
- Thermometer test: To test if your meat thermometer is accurate, place in boiling water – it should read 212°F (100°C) at sea level.
- Serving platter prep: Warm your serving platter in a low oven (200°F) for 10 minutes before adding chicken. This keeps chicken hot longer.
- Make ahead tip: You can prepare and coat chicken up to 3 hours ahead. Keep refrigerated on wire rack, then bring to room temperature 30 minutes before frying.