Key Takeaways:
- Ready in just 30 minutes – perfect for busy weeknights
- Uses simple pantry ingredients you already have
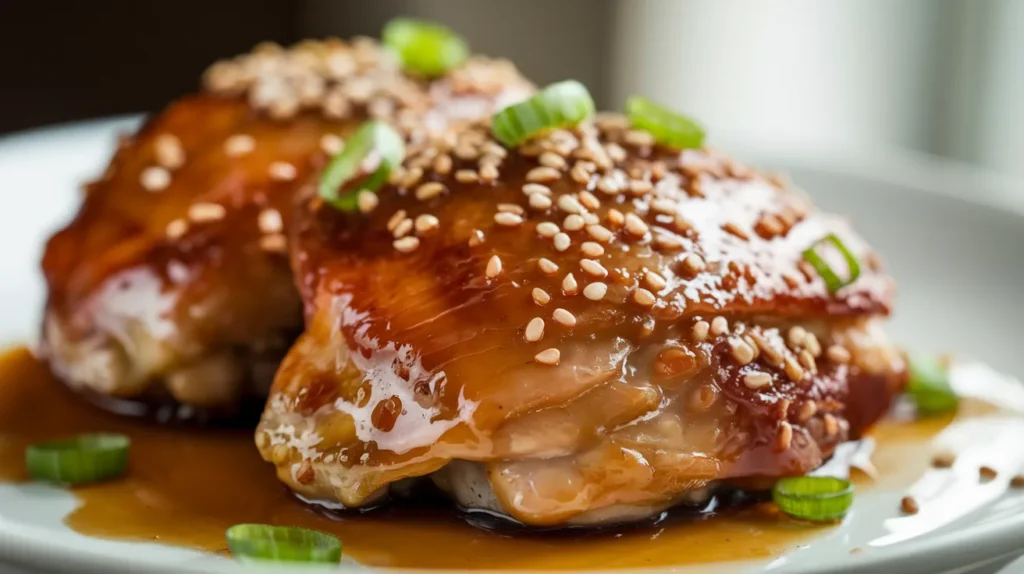
- Sweet and savory glaze that caramelizes perfectly
- Family-friendly Honey Garlic Chicken Recipe that serves 4 people
Weeknight Dinner Crisis Solved!
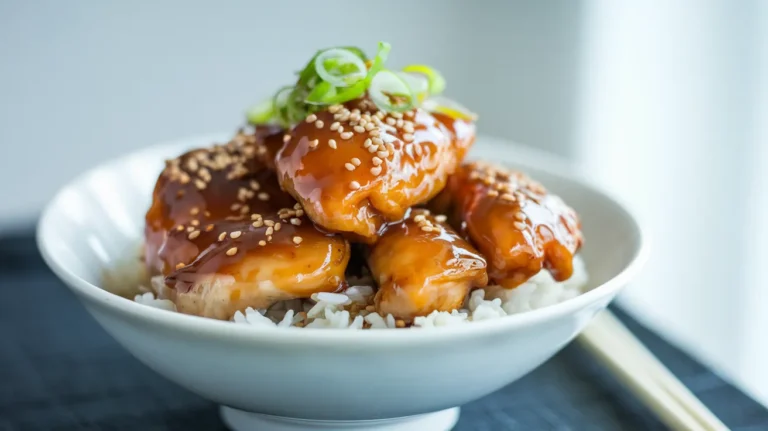
Tired of the same boring chicken dinners? This Honey Garlic Chicken Recipe is about to change your dinner game forever! With just a handful of ingredients and 30 minutes, you’ll have a restaurant-quality meal that your family will beg for again and again.
The magic happens when honey meets garlic in a sticky, sweet, and savory glaze that caramelizes around tender chicken pieces. Best of all, this Honey Garlic Chicken Recipe is completely fool-proof, even for beginners.
If you enjoy Asian-inspired chicken dishes, you might also love my Chicken Nanban recipe, which features a similar sweet-tangy sauce profile but with a Japanese twist.
Nutrition Facts
| Nutrient | Amount per Serving |
|---|---|
| Calories | 385 |
| Protein | 35g |
| Carbohydrates | 24g |
| Fat | 18g |
| Fiber | 0g |
| Sugar | 20g |
| Sodium | 650mg |
Serving size: 1/4 of recipe (approximately 6 oz chicken with sauce)
What You’ll Need
Ingredients
| Ingredient | Amount | Notes |
|---|---|---|
| Boneless, skinless chicken thighs | 2 pounds | About 8 thighs |
| Salt | 1 teaspoon | |
| Black pepper | 1/2 teaspoon | Freshly ground preferred |
| Garlic powder | 1 teaspoon | |
| Olive oil | 2 tablespoons | |
| Garlic cloves | 6 cloves | Minced |
| Honey | 1/3 cup | |
| Low-sodium soy sauce | 1/4 cup | |
| Rice vinegar | 1 tablespoon | |
| Red pepper flakes | 1/4 teaspoon | Optional, for heat |
| Cornstarch | 1 tablespoon | |
| Water | 2 tablespoons | |
| Green onions | 3 stalks | Sliced, for garnish |
| Sesame seeds | 1 tablespoon | For garnish |
Kitchen Tools
| Tool | Purpose |
|---|---|
| Large skillet | For cooking chicken |
| Tongs | For flipping chicken |
| Measuring cups and spoons | For accurate measurements |
| Small bowl | For mixing cornstarch slurry |
| Sharp knife | For cutting chicken if needed |
| Cutting board | For prep work |
| Garlic press | Optional, for mincing garlic |
| Wooden spoon | For stirring sauce |
Possible Substitutions
- Chicken breasts can replace thighs (reduce cooking time by 2-3 minutes)
- Maple syrup works in place of honey
- Apple cider vinegar can substitute for rice vinegar
- Coconut aminos can replace soy sauce for a gluten-free option
- Arrowroot powder can substitute for cornstarch
Extremely Detailed Step-by-Step Honey Garlic Chicken Recipe Instructions
Prep Time: 10 minutes
Cook Time: 20 minutes
Total Time: 30 minutes
Servings: 4 people
Preparation Phase
- Gather all ingredients and tools:
- Before you start cooking, place all ingredients on your counter
- Read through the entire Honey Garlic Chicken Recipe once to familiarize yourself
- Check that you have all tools and ingredients ready
- Preheat your skillet on low heat while you prepare ingredients
- Prepare your workspace:
- Clear enough counter space for your cutting board
- Have a small trash bowl nearby for scraps
- Place your measuring spoons and cups within easy reach
- Set out a plate for the cooked chicken
- Prepare the chicken:
- Open the package of chicken thighs
- Lay out paper towels on a plate or cutting board
- Place chicken thighs on paper towels
- Press another paper towel on top to absorb moisture
- Why this matters: Dry chicken browns better and prevents splattering
- Season the chicken:
- Measure 1 teaspoon salt, 1/2 teaspoon pepper, and 1 teaspoon garlic powder
- Sprinkle half of each seasoning on one side of chicken thighs
- Flip the chicken thighs over using your hands or tongs
- Sprinkle the remaining seasonings on the other side
- Use your fingertips to gently rub seasonings into the meat
- Let chicken rest for 5 minutes to absorb flavors
- Beginner tip: Try to season evenly across all pieces
- Prepare the garlic:
- Place 6 garlic cloves on your cutting board
- With the flat side of your knife, gently press down on each clove to loosen the skin
- Remove and discard the papery skins
- For a fine mince: slice each clove thinly, then run your knife through the slices repeatedly until garlic is finely minced
- Alternative: Use a garlic press if you have one
- Place minced garlic in a small bowl and set aside
- Safety tip: Keep fingers curved under and away from knife blade
For another delicious garlic-forward recipe, check out my Garlic Parmesan Chicken and Potatoes which combines these two powerhouse flavors.
- Prepare the sauce ingredients:
- Measure 1/3 cup honey (spray measuring cup with a little oil first so honey slides out easily)
- Measure 1/4 cup low-sodium soy sauce
- Measure 1 tablespoon rice vinegar
- Measure 1/4 teaspoon red pepper flakes (optional)
- Keep all measured ingredients nearby but separate
- Make cornstarch slurry:
- Get a small bowl
- Add 1 tablespoon cornstarch to the bowl
- Add 2 tablespoons cold water
- Stir with a fork or small whisk until completely smooth with no lumps
- Set aside near your cooking area
- Beginner tip: Always mix cornstarch with cold liquid before adding to hot liquids
- Prepare garnishes:
- Place green onions on cutting board
- Cut off and discard the root ends
- Slice thinly across the stalks (both white and green parts)
- Place sliced green onions in a small bowl
- Measure 1 tablespoon sesame seeds into another small bowl
- Set both aside for garnishing later
Cooking Phase
- Heat the pan properly:
- Increase heat under skillet to medium-high
- Add 2 tablespoons olive oil to the skillet
- Allow oil to heat until it shimmers (looks wavy)
- How to check if pan is ready: Sprinkle a few drops of water – if they sizzle immediately, the pan is ready
- Beginner warning: If oil starts smoking, remove pan from heat, let cool slightly, and lower heat
- Cook the chicken (first side):
- Using tongs, carefully place chicken thighs in the hot pan, smooth side down
- Don’t overcrowd the pan – leave space between pieces
- If necessary, cook in batches (4 thighs at a time)
- Allow chicken to cook undisturbed for 5-6 minutes
- How to check if ready to flip: Edges look opaque and bottom is golden brown
- Beginner tip: Resist the urge to move the chicken around – this helps it brown properly
- Cook the chicken (second side):
- Using tongs, carefully flip each piece of chicken
- Cook for another 4-5 minutes on the second side
- How to check doneness: Use a meat thermometer inserted into thickest part – it should read 165°F
- If you don’t have a thermometer, cut into thickest piece – meat should be opaque with no pink
- Once cooked, transfer chicken to a clean plate
- Cover loosely with foil to keep warm
- Safety note: Never use the same plate that held raw chicken
- Prepare the skillet for sauce:
- Leave the skillet on the heat but reduce to medium
- Keep all the browned bits and remaining oil in the pan
- These brown bits (called fond) add incredible flavor to your sauce
- If the pan seems too hot, lift it off the heat for 30 seconds to cool slightly
- Warning: If oil is smoking, wipe out pan with paper towels, add fresh oil, and continue
- Cook the garlic:
- Add minced garlic to the pan
- Immediately begin stirring with wooden spoon
- Cook for exactly 30 seconds, stirring constantly
- Beginner warning: Watch carefully! Garlic burns quickly and will taste bitter if it does
- Visual cue: Garlic should become fragrant and slightly golden, not brown
- Add liquid ingredients:
- Pour in the 1/3 cup honey
- Add 1/4 cup soy sauce
- Add 1 tablespoon rice vinegar
- Add red pepper flakes if using
- Immediately stir to combine and prevent garlic from burning
- Safety tip: Stand back slightly as liquid may sizzle and steam when added to hot pan
- Deglaze the pan:
- Use your wooden spoon to scrape all brown bits from bottom of pan
- Stir them into the sauce
- Continue stirring until all bits are incorporated
- Why this matters: These brown bits contain concentrated flavor
- Simmer the sauce:
- Allow sauce to come to a gentle simmer (small bubbles around the edge)
- Let it simmer for 2 minutes, stirring occasionally
- Watch for the sauce to reduce slightly
- Visual cue: Sauce will become slightly more syrupy
- Thicken the sauce:
- Stir the cornstarch slurry again (it settles quickly)
- While whisking the simmering sauce constantly, slowly pour in the cornstarch slurry
- Continue whisking for 1-2 minutes
- Visual cue: Sauce will thicken enough to coat the back of a spoon
- Spoon test: Dip a spoon in sauce, run your finger through it – line should remain clear
- Beginner tip: If sauce gets too thick, add 1 tablespoon water at a time
- Return chicken to sauce:
- Use tongs to place chicken pieces back into the skillet
- Gently turn each piece to coat with sauce
- Spoon additional sauce over the top of each piece
- Allow to simmer for 1-2 minutes until chicken is hot again
- Baste chicken with sauce several times during this final cooking
If you’re looking for a more complex flavor profile with warm spices, my Chicken Rogan Josh offers a different but equally delicious take on chicken thighs.
Serving Phase
- Plate the chicken:
- Prepare 4 serving plates
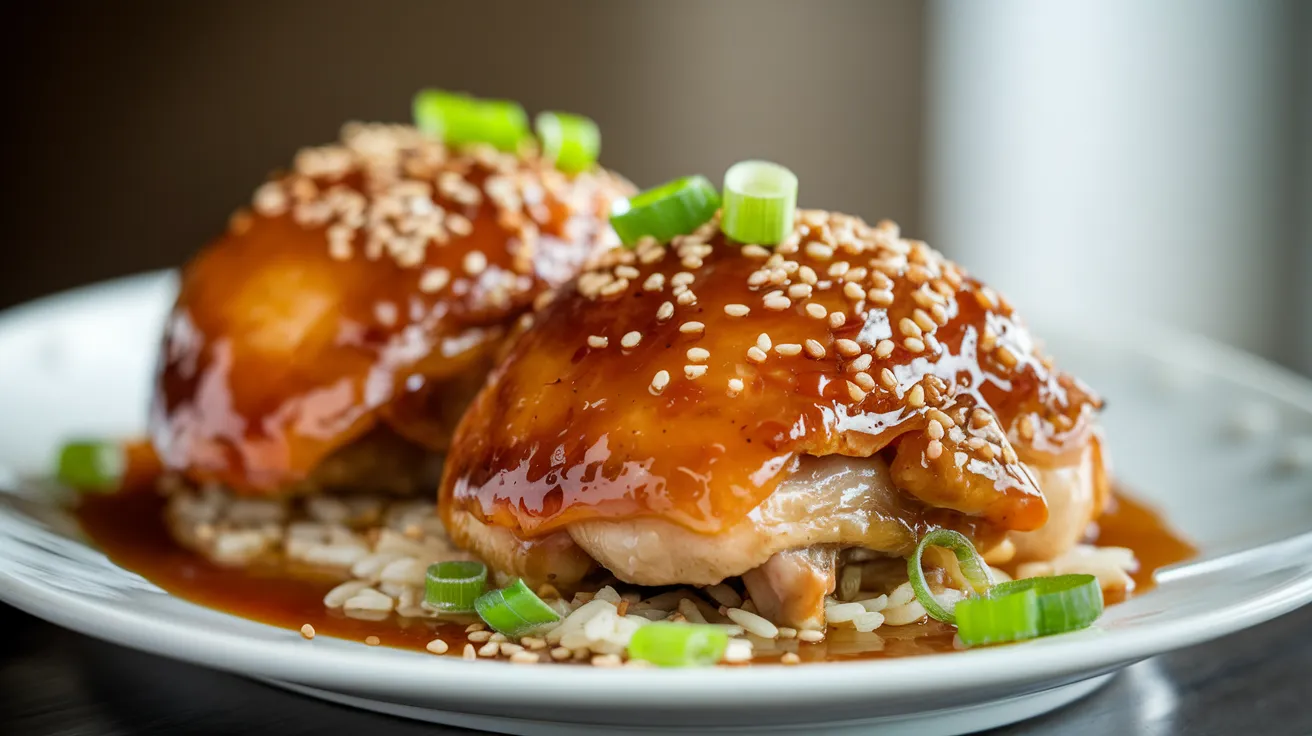
- Using tongs, transfer 2 chicken thighs to each plate
- For family-style serving, transfer all chicken to a serving platter
- Add the finishing touches:
- Using a spoon, drizzle remaining sauce evenly over chicken pieces
- Sprinkle sliced green onions over each serving
- Finish with a light sprinkle of sesame seeds on top
- Presentation tip: Leave some green onions and sesame seeds to the side for people to add more if desired
- Serve immediately:
- For a complete meal, serve with steamed rice and a vegetable
- Place sauce from the pan in a small bowl with a spoon for extra drizzling
- Beginner tip: White rice, steamed broccoli, or simple salad all pair wonderfully with this dish
Troubleshooting Your Honey Garlic Chicken Recipe
Common Issues and Solutions
- Sauce too thin? Mix an additional 1/2 tablespoon cornstarch with 1 tablespoon cold water and add to the simmering sauce.
- Sauce too thick? Add water, 1 tablespoon at a time, until desired consistency is reached.
- Chicken not browning? Make sure to pat chicken very dry before cooking and don’t overcrowd the pan.
- Garlic burning? Lower the heat immediately and add some of the liquid ingredients to stop the cooking process.
- Sauce too salty? Add 1 teaspoon more honey to balance the flavors.
- Chicken not cooked through but outside getting too dark? Lower heat, cover pan with lid, and cook for a few more minutes.
- Oil splattering too much? Make sure chicken is very dry before adding to pan and try a slightly lower heat.
Variations & Substitutions
Make Your Honey Garlic Chicken Recipe Your Own
- Spicy Honey Garlic Chicken: Double the red pepper flakes or add 1 tablespoon of sriracha sauce.
- Citrus Honey Garlic Chicken: Add 1 tablespoon of fresh orange or lemon zest to the sauce.
- Ginger Honey Garlic Chicken: Add 1 tablespoon of minced fresh ginger with the garlic.
- Pineapple Honey Garlic Chicken: Add 1/2 cup pineapple chunks during the last 2 minutes of cooking.
- Vegetarian Option: Replace chicken with firm tofu or cauliflower florets (reduce cooking time).
- One-Pan Meal: Add 2 cups of broccoli florets when you return the chicken to the sauce.
Storage & Reheating
Keep Your Honey Garlic Chicken Recipe Fresh
- Refrigeration:
- Allow chicken to cool completely first (no more than 2 hours at room temperature)
- Store in airtight containers
- Keeps for up to 3 days in refrigerator
- Store sauce separately if possible to prevent chicken from becoming soggy
- Freezing:
- Place cooled chicken in freezer-safe containers or heavy-duty freezer bags
- Pour sauce over chicken or freeze separately
- Label with date and contents
- Freeze for up to 2 months
- Thaw overnight in refrigerator before reheating
- Reheating:
- Microwave method:
- Place chicken and sauce in microwave-safe dish
- Cover with microwave-safe lid or paper towel
- Heat on 70% power for 1 minute
- Stir sauce around chicken
- Heat for another 30-60 seconds until internal temperature reaches 165°F
- Let stand for 1 minute before serving
- Stovetop method:
- Add 1-2 tablespoons water to a skillet
- Place chicken in skillet
- Cover with lid
- Heat on medium-low for 5-7 minutes, turning occasionally
- Check that internal temperature reaches 165°F
- Oven method:
- Preheat oven to 325°F
- Place chicken in oven-safe dish
- Add 2 tablespoons water or chicken broth
- Cover tightly with foil
- Heat for 10-15 minutes until internal temperature reaches 165°F
- Microwave method:
Safety Notes & Tips
Food Safety First
- Always wash hands thoroughly before and after handling raw chicken.
- Use separate cutting boards for raw chicken and other ingredients.
- Chicken is safely cooked when internal temperature reaches 165°F (74°C).
- Don’t reuse marinades or sauces that have touched raw chicken.
- When reheating, ensure the chicken reaches 165°F throughout.
- Refrigerate leftovers within 2 hours of cooking.
- Never thaw frozen chicken at room temperature – always thaw in refrigerator.
Pro Tips for Perfect Honey Garlic Chicken Recipe
- For extra flavor: Marinate the chicken in a tablespoon of soy sauce and garlic powder for 30 minutes before cooking.
- For crispier edges: Dredge chicken pieces lightly in flour before frying.
- For more complex flavor: Add 1/2 teaspoon of Chinese five spice powder to your seasoning mix.
- For extra sticky glaze: Add an extra tablespoon of honey to the sauce.
- For meal prep: Double the recipe and freeze individual portions for quick future meals.
- For a complete meal: Serve with steamed rice and stir-fried broccoli or bok choy.
- For extra sauce lovers: Double the sauce ingredients (except cornstarch) for more to spoon over rice.
- For restaurant-quality presentation: Garnish with thin strips of red pepper and a lime wedge.