Prep Time: 5 minutes | Cook Time: 15 minutes | Total Time: 20 minutes | Servings: 4 persons
Key Takeaways
- Ready in just 20 minutes with only 5 ingredients
- Hormel Chili Dip is perfect for game days, potlucks, or quick appetizers
- Customizable with your favorite toppings
- Makes exactly enough for 4 hungry dippers
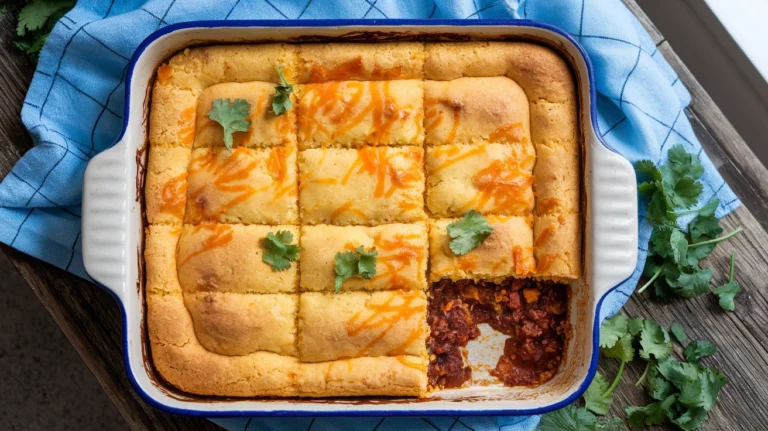
The Easiest Game Day Hormel Chili Dip You’ll Ever Make
Need a quick dip that’ll wow your guests? This Hormel Chili Dip recipe solves your party food dilemma in minutes.
No complicated ingredients or techniques here. Just a few pantry staples transformed into a rich, cheesy dip that disappears fast.
The Hormel Chili Dip combines creamy cheese with savory chili for an appetizer that’s both filling and crowd-pleasing. If you enjoy bold flavors like my Sweet Chili Sauce, you’ll love this dip. Best of all? It takes just 20 minutes from start to finish.
Nutrition Information (Per Serving)
| Nutrient | Amount |
|---|---|
| Calories | 320 |
| Protein | 12g |
| Carbohydrates | 14g |
| Fat | 24g |
| Fiber | 3g |
| Sodium | 890mg |
What You’ll Need for Hormel Chili Dip
Ingredients
| Ingredient | Measurement | Notes |
|---|---|---|
| Hormel Chili (No Beans) | 1 can (15 oz) | Room temperature |
| Cream cheese | 8 oz (1 block) | Softened |
| Shredded cheddar cheese | 1 cup | Freshly shredded melts better |
| Green onions | 3 stalks | Finely chopped |
| Tortilla chips | 1 family-size bag | For serving |
Optional Toppings
- Diced jalapeños
- Sour cream
- Diced tomatoes
- Chopped cilantro
Kitchen Equipment
| Tool | Purpose |
|---|---|
| 9-inch pie plate or 1-quart baking dish | For baking the dip |
| Mixing bowl | For combining ingredients |
| Rubber spatula | For stirring and scraping |
| Measuring cups | For measuring ingredients |
| Knife and cutting board | For chopping green onions |
Ingredient Substitutions
Don’t have everything on hand? Try these swaps:
- Cream cheese: Substitute with Neufchâtel cheese for a lighter option
- Cheddar cheese: Pepper jack or Mexican blend work great for different flavors
- Hormel Chili: Try the bean version if you prefer extra texture
- Green onions: Substitute with 2 tablespoons minced white onion
Hormel Chili Dip: Step-by-Step Instructions
Preparation Phase
- Take cream cheese out of refrigerator (30 minutes before starting)
- Remove the cream cheese from its packaging and place it on a plate
- Let it sit at room temperature for about 30 minutes
- Beginner tip: Properly softened cream cheese should yield slightly when pressed with your finger but still hold its shape
- Time-saving tip: If you forgot to take it out early, unwrap it, place on a microwave-safe plate, and microwave for 10 seconds, rotate, then another 5-10 seconds if needed
- Gather and prepare all ingredients (5 minutes)
- Open your kitchen cabinets and refrigerator to collect all ingredients
- Place all ingredients on your counter for easy access
- Unwrap the cream cheese if you haven’t already
- Open the can of Hormel Chili (a standard can opener works best)
- Beginner tip: Having everything ready before you start cooking prevents mistakes and rushing
- Preheat your oven (1 minute to start, 10 minutes to heat)
- Turn your oven on to 350°F (175°C)
- If your oven has a preheat notification, wait for it to beep before baking
- Beginner tip: Most ovens take 8-10 minutes to fully preheat, so do this first
- Prepare your green onions (2 minutes)
- Rinse 3 green onions under cool water
- Pat them dry with a paper towel or clean kitchen towel
- Place on cutting board and trim off the root ends (the white hard part at the bottom)
- Trim off any wilted parts at the green tops
- Slice them into thin rounds (about 1/8 inch thick)
- Beginner tip: Use your fingers to separate the white/light green parts from the dark green parts into two piles – we’ll use them at different times
- Safety tip: Always cut away from your fingers, keeping fingertips curled under
- Prepare your baking dish (1 minute)
- Get out a 9-inch pie plate or a 1-quart baking dish
- Beginner tip: No need to grease or prepare the dish in any way
- Note: The shallower the dish, the more surface area for cheese to melt and brown
Assembly Steps for Perfect Hormel Chili Dip
- Create the cream cheese layer (2 minutes)
- Take your softened cream cheese block
- Place it in the center of your baking dish
- Using the back of a large spoon or rubber spatula, begin spreading it outward
- Press down and spread until you have an even layer covering the entire bottom of the dish
- Beginner tip: If the cream cheese is sticking to your spatula, dip the spatula in warm water and wipe it dry between spreads
- Troubleshooting: If you’re having trouble spreading, the cream cheese isn’t soft enough – wait a few more minutes or microwave the whole dish for 10 seconds
- Add the chili layer (1 minute)
- Open your can of Hormel Chili completely
- Using a spoon or rubber spatula, gently scoop the chili out of the can
- Pour it over the cream cheese layer, starting from the center
- Use your spatula to spread it evenly across the entire dish, covering all the cream cheese
- Beginner tip: Work slowly from the center outward to avoid mixing the layers
- Extra tip: Scrape the can with a silicone spatula to get every bit of chili out
- Add the cheese and onion layer (2 minutes)
- Take your 1 cup of shredded cheddar cheese
- Sprinkle it evenly over the chili layer, making sure to cover all the way to the edges
- Take the white/light green parts of your chopped green onions
- Sprinkle them evenly over the cheese layer
- Beginner tip: Save the dark green parts in a small bowl for garnishing after baking
- Note: If you’re shredding your own cheese, use the large holes on a box grater for best melting
Cooking Your Hormel Chili Dip
- Bake your dip (15 minutes)
- Make sure your oven is fully preheated to 350°F
- Carefully place your baking dish on the middle rack of your oven
- Set a timer for 15 minutes
- Safety tip: Always use oven mitts when putting dishes in or taking them out of the oven
- Visual cue: The dip is ready when the cheese is completely melted and bubbling around the edges
- Beginner tip: If your cheese isn’t browning but the dip is hot, you can turn on the broiler for 1-2 minutes at the end – but watch it constantly to prevent burning
Finishing Your Hormel Chili Dip
- Remove and garnish your dip (2 minutes)
- When your timer goes off, put on oven mitts
- Carefully open the oven door, standing to the side to avoid the rush of hot air
- Pull the middle rack out slightly for easier access
- Lift your baking dish out carefully using both hands with oven mitts
- Place it on a heat-resistant surface or cooling rack
- Immediately sprinkle the reserved dark green onion pieces over the top
- Safety warning: The dish will be extremely hot! Don’t touch it without oven mitts for at least 15 minutes
- Beginner tip: Place the hot dish on a folded kitchen towel to protect your counter or table
- Let the dip rest (3-5 minutes)
- Allow the dip to cool slightly for 3-5 minutes before serving
- This resting time helps the dip set up and become easier to scoop
- Beginner tip: Use this time to arrange your tortilla chips in a serving bowl or around the edge of the dip
- Serve your dip (1 minute)
- Place the baking dish on a serving plate or trivet at the table
- Arrange tortilla chips around the dish or in a separate bowl beside it
- Add a serving spoon for easy scooping
- Serving tip: For a nice presentation, place small bowls of optional toppings (sour cream, jalapeños, etc.) around the dip so guests can customize their portions
- Beginner tip: The first scoop might be messy – it’s easier if you’re the one to take it!

Troubleshooting Hormel Chili Dip
| Problem | Solution |
|---|---|
| Dip is too runny | Let it sit for 5-10 minutes to set up before serving |
| Cheese isn’t melting evenly | Cover with foil for the first 10 minutes, then remove for the final 5 minutes |
| Cream cheese still has lumps | Make sure it’s fully softened before spreading. Next time, leave it out longer or microwave briefly |
| Edges burning before center is hot | Lower oven temperature to 325°F and bake 5 minutes longer |
| Dip is cooling too quickly at the table | Next time, warm your serving dish by rinsing it with hot water before adding the dip |
Variations & Substitutions
Spicy Hormel Chili Dip
Add 1/4 cup diced jalapeños and substitute pepper jack for the cheddar cheese. For a more complex flavor profile similar to my Slow Cooker White Chicken Chili, add a teaspoon of cumin and a dash of cayenne pepper.
Meat-Lover’s Version
Mix in 1/2 cup cooked, crumbled bacon before baking.
Vegetarian Option
Use vegetarian chili instead of Hormel Chili.
Loaded Version
After baking, top with diced tomatoes, black olives, avocado chunks, and a dollop of sour cream.
Storage & Reheating
Storage Instructions
- Refrigerator: Store leftovers in an airtight container for up to 3 days
- Freezer: Not recommended, as the texture changes significantly
Reheating Instructions
- Microwave method:
- Place desired portion in a microwave-safe dish
- Heat on 50% power for 1 minute, stir, then heat in 30-second intervals until warm
- Stir between intervals to ensure even heating
- Oven method:
- Preheat oven to 325°F
- Transfer dip to an oven-safe dish
- Cover with foil and heat for 10-15 minutes until warmed through
Safety Notes & Tips for Hormel Chili Dip
Food Safety
- Never leave the dip at room temperature for more than 2 hours
- If serving at a party, consider placing the dish over a warming tray
- Always check that the dip reaches an internal temperature of at least 165°F when reheating
- Those with dietary concerns might want to check out my Diabetic Slow Cooker White Chili for a healthier alternative
Helpful Tips
- For best results: Use block cheese and shred it yourself rather than pre-shredded (which contains anti-caking agents)
- Make-ahead option: Assemble the dip the day before, refrigerate, and add an extra 5-10 minutes to the baking time
- Serving suggestion: Provide a variety of dippers like tortilla chips, pita chips, and fresh vegetables
- Heat management: If you need to keep the dip warm during a party, transfer to a small slow cooker on the “warm” setting
Quick Answers to Common Questions
Can I make this Hormel Chili Dip in a slow cooker? Yes! Layer ingredients in the slow cooker and heat on LOW for 1-2 hours, stirring occasionally.
Is this dip gluten-free? Check the Hormel Chili label as formulations may vary. Serve with gluten-free chips if needed.
How can I make this healthier? Use light cream cheese, reduced-fat cheese, and serve with fresh vegetables instead of chips.
Can I double this recipe? Absolutely! Use a 9×13 baking dish and increase baking time by 5-10 minutes.