Key Takeaways:
- The oven method delivers the crispiest results when you need to reheat fried fish (400°F for 10-12 minutes)
- Always let refrigerated fried fish reach room temperature first (15 minutes)
- Skip the microwave unless you’re truly desperate
- Air fryers work magic in just 3-4 minutes at 350°F
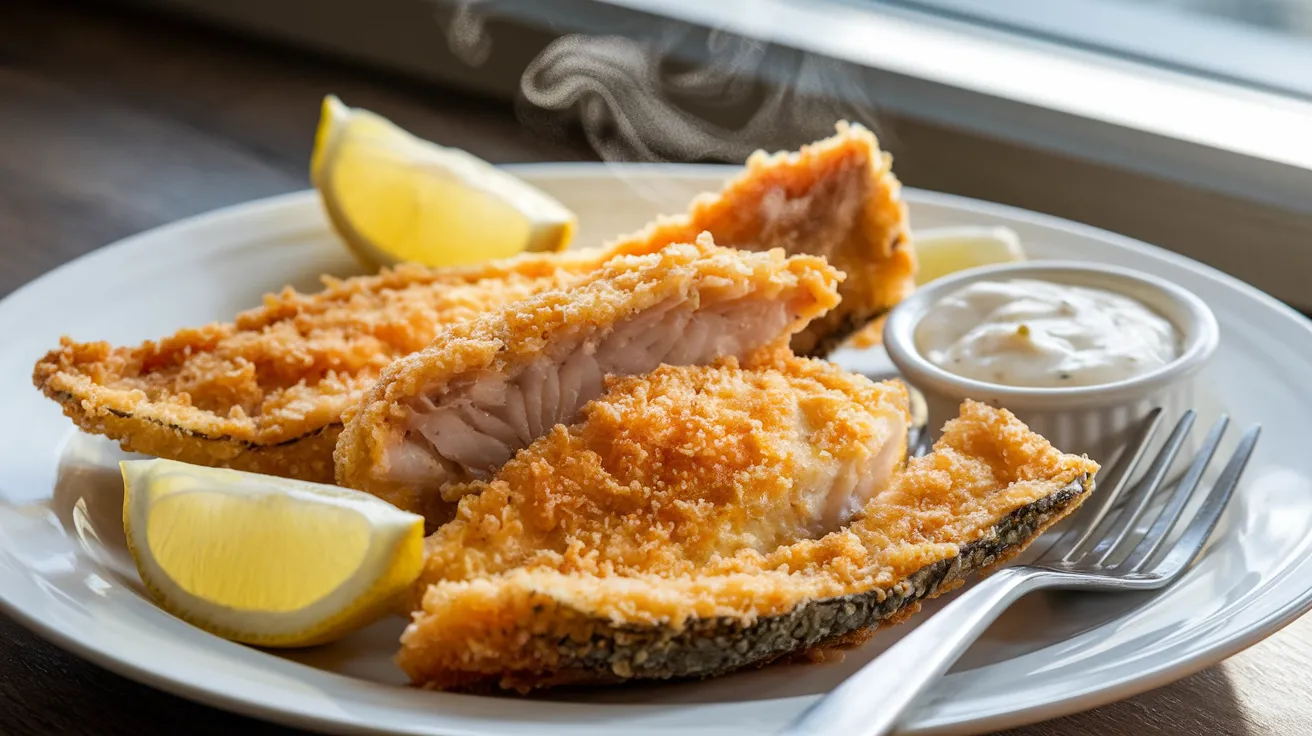
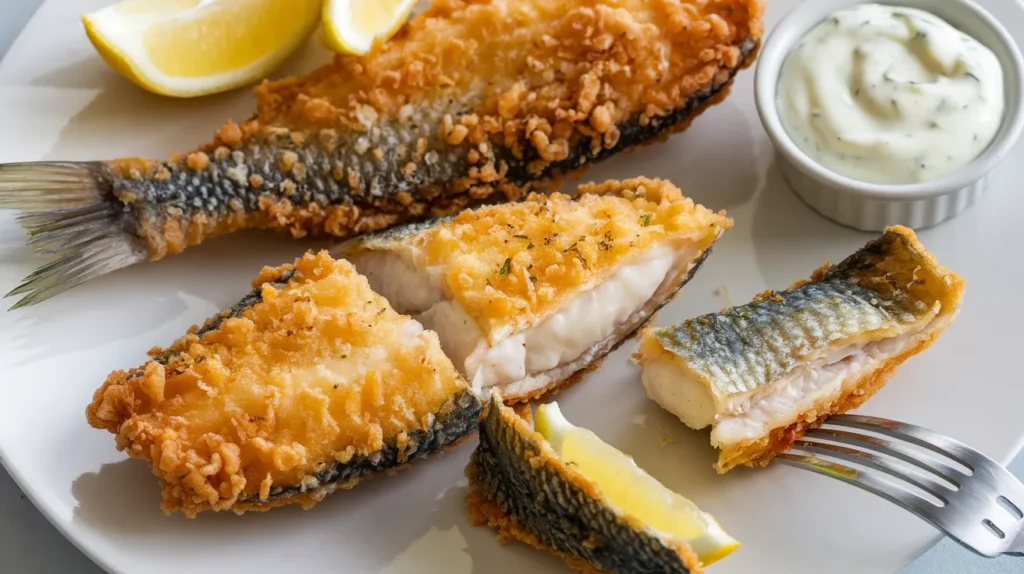
Say Goodbye to Soggy Leftover Fried Fish
We’ve all been there. You’re staring at that container of leftover fried fish from yesterday’s dinner, wondering if there’s any hope of bringing back its crispy glory.
Good news: you absolutely can reheat fried fish without turning it into a sad, soggy disappointment.
The trick? Choosing the right method that preserves that golden crunch while keeping the fish tender inside. In this guide, we’ll walk through five foolproof ways to reheat fried fish for four people, with step-by-step instructions even beginners can master.
Let’s rescue that leftover fried fish and make it taste almost as good as when it was fresh from the fryer! If you’re a fan of perfectly crispy fish, you might also enjoy our recipe for Indian fish fry which uses similar techniques to achieve that perfect crunch.
Nutrition Comparison: Reheating Methods for Fried Fish
| Method | Calories (per 4oz) | Fat Retention | Texture Quality | Time Required |
|---|---|---|---|---|
| Oven | 210 | High | Excellent | 15-17 min |
| Air Fryer | 205 | Medium-High | Excellent | 5-7 min |
| Stovetop | 215 | High | Very Good | 8-10 min |
| Toaster Oven | 208 | Medium-High | Very Good | 10-12 min |
| Microwave | 200 | Medium | Poor | 2-3 min |
Equipment & Ingredients for Reheating Fried Fish
What You’ll Need (Serves 4)
| Ingredient | Amount | Notes |
|---|---|---|
| Leftover fried fish | 1-1.5 pounds | Any variety works |
| Cooking spray | As needed | For non-stick surfaces |
| Aluminum foil | As needed | For oven method |
| Paper towels | Several sheets | For draining excess oil |
| Salt | To taste | For refreshing flavor |
| Lemon wedges | 1 lemon | Optional, for serving |
| Tartar sauce | 4 oz | Optional, for serving |
Kitchen Tools
| Tool | Purpose |
|---|---|
| Baking sheet | For oven method |
| Wire rack | For elevated cooking (crispier results) |
| Tongs | For flipping fish |
| Spatula | For removing fish without breaking |
| Oven mitts | For safely handling hot equipment |
| Food thermometer | To ensure proper internal temperature (145°F) |
| Timer | To prevent overcooking |
Possible Substitutions
- No wire rack? Crumple aluminum foil into an improvised rack
- No cooking spray? Brush with a light coating of olive oil instead
- No paper towels? Clean kitchen towels can work in a pinch
- No lemon? Try a splash of vinegar or a dash of hot sauce to brighten flavor
How To Reheat Fried Fish: Detailed Step-by-Step Instructions for Beginners
Preparation Phase (5 minutes)
- Take fish out of the refrigerator:
- Open your refrigerator and locate your container of leftover fried fish
- Remove the container from the refrigerator
- Place the container on your kitchen counter
- Remove the lid or covering from the container
- Let the fish sit for exactly 15 minutes (set a timer!)
- This warming period prevents cold spots and helps the fish heat evenly
- If your fish was already at room temperature, you can skip this 15-minute wait
- Gather your equipment based on your chosen method:
- For oven method:
- Find a baking sheet that’s large enough to hold all your fish pieces
- Locate aluminum foil and cooking spray
- Get your oven mitts ready
- Make sure you have tongs or a spatula for handling the hot fish
- For air fryer method:
- Make sure your air fryer is clean and ready to use
- Find the basket and check that it’s clean
- Locate your cooking spray
- Have tongs or a heat-resistant spatula ready
- For stovetop method:
- Select a skillet or frying pan large enough for your fish
- Make sure you have cooking oil
- Find a splatter guard if you have one
- Get your spatula or fish turner ready
- For toaster oven method:
- Locate the small baking tray that came with your toaster oven
- Cut a piece of foil to fit the tray
- Have cooking spray ready
- Find tongs small enough to reach inside the toaster oven
- For microwave method:
- Find a microwave-safe plate
- Locate paper towels
- Make sure your microwave is clean inside
- For oven method:
- Prepare the fish:
- Gently remove each piece of fish from the container
- Place them on a clean plate or paper towels
- Take 2-3 paper towels and fold them in half
- Very gently press (don’t rub) the paper towels against each piece of fish
- The paper towels should absorb excess moisture (the enemy of crispiness!)
- Replace paper towels if they become too damp
- Continue until all fish pieces feel dry to the touch
Method 1: How To Reheat Fried Fish in the Oven (Best Overall Results)
Prep time: 5 minutes | Cook time: 10-12 minutes | Total time: 15-17 minutes
- Preheat your oven to exactly 400°F:
- Turn on your oven by pressing the “Bake” function
- Use the arrow buttons to set the temperature to 400°F
- Press “Start” or “Preheat”
- Wait for the oven to preheat completely—most ovens beep or light up when ready
- This typically takes 10-15 minutes depending on your oven
- BEGINNER TIP: Use an oven thermometer if you have one to verify the temperature is accurate
- Prepare the baking sheet while the oven preheats:
- Take out a baking sheet (a rimmed cookie sheet works great)
- Tear off a piece of aluminum foil large enough to cover the entire sheet
- Smooth the foil over the baking sheet, pressing it down gently
- Make sure the shiny side is facing up (though this isn’t critical)
- Place a wire rack on top of the foil (this elevates the fish for better air circulation)
- Take your cooking spray and lightly spray the wire rack
- Hold the spray can about 6-8 inches away from the rack while spraying
- BEGINNER TIP: If you don’t have a wire rack, crumple several 6-inch pieces of foil into “snakes” and lay them across the baking sheet to elevate the fish
- Arrange fish pieces properly:
- Pick up each piece of fish carefully using tongs or your fingers
- Place them one by one onto the wire rack
- Make sure there’s at least 1 inch of space between each piece
- This space allows hot air to circulate on all sides of the fish
- If you have more fish than can fit with proper spacing, plan to cook in batches
- BEGINNER TIP: Thicker pieces should go toward the back of the oven, thinner pieces toward the front (the back is usually hotter)
- Add moisture and crispness helpers:
- Take your cooking spray again
- Very lightly spray the top surface of each fish piece
- Hold the can 8-10 inches away to ensure an even, light coating
- You just need a fine mist—too much will make the fish soggy
- BEGINNER TIP: If you don’t have cooking spray, dip a pastry brush in a tiny amount of oil and very lightly brush the top of each piece
- Bake with careful timing:
- Put on your oven mitts
- Open the oven door completely
- Slide the baking sheet onto the middle rack of the oven
- Close the oven door completely
- Set a timer for exactly 10 minutes
- Don’t open the oven during cooking (this lets heat escape)
- BEGINNER TIP: If your fish pieces are very thick (more than 1 inch), plan to flip them halfway through cooking time
- Check for doneness:
- When the timer goes off, put on your oven mitts
- Open the oven door and carefully pull the rack out partway
- Look for these signs of readiness:
- The coating looks crisp and golden
- You can see steam rising from the fish
- The fish feels hot (you can carefully test with tongs by touching the fish)
- If you have a food thermometer, insert it into the thickest part of the fish
- The internal temperature should be at least 145°F
- If the fish isn’t hot enough, return it to the oven for 1-2 more minutes
- BEGINNER TIP: If the fish is heating unevenly, rotate the baking sheet 180 degrees
- Remove and serve properly:
- Once fully heated, put on your oven mitts again
- Carefully remove the baking sheet from the oven
- Place it on a heat-resistant surface or cooling rack
- Use tongs or a spatula to transfer each piece to serving plates
- Serve immediately while the fish is hot and crispy
- Add a fresh lemon wedge to each plate
- Put tartar sauce in a small bowl for dipping
- BEGINNER TIP: Eat immediately! The crispiness will begin to fade within minutes
Method 2: How To Reheat Fried Fish in an Air Fryer (Fastest Method)
Prep time: 2 minutes | Cook time: 3-4 minutes | Total time: 5-6 minutes
- Preheat your air fryer properly:
- Plug in your air fryer and make sure it’s on a heat-resistant surface
- Press the power button to turn it on
- Press the temperature button or use the dial to set it to exactly 350°F
- Some air fryers have a “Preheat” button—press this if yours does
- If no preheat button exists, just set the time to 2 minutes and let it run empty
- BEGINNER TIP: Keep the air fryer at least 5 inches away from walls and don’t place anything on top
- Prepare the air fryer basket:
- Once preheated, carefully pull out the basket (it may be hot—use caution)
- Set the basket on a heat-resistant surface
- Take your cooking spray and lightly spray the bottom of the basket
- IMPORTANT BEGINNER TIP: Spray the basket BEFORE putting it in the air fryer, never spray inside the air fryer itself as this can damage the heating element
- Arrange fish correctly:
- Place your fish pieces carefully in the basket
- Make sure they are in a single layer with space between each piece
- Don’t stack or overlap any pieces—this prevents proper crisping
- If you can’t fit all the fish in one layer, you’ll need to cook in batches
- For 4 servings, you’ll likely need 2-3 batches depending on your air fryer size
- BEGINNER TIP: Start with smaller pieces first as they’ll heat more quickly
- Set precise cooking time:
- Slide the basket back into the air fryer
- Press the time button or use the dial to set it for 3 minutes
- Press “Start” or “Cook” to begin
- BEGINNER TIP: Fish thickness matters—for thin fillets, 3 minutes is usually enough, for thicker pieces, set it to 4 minutes
- Check halfway through:
- At the 1.5-minute mark, quickly pull out the basket
- Look at the fish—it should be starting to crisp but not brown too much
- If it looks pale, lightly spray with cooking spray again
- If it’s browning too quickly, lower the temperature to 330°F
- Slide the basket back in quickly to maintain temperature
- BEGINNER TIP: The cooking process continues even during this quick check, so work efficiently
- Verify doneness:
- When the timer beeps, carefully pull out the basket
- The fish should look golden and crispy
- You should see steam rising from the hot fish
- If you have a food thermometer, check that the internal temperature is 145°F
- If the fish needs more time, cook for additional 30-second intervals
- BEGINNER TIP: Listen for sizzling sounds—these indicate the fish is still cooking
- Remove and serve safely:
- Once done, place the air fryer basket on a heat-resistant surface
- Use silicone-tipped tongs or a heat-resistant spatula to remove each piece
- Never use metal utensils which can scratch the basket coating
- Transfer directly to serving plates
- Serve immediately for maximum crispiness
- BEGINNER TIP: Have your plates, lemon wedges, and sauce ready before the fish is done cooking
Method 3: How To Reheat Fried Fish on the Stovetop (Best for Retaining Moisture)
Prep time: 2 minutes | Cook time: 6-8 minutes | Total time: 8-10 minutes
- Select the right pan:
- Choose a large skillet or frying pan with a flat bottom
- Non-stick pans work best for beginners
- Cast iron is excellent if well-seasoned
- Make sure your pan is large enough to hold half of your fish (you’ll likely cook in batches)
- BEGINNER TIP: Heavy-bottomed pans distribute heat more evenly
- Heat the pan properly:
- Place your pan on the stove
- Turn the heat to medium (usually level 5 on a dial that goes to 10)
- Allow the pan to heat for a full 3 minutes
- To test if the pan is ready, sprinkle a few drops of water on it—they should sizzle and evaporate quickly
- BEGINNER TIP: Never place fish in a cold pan, as it will stick and become soggy
- Add oil correctly:
- Measure 1-2 teaspoons of cooking oil
- Vegetable oil, canola oil, or the same oil used in the original frying works best
- Pour the oil into the center of the pan
- Tilt the pan gently in all directions to spread the oil evenly
- The entire cooking surface should have a thin, even coating
- BEGINNER TIP: Don’t use olive oil as it has a low smoke point and may burn
- Place fish in the pan:
- Using tongs or a spatula, gently place each piece of fish in the pan
- Start at the far side of the pan and work toward you to avoid oil splatter
- Leave at least 1 inch between pieces
- You’ll likely need to cook in 2 batches for 4 servings
- BEGINNER TIP: If the oil smokes, your pan is too hot—remove it from heat for 30 seconds and reduce the heat level
- Cook the first side patiently:
- Let the fish cook undisturbed for a full 3 minutes
- Resist the urge to move, poke, or flip the fish during this time
- You should hear a gentle sizzling sound—this is good!
- If the sizzling is very loud, your heat is too high
- Use this time to prepare a plate lined with paper towels for the finished fish
- BEGINNER TIP: Set a timer for the full 3 minutes—it’s longer than you think!
- Flip with proper technique:
- After 3 minutes, slide a wide, thin spatula completely under one piece of fish
- Lift it slightly to see if it’s golden brown underneath
- If golden, flip it over in one smooth motion
- If not golden, cook for 30 more seconds and check again
- Repeat for each piece of fish
- BEGINNER TIP: A fish spatula (wider and thinner than regular spatulas) works best, but any wide spatula will do
- Cook the second side:
- Once flipped, cook the second side for 2-3 minutes
- You’ll notice the second side often cooks faster than the first
- Look for these signs of doneness:
- Steam rising from the fish
- Edges look crispy
- The coating has regained its golden color
- BEGINNER TIP: If you have a food thermometer, the internal temperature should reach 145°F
- Remove properly:
- Line a plate with 2-3 paper towels
- Once fish is done, use your spatula to transfer each piece to the paper towels
- Let rest for 15 seconds to absorb any excess oil
- Transfer to serving plates and serve immediately
- BEGINNER TIP: If cooking a second batch, wipe out the pan with paper towels and add fresh oil before starting again
If you enjoy pan-fried methods, you might want to try our crispy fried whole fish recipe for your next fresh catch.
Method 4: How To Reheat Fried Fish in a Toaster Oven (Best for Small Portions)
Prep time: 3 minutes | Cook time: 7-9 minutes | Total time: 10-12 minutes
- Prepare your toaster oven:
- Make sure your toaster oven is clean (food debris can cause smoking)
- Place the toaster oven on a heat-resistant surface with nothing above it
- Turn the function dial to “Bake” (not “Toast” or “Broil”)
- Set the temperature to exactly 375°F
- Turn on the toaster oven to preheat
- Most toaster ovens preheat in about 5 minutes
- BEGINNER TIP: Keep the toaster oven door closed during preheating
- Prepare the cooking tray:
- Remove the toaster oven tray
- Cut a piece of aluminum foil to fit the tray precisely
- Place the foil on the tray, pressing it down to lay flat
- Lightly spray the foil with cooking spray
- BEGINNER TIP: Don’t let foil hang over the edges as it can touch heating elements and cause sparks
- Arrange fish for even cooking:
- For a 4-person serving, you’ll need to work in 2 batches
- Place 2-3 pieces of fish on the prepared tray
- Leave at least 1/2 inch between pieces
- Don’t overcrowd the tray—this leads to steaming instead of crisping
- BEGINNER TIP: Place similar-sized pieces together in the same batch for even cooking
- Insert tray correctly:
- Wait until the toaster oven is fully preheated
- Open the door completely
- Slide the tray into the middle rack position
- Make sure it’s centered for even heat distribution
- Close the door gently but completely
- BEGINNER TIP: Most toaster ovens have rack guides—make sure the tray slides into these properly
- Set timing precisely:
- Set the timer for 4 minutes initially
- Stay nearby during cooking to monitor progress
- BEGINNER TIP: Toaster ovens heat very quickly and can burn food if left unattended
- Flip halfway through:
- After 4 minutes, open the toaster oven door
- Using tongs or a small spatula, carefully flip each piece of fish
- Work quickly to minimize heat loss
- Close the door and continue cooking
- BEGINNER TIP: Use oven mitts when opening the toaster oven door—it gets very hot
- Check for doneness:
- After 3 more minutes (7 minutes total), check the fish
- Signs of readiness include:
- Golden, crispy exterior
- Steam rising from the fish
- Feels hot when you hover your hand above it (don’t touch it!)
- If needed, cook for 1-2 more minutes
- BEGINNER TIP: Fish continues cooking slightly after removal, so it’s better to slightly undercook than overcook
- Remove safely:
- Turn off the toaster oven
- Put on oven mitts or use tongs
- Carefully slide the tray out
- Transfer the fish to serving plates
- Return to cook the second batch if needed
- BEGINNER TIP: Let the toaster oven cool slightly between batches to prevent overheating
Method 5: How To Reheat Fried Fish in a Microwave (Last Resort Method)
Prep time: 1 minute | Cook time: 1-2 minutes | Total time: 2-3 minutes
- Prepare the microwave plate:
- Choose a microwave-safe plate (usually marked on the bottom)
- Never use metal, aluminum foil, or plastic containers not marked microwave-safe
- Take 2 paper towels and place one on the plate
- BEGINNER TIP: A microwave-safe glass plate works best for even heating
- Arrange fish pieces properly:
- Place fish pieces in a single layer on the paper towel
- Keep them separated with space between each piece
- For 4 servings, you’ll need to work in 2-3 batches
- BEGINNER TIP: Arrange thicker parts toward the outer edge of the plate where microwave heating is often stronger
- Add moisture to prevent drying:
- Take another paper towel and run it under tap water
- Squeeze it gently so it’s damp but not dripping wet
- Drape this damp paper towel over the fish pieces
- This creates a steamy environment that helps prevent drying
- BEGINNER TIP: Make sure the paper towel touches the plate on all sides to create a sealed environment
- Set power level correctly:
- Place the plate in the center of the microwave
- Close the door securely
- Press the “Power Level” button on your microwave
- Use the number pad to enter “5” (for 50% power)
- Enter the time: 30 seconds
- Press “Start”
- BEGINNER TIP: Full power will ruin the texture of your fish—50% power is essential!
- Check and rotate:
- When the 30 seconds is up, open the microwave
- Carefully lift the paper towel (watch for hot steam!)
- Touch the fish gently with a fingertip to check warmth
- Rotate the plate 180 degrees
- Replace the damp paper towel
- BEGINNER TIP: If the paper towel has dried out, dampen it again before replacing
- Continue heating in short intervals:
- Close the microwave door
- Heat for another 20 seconds at 50% power
- Check again
- Continue in 10-second intervals until the fish is heated through
- This typically takes 1-2 minutes total depending on thickness
- BEGINNER TIP: Short intervals prevent overheating, which will ruin the texture
- Final resting period:
- Once heated through, remove the plate from the microwave
- Keep the paper towel covering the fish
- Let it stand for exactly 30 seconds
- This allows the heat to distribute evenly
- BEGINNER TIP: This resting step is crucial for even heating and food safety
- Crisp if possible:
- Note: The microwave will not restore crispiness
- If you have a toaster oven, you can place the fish under the broiler for 30 seconds to crisp the outside
- Alternatively, heat a pan on high and sear each side for 10 seconds
- BEGINNER TIP: A quick sprinkle of panko breadcrumbs before serving can add some textural contrast
Troubleshooting: Common Problems When Reheating Fried Fish
Problem: Fish Is Still Cold in the Center
Solution:
- Cut larger pieces into smaller portions before reheating
- Use a sharp knife
- Cut through the thickest part
- Try to make pieces of even thickness
- Extend heating time in 1-minute increments
- Always check between each additional minute
- For oven/toaster oven: add 1 minute at a time
- For microwave: add 10 seconds at a time
- For air fryer: add 30 seconds at a time
- Allow fish to reach room temperature before reheating
- Set timer for 15-20 minutes of counter time
- Place on a plate, not in its storage container
- Check for even thickness – thinner parts will heat faster
- Fold thin tail sections under thicker parts
- Shield thin edges with small pieces of foil in the oven
Problem: Fish Is Dry After Reheating
Solution:
- Lower heat slightly and cover loosely with foil (oven method)
- Reduce temperature by 25°F
- Tent foil over fish without sealing edges
- This creates a moist environment
- Spritz with water before reheating
- Use a clean spray bottle filled with water
- Very lightly mist the fish
- Just 1-2 sprays per piece
- Add a small pat of butter on top when almost done
- Wait until fish is almost heated through
- Place a thin slice of butter (¼ teaspoon) on each piece
- Let it melt into the fish for the last minute of heating
- Reduce reheating time – overheating causes dryness
- Check fish 2 minutes earlier than recommended time
- Remove as soon as it reaches 145°F internally
Problem: Breading Falls Off When Reheating Fried Fish
Solution:
- Handle fish less during reheating
- Use tools instead of hands
- Slide spatulas completely under fish
- Avoid repeated adjustments
- Pat dry thoroughly before reheating
- Use fresh paper towels
- Press gently, don’t rub
- Change towels if they become damp
- Make sure pan/oven is fully preheated before adding fish
- Wait for the preheat indicator
- For stovetop, test with water droplets
- Allow 5-10 minutes for full preheating
- Use tongs or spatula instead of forks that puncture the coating
- Choose tools with flat, smooth surfaces
- Silicone-tipped tools work best
- Support fish from underneath when lifting
Problem: Fish Smells Too “Fishy” When Reheated
Solution:
- Add a squeeze of fresh lemon before and after reheating
- Cut a lemon into wedges
- Squeeze lightly over each piece
- About ¼ teaspoon juice per piece is enough
- Place a small slice of lemon on the fish while reheating
- Cut thin slices (⅛ inch)
- Place one on each piece during oven reheating
- Remove before serving
- Serve with fresh herbs like dill or parsley
- Chop herbs finely
- Sprinkle over fish after reheating
- Use about ½ teaspoon per serving
- Check fish freshness – if it smells very strong, it might be past its prime
- Fried fish should be good for 3 days refrigerated
- If it smells ammonia-like, discard it
- When in doubt, throw it out
Variations & Substitutions When Reheating Fried Fish
Different Fish Types
- White fish fillets (cod, tilapia):
- Reheat at 375°F instead of 400°F
- Reduce cooking time by 1-2 minutes
- Watch carefully as they dry out easily
- Best with oven or air fryer method
- Salmon or fatty fish:
- Can handle higher heat (400-425°F)
- Needs shorter cooking times (7-8 minutes in oven)
- Retains moisture better
- Works well with all methods except microwave
- Fish sticks or nuggets:
- Perfect for air fryer (400°F for 2-3 minutes)
- Turn halfway through cooking
- No need to let come to room temperature first
- Can be cooked from frozen (add 1-2 minutes)
- Whole fried fish:
- Best reheated in oven at 350°F
- Allow 15-18 minutes cooking time
- Place on foil-lined baking sheet
- Cover loosely with foil for first 10 minutes, then uncover
Alternative Serving Ideas for Reheated Fried Fish
- Fish tacos:
- Reheat fish using any method
- Break into 1-inch chunks
- Warm corn tortillas (10 seconds in microwave)
- Add shredded cabbage, lime crema, and pico de gallo
- Fish sandwiches:
- Reheat fish until very hot
- Toast sandwich buns lightly
- Spread tartar sauce on bottom bun (1 tablespoon)
- Add lettuce, tomato, and pickles
- Place fish on top and serve immediately
- Fish salad:
- Reheat fish until crispy
- Prepare a green salad with mixed greens
- Add cucumber, tomato, and red onion
- Break fish into large chunks and place on top
- Drizzle with lemon vinaigrette
- Fish and chips revival:
- Reheat fish in oven at 400°F
- Place frozen fries on a separate baking sheet
- Start fries 5 minutes before fish
- Serve with malt vinegar and ketchup
For a light, complementary side dish, our corn and fish maw soup pairs wonderfully with reheated fried fish, offering a balanced meal with contrasting textures.
Storage & Reheating Guidelines for Fried Fish
Proper Storage Before Reheating
- Cool completely before storing (within 2 hours of cooking):
- Spread fish pieces on a plate instead of stacking
- Leave space between pieces
- Let cool at room temperature for 30-45 minutes maximum
- Never put hot fish directly in the refrigerator (condensation makes it soggy)
- Wrap properly to prevent odor transfer:
- Use airtight containers with tight-fitting lids
- Alternatively, wrap each piece in aluminum foil
- For extra protection, place wrapped fish in a zip-top bag
- Press out as much air as possible before sealing
- Refrigerate promptly:
- Place fish at the back of the refrigerator
- This area maintains the coldest, most consistent temperature
- Keep away from dairy products which easily absorb fish odors
- Fish remains safe to eat for up to 3 days (but tastes best within 1-2 days)
- Label with date of original cooking:
- Use a piece of masking tape and marker
- Write the date the fish was cooked
- Add this to the container or wrap
- Makes it easy to track freshness
Freezing & Reheating Fried Fish From Frozen
- Freeze properly:
- Wrap individual pieces in plastic wrap tightly
- Press out all air bubbles
- Place wrapped pieces in freezer bags
- Remove as much air as possible before sealing
- Label with contents and date
- Store up to 1 month for best quality
- Thaw before reheating:
- Move from freezer to refrigerator 24 hours before needed
- Place on a plate to catch any moisture
- Keep wrapped until fully thawed
- Never thaw at room temperature (bacterial growth risk)
- Pat dry thoroughly before reheating
- Reheat from frozen (emergency only):
- Add 50% more time to your chosen reheating method
- For oven: 400°F for 15