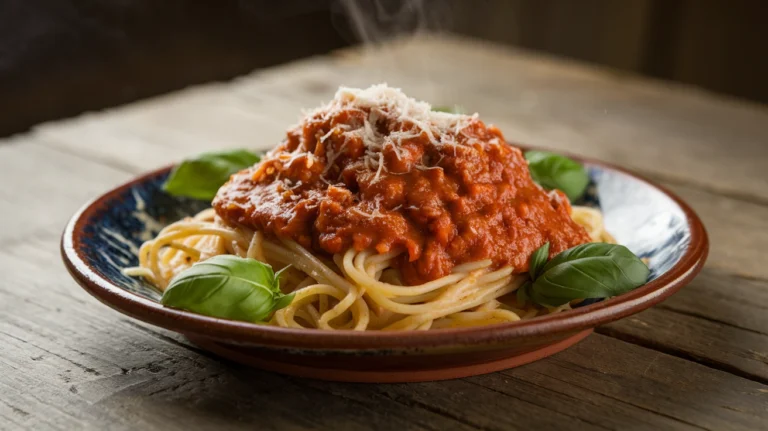
These Korean ground beef and rice bowls are your answer to busy weeknight dinners. Sweet, savory, and ready in just 20 minutes, these korean ground beef and rice bowls pack restaurant-quality flavor without the takeout price. Perfect for families who crave bold Asian-inspired meals without spending hours in the kitchen.
SERVES: 4 | PREP: 10 MIN | COOK: 10 MIN | TOTAL: 20 MIN
Ingredients
For the Beef Mixture
| Ingredient | Amount |
|---|---|
| Ground beef (80/20 blend) | 1½ pounds |
| Soy sauce | ⅓ cup |
| Brown sugar | ¼ cup |
| Sesame oil | 1 tablespoon |
| Fresh ginger (minced) | 1 tablespoon |
| Garlic cloves (minced) | 4 cloves |
| Red pepper flakes | ½ teaspoon |
| Black pepper | ¼ teaspoon |
For Serving
| Ingredient | Amount |
|---|---|
| Cooked white rice (warm) | 4 cups |
| Green onions (sliced) | 4 stalks |
| Sesame seeds | 2 tablespoons |
| Shredded carrots (optional) | 1 cup |
| Cucumber slices (optional) | 1 cup |
Step-by-Step Instructions
Phase 1: Prep Work (5 minutes)
Step 1: Start with your rice situation first. If you don’t have leftover rice ready, get fresh rice cooking now using your rice cooker or stovetop method. You’ll need 4 cups of cooked rice when it’s done. Day-old rice actually works better because it’s less sticky.
Step 2: Grab your cutting board and mince 4 garlic cloves super fine. The smaller you chop them, the better they’ll blend into your sauce. You want tiny pieces, not chunks.
Step 3: Peel a thumb-sized piece of fresh ginger using a spoon (it’s easier than a peeler). Mince it just as fine as your garlic. Fresh ginger makes a huge difference here—don’t skip it.
Step 4: Slice your green onions thin, keeping the white and green parts separate. The white parts go in during cooking, the green parts are your pretty topping at the end.
Step 5: If you’re adding vegetables, shred your carrots and slice your cucumber into thin half-moons now. Set everything aside in separate bowls so you’re ready to assemble fast.
Phase 2: Building Your Sauce (2 minutes)
Step 6: In a small bowl, mix together ⅓ cup soy sauce and ¼ cup brown sugar. Stir until the sugar mostly dissolves. This sweet-salty combo is the magic behind Korean ground beef and rice bowls.
Step 7: Add 1 tablespoon sesame oil to your sauce mixture. This nutty oil gives that authentic Korean restaurant taste you’re after. Regular vegetable oil won’t give you the same flavor.
Step 8: Toss in your ½ teaspoon red pepper flakes and ¼ teaspoon black pepper. Mix everything together. Taste it if you want—it should be pretty intense because it’s concentrated. Don’t worry, it’ll mellow when mixed with the beef.
Phase 3: Cooking the Beef (8 minutes)
Step 9: Heat a large skillet over medium-high heat. Don’t add oil yet—your ground beef has plenty of fat. Wait until you see a shimmer of heat coming off the pan (about 1 minute).
Step 10: Add your 1½ pounds ground beef to the hot skillet. Break it up with a wooden spoon or spatula. Let it sit untouched for 2 minutes—this creates a nice brown crust on the bottom.
Step 11: Break up the beef into small crumbles as it cooks. You want pieces about the size of a dime. Keep stirring and breaking it apart for about 4-5 minutes until no pink remains. The beef should be nicely browned.
Step 12: If there’s a lot of grease pooling in your pan (more than 2 tablespoons), carefully drain most of it by tilting the pan and spooning it out into a heat-safe container. Never pour grease down your sink. A little fat is good for flavor, but too much makes it greasy.
Step 13: Push your cooked beef to the edges of the pan, creating a clear spot in the middle. Add your minced garlic, ginger, and the white parts of your green onions to that empty spot. Let them sizzle for 30 seconds until fragrant. This blooms the flavors.
Step 14: Mix everything together in the pan, then pour your prepared sauce mixture over the beef. Stir well so every bit of meat gets coated.
Step 15: Let the sauce bubble and simmer for 2-3 minutes, stirring occasionally. You’ll notice it starts to thicken and caramelize slightly. The beef should look glossy and smell incredible. This is when the magic happens—the sauce reduces and clings to every piece of meat.
Phase 4: Assembly (2 minutes)
Step 16: Scoop 1 cup of warm rice into each of your four bowls. Pack it down slightly in the center to create a nice base. The rice needs to be warm so it absorbs some of that delicious sauce.
Step 17: Spoon the Korean ground beef mixture generously over each rice portion. Make sure everyone gets plenty of that sauce—it’s liquid gold. Each bowl should get about ¾ to 1 cup of the beef mixture.
Step 18: Top each bowl with your sliced green onions (the green parts), sesame seeds, and any vegetables you prepped. Shredded carrots add crunch and color. Cucumber slices add refreshing contrast.
Step 19: Serve immediately while everything’s hot. The contrast between warm beef and cool cucumbers is perfect. Have extra soy sauce on the table for anyone who wants more saltiness.
Chef’s Notes
Meat Selection Matters: The 80/20 ground beef blend gives you the best flavor-to-fat ratio for korean ground beef and rice bowls. Leaner beef (90/10) works but can taste dry. If you use 73/27, plan to drain more fat.
Sauce Thickness: Your sauce should coat the back of a spoon when done. If it’s too thin after simmering, let it cook another minute. Too thick? Add a tablespoon of water.
Make It Spicier: Want more heat in your korean ground beef and rice bowls? Add gochugaru (Korean red pepper flakes) instead of regular red pepper flakes, or stir in a spoonful of gochujang (Korean chili paste) with your sauce.
The Rice Rule: Cold rice straight from the fridge actually works better than freshly cooked rice because it’s less mushy. Just reheat it before serving.
Nutrition Information (Per Serving)
Calories: 520 | Protein: 32g | Carbohydrates: 58g | Fat: 18g | Fiber: 2g | Sodium: 980mg | Sugar: 14g
Delicious Variations
Cauliflower Rice Bowl: Swap regular rice for cauliflower rice to cut carbs dramatically. This makes healthy meals with ground beef low carb while keeping all that Korean flavor. Sauté your cauliflower rice separately with a little sesame oil first.
Lettuce Wrap Style: Skip the rice completely and serve your Korean ground beef in crisp butter lettuce cups. Add extra veggies like shredded cabbage and pickled carrots for crunch. Perfect for keto eaters.
Ground Turkey Version: Use 1½ pounds ground turkey instead of beef for a leaner option. Add an extra tablespoon of sesame oil because turkey is drier than beef. The cooking time stays the same.
Meal Prep Bowls: Make a big batch and portion into containers with rice, beef, and veggies separated. Keeps 4 days in the fridge. If you love ground beef meal prep ideas, try Salisbury steak with ground beef next for variety.
Storage & Reheating
Refrigerator Storage: Store leftover Korean ground beef and rice bowls in airtight containers for up to 4 days. Keep the beef mixture separate from rice if possible—this prevents soggy rice.
Freezer Storage: The beef mixture freezes beautifully for up to 3 months in freezer-safe bags. Lay bags flat to freeze so they stack easily. Don’t freeze the assembled bowls with rice—cooked rice gets mushy when frozen and thawed.
Reheating: Microwave individual portions for 2-3 minutes, stirring halfway through. Or reheat the beef in a skillet over medium heat with a splash of water to prevent drying out. Rice reheats best in the microwave with a damp paper towel on top.
Make-Ahead Tip: Cook the beef mixture up to 2 days ahead and store it in the fridge. When dinner time hits, just reheat and serve over freshly cooked rice. Takes 5 minutes.

Troubleshooting Common Problems
Problem 1: Sauce is Too Salty Your soy sauce brand might be higher in sodium. Next time, start with ¼ cup soy sauce and taste before adding more. Fix it now by adding a tablespoon of honey and ¼ cup water to dilute. Serve over extra rice to balance the saltiness.
Problem 2: Beef is Dry and Crumbly You either overcooked it or used beef that’s too lean. Ground beef is done when just barely no pink remains—cooking it longer dries it out. If it’s already dry, stir in 2-3 tablespoons of beef broth or water with the sauce to add moisture back.
Problem 3: Sauce Won’t Thicken Your heat might be too low. Crank it up to medium-high and let it bubble actively for 2-3 minutes. If that doesn’t work, mix ½ teaspoon cornstarch with 1 tablespoon cold water, then stir it into your beef. It’ll thicken in 30 seconds.
Problem 4: Garlic Burned and Tastes Bitter Garlic burns fast over high heat. Always add it to a cleared spot in the pan after your beef is fully cooked, and only let it cook 30 seconds before mixing. If it’s already burned, pick out the black pieces and add fresh minced garlic with your sauce.
Problem 5: Ground Beef is Greasy This happens with higher-fat beef. After cooking, tip your pan slightly and spoon out excess fat before adding sauce. You can also use a turkey baster to suck up grease from the pan. A little fat is good—too much is gross.
Equipment Essentials
- Large skillet or wok (12-inch works best for 1½ pounds beef)
- Wooden spoon or silicone spatula (for breaking up meat)
- Rice cooker or medium pot (for cooking rice)
- Small mixing bowl (for sauce prep)
- Sharp knife and cutting board (for mincing garlic and ginger)
- Measuring cups and spoons
- 4 serving bowls
- Grater (if using fresh carrots)
Shopping List
Meat Counter
- Ground beef (80/20 blend) – 1½ pounds
Produce Section
- Fresh ginger root – 1 piece
- Garlic – 1 head
- Green onions – 1 bunch
- Carrots – 1 pound (optional)
- Cucumber – 1 large (optional)
Asian/International Aisle
- Soy sauce – 1 bottle
- Sesame oil – 1 small bottle
- Sesame seeds – 1 container
- Red pepper flakes – 1 jar
Baking Aisle
- Brown sugar – 1 bag
Rice/Grains Aisle
- White rice – 1 bag (or use what you have)
Spices
- Black pepper
Success Secrets
1. Room Temperature Beef Cooks Better: Take your ground beef out of the fridge 15 minutes before cooking. Cold beef steams instead of browning, which means less flavor. Room temperature beef sears properly and develops that caramelized crust.
2. Don’t Crowd Your Pan: If your skillet looks cramped, cook the beef in two batches. Overcrowded meat steams and turns gray instead of brown. You want that crispy, caramelized exterior that makes korean ground beef and rice bowls taste restaurant-quality.
3. Taste and Adjust: Always taste your beef mixture before serving. Too sweet? Add more soy sauce. Too salty? Add a pinch more brown sugar. Every brand of soy sauce varies in saltiness, so trust your taste buds.
4. Fresh Ginger Changes Everything: Powdered ginger can’t match the bright, zesty punch of fresh ginger. It costs a little more, but that fresh zing is what separates good Korean ground beef from amazing Korean ground beef.
5. Let the Sauce Reduce: Don’t rush the final simmer. Those 2-3 minutes of bubbling turn watery sauce into thick, glossy coating that clings to every piece of beef. This step is where all the flavors concentrate and intensify.
Enjoy your Korean ground beef and rice bowls! This recipe proves that restaurant-quality flavor doesn’t require complicated techniques or hours of cooking. The sweet and savory sauce, tender beef, and fluffy rice come together in just 20 minutes for a meal your whole family will request on repeat.