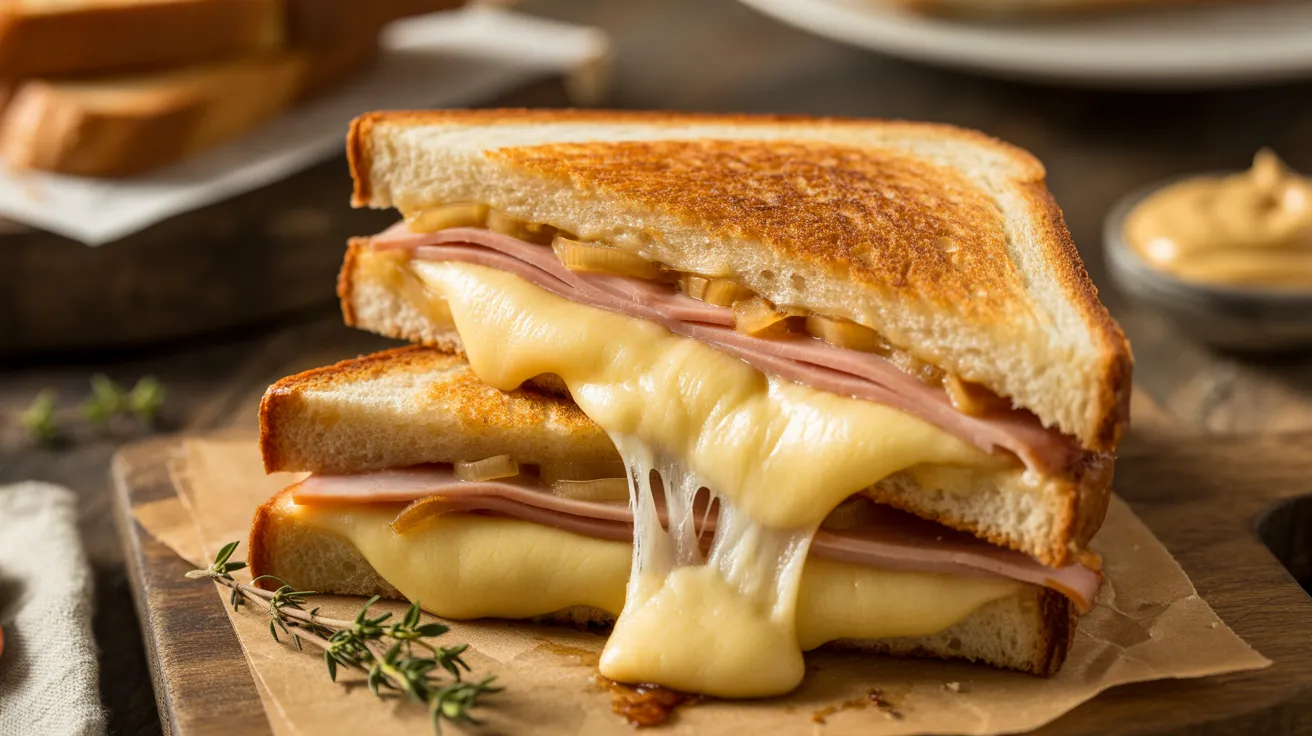
This leftover ham grilled cheese transforms yesterday’s dinner into pure comfort food magic. When I discovered how melted Gruyère and caramelized onions elevate simple leftover ham grilled cheese sandwiches, my family started requesting ham just for the leftovers. This leftover ham grilled cheese recipe serves four people with crispy, buttery bread and perfectly melted cheese in under 20 minutes.
SERVES: 4 | PREP: 10 MIN | COOK: 8 MIN | TOTAL: 18 MIN
Ingredients
Bread & Butter
| Ingredient | Amount |
|---|---|
| Sourdough bread, sliced | 8 slices |
| Unsalted butter, softened | 4 tablespoons |
| Dijon mustard | 2 tablespoons |
Protein & Cheese
| Ingredient | Amount |
|---|---|
| Leftover ham, sliced thin | 12 ounces |
| Gruyère cheese, shredded | 8 ounces |
| Sharp cheddar, shredded | 4 ounces |
Flavor Builders
| Ingredient | Amount |
|---|---|
| Yellow onion, thinly sliced | 1 medium |
| Honey | 1 tablespoon |
| Fresh thyme leaves | 1 teaspoon |
| Black pepper, freshly ground | ½ teaspoon |
Step-by-Step Instructions
Phase 1: Prep Work (3 minutes)
Step 1: Remove your leftover ham from the refrigerator and let it sit at room temperature for 5 minutes. Cold ham won’t heat through properly and creates uneven melting. While waiting, shred both cheeses and combine them in a bowl.
Step 2: Slice your onion into ⅛-inch thick half-moons. Thinner slices caramelize faster and distribute better in the sandwich. Pat the onion slices with a paper towel to remove excess moisture that would make your bread soggy.
Step 3: Lay out all 8 bread slices on your work surface. Spread ½ tablespoon softened butter on one side of each slice, making sure to reach the edges. The butter acts as a waterproof barrier and creates that signature golden crust.
Phase 2: Caramelizing Onions (5 minutes)
Step 4: Heat a large skillet over medium heat for 1 minute. Add 1 teaspoon butter and let it melt completely without browning. You want the pan warm but not smoking hot.
Step 5: Add the sliced onions and honey to the skillet. Stir to coat every piece with the honey-butter mixture. The honey speeds up caramelization and adds a subtle sweetness that balances the salty ham.
Step 6: Cook the onions for 4-5 minutes, stirring every minute. They should turn golden brown and smell sweet. If they start burning, reduce heat to medium-low. The onions are ready when they’ve shrunk by half and developed deep golden edges.
Step 7: Sprinkle the thyme leaves and black pepper over the caramelized onions. Stir for 30 seconds to release the thyme’s oils, then transfer onions to a bowl. Wipe the skillet clean with a paper towel.
Phase 3: Building the Sandwiches (2 minutes)
Step 8: Take 4 bread slices (butter-side down) and spread ½ tablespoon Dijon mustard on the non-buttered side of each. The mustard cuts through the richness and adds a subtle tang that makes ham shine.
Step 9: Layer 2 ounces of cheese mixture on each mustard-coated slice. Press the cheese down gently so it makes full contact with the bread. This bottom layer melts first and glues everything together.
Step 10: Divide your leftover ham evenly among the four sandwiches, placing 3 ounces on each. Fold or tear the ham slices so they fit within the bread edges. Ham hanging over the sides burns and creates a mess.
Step 11: Spoon the caramelized onions over the ham layer, using about 2 tablespoons per sandwich. Spread them evenly so every bite includes that sweet, savory flavor.
Step 12: Top each sandwich with another 1 ounce of cheese mixture. This upper cheese layer melts down through the ham and onions. Place the remaining 4 bread slices on top, butter-side up.
Phase 4: Grilling to Perfection (8 minutes)
Step 13: Heat your clean skillet over medium-low heat for 2 minutes. Test the temperature by flicking a drop of water on the surface. It should sizzle gently, not explode into steam. Too hot and you’ll burn the bread before the cheese melts.
Step 14: Carefully place 2 sandwiches in the skillet. Press down gently with a spatula for 5 seconds to ensure good contact. Don’t press hard or you’ll squeeze out the melted cheese.
Step 15: Cook for 3-4 minutes without moving the sandwiches. Peek underneath at the 3-minute mark by lifting one corner with your spatula. You’re looking for a deep golden-brown color, not pale yellow or dark brown.
Step 16: When the bottom is perfectly golden, slide your spatula under the entire sandwich and flip in one smooth motion. Press down gently again and cook the second side for another 3-4 minutes.
Step 17: Check if the cheese has melted by pressing the sandwich gently with your spatula. It should feel soft throughout, not firm in the center. If the bread is brown but cheese isn’t melted, reduce heat to low and cover the skillet with a lid for 1 minute.
Step 18: Transfer the first batch to a cutting board and let rest for 1 minute while you cook the remaining 2 sandwiches. This resting time lets the cheese set slightly so it doesn’t all pour out when you cut.
Step 19: Slice each leftover ham grilled cheese diagonally using a sharp serrated knife. Use a gentle sawing motion instead of pressing down, which compresses the sandwich.
Step 20: Serve immediately while the cheese is still stretchy and hot. If you made extra ham sandwiches and want more ideas, try this leftover ham Cuban sandwich for a tangy twist.
Chef’s Notes
Cheese Selection Matters: Gruyère provides nutty complexity while cheddar adds sharpness. For a more budget-friendly leftover ham grilled cheese, use all cheddar, though you’ll lose some depth of flavor. Never use pre-shredded cheese—the anti-caking agents prevent smooth melting.
Ham Thickness Is Critical: Slice your ham ⅛-inch thick or shave it paper-thin. Thick chunks won’t heat through and create cold spots. If your ham is in thick slices, pound them gently between plastic wrap to thin them out.
Temperature Control Wins Every Time: The biggest mistake people make is cooking too hot. Medium-low heat gives the cheese time to melt while the bread slowly browns. If your bread burns before the cheese melts, your heat is too high.
Butter Temperature Matters: Softened butter spreads evenly and creates consistent browning. Cold butter tears the bread. Room temperature butter should spread like mayonnaise. Leave it out for 30 minutes before cooking.
Nutrition Information (Per Serving)
Calories: 520 | Protein: 32g | Carbohydrates: 38g | Fat: 26g | Fiber: 2g | Sodium: 1,240mg | Calcium: 420mg
Creative Variations
Apple & Brie Upgrade: Replace Gruyère with 6 ounces Brie and add 1 thinly sliced Granny Smith apple per sandwich. The apple’s tartness balances the creamy Brie beautifully and adds a crisp texture contrast.
Spicy Southwest Version: Mix 2 tablespoons pickled jalapeños and 1 teaspoon smoked paprika into the cheese blend. Swap sourdough for jalapeño cheddar bread and replace Dijon with chipotle mayo. This kicks your sandwich up several heat levels.
Italian-Style Panini: Use 8 ounces mozzarella and 4 ounces fontina instead of Gruyère and cheddar. Add 2 tablespoons pesto and 8 fresh basil leaves to each sandwich. For more Italian-inspired options, check out this leftover ham panini recipe.
Breakfast Grilled Cheese: Add 2 fried eggs (one per sandwich, cooked over-easy), swap thyme for fresh chives, and include 2 slices cooked bacon per sandwich. Serve with hot sauce for a hearty morning meal.
Storage & Reheating
Refrigerator Storage
Wrap cooled sandwiches individually in aluminum foil and refrigerate for up to 2 days. The bread will soften but still tastes good reheated. Don’t stack them or the weight will compress the bread.
Freezing Instructions
Freeze assembled but uncooked sandwiches wrapped in plastic wrap, then foil, for up to 1 month. Cook directly from frozen, adding 2 extra minutes per side. This works great for meal prep.
Reheating Method
Never microwave leftover grilled cheese—it makes the bread rubbery. Instead, reheat in a 350°F oven for 10 minutes, flipping halfway through. For extra crispiness, finish under the broiler for 1 minute per side.
Make-Ahead Strategy
Caramelize the onions up to 3 days ahead and store refrigerated in an airtight container. Shred the cheese 1 day ahead. When ready to cook, assemble and grill fresh. This cuts active cooking time in half.
Troubleshooting Common Problems
Problem: Bread Burns Before Cheese Melts Solution: Your heat is too high. Grilled cheese needs patience. Cook on medium-low and give it time. If you’re already burning, reduce to low and cover the pan with a lid to trap heat and melt the cheese faster. Add 1 minute to each side.
Problem: Cheese Won’t Melt Evenly Solution: You used cold ingredients or too-thick cheese slices. Always bring ham and cheese to room temperature 15 minutes before cooking. Shred cheese finely instead of using thick slices. Press the sandwich gently while cooking to bring ingredients into contact.
Problem: Sandwich Falls Apart When Flipping Solution: You didn’t let the first side cook long enough. The cheese needs to start melting before you flip or it won’t hold together. Wait until you see cheese beginning to ooze at the edges. Use a wide spatula that supports the entire sandwich.
Problem: Bread Is Soggy Instead of Crispy Solution: Either your onions were too wet or you didn’t butter the bread properly. Always pat onions dry after caramelizing. Spread butter all the way to the bread edges. If using tomatoes or wet ingredients, place them between cheese layers, never touching bread.
Problem: Ham Is Still Cold in the Center Solution: Your ham was too thick or too cold. Thin-sliced ham heats through quickly. If using thick-cut ham, microwave it for 30 seconds before building the sandwich. You can also cover the pan while cooking to trap heat and warm the center faster.
Equipment Essentials

- Large heavy-bottomed skillet (12-inch works best for 2 sandwiches)
- Wide metal spatula for easy flipping
- Sharp serrated knife for clean cutting
- Cheese grater (box grater or microplane)
- Cutting board for prep and serving
- Small bowl for mixing cheese
- Measuring spoons and cups
- Paper towels for drying onions
Equipment Alternatives
No large skillet? Use a griddle or cook one sandwich at a time in a smaller pan. A panini press works but won’t give you as much control over the crispiness. An electric skillet set to 325°F provides consistent temperature control.
Shopping List
Dairy Section
- Unsalted butter
- Gruyère cheese block
- Sharp cheddar cheese block
Bakery
- Sourdough bread loaf
Deli/Meat
- Leftover ham (or purchase honey-baked ham)
Produce
- Yellow onion
- Fresh thyme
Pantry/Condiments
- Dijon mustard
- Honey
- Black peppercorns
Success Secrets
1. Room Temperature Ingredients Cook Evenly Take your cheese, ham, and butter out 20 minutes before cooking. Cold ingredients create uneven heating and prevent proper melting. This single step improves your results dramatically.
2. Shred Your Own Cheese Pre-shredded cheese contains cellulose (wood pulp) that prevents clumping but also prevents smooth melting. Buy cheese blocks and shred them yourself. The extra 2 minutes of work creates noticeably better texture.
3. Low and Slow Wins the Race Resist the urge to crank up the heat. Professional cooks use medium-low temperatures for grilled cheese. The bread should take 3-4 minutes per side to brown. Any faster and you’re cooking too hot.
4. Press Gently, Not Hard A light press with your spatula helps ingredients make contact. Pressing hard squeezes out melted cheese and makes sandwiches flat and dense. Think “gentle encouragement,” not “crushing.”
5. Let It Rest That 1-minute rest after cooking isn’t optional. It lets the cheese set slightly so it stretches instead of running out when you cut. Cut immediately and you’ll have a puddle of cheese on your cutting board instead of in your sandwich.
This leftover ham grilled cheese proves that leftovers can outshine the original meal. The combination of caramelized onions, melted Gruyère, and crispy sourdough creates restaurant-quality results at home.