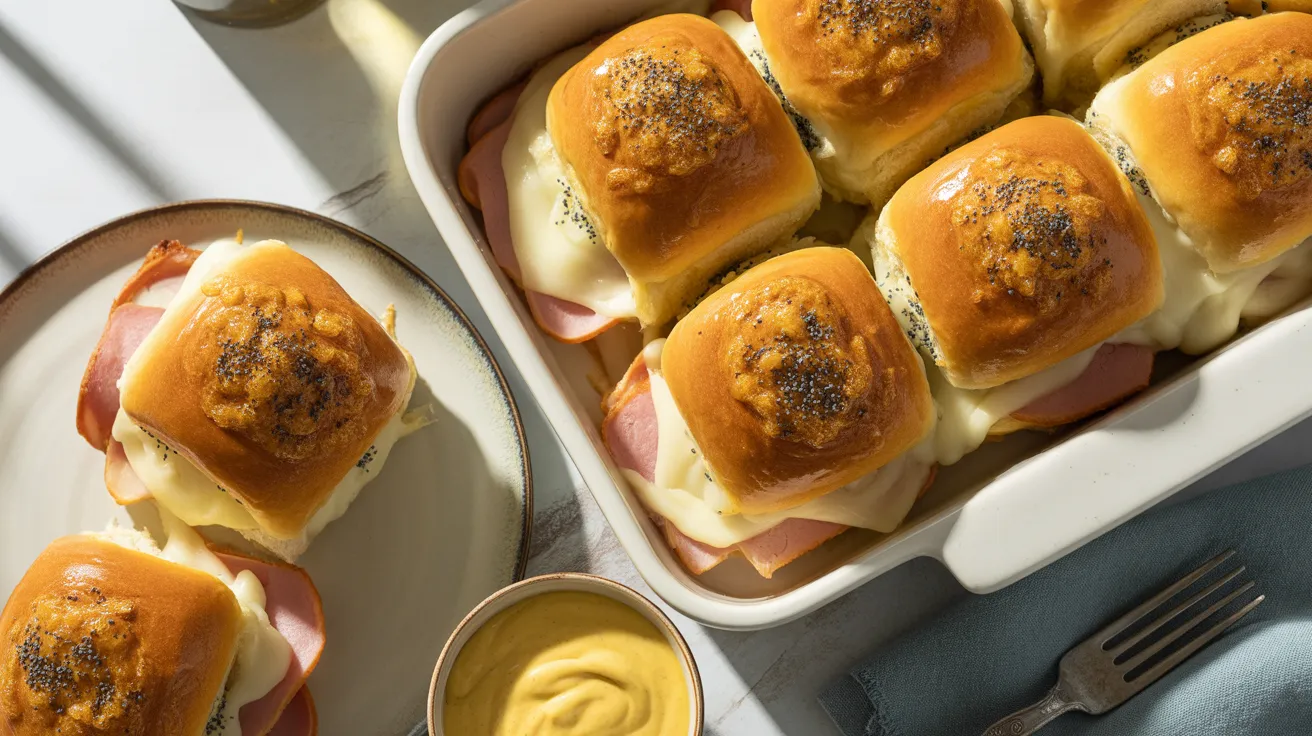
After the holiday feast comes the best part—transforming your leftover ham into these irresistible sliders that’ll have everyone fighting over the last one. These leftover ham sliders combine sweet Hawaiian rolls, melted cheese, and a buttery glaze that turns simple ingredients into the ultimate comfort food your family will beg you to make year-round.
SERVES: 4 | PREP: 15 MIN | COOK: 20 MIN | TOTAL: 35 MIN
Ingredients
| Category | Ingredient | Amount |
|---|---|---|
| Bread & Protein | Hawaiian sweet dinner rolls | 12 rolls (1 package) |
| Leftover ham, thinly sliced | 12 ounces | |
| Swiss cheese slices | 8 slices | |
| Glaze | Unsalted butter, melted | 6 tablespoons |
| Dijon mustard | 2 tablespoons | |
| Worcestershire sauce | 1 tablespoon | |
| Brown sugar | 1 tablespoon | |
| Dried minced onion | 1 teaspoon | |
| Poppy seeds | 1 tablespoon | |
| Optional Additions | Pickle slices | 12 slices |
| Honey mustard | For serving |
Step-by-Step Instructions
Phase 1: Preparation & Assembly (10 minutes)
Step 1: Preheat your oven to 350°F and position the rack in the center. This temperature is perfect because it melts the cheese completely while crisping the tops without burning the bottoms.
Step 2: Take a 9×13-inch baking dish and spray it lightly with cooking spray. I like to get the corners really well because that’s where the glaze tends to stick.
Step 3: Remove the entire pack of Hawaiian rolls from the package without separating them. Use a sharp serrated bread knife to slice horizontally through the middle, keeping all the rolls connected as one slab. This keeps everything together and makes assembly so much easier.
Step 4: Place the bottom half of the rolls in your prepared baking dish, cut side facing up. The rolls should fit snugly in the pan with just a little space around the edges.
Step 5: Layer the Swiss cheese evenly across the bottom rolls. I tear some slices in half to make sure every bite gets cheese coverage—nobody wants a cheeseless corner.
Step 6: Distribute your leftover ham evenly over the cheese layer. If your ham slices are thick, fold them or tear them into smaller pieces so each slider gets an equal amount. I aim for about 1 ounce of ham per slider.
Step 7: If you’re using pickle slices, place one on each slider position now. The pickles add a tangy brightness that cuts through the richness perfectly.
Step 8: Carefully place the top half of the rolls over the ham and cheese. Press down gently but firmly so everything sits flat and even.
Phase 2: Creating the Glaze (3 minutes)
Step 9: In a small microwave-safe bowl, melt the 6 tablespoons of butter for about 30-45 seconds. You want it fully liquid but not bubbling hot.
Step 10: Add the Dijon mustard, Worcestershire sauce, brown sugar, and dried minced onion to the melted butter. Whisk everything together with a fork until the brown sugar dissolves completely. This glaze is what makes these sliders legendary—the mustard adds tang, the Worcestershire brings umami depth, and the brown sugar creates a sweet-savory balance.
Step 11: Pour the glaze mixture evenly over the top of the rolls. Use a pastry brush or the back of a spoon to spread it into every corner and make sure the entire surface is covered. The glaze will soak into the rolls and create that signature buttery crust.
Step 12: Sprinkle the poppy seeds evenly across the top. They add a subtle nutty flavor and make these look bakery-professional.
Phase 3: Baking & Finishing (20 minutes)
Step 13: Cover the baking dish tightly with aluminum foil. This is important because it steams the sliders first, melting the cheese and warming the ham without drying out the tops.
Step 14: Bake covered for 15 minutes. You’ll know they’re ready when you can see the cheese starting to melt around the edges of the foil.
Step 15: Remove the foil carefully—watch out for the steam! Return the uncovered dish to the oven for another 5 minutes. This final step crisps up the tops and caramelizes the glaze, creating those golden-brown edges everyone loves.
Step 16: Remove from the oven when the tops are golden brown and you can see the cheese bubbling around the edges. Let the sliders rest in the pan for 3-4 minutes before cutting.
Step 17: Use a sharp knife to cut along the original roll lines, creating 12 individual sliders. Serve immediately while the cheese is still gooey and the tops are warm.
Step 18: Place 3 sliders per person on plates. These are rich, so three sliders with a side salad makes a perfect meal for four people.
Chef’s Notes
Perfect Ham Thickness: Your leftover ham sliders work best when the ham is sliced thin—about ⅛ inch thick. If your ham is thicker, I recommend slicing it thinner or shredding it with your hands for better distribution.
Cheese Alternatives: While Swiss is traditional, smoked gouda or sharp cheddar create amazing flavor variations. Provolone works beautifully if you want something milder.
Make-Ahead Magic: Assemble these completely through Step 12, then cover and refrigerate for up to 24 hours. When ready to bake, add 5 extra minutes to the covered baking time since they’ll be cold.
Glaze Customization: Double the glaze recipe if you love extra buttery tops. I sometimes add a pinch of garlic powder or smoked paprika to the mixture for depth.
Nutrition Information (Per 3-Slider Serving)
Calories: 485 | Protein: 28g | Carbohydrates: 38g | Fat: 24g | Saturated Fat: 13g | Fiber: 2g | Sugar: 14g | Sodium: 1,240mg | Cholesterol: 95mg
Creative Variations
Hawaiian BBQ Style: Brush the sliders with your favorite BBQ sauce before adding the glaze, and top with grilled pineapple chunks. The sweet-smoky combination pairs perfectly with ham.
Spicy Cajun Version: Add 1 teaspoon of Cajun seasoning to the glaze and use pepper jack cheese instead of Swiss. Serve with a creamy ranch dipping sauce.
Italian-Inspired: Replace the glaze with garlic butter, use provolone cheese, and add thin tomato slices and fresh basil leaves. If you’re looking for more ways to use your holiday ham, try my leftover ham bone soup which transforms the bone into liquid gold.
Breakfast Sliders: Add a thin layer of scrambled eggs between the cheese and ham, and serve with hot sauce. For another creative breakfast idea using leftover ham, check out my leftover ham fried rice recipe.
Storage & Reheating
Refrigerator Storage: Place cooled sliders in an airtight container separated by parchment paper. They’ll keep for 3-4 days in the fridge.
Reheating Instructions: Wrap sliders in foil and heat at 300°F for 10-12 minutes. The foil prevents them from drying out while the oven warms them through.
Freezing: Wrap individual sliders tightly in plastic wrap, then place in a freezer bag. Freeze for up to 2 months. Thaw overnight in the fridge before reheating.
Best Texture Tip: Reheat in the oven rather than the microwave. The microwave makes the bread soggy while the oven restores that buttery, crispy top.
Troubleshooting Common Problems
Problem 1: Soggy Bottoms Your rolls might be sitting in too much glaze. Make sure to spread the glaze evenly and not pool it in the center. If this happens, place the dish on a lower oven rack next time so the bottom gets more direct heat.
Problem 2: Dry Tops This happens when you skip the foil-covered baking step or bake too long uncovered. Always cover for the first 15 minutes to trap moisture, then uncover just for the final crisping.
Problem 3: Cheese Not Melting Your oven temperature might be too low, or the cheese slices were too thick. Check your oven temperature with an oven thermometer, and make sure cheese slices are thin and cover the entire surface.
Problem 4: Glaze Burning If your glaze darkens too quickly, tent the dish with foil earlier. Some ovens run hot, so you might need to reduce temperature to 325°F and bake a few minutes longer.
Problem 5: Sliders Falling Apart This usually means you separated the rolls individually before slicing. Always keep the rolls attached as one unit during preparation and cutting. The connected structure holds everything together.
Equipment Essentials

- 9×13-inch baking dish (glass or ceramic)
- Serrated bread knife (for clean horizontal cuts)
- Pastry brush (for even glaze distribution)
- Small mixing bowl (for glaze preparation)
- Whisk or fork (to blend glaze ingredients)
- Aluminum foil (heavy-duty works best)
- Sharp chef’s knife (for cutting finished sliders)
- Oven thermometer (to verify accurate temperature)
Shopping List
Bakery Section:
- 1 package Hawaiian sweet dinner rolls (12 count)
Deli/Meat Counter:
- 12 ounces sliced Swiss cheese (or 8 pre-sliced)
Dairy Section:
- 1 stick unsalted butter
Condiment Aisle:
- Dijon mustard
- Worcestershire sauce
Baking Aisle:
- Brown sugar
- Poppy seeds
Spice Aisle:
- Dried minced onion
Optional:
- Dill pickle slices
- Honey mustard
Success Secrets
Secret 1: Use day-old Hawaiian rolls if possible. They’re slightly firmer and absorb the glaze better without getting mushy. Fresh rolls work too but can be more delicate.
Secret 2: Let the leftover ham sliders sit for 3-4 minutes after baking before cutting. This resting time lets the cheese set slightly so your sliders hold together perfectly instead of becoming a gooey mess.
Secret 3: Score the top of the rolls lightly with a knife before adding the glaze. These shallow cuts help the butter mixture soak into the bread more evenly.
Secret 4: Place your baking dish on a rimmed baking sheet before putting it in the oven. If any glaze drips over, you won’t have a mess in your oven.
Secret 5: Serve these with honey mustard or ranch dressing on the side. The extra sauce takes these from great to unforgettable, and guests love having options for dipping.
These leftover ham sliders prove that the post-holiday meals can be even better than the main event. The combination of buttery Hawaiian rolls, melted cheese, and that incredible glaze transforms simple ingredients into something your family will request long after the holiday ham is gone.
The best part? You can customize these endlessly based on what you have in your fridge. Different cheeses, various glazes, and creative add-ins mean you’ll never get bored making these sliders.
Serve them for lunch, dinner, game day, or even brunch—they work for any occasion. Just remember to make extra because three sliders per person somehow never feels like enough when they taste this good.