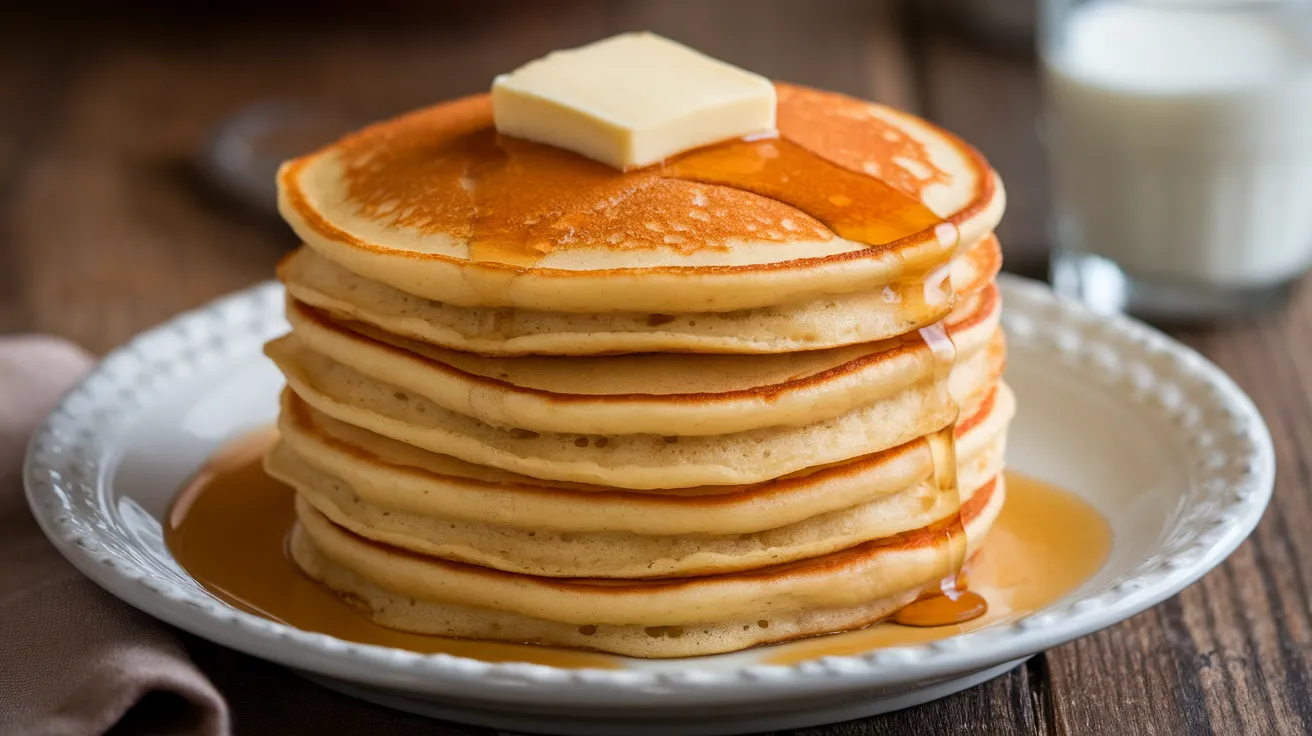
This amazing low salt pancake recipe transforms your breakfast routine with incredibly fluffy, tender pancakes that prove you don’t need excess sodium for spectacular morning flavor. Designed specifically for health-conscious families, this low salt pancake recipe delivers all the classic taste and texture you love while keeping your sodium intake in check – perfect for anyone managing blood pressure or simply choosing healthier options.
SERVES: 4 | PREP: 15 MIN | COOK: 20 MIN | TOTAL: 35 MIN
Ingredients for Your Low Salt Pancake Recipe
Dry Ingredients
| Ingredient | Amount | Purpose |
|---|---|---|
| All-purpose flour | 2 cups | Creates structure |
| Baking powder (low sodium) | 2 teaspoons | Provides lift |
| Sugar | 2 tablespoons | Adds sweetness |
| Salt | 1/4 teaspoon | Enhances flavor |
Wet Ingredients
| Ingredient | Amount | Purpose |
|---|---|---|
| Large eggs | 2 | Binds ingredients |
| Milk | 1 3/4 cups | Creates tenderness |
| Unsalted butter, melted | 3 tablespoons | Adds richness |
| Vanilla extract | 1 teaspoon | Boosts flavor |
For Cooking
| Ingredient | Amount |
|---|---|
| Cooking oil or butter | As needed |
Detailed Step-by-Step Instructions for Perfect Low Salt Pancakes
Phase 1: Complete Preparation Setup (8 minutes)
- Set up your cooking station properly. Place your griddle or large non-stick pan (at least 10-12 inches wide) on the stove. Turn heat to medium – this means about setting 5 on an electric stove or medium flame on gas. Why this matters: Starting with proper heat prevents burning and ensures even cooking throughout.
- Gather and organize every single ingredient. Line up all your ingredients on the counter in the order you’ll use them. Check expiration dates, especially on your baking powder (it should fizz when mixed with hot water if it’s fresh). Beginner tip: Having everything ready prevents mistakes and rushing.
- Measure ingredients with precision. Use dry measuring cups for flour (level off with a knife), liquid measuring cups for milk, and measuring spoons for small amounts. Critical detail: Pack nothing down – just scoop and level for accurate results.
- Prepare your mixing area. Get out one large bowl (at least 3-quart capacity) and one medium bowl (2-quart capacity). Place a whisk, wooden spoon, and rubber spatula within easy reach. Why separate bowls: This prevents overmixing, which creates tough pancakes.
- Test your griddle temperature. After 5 minutes of heating, sprinkle 3-4 drops of water onto the surface. They should immediately sizzle and dance around, then disappear within 2-3 seconds. Too hot: Water disappears instantly. Too cool: Water just sits there.
Phase 2: Creating Perfect Batter (7 minutes)
- Mix all dry ingredients thoroughly. In your large bowl, combine flour, low-sodium baking powder, sugar, and salt. Whisk these together for 30-45 seconds until you see no streaks of individual ingredients. Visual check: The mixture should look uniformly combined with no white flour pockets.
- Create a deep well in your dry mixture. Push the dry ingredients up the sides of the bowl, creating a crater in the center about 4 inches wide and reaching almost to the bottom. Purpose: This technique helps wet ingredients distribute evenly without overmixing.
- Prepare wet ingredients separately. Crack both eggs into your medium bowl. Beginner safety: Crack each egg into a small cup first, then add to the bowl – this catches any bad eggs or shell pieces.
- Beat eggs until frothy. Whisk the eggs vigorously for 45-60 seconds until they become slightly foamy and lighter in color. What you’re looking for: The eggs should look almost doubled in volume and have tiny bubbles throughout.
- Combine remaining wet ingredients. Add milk, melted butter (make sure it’s cooled slightly so it doesn’t cook the eggs), and vanilla extract to your beaten eggs. Whisk everything together for 30 seconds until completely smooth. Temperature tip: Ingredients should be room temperature for best mixing.
- Pour wet ingredients into the well. Pour your wet mixture directly into the center crater of your dry ingredients. Don’t dump it everywhere – keep it concentrated in the middle initially.
- Mix with extreme gentleness. Using a wooden spoon or large whisk, start stirring from the center well, gradually pulling in flour from the sides. Critical technique: Stop mixing the moment you can’t see any dry flour – the batter should still have small lumps. Count your stirs: Aim for 15-20 gentle folds maximum.
Phase 3: Cooking Your Low Salt Pancakes to Perfection (20 minutes)
- Double-check your griddle temperature. The surface should feel hot when you hold your hand 4 inches above it. If you have an infrared thermometer, aim for 350°F. No thermometer: The water droplet test from step 5 should still work perfectly.
- Apply cooking fat correctly. Add just enough oil or butter to lightly coat the surface – about 1/2 teaspoon for the whole griddle. Use a paper towel to spread it evenly, wiping away any excess. Why not too much: Excess fat creates uneven browning and greasy pancakes.
- Portion batter consistently. Use a 1/4 cup measuring cup (or large ice cream scoop) to pour batter onto the griddle. Spacing matters: Leave at least 2 inches between each pancake so they don’t run together and you can flip them easily.
- Watch for the first cooking stage carefully. Cook without touching for 2-3 minutes. Visual cues to look for: Small bubbles will start forming around the edges first, then across the entire surface. The edges should look slightly less wet and more set.
- Identify perfect flip timing. The pancakes are ready to flip when bubbles form across the entire surface, pop, and stay open (don’t fill back in). The edges should look dry and slightly cooked. Beginner mistake: Don’t flip too early – undercooked centers will be gummy.
- Execute the perfect flip. Slide a wide, thin spatula completely under each pancake. Lift quickly but flip gently in one smooth motion. If batter spills out: Your pancakes weren’t ready – wait longer next time.
- Cook the second side properly. The second side cooks much faster – usually 1-2 minutes maximum. Visual check: Lift a corner with your spatula to peek at the color. You want golden brown, not dark brown.
- Keep finished pancakes warm. Transfer cooked pancakes to a baking sheet and place in a 200°F oven. Don’t stack them – lay them in a single layer so they stay fluffy, not compressed.
- Repeat the process efficiently. Add a tiny bit more oil to the griddle between batches if needed. The pan gets more seasoned with each batch, so you might need less oil as you go. Batter consistency: Give it a very gentle stir if it seems to separate.
Professional Chef’s Notes for Low Salt Pancake Success
Temperature Mastery: This low salt pancake recipe requires steady medium heat. Too high burns the outside before the inside cooks; too low creates pale, dense pancakes.
Salt Science: The reduced salt works because vanilla extract and proper browning create complex flavors that your taste buds interpret as more satisfying.
Mixing Method: The lumpy batter technique prevents gluten development, which keeps these low salt pancakes incredibly tender instead of chewy.
Ingredient Quality: Fresh, high-quality vanilla extract makes a noticeable difference in this low salt pancake recipe since we’re relying on fewer flavor enhancers.
Nutrition Information (Per Serving)
- Calories: 285
- Protein: 9g
- Carbohydrates: 42g
- Fat: 8g
- Sodium: 195mg (83% less than traditional recipes)
- Fiber: 2g
Creative Variations for Your Low Salt Pancake Recipe
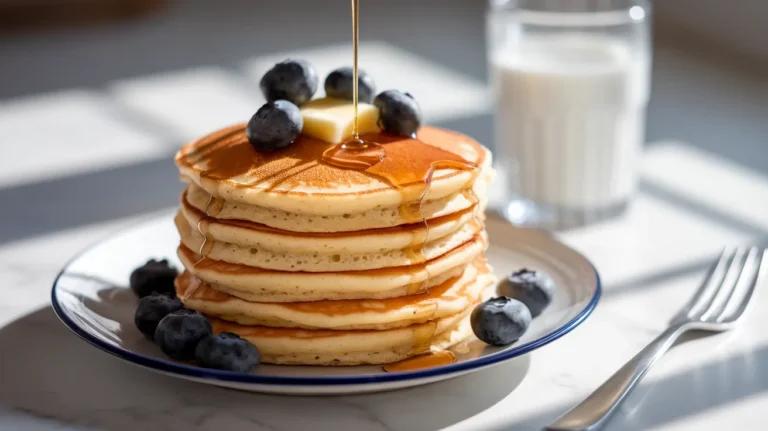
Berry Burst Low Salt Pancakes
Gently fold 1/2 cup fresh or frozen blueberries into the finished batter. The natural fruit sugars complement the reduced sodium perfectly while adding antioxidants.
Cinnamon Spice Version
Add 1 teaspoon ground cinnamon and 1/4 teaspoon nutmeg to your dry ingredients. These warming spices enhance the flavor profile without any additional sodium.
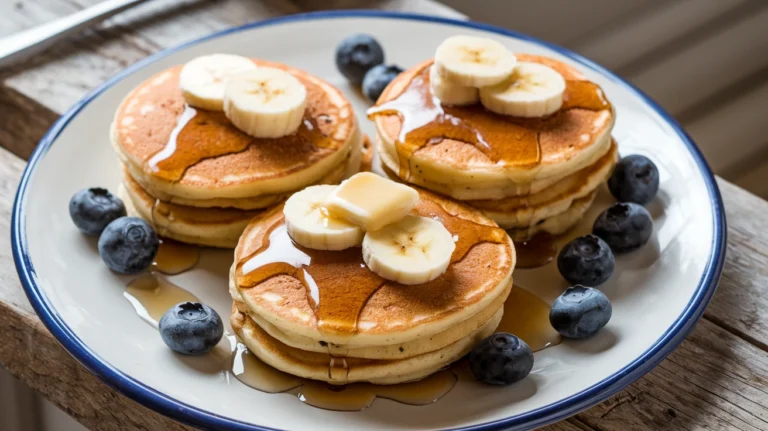
Banana Protein Boost
Mash 1 very ripe banana and fold into wet ingredients before combining with dry. For more banana breakfast ideas, try these mini banana pancakes that use similar heart-healthy techniques.
Whole Grain Health Upgrade
Replace 1 cup of all-purpose flour with whole wheat pastry flour for added fiber and nutty flavor that pairs beautifully with this low salt approach.
Storage & Reheating Your Low Salt Pancakes
Refrigerator Method: Store cooled pancakes in an airtight container with parchment paper between layers for up to 4 days.
Freezing Technique: Arrange pancakes in a single layer on a baking sheet, freeze for 2 hours, then transfer to freezer bags for up to 3 months.
Best Reheating: Toast frozen pancakes directly in a toaster for crispy edges, or microwave refrigerated ones for 20-30 seconds.
Make-Ahead Strategy: Mix your dry ingredients up to 1 week ahead and store in an airtight container. Add wet ingredients fresh each morning.
Troubleshooting Guide for Low Salt Pancake Recipe Problems
Dense, Heavy Pancakes
Cause: Overmixed batter or old leavening
Solution: Mix only until flour disappears, replace baking powder every 6 months
Prevention: Count your mixing strokes – never exceed 25 folds
Pale, Undercooked Centers
Cause: Heat too low or flipping too early
Solution: Increase heat slightly, wait for bubble formation across entire surface
Test: Internal temperature should reach 190°F
Burnt Outside, Raw Inside
Cause: Heat too high for this low salt pancake recipe
Solution: Lower heat to medium-low, cook longer on each side
Fix: Reduce heat and cover pan with lid for even cooking
Pancakes Fall Apart When Flipping
Cause: Not enough binding or batter too thin
Solution: Add 1 extra tablespoon flour, ensure eggs are well beaten
Technique: Use wider spatula and flip decisively
Metallic or Bitter Taste
Cause: Too much baking powder or aluminum-based baking powder
Solution: Measure carefully, use aluminum-free, low-sodium baking powder
Ratio: Never exceed 1 teaspoon per cup of flour
Essential Equipment for This Low Salt Pancake Recipe
- Large non-stick griddle (12-inch minimum) or heavy-bottomed pan
- Two mixing bowls (3-quart and 2-quart capacity)
- Wire whisk for smooth, lump-free mixing
- 1/4 cup dry measuring cup for consistent pancake sizing
- Wide, thin spatula (4-inch width minimum) for easy flipping
- Complete measuring set for precise ingredient ratios
Organized Shopping List
Dairy Section
- Large eggs (1 dozen – check for cracks)
- Whole milk (half gallon – 2% works too)
- Unsalted butter (1-pound box)
Baking Aisle
- All-purpose flour (5-pound bag)
- Low-sodium baking powder (crucial for this recipe)
- Granulated sugar (4-pound bag)
- Pure vanilla extract (not imitation)
- Fine sea salt (if needed)
Oil & Pantry
- Neutral cooking oil or cooking spray
Five Success Secrets for Perfect Low Salt Pancakes
- Temperature Consistency: Use medium heat throughout – resist the urge to turn up the heat for faster cooking. Patience creates perfect texture in this low salt pancake recipe.
- Room Temperature Magic: Let eggs and milk sit out for 30 minutes before mixing. This creates better emulsion and fluffier final results.
- Batter Rest Period: Allow mixed batter to rest for 3-4 minutes before cooking. This hydrates the flour completely and improves texture.
- Visual Cooking Cues: Trust what you see over timing. Every stove heats differently, so watch for bubbles and color changes rather than following strict time guidelines.
- Gentle Handling Philosophy: Treat your batter like it’s fragile. Every gentle fold and careful flip contributes to the tender, fluffy texture that makes this low salt pancake recipe special.
For more creative breakfast ideas using similar mixing techniques, discover how to make donuts with pancake mix – perfect for weekend family projects.
This comprehensive low salt pancake recipe proves that reducing sodium doesn’t mean compromising on flavor or texture. With these detailed instructions, even complete beginners can create restaurant-quality pancakes that support heart health while delivering the perfect breakfast experience your family craves.