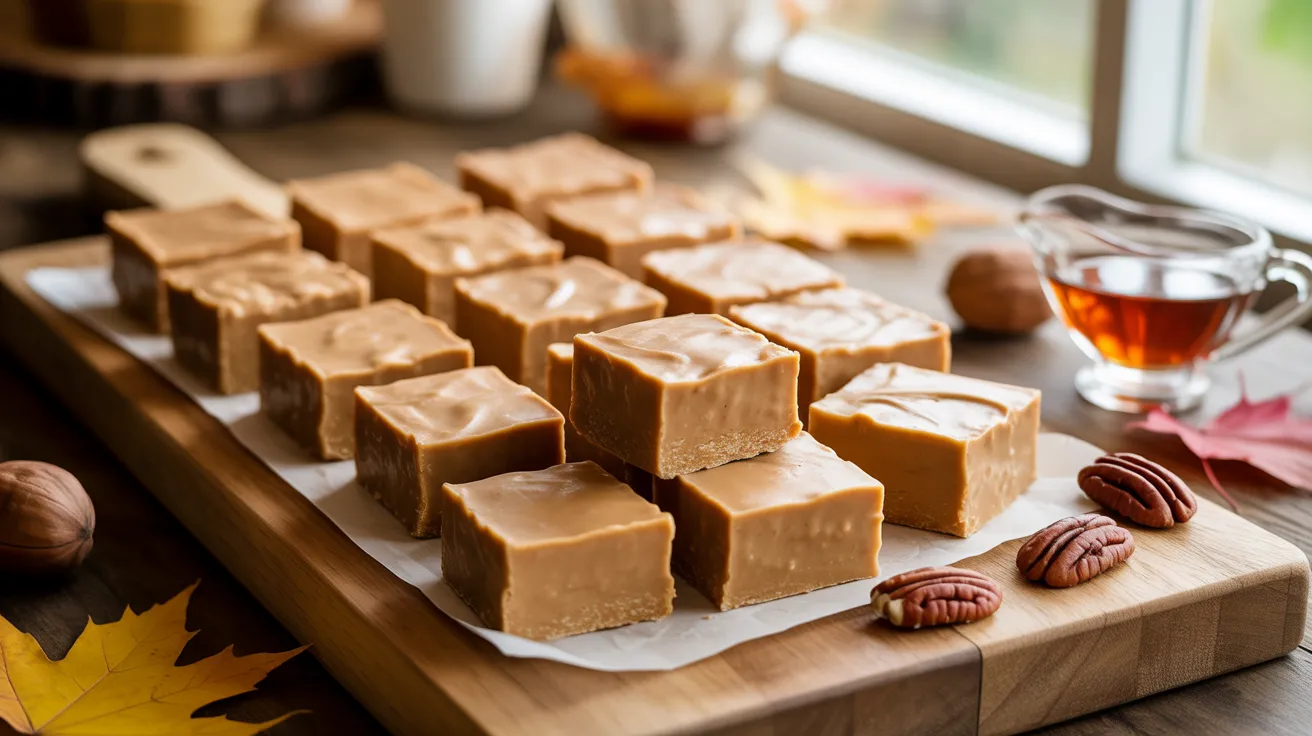
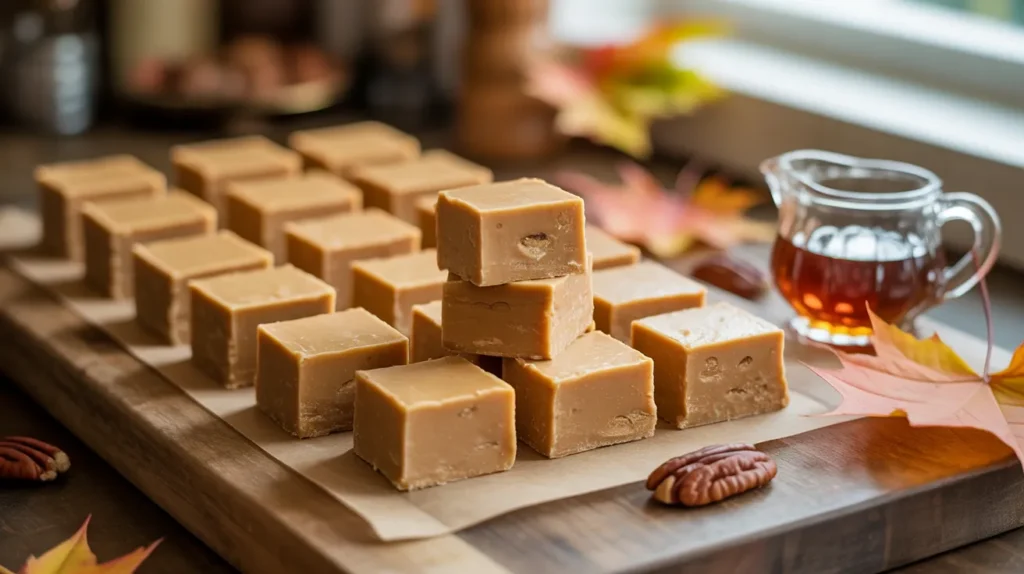
Nothing captures fall flavor quite like maple fudge with its sweet, creamy texture and rich maple taste. This maple fudge recipe transforms simple ingredients into a decadent treat that rivals any candy shop version, and you’ll master it on your first try.
SERVES: 4 | PREP: 10 MIN | COOK: 15 MIN | TOTAL: 25 MIN
Why This Maple Fudge Works
I’ve made countless batches of fudge over the years, and this recipe nails the perfect balance between creamy and firm. The secret? Real maple syrup combined with precise temperature control creates that signature smooth texture without any graininess.
You don’t need fancy equipment or culinary school skills. Just a candy thermometer, some patience, and these foolproof techniques that I’ll walk you through step by step.
Ingredients You’ll Need
Base Ingredients
| Ingredient | Amount | Notes |
|---|---|---|
| Granulated sugar | 2 cups | Pure cane sugar works best |
| Heavy cream | 1 cup | Full-fat only, no substitutes |
| Pure maple syrup | 3/4 cup | Grade A Dark for deeper flavor |
| Unsalted butter | 4 tablespoons | Plus extra for greasing pan |
| Vanilla extract | 1 teaspoon | Pure vanilla, not imitation |
| Salt | 1/4 teaspoon | Enhances maple flavor |
Optional Toppings
- Chopped pecans (1/2 cup)
- Sea salt flakes for sprinkling
- Maple sugar for dusting
Step-by-Step Instructions
Phase 1: Preparation (5 minutes)
Step 1: Line an 8×8-inch baking pan with parchment paper, leaving overhang on two sides for easy removal later. Butter the parchment paper thoroughly using about 1 tablespoon of softened butter. This prevents sticking and makes cutting your fudge much easier. The overhang acts like handles when you’re ready to lift the finished fudge out.
Step 2: Gather all your ingredients and measure them precisely. Fudge-making moves quickly once you start, so having everything ready prevents disasters. Set your candy thermometer next to the stove. Clip it to your heaviest saucepan to make sure it’s working properly. The thermometer should read 212°F when you boil water – this confirms it’s accurate.
Step 3: Choose a heavy-bottomed 3-quart saucepan. Thin pans create hot spots that burn your maple fudge before it reaches the right temperature. Stainless steel or copper works beautifully. Avoid nonstick pans since they don’t conduct heat evenly enough for candy making.
Phase 2: Creating the Base (10 minutes)
Step 4: Combine the 2 cups sugar, 1 cup heavy cream, 3/4 cup maple syrup, and 4 tablespoons butter in your prepared saucepan. Stir gently with a wooden spoon over medium-low heat until the sugar completely dissolves. You’ll know it’s ready when you can’t feel any grittiness when you rub a bit between your fingers. This takes about 3-4 minutes and prevents crystallization later.
Step 5: Once the sugar dissolves, increase the heat to medium. Attach your candy thermometer to the side of the pan, making sure the bulb doesn’t touch the bottom. Stop stirring completely at this point. Stirring after this stage introduces air bubbles and causes grainy texture – the enemy of smooth fudge.
Step 6: Watch the mixture carefully as it heats. It will bubble vigorously, which is normal. The color deepens from light tan to rich amber as the maple caramelizes. Don’t walk away from the stove. Fudge can go from perfect to burned in 30 seconds once it’s near the target temperature.
Step 7: Cook the maple fudge mixture until it reaches exactly 238°F on your candy thermometer. This is called the soft-ball stage in candy making. At this temperature, a small amount dropped in cold water forms a soft ball that flattens when removed. This takes about 8-10 minutes from when you stopped stirring. If you’re at high altitude, subtract 2°F for every 1,000 feet above sea level.
Phase 3: Cooling and Beating (5 minutes)
Step 8: The moment your thermometer reads 238°F, remove the pan from heat immediately. Don’t let it coast to a higher temperature. Transfer the pan to a cooling rack or trivet. Add the 1 teaspoon vanilla extract and 1/4 teaspoon salt. Don’t stir yet. Let the mixture cool undisturbed until it reaches 110°F, which takes about 20-25 minutes. I know this seems like forever, but patience here makes the difference between creamy fudge and sugary disaster.
Step 9: While waiting, resist every urge to stir, jiggle, or move the pan. Even small disturbances can cause premature crystallization. You’ll notice the mixture stops bubbling and becomes very still. The surface may look slightly glossy. Trust the thermometer more than your eyes.
Step 10: Once the mixture hits 110°F (it should feel just warm to the touch, not hot), it’s time to beat it. Using a wooden spoon or sturdy spatula, stir vigorously in one direction. The mixture transforms dramatically over the next 3-5 minutes. It starts thin and glossy, then thickens, loses its shine, and turns lighter in color.
Step 11: Keep beating until the maple fudge loses almost all its gloss and becomes thick and creamy. It should start to hold its shape but still be pourable. This is the critical moment. If you see it starting to set in the pan, you’ve got about 30 seconds to pour it before it becomes too stiff. You’ll feel the resistance increase in your arm as you stir – that’s your cue.
Phase 4: Setting and Finishing (2 hours minimum)
Step 12: Immediately pour the beaten fudge into your prepared pan. Use your spoon to spread it quickly into an even layer. Don’t worry about perfection – just get it level. If you’re adding chopped pecans or other toppings, sprinkle them now and press gently into the surface. The fudge sets fast, so work quickly.
Step 13: Let the maple fudge cool completely at room temperature for 2-3 hours. Don’t refrigerate it. Cold temperatures create condensation that makes the surface sticky. You’ll know it’s ready when you can press the center gently and it feels firm, not soft or tacky.
Step 14: Once set, use the parchment paper overhang to lift the entire block out of the pan. Place it on a cutting board. Use a sharp knife wiped clean between cuts to slice into 16 pieces (4 servings of 4 pieces each). Wipe the knife after every cut for clean edges.
Step 15: If your fudge is too hard to cut, let it sit at room temperature for 15 minutes. If it’s still soft and won’t hold its shape, pop it in the refrigerator for 20 minutes to firm up before cutting.
Chef’s Notes
Temperature precision matters more than timing. I’ve seen people make perfect maple fudge in 12 minutes and others take 18 minutes. The thermometer tells the truth, not the clock. Invest in a quality candy thermometer and test it in boiling water before each batch.
Real maple syrup is non-negotiable. Pancake syrup or maple-flavored corn syrup won’t work. They contain different sugars that prevent proper crystallization. Spend the extra money on Grade A Dark or Grade B maple syrup for the best flavor.
Humidity affects your results. Making fudge on rainy or humid days increases cooking time and can make your maple fudge softer. If possible, choose dry days for candy making. If you must make it in humidity, cook to 2°F higher than the recipe states.
The beating stage separates amateurs from pros. Under-beaten fudge stays soft and doesn’t set properly. Over-beaten fudge becomes crumbly and dry. Watch for the loss of shine and the mixture thickening but still being pourable. That sweet spot lasts about 30-45 seconds, so stay focused.
Nutrition Information (Per Serving – 4 pieces)
- Calories: 520
- Total Fat: 18g
- Saturated Fat: 11g
- Cholesterol: 55mg
- Sodium: 180mg
- Total Carbohydrates: 92g
- Sugars: 88g
- Protein: 1g
Creative Variations to Try
Maple Walnut Fudge: Stir in 1/2 cup toasted walnuts instead of pecans after beating the mixture. Toast them in a 350°F oven for 8 minutes first to intensify their flavor. The slight bitterness of walnuts balances the sweet maple beautifully.
Bourbon Maple Fudge: Replace the vanilla extract with 1 tablespoon bourbon added at the cooling stage. The warmth of bourbon amplifies the maple’s complexity. This adult version makes an impressive gift for the holidays, similar to how gingerbread fudge brings warm spices to the classic recipe.
Salted Maple Caramel Fudge: Add 2 tablespoons of caramel sauce swirled on top before the fudge sets completely. Sprinkle with flaky sea salt. The salt cuts through the sweetness and adds a gourmet touch that people go crazy for.
Chocolate Maple Swirl: Make a half-batch of chocolate fudge and pour it into the pan first, then pour your maple fudge on top and swirl with a knife. You get the best of both worlds, and it looks stunning when cut. For another seasonal twist, try the cooling peppermint flavors in peppermint fudge during winter months.
Storage and Reheating Guide
Room Temperature Storage: Keep your maple fudge in an airtight container lined with parchment paper between layers. It stays fresh for 2 weeks at room temperature. Place the container in a cool, dark cupboard away from heat sources.
Refrigerator Storage: Fudge keeps for 3-4 weeks refrigerated. Let it come to room temperature for 30 minutes before serving. Cold fudge is too firm and loses its creamy texture. Wrap individual pieces in wax paper to prevent them from sticking together.
Freezer Storage: Wrap pieces individually in plastic wrap, then place in a freezer bag. Frozen maple fudge lasts 3 months. Thaw in the refrigerator overnight, then bring to room temperature before eating. Never microwave frozen fudge – it creates a sticky mess.
Gift Packaging: Layer pieces between parchment paper in a decorative tin. Store in a cool place if gifting within 1 week. For longer storage before gifting, freeze the fudge and thaw 2 days before presenting.
Troubleshooting Common Problems
Problem: Fudge Won’t Set and Stays Soft
Your mixture didn’t reach 238°F or you underbaked it. The temperature is crucial. Next time, make sure your thermometer is accurate by testing it in boiling water first. If your current batch is too soft, you can actually reheat it gently to 238°F again, cool to 110°F, and re-beat it. I’ve saved many batches this way.
Problem: Fudge Turned Out Grainy and Crumbly
This happens when sugar crystals form prematurely. You either stirred after the sugar dissolved, let the mixture cool too long before beating (below 110°F), or beat it too long. The texture is still edible but not creamy. Prevent this by following the no-stirring rule religiously and watching your temperatures.
Problem: Fudge is Too Hard to Cut
You cooked it past 238°F or over-beat it. Let it sit at room temperature for 20 minutes to soften slightly. Run your knife under hot water and wipe it dry before each cut. The warmth helps the knife glide through. If it’s rock-hard, you may have hit 240°F or higher – just 2°F makes a huge difference.
Problem: Fudge Stuck to the Pan
You didn’t grease the parchment paper enough or you used wax paper instead of parchment. Wax paper melts and sticks. If your fudge is stuck, place the whole pan in a warm oven (200°F) for 2-3 minutes to soften the bottom slightly, then use an offset spatula to loosen the edges.
Problem: White Spots Appeared on Top
This is called “bloom” and happens when moisture settles on the surface. It’s harmless but looks unattractive. Store fudge properly in an airtight container with no temperature fluctuations. The spots are just sugar crystals and don’t affect taste. You can scrape them off with a knife if they bother you.
Equipment Essentials
- Heavy-bottomed 3-quart saucepan (stainless steel or copper)
- Candy thermometer (digital or dial-type that clips on)
- 8×8-inch baking pan
- Parchment paper
- Wooden spoon or heat-resistant silicone spatula
- Sharp chef’s knife for cutting
- Cutting board
- Measuring cups (dry and liquid)
- Measuring spoons
- Cooling rack
Nice to Have But Not Required
- Offset spatula for spreading
- Pastry brush for washing down pan sides
- Kitchen scale for precise measurements
- Stand mixer with paddle (saves your arm during beating)
Shopping List by Store Section
Baking Aisle
- Granulated sugar (2 cups)
- Pure vanilla extract (1 teaspoon)
Dairy Section
- Heavy cream (1 cup)
- Unsalted butter (4 tablespoons plus extra)
Breakfast/Syrup Aisle
- Pure maple syrup, Grade A Dark (3/4 cup)
Spices & Seasonings
- Salt (1/4 teaspoon)
Baking Supplies (if not in pantry)
- Parchment paper
Nuts Section (Optional)
- Pecans or walnuts (1/2 cup)
Specialty Items (Optional)
- Flaky sea salt for topping
- Maple sugar for dusting
5 Success Secrets for Perfect Maple Fudge
1. Test your thermometer accuracy every single time. Boil water and check that your thermometer reads 212°F at sea level. If it’s off by even 2°F, you need to adjust your target temperature accordingly. A $15 digital thermometer will last you years and prevent countless failed batches.
2. Use the cold water test as backup. When your thermometer reads 238°F, drop a tiny bit of the mixture into a cup of cold water. It should form a soft ball that flattens when you pick it up. This confirms your thermometer is accurate and gives you confidence before removing the pan from heat.
3. Keep a damp pastry brush handy. As the mixture boils, sugar crystals form on the pan sides above the liquid line. Brush these down with the damp brush. These stray crystals can seed your entire batch and create graininess. I learned this after ruining three batches in a row.
4. Beat by hand, not with a mixer. Electric mixers introduce too much air and can over-beat the mixture in seconds. Hand-beating gives you complete control. Yes, your arm gets tired, but you’ll feel the texture change through the spoon and know exactly when to stop.
5. Make fudge in small batches. Doubling or tripling this recipe changes the cooking time unpredictably and makes temperature control harder. Stick with single batches until you’re a fudge-making pro. The recipe makes the perfect amount for one 8×8-inch pan anyway.
This maple fudge brings pure comfort in every creamy, maple-sweet bite. The recipe looks long because I explained everything in detail, but the actual hands-on time is only about 25 minutes. Once you nail the temperature control and beating technique, you’ll make this confidently whenever a maple craving hits.