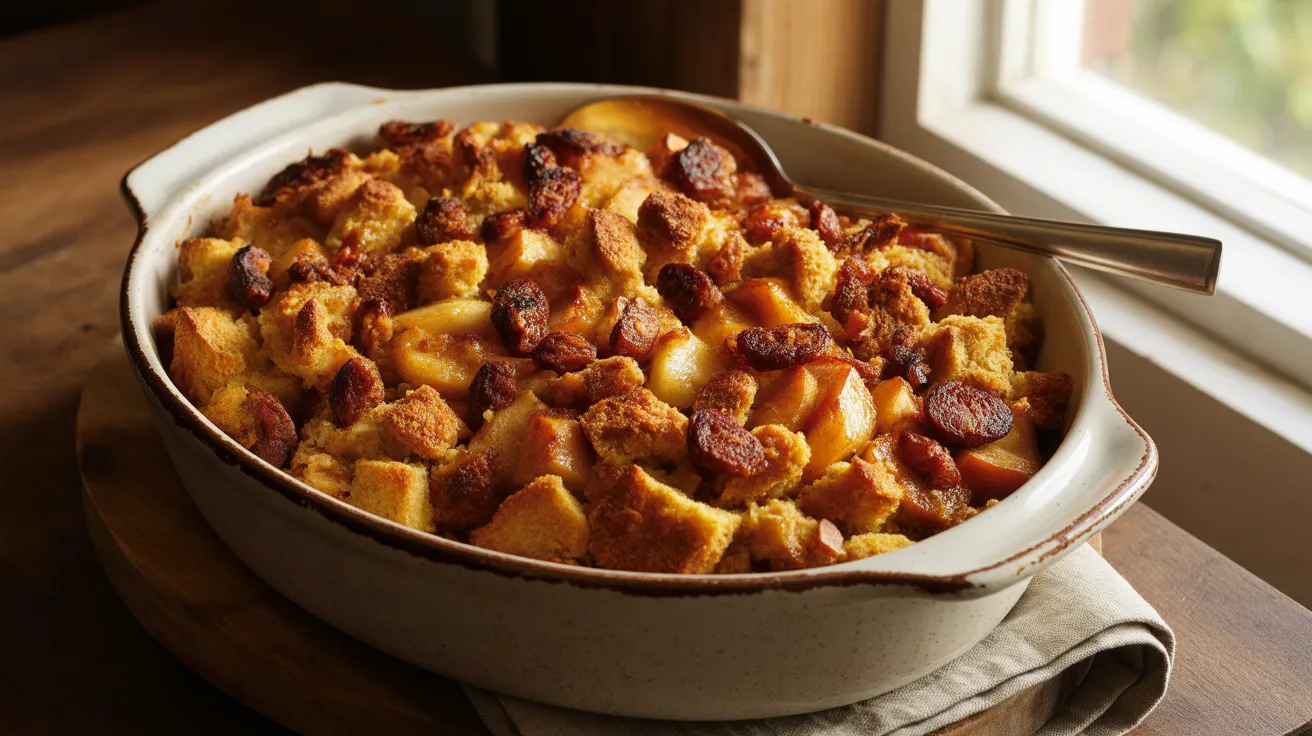
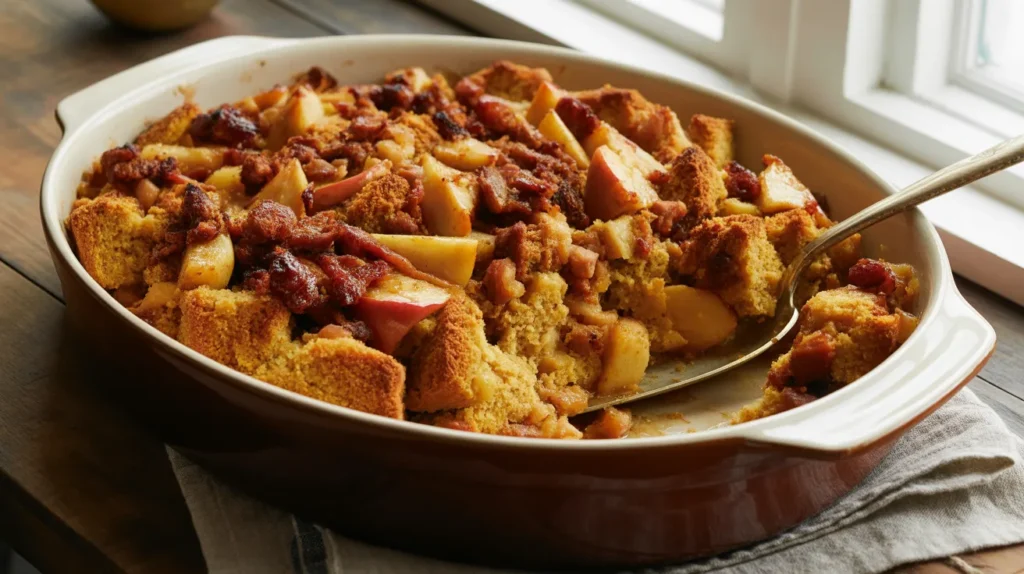
Picture this: golden cubes of cornbread mingling with spicy chorizo, sweet maple-kissed apples, and aromatic herbs coming together in one unforgettable side dish. This maple-glazed apple and chorizo cornmeal stuffing transforms your holiday table with bold flavors that’ll have everyone asking for the recipe. I’ve made this for Thanksgiving three years running, and it’s become the dish my family requests most—even more than the turkey itself.
SERVES: 4 | PREP: 25 MIN | COOK: 45 MIN | TOTAL: 70 MIN
Ingredients
For the Cornbread Base
| Ingredient | Amount |
|---|---|
| Cornbread, cubed (day-old preferred) | 6 cups |
| Unsalted butter | 4 tablespoons |
| Yellow onion, diced | 1 large |
| Celery stalks, diced | 3 medium |
| Fresh chorizo, casings removed | 8 ounces |
For the Apple Mixture
| Ingredient | Amount |
|---|---|
| Honeycrisp apples, peeled and diced | 2 medium |
| Pure maple syrup | ¼ cup |
| Apple cider | 1 cup |
| Chicken stock | 1 cup |
Seasonings & Herbs
| Ingredient | Amount |
|---|---|
| Fresh sage, chopped | 2 tablespoons |
| Fresh thyme leaves | 1 tablespoon |
| Garlic cloves, minced | 4 large |
| Kosher salt | 1 teaspoon |
| Black pepper, freshly ground | ½ teaspoon |
| Smoked paprika | ½ teaspoon |
| Eggs, beaten | 2 large |
Step-by-Step Instructions
Phase 1: Preparing the Cornbread (10 minutes)
Step 1: Preheat your oven to 375°F and position the rack in the center.
This temperature gives you perfectly crispy edges while keeping the center moist. Too hot and you’ll burn the top before the inside cooks through.
Step 2: Spread your 6 cups of cubed cornbread on a large baking sheet in a single layer.
Day-old cornbread works best because it’s already slightly dried out. Fresh cornbread will get mushy instead of absorbing all those delicious flavors we’re building.
Step 3: Toast the cornbread cubes for 8-10 minutes until they’re golden and slightly crispy on the edges.
You’ll know they’re ready when you can pick one up and it feels dry to the touch, not soft. This step is crucial—it prevents soggy stuffing.
Phase 2: Building the Flavor Base (12 minutes)
Step 4: While the cornbread toasts, heat a large skillet over medium-high heat and add the 8 ounces of chorizo.
Break it up with a wooden spoon as it cooks. The chorizo will release its flavorful oils, which become the foundation of your maple-glazed apple and chorizo cornmeal stuffing.
Step 5: Cook the chorizo for 5-6 minutes, stirring occasionally, until it’s browned and cooked through with crispy edges.
Those crispy bits pack the most flavor. Don’t rush this step by turning up the heat—you want golden-brown, not burnt.
Step 6: Use a slotted spoon to transfer the cooked chorizo to a large mixing bowl, leaving the rendered fat in the skillet.
That flavorful fat is liquid gold for sautéing your vegetables. Save every drop.
Step 7: Add 4 tablespoons of butter to the chorizo fat in the skillet and let it melt over medium heat.
The combination of butter and chorizo fat creates an incredibly rich base. You’ll smell the difference immediately.
Step 8: Add your diced onion and celery to the skillet and sauté for 5-6 minutes until the onion turns translucent and the celery softens.
Stir every minute or so to prevent sticking. The vegetables should still have a slight bite—they’ll continue cooking in the oven.
Step 9: Stir in the minced garlic, sage, thyme, and smoked paprika and cook for 1 minute until fragrant.
When garlic hits hot butter, it should sizzle immediately. If it doesn’t, your heat is too low. The herbs will perfume your kitchen—that’s how you know you’re on the right track.
Phase 3: Creating the Maple-Apple Magic (8 minutes)
Step 10: Add the diced apples to the skillet and toss them with the vegetables for 2 minutes to coat them in the seasoned butter.
The apples will start to soften slightly at the edges. This brief cooking time keeps them from turning to mush later.
Step 11: Pour in the ¼ cup of maple syrup and stir everything together for 1 minute until the apples glisten with the glaze.
Real maple syrup makes a huge difference here—artificial syrup won’t give you the same depth of flavor. You should see the syrup start to bubble and thicken slightly.
Step 12: Add the apple cider and chicken stock to the skillet and bring the mixture to a simmer.
The liquid will deglaze the pan, picking up all those browned bits stuck to the bottom. That’s concentrated flavor you don’t want to waste.
Step 13: Season with salt and black pepper, then remove from heat and let cool for 3-4 minutes.
Cooling slightly prevents the hot liquid from scrambling the eggs you’ll add next. Touch the side of the skillet—it should be warm, not blazing hot.
Phase 4: Assembly and Baking (25 minutes)
Step 14: Pour the apple-vegetable mixture over the toasted cornbread cubes in your mixing bowl and add the cooked chorizo back in.
Use a large bowl—you need room to toss everything without crushing the cornbread. Mix gently with your hands or a large spoon.
Step 15: Drizzle the beaten eggs over the mixture and fold everything together until the cornbread is evenly moistened.
The eggs act as a binder, holding everything together. Every cube should look glossy—if you see dry patches, add a splash more stock (¼ cup at a time).
Step 16: Transfer the maple-glazed apple and chorizo cornmeal stuffing to a greased 9×13-inch baking dish and spread it evenly.
Press down gently—you want it compact but not squashed. Leave the top slightly rough; those peaks will get golden and crispy.
Step 17: Cover the dish tightly with foil and bake for 20 minutes.
The foil traps steam, which keeps the stuffing moist inside. Don’t skip this step or you’ll end up with dry stuffing.
Step 18: Remove the foil and bake for an additional 20-25 minutes until the top is golden brown and crispy.
You’re looking for a beautiful contrast—crispy top, moist center. If the edges brown too quickly, tent just the edges with foil.
Step 19: Remove from the oven and let the stuffing rest for 5 minutes before serving.
This resting time lets the flavors settle and makes it easier to scoop clean portions. Serve it while it’s still warm for maximum impact.
Chef’s Notes
Cornbread Choice Matters: I always use homemade cornbread with a slightly sweet profile, but store-bought works in a pinch. Make sure it’s not too crumbly—you want cubes that hold their shape. If you’re looking for other creative bread-based sides, try this black garlic and sage onion ciabatta for a different savory twist.
Chorizo Options: Fresh Mexican chorizo gives the boldest flavor, but Spanish chorizo works too. Just slice it thin and reduce the cooking time slightly since it’s already cured. The spice level varies by brand, so taste as you go.
Apple Varieties: Honeycrisp apples hold their shape beautifully and provide the perfect sweet-tart balance. Granny Smith works if you want more tartness, while Fuji apples add extra sweetness. Avoid Red Delicious—they turn mealy when cooked.
Make-Ahead Strategy: Assemble the entire maple-glazed apple and chorizo cornmeal stuffing up to step 16 the night before. Cover tightly and refrigerate. Add 10 minutes to the covered baking time since it’ll be cold from the fridge.
Nutrition Information (Per Serving)
Calories: 485 | Protein: 18g | Carbohydrates: 52g | Fat: 23g | Fiber: 4g | Sugar: 18g | Sodium: 890mg
Delicious Variations
Vegetarian Apple Cornmeal Stuffing: Skip the chorizo and double up on mushrooms instead. Use 1 pound of cremini mushrooms, diced, and sauté them until golden. Add 1 teaspoon of fennel seeds to mimic the chorizo’s savory depth. Replace chicken stock with vegetable stock.
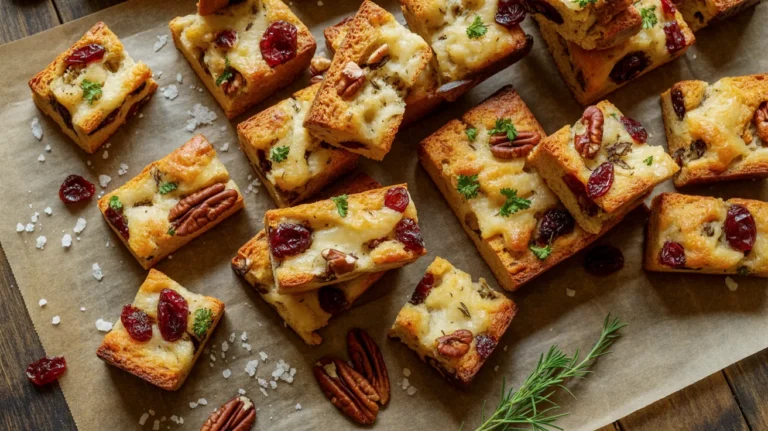
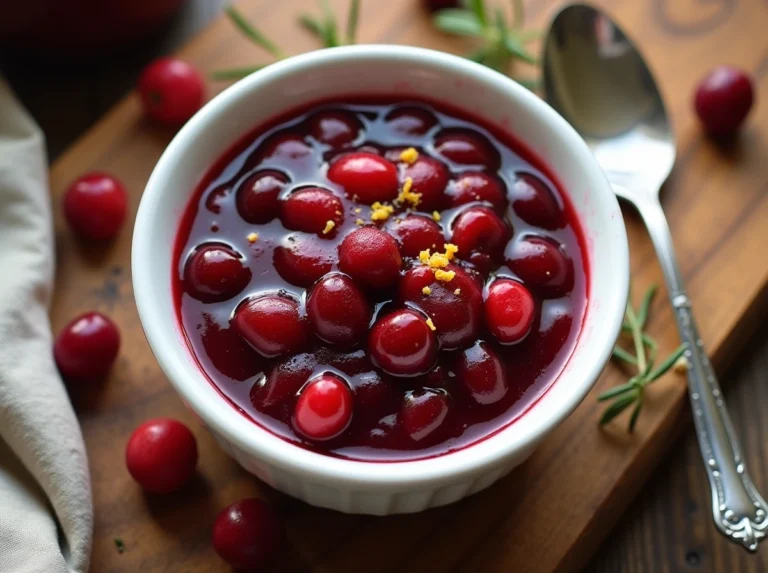
Cranberry-Pecan Version: Swap half the apples for fresh cranberries and fold in ½ cup of toasted pecans after the final baking step. The tartness of cranberries plays beautifully against the maple glaze. Reduce maple syrup to 3 tablespoons to balance the added sweetness from pecans.
Spicy Jalapeño Twist: Add 2 diced jalapeños (seeds removed) when you sauté the onions and celery. The heat cuts through the richness perfectly. For bread pudding lovers who enjoy bold flavors, this smoky harissa and sausage bread pudding takes a similar approach with different seasonings.
Gluten-Free Adaptation: Use your favorite gluten-free cornbread recipe as the base. The rest of the ingredients are naturally gluten-free. Just verify your chicken stock doesn’t contain gluten additives—many store brands sneak it in.
Storage & Reheating
Refrigerator Storage: Let the stuffing cool completely, then transfer to an airtight container. It’ll stay fresh for 4-5 days in the fridge. The flavors actually deepen overnight as everything melds together.
Freezing Instructions: Wrap individual portions tightly in plastic wrap, then aluminum foil, and freeze for up to 3 months. Thaw overnight in the refrigerator before reheating. The texture stays remarkably close to fresh.
Reheating Method: Cover with foil and warm in a 350°F oven for 15-20 minutes until heated through. Remove the foil for the last 5 minutes to re-crisp the top. Microwave reheating works for single portions—just cover with a damp paper towel to prevent drying out.
Food Safety Note: Never leave this stuffing at room temperature for more than 2 hours. The combination of eggs, meat, and moisture creates a perfect environment for bacteria if left out too long.
Troubleshooting Common Problems
Problem: Stuffing Turned Out Too Dry
Your cornbread soaked up all the liquid too quickly. Next time, add an extra ½ cup of chicken stock to the mixture before baking. When you press down on the stuffing before baking, it should feel moist to the touch, not crumbly. Also check your oven temperature with an oven thermometer—if it runs hot, it’ll dry out the stuffing faster.
Problem: Soggy, Mushy Texture
You either didn’t toast the cornbread long enough or added too much liquid. The cornbread cubes need to be completely dry and crispy before you add the wet ingredients. Skip the foil covering step next time and bake uncovered for 30-35 minutes total. Also make sure you’re measuring liquids accurately—too much stock creates mush.
Problem: Top Got Too Dark Before Center Cooked
Your oven rack was positioned too high or the temperature was too hot. Always use the center rack position. If the top browns too quickly, tent it loosely with foil for the last 10 minutes of baking. Consider getting an oven thermometer—many ovens run 25°F hotter than the dial indicates.
Problem: Chorizo Flavor Overpowering Everything
Mexican chorizo varies wildly in spice level between brands. Next time, reduce the chorizo to 6 ounces and add 2 ounces of mild Italian sausage to balance it out. You can also increase the apples to 3 medium to add more sweetness that counters the spice.
Problem: Stuffing Fell Apart When Serving
You didn’t use enough egg to bind everything together, or you didn’t let it rest after baking. The eggs need to set fully, which happens during that 5-minute rest. If you’re making this ahead and reheating, add one extra beaten egg to the mixture before the initial baking—the stuffing firms up more when reheated.
Equipment Essentials
- Large baking sheet for toasting cornbread
- 12-inch skillet with high sides for sautéing
- 9×13-inch baking dish for final assembly
- Large mixing bowl (at least 6-quart capacity)
- Sharp chef’s knife for efficient dicing
- Wooden spoon for stirring
- Slotted spoon for transferring chorizo
- Aluminum foil for covered baking phase
- Measuring cups and spoons
- Cutting board (preferably two—one for meat, one for produce)
Shopping List
Produce Section
- 1 large yellow onion
- 3 medium celery stalks
- 2 medium Honeycrisp apples
- 4 large garlic cloves
- Fresh sage (small bunch)
- Fresh thyme (small bunch)
Meat Counter
- 8 ounces fresh chorizo
Dairy Section
- 4 tablespoons unsalted butter
- 2 large eggs
Bakery Section
- 6 cups cornbread (make ahead or purchase)
Pantry & Baking Aisle
- Pure maple syrup
- Kosher salt
- Black pepper
- Smoked paprika
Beverages Section
- 1 cup apple cider
- 1 cup chicken stock
Success Secrets
1. Toast Your Cornbread Properly: This single step separates amateur stuffing from restaurant-quality results. Those dried-out cubes absorb liquid without turning to mush. Press a cube between your fingers—it should feel completely dry and slightly crunchy, never soft. I learned this the hard way after serving mushy stuffing at my first Thanksgiving.
2. Don’t Skip the Resting Time: Five minutes feels like forever when you’re hungry, but it’s essential. The eggs finish setting, the flavors meld, and the texture firms up just enough to serve clean portions. I use this time to garnish with fresh sage leaves for presentation.
3. Layer Your Seasonings: Notice how we add herbs twice—once when sautéing and again in the final mix. This creates depth of flavor that single-addition recipes can’t match. The sautéed herbs bloom in the fat, while the fresh herbs added later provide brightness.
4. Control Your Moisture Level: The stuffing should look glossy and moist before baking, not swimming in liquid. When you press down gently, a tiny bit of liquid should pool around the edges but not cover the surface. Too dry and it won’t bind; too wet and you’ll get mush.
5. Embrace the Crispy Bits: Those golden, crunchy edges that form during the final uncovered baking are the best part. Don’t smooth the top too much before baking—those irregular peaks and valleys create more surface area for crisping. I actually create extra texture by roughing up the surface with a fork before the final bake.