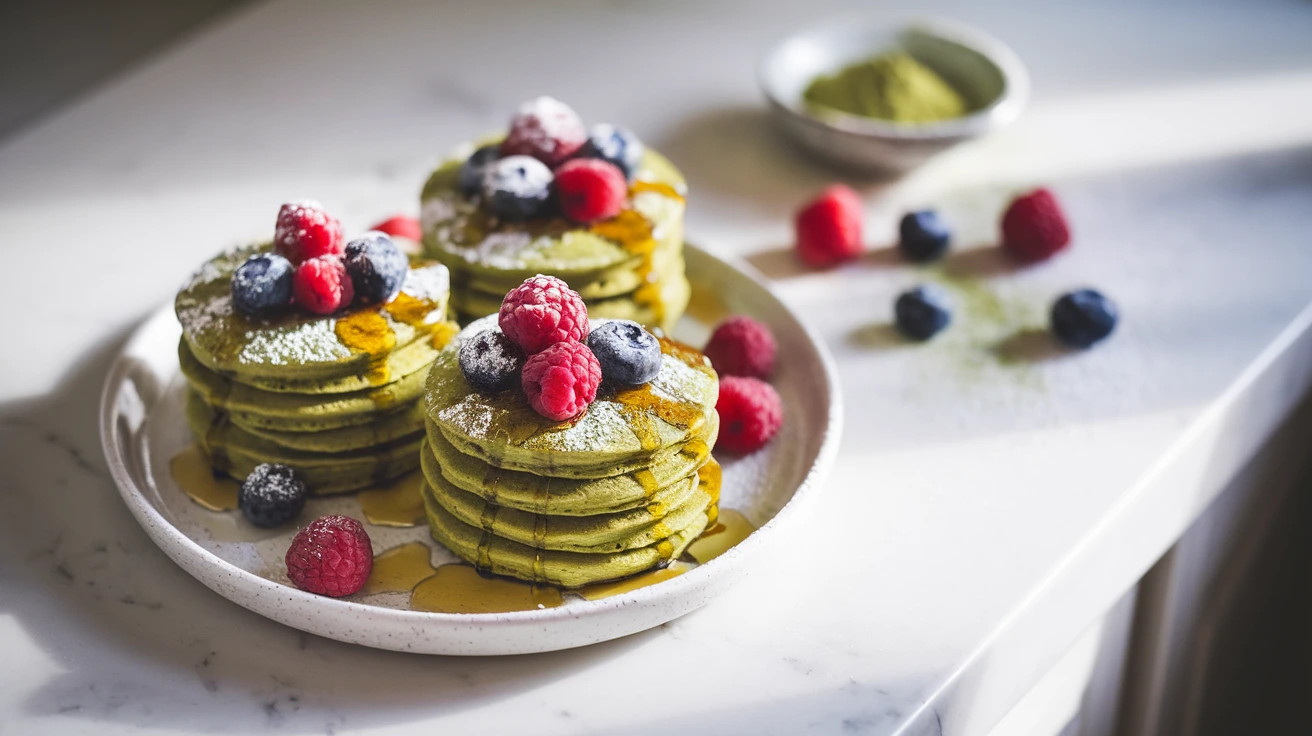
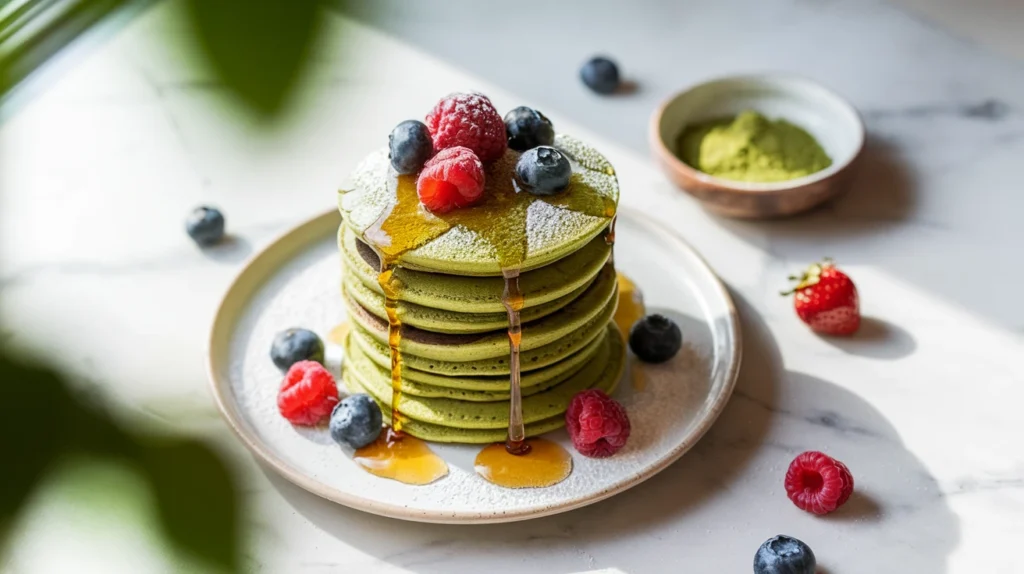
These vibrant matcha tea pancakes bring Japanese elegance to your breakfast table with their stunning green color and earthy-sweet flavor. Perfect for weekend mornings, these fluffy stacks combine ceremonial-grade matcha powder with classic pancake comfort, creating Instagram-worthy breakfast art that tastes as incredible as it looks.
SERVES: 4 | PREP: 15 MIN | COOK: 20 MIN | TOTAL: 35 MIN
Ingredients You’ll Need
Dry Ingredients
| Ingredient | Amount |
|---|---|
| All-purpose flour | 2 cups |
| Matcha tea powder (culinary grade) | 2 tablespoons |
| Granulated sugar | 3 tablespoons |
| Baking powder | 2 teaspoons |
| Baking soda | ½ teaspoon |
| Fine sea salt | ½ teaspoon |
Wet Ingredients
| Ingredient | Amount |
|---|---|
| Whole milk (room temperature) | 1¾ cups |
| Large eggs | 2 |
| Unsalted butter (melted) | 4 tablespoons |
| Vanilla extract | 1 teaspoon |
| Fresh lemon juice | 1 teaspoon |
For Serving
| Ingredient | Amount |
|---|---|
| Pure maple syrup | ½ cup |
| Fresh berries | 1 cup |
| Whipped cream | Optional |
| Extra matcha powder (for dusting) | 1 teaspoon |
Step-by-Step Instructions
Phase 1: Preparation (5 minutes)
Step 1: Set your ingredients on the counter 15 minutes before cooking. Room temperature ingredients blend smoother and create fluffier matcha tea pancakes without overmixing.
Step 2: Sift the flour, matcha tea powder, sugar, baking powder, baking soda, and salt together in a large mixing bowl. Sifting breaks up matcha clumps and aerates the flour, which creates lighter pancakes with even green color distribution.
Step 3: Whisk the dry ingredients for 30 seconds to combine thoroughly. This step ensures every pancake gets equal matcha flavor instead of some being plain and others too green.
Phase 2: Mixing the Batter (5 minutes)
Step 4: Crack the eggs into a separate medium bowl and whisk vigorously for 20 seconds until slightly frothy. This incorporates air that makes your matcha tea pancakes rise beautifully.
Step 5: Pour the milk, melted butter, vanilla extract, and lemon juice into the eggs. Whisk gently for 15 seconds until combined. The lemon juice reacts with baking soda to create extra lift.
Step 6: Create a well in the center of your dry ingredients by pushing them toward the bowl sides. Pour the wet mixture directly into this well.
Step 7: Use a rubber spatula to fold the wet and dry ingredients together with 12-15 gentle strokes. Stop when you still see small flour streaks. Critical tip: Overmixing develops gluten and creates tough, rubbery pancakes instead of fluffy ones.
Step 8: Let the batter rest for 5 minutes while you heat your cooking surface. During this rest, the flour hydrates and the baking powder activates, creating those signature air bubbles.
Phase 3: Cooking (15 minutes)
Step 9: Heat a large nonstick griddle or skillet over medium heat (350°F if you have a temperature setting). Test readiness by flicking water droplets on the surface—they should sizzle and evaporate within 2 seconds.
Step 10: Lightly brush the cooking surface with ½ teaspoon of butter. Too much butter creates greasy pancakes; too little causes sticking.
Step 11: Pour ⅓ cup of batter per pancake onto the griddle, spacing them 2 inches apart. Use the bottom of your measuring cup to gently shape them into even circles if needed.
Step 12: Watch for bubbles to form across the entire surface (this takes 2-3 minutes). The edges should look dry and set, and the bottom should be golden brown with green undertones when you peek underneath.
Step 13: Slide your spatula completely under each matcha tea pancake before flipping. Flip with one quick, confident motion to avoid breaking. Cook the second side for 90 seconds until golden.
Step 14: Transfer finished pancakes to a baking sheet in a 200°F oven to keep warm while you cook the remaining batches. This ensures everyone eats hot pancakes together.
Step 15: Repeat steps 10-13 with remaining batter, re-buttering the griddle between batches. You should get 12 pancakes total (3 per person).
Phase 4: Finishing Touches (2 minutes)
Step 16: Stack 3 matcha tea pancakes per plate. Place a small pat of butter between each layer so it melts down through the stack.
Step 17: Drizzle warm maple syrup over each stack. Arrange fresh berries on top and add a dollop of whipped cream if desired.
Step 18: Dust the entire presentation with a light sprinkle of matcha powder through a fine-mesh sieve for professional appearance. Serve immediately while hot.
Chef’s Notes
Matcha Quality Matters: Use culinary-grade matcha for cooking rather than ceremonial grade. Culinary matcha costs less and has a stronger flavor that holds up to heat, while ceremonial matcha’s delicate notes disappear during cooking.
Color Consistency: If your matcha tea pancakes have dark green spots, your matcha wasn’t sifted properly. Always sift matcha with flour to break up clumps before adding liquids.
Temperature Control: Medium heat creates the perfect balance—high heat burns the outside before the inside cooks, while low heat creates pale, dense pancakes. Your griddle should maintain steady 350°F throughout cooking.
Batter Thickness: Proper matcha tea pancake batter should flow slowly off a spoon but not run like water. If too thick, add milk one tablespoon at a time. If too thin, sprinkle in flour one tablespoon at a time.
Nutrition Information (Per Serving – 3 Pancakes)
Calories: 385
Protein: 11g
Carbohydrates: 52g
Fat: 15g
Fiber: 2g
Sugar: 14g
Sodium: 480mg
Calcium: 185mg (good source)
Antioxidants: High (from matcha)
Creative Variations
Chocolate Chip Matcha Pancakes: Fold ½ cup mini chocolate chips into the finished batter. The dark chocolate complements matcha’s earthy flavor beautifully, creating a sweet-bitter balance.
Coconut Matcha Pancakes: Replace ½ cup milk with coconut milk and add ⅓ cup shredded coconut to the batter. Top with toasted coconut flakes for tropical flair. If you love creative pancake variations, try our blueberry pancake muffins for another fun twist.
Lemon Matcha Pancakes: Add 1 tablespoon lemon zest to the batter and serve with lemon curd instead of maple syrup. The citrus brightens matcha’s earthy notes perfectly.
Protein-Packed Matcha Pancakes: Replace ½ cup flour with vanilla protein powder and use Greek yogurt instead of ½ cup milk. These keep you full until lunch while maintaining fluffy texture. For more indulgent breakfast treats, check out our pancake donuts recipe.
Storage & Reheating Guide
Refrigerator Storage: Stack cooled matcha tea pancakes between parchment paper squares and store in an airtight container for up to 4 days. The parchment prevents sticking and moisture buildup.
Freezer Storage: Freeze pancakes in a single layer on a baking sheet for 2 hours, then transfer to a freezer bag with parchment between each pancake. Freeze up to 3 months without losing texture or color.
Reheating from Refrigerator: Microwave 2-3 pancakes for 30-45 seconds, or toast in a toaster on low setting for crispier edges.
Reheating from Frozen: Microwave frozen pancakes for 60-90 seconds, flipping halfway through. Alternatively, reheat in a 350°F oven for 10 minutes covered with foil, then 2 minutes uncovered for crispy surfaces.
Make-Ahead Tip: Prepare dry ingredients the night before and store in an airtight container. Mix wet ingredients in the morning for fresh pancakes in under 30 minutes.
Troubleshooting Common Problems
Problem 1: Pancakes Turn Out Flat and Dense
Your baking powder is likely expired or you overmixed the batter. Check that your baking powder fizzes when mixed with water (it should). Mix batter only until combined—lumps are perfectly fine and create fluffier results.
Problem 2: Uneven Green Color with Dark Spots
Matcha powder clumped during mixing. Always sift matcha with flour before adding any liquids. If you skipped sifting, run your dry ingredients through a fine-mesh sieve before proceeding.
Problem 3: Burnt Outside, Raw Inside
Your cooking temperature is too high. Reduce heat to medium-low and give pancakes an extra minute per side. The surface should bubble gently, not violently, during cooking.
Problem 4: Bitter or Grassy Flavor
You used too much matcha or low-quality powder. Reduce matcha to 1½ tablespoons for milder flavor, or invest in better quality culinary-grade matcha from Japanese suppliers.
Problem 5: Pancakes Stick to Griddle
Your cooking surface isn’t hot enough or needs more butter. Preheat griddle for 5 minutes before cooking, and lightly butter before each batch. Nonstick surfaces still need light greasing for matcha tea pancakes.
Equipment Essentials
- Large mixing bowl (3-quart capacity minimum)
- Medium mixing bowl (2-quart capacity)
- Fine-mesh sieve (for sifting matcha and flour)
- Whisk (balloon style works best)
- Rubber spatula (for gentle folding)
- ⅓ cup measuring cup (for consistent pancake sizing)
- Nonstick griddle or large skillet (12-inch diameter ideal)
- Wide spatula (4-inch width for easy flipping)
- Pastry brush (for buttering griddle)
- Baking sheet (for keeping pancakes warm)
Alternative Equipment: No griddle? Use your largest nonstick skillet. No sifter? Place dry ingredients in a fine-mesh strainer and shake vigorously over the bowl.
Shopping List by Store Section
Baking Aisle:
- All-purpose flour
- Granulated sugar
- Baking powder
- Baking soda
- Pure vanilla extract
Tea/Coffee Aisle:
- Culinary-grade matcha powder (look for bright green color)
Dairy Section:
- Whole milk
- Large eggs
- Unsalted butter
- Whipped cream (optional)
Produce Section:
- Fresh lemon (for juice)
- Fresh berries (strawberries, blueberries, or raspberries)
Condiments Aisle:
- Pure maple syrup
Spice Aisle:
- Fine sea salt
Success Secrets from the Test Kitchen
1. Sift Twice for Perfect Color
Sift your matcha and flour together twice instead of once. This extra step eliminates every last clump and creates pancakes with flawless, uniform green color throughout.
2. Rest Your Batter
That 5-minute rest period isn’t optional—it’s when the magic happens. Flour absorbs liquid, creating the right consistency, while leavening agents activate for maximum fluffiness.
3. First Pancake Test
The first pancake tells you everything. Too dark? Lower heat. Too pale? Increase heat. Adjust before cooking the rest of your batch for consistent results.
4. Butter Between Layers
Restaurant trick: place thin butter pats between stacked pancakes. The butter melts down through the stack, keeping every layer moist instead of just the top one getting syrup.
5. Serve Immediately
Matcha tea pancakes taste best within 5 minutes of cooking. The texture changes as they cool, so coordinate your cooking with serving time. Keep the oven warm setting ready for finished pancakes while you cook batches.
These matcha tea pancakes transform ordinary breakfast into something special. The vibrant green color catches everyone’s attention, while the subtle earthy-sweet flavor keeps them coming back for seconds. Master this recipe once, and you’ll have a showstopping breakfast that impresses without complicated techniques.