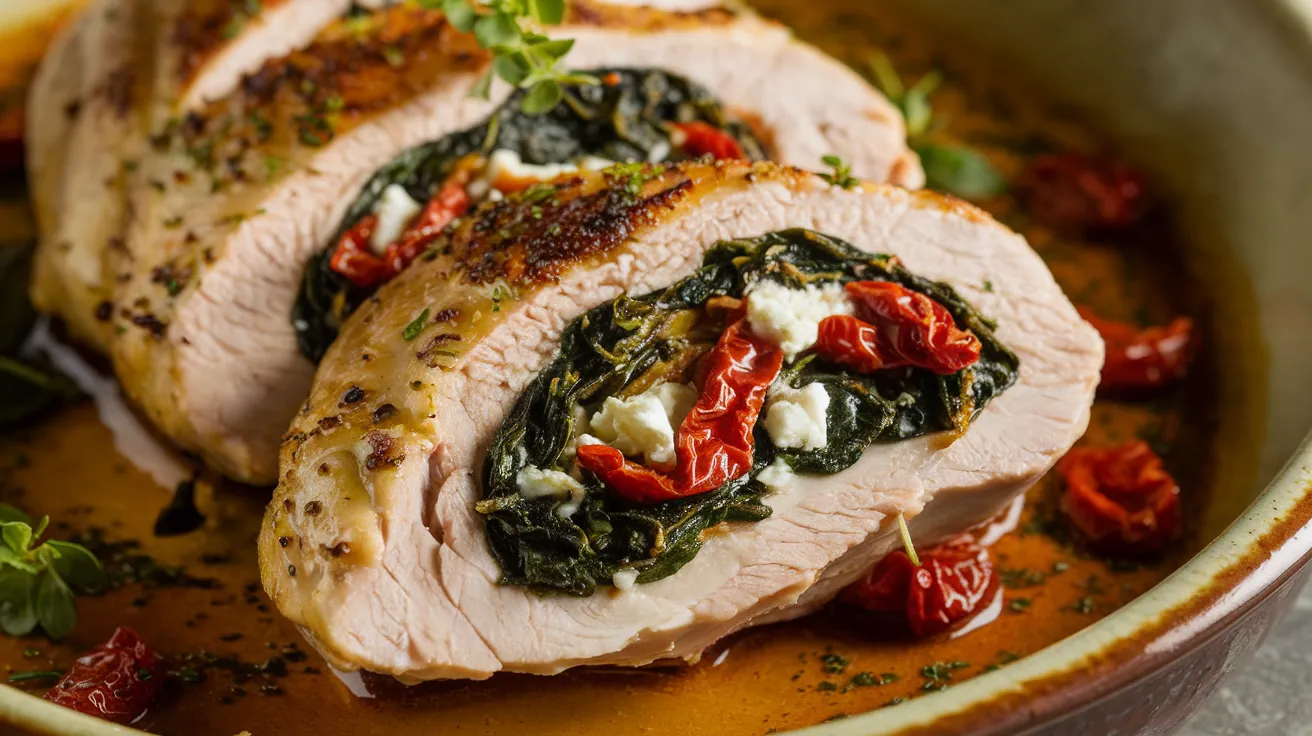
- Ready in just 40 minutes – perfect for busy weeknights
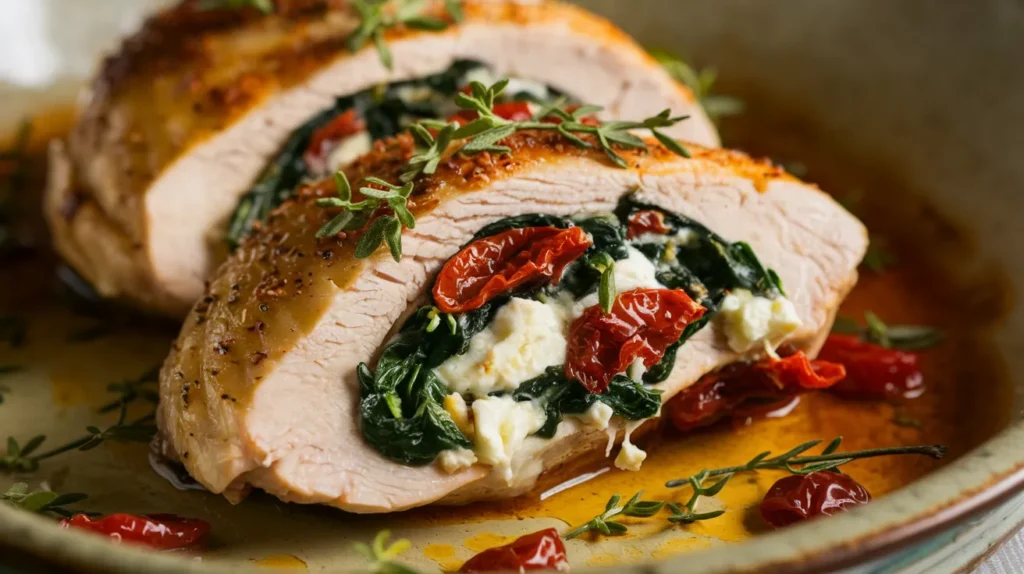
- Bursting with feta, spinach, and sun-dried tomatoes for amazing flavor
- Easy make-ahead option – prep now, cook later
- Naturally low-carb and gluten-free – fits most healthy eating plans
Skip Boring Chicken Forever
Tired of the same dry, flavorless chicken breasts night after night? You’re not alone.
This Mediterranean Stuffed Chicken Breasts recipe transforms ordinary chicken into a restaurant-worthy meal that’s surprisingly simple to make. The Mediterranean Stuffed Chicken Breasts combine tangy feta, vibrant spinach, and sweet sun-dried tomatoes that bring Mediterranean magic to your table in less than an hour.
Perfect for beginners yet impressive enough for guests, these Mediterranean Stuffed Chicken Breasts will become your new go-to dinner solution when you want something special without hours in the kitchen. If you love chicken with bold flavors, this dish delivers that perfect balance of savory cheese, herbs, and tangy tomatoes.
Nutrition Facts
| Nutrient | Amount per Serving |
|---|---|
| Calories | 375 |
| Protein | 42g |
| Fat | 18g |
| Carbs | 6g |
| Fiber | 2g |
| Sodium | 650mg |
| Sugar | 3g |
Serving size: 1 stuffed chicken breast
What You’ll Need
Ingredients List
| Ingredient | Amount | Notes |
|---|---|---|
| Boneless, skinless chicken breasts | 4 large (about 6-8 oz each) | Room temperature |
| Feta cheese | 1 cup (8 oz) | Crumbled |
| Fresh spinach | 2 cups | Roughly chopped |
| Sun-dried tomatoes | ⅓ cup | Oil-packed, drained and chopped |
| Garlic | 3 cloves | Minced |
| Fresh oregano | 2 tablespoons | Chopped (or 2 tsp dried) |
| Lemon | 1 medium | Zest and juice |
| Olive oil | 3 tablespoons | Divided |
| Salt | 1 teaspoon | |
| Black pepper | ½ teaspoon | Freshly ground |
| Paprika | 1 teaspoon | |
| Chicken broth | ¼ cup | Low-sodium |
Kitchen Tools
| Tool | Purpose |
|---|---|
| Sharp knife | For butterflying chicken and chopping ingredients |
| Cutting board | For safe food preparation |
| Mixing bowl | For combining filling ingredients |
| Toothpicks | For securing stuffed chicken |
| Large oven-safe skillet | For searing and baking |
| Meat thermometer | For checking doneness |
| Measuring cups and spoons | For accurate measurements |
| Small bowl | For mixing seasonings |
| Plastic wrap | For pounding chicken |
| Meat mallet | For evening chicken thickness |
| Zester/grater | For lemon zest |
| Garlic press (optional) | For mincing garlic |
Possible Substitutions
- Cheese options: Replace feta with goat cheese or mozzarella
- Greens: Swap spinach with kale or arugula (reduce amount by half for arugula)
- Herbs: Use basil or Italian seasoning instead of oregano
- Sun-dried tomatoes: Substitute with roasted red peppers or olives
- For dairy-free: Use dairy-free cheese alternative or skip cheese and add extra herbs
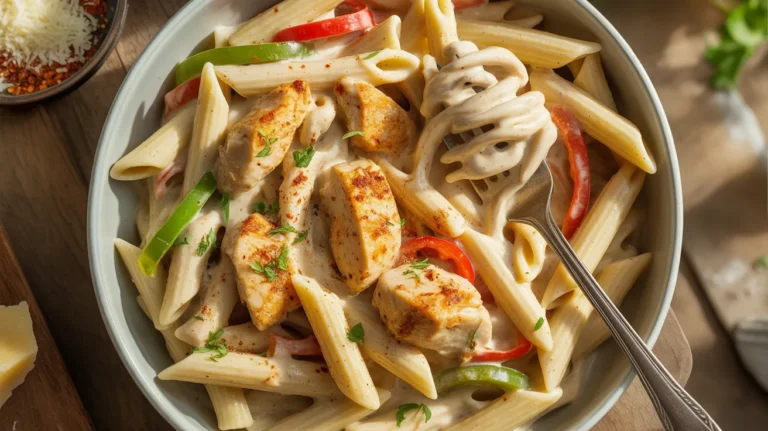
If you enjoy working with chicken and spinach combinations, you might also like this Creamy Garlic Chicken with Spinach that uses similar ingredients with a different flavor profile.
Step-by-Step Instructions
Prep Time: 20 minutes Cook Time: 20 minutes Total Time: 40 minutes Servings: 4
Preparation Phase
- Gather all ingredients and tools before starting.
- Take chicken breasts out of refrigerator 20-30 minutes before cooking to reach room temperature.
- This ensures even cooking throughout the chicken.
- Place all ingredients on the counter so they’re within easy reach.
- Read through the entire recipe once before beginning.
- Preheat your oven to 375°F (190°C).
- Turn on your oven before you start preparing ingredients.
- Position the rack in the middle of the oven.
- Allow at least 10 minutes for your oven to reach the proper temperature.
- An oven thermometer can verify your oven is at the right temperature.
- Prepare your work area.
- Wash your hands with soap and warm water for 20 seconds.
- Clean and sanitize your work surface.
- Set up a separate cutting board just for raw chicken to prevent cross-contamination.
- Have a trash bowl nearby for scraps and packaging.
- Prepare the fresh ingredients.
- Rinse the fresh spinach under cold water, then pat dry with paper towels.
- Roughly chop the spinach into smaller pieces (aim for ½-inch pieces).
- Drain sun-dried tomatoes on paper towels to remove excess oil.
- Chop sun-dried tomatoes into small, ¼-inch pieces.
- Peel garlic cloves by pressing them with the flat side of your knife, then remove the papery skin.
- Mince garlic finely (or use a garlic press if you have one).
- Rinse fresh oregano, pat dry, and remove leaves from stems.
- Chop oregano leaves finely.
- Wash the lemon and pat dry.
- Using a zester or the fine side of a grater, remove just the yellow part of the lemon skin (avoid the white pith which is bitter).
- Cut the lemon in half and set aside for later.
- Butterfly the chicken breasts.
- Place one chicken breast on your cutting board.
- Place your non-dominant hand flat on top of the chicken breast to hold it steady.
- Hold your knife parallel to the cutting board with your dominant hand.
- Starting at the thicker side of the breast, carefully insert the knife about ¾ of the way into the middle of the chicken.
- Slowly slice through the breast horizontally, stopping about ½ inch from the opposite edge.
- Open the chicken breast like a book, creating one larger, thinner piece.
- Repeat with the remaining chicken breasts.
- Pound the chicken to even thickness.
- Place a sheet of plastic wrap on your cutting board.
- Put one butterflied chicken breast on the plastic wrap.
- Cover with another sheet of plastic wrap.
- Using a meat mallet or the bottom of a heavy pan, gently pound the chicken.
- Focus on the thicker parts to create an even ½-inch thickness throughout.
- Be careful not to pound too hard, which could tear the meat.
- Repeat with all chicken breasts.
- Make the Mediterranean filling.
- In a mixing bowl, add the crumbled feta cheese.
- Add the chopped spinach, chopped sun-dried tomatoes, and minced garlic.
- Add chopped oregano and lemon zest.
- Add 1 tablespoon of olive oil.
- Using a spoon, gently mix all ingredients together until well combined.
- The filling should hold together somewhat but still be crumbly.
- Taste a small amount and adjust seasoning if needed.
- Create the seasoning mixture.
- In a small bowl, measure and add 1 teaspoon salt.
- Add ½ teaspoon freshly ground black pepper.
- Add 1 teaspoon paprika.
- Mix together with a fork or small whisk until well combined.
- Divide the mixture in half (approximately): half for the inside of the chicken and half for the outside.
Assembly Steps
- Season the inside of the chicken.
- Lay the butterflied chicken breasts open on your work surface.
- Sprinkle the inside of each chicken breast lightly with about ¼ of the first half of your seasoning mixture.
- Make sure to season all areas of the inside surface.
- Stuff the chicken breasts.
- Place one butterflied chicken breast in front of you with the inside facing up.
- Scoop approximately ¼ of the filling mixture (about ⅓ cup) onto one side of the open chicken breast.
- Using the back of a spoon, spread the filling evenly, leaving about ½ inch space around the edges.
- Fold the other half of the chicken breast over the filling, like closing a book.
- Press the edges gently to seal as much as possible.
- Repeat with the remaining chicken breasts.
- Secure with toothpicks.
- Hold the stuffed chicken breast closed with one hand.
- With your other hand, insert a toothpick through the edge of the chicken, catching both the top and bottom layers.
- Insert the toothpick at an angle, like you’re sewing the chicken closed.
- Add 2-3 toothpicks per chicken breast, spaced evenly.
- Make sure toothpicks are inserted firmly but not sticking out too far.
- Season the outside.
- In a small bowl, mix the remaining 2 tablespoons of olive oil with the juice from half the lemon.
- Using a pastry brush (or your fingers if you don’t have one), brush this mixture all over the outside of each stuffed chicken breast.
- Sprinkle the remaining half of your seasoning mixture evenly over all sides of the chicken.
- Press gently with your fingers to help the seasoning adhere.
Cooking Phase
- Prepare the skillet.
- Select a large oven-safe skillet (cast iron works great).
- Place it on the stovetop over medium-high heat.
- Add the remaining 1 tablespoon olive oil to the skillet.
- Allow the pan to heat for 1-2 minutes until the oil is shimmering but not smoking.
- Sear the chicken.
- Using tongs, carefully place the stuffed chicken breasts in the hot skillet.
- Leave space between each piece – work in batches if your skillet is too small.
- Let the chicken cook undisturbed for 3-4 minutes on the first side.
- The chicken should develop a golden-brown crust before flipping.
- Using tongs, carefully flip each chicken breast.
- Sear the second side for 3-4 minutes.
- If filling starts to leak out, don’t worry – it will still taste delicious.
- Add chicken broth.
- Carefully pour ¼ cup chicken broth into the skillet around the chicken (not directly on top).
- The broth should sizzle and start to steam immediately.
- This creates moisture for the oven-baking phase and prevents the chicken from drying out.
- Finish cooking in the oven.
- Using oven mitts, carefully transfer the entire skillet to the preheated oven.
- If your skillet doesn’t have an oven-safe handle, wrap the handle in aluminum foil for protection.
- Bake for 15-18 minutes.
- The exact time will depend on the thickness of your chicken.
- About halfway through cooking (after 7-8 minutes), you can open the oven and spoon some of the pan juices over the chicken.
- Check for doneness.
- After 15 minutes, check the internal temperature using a meat thermometer.
- Insert the thermometer into the thickest part of the chicken (not into the filling).
- Chicken is done when it reaches 165°F (74°C).
- If it hasn’t reached temperature, return to the oven for 2-3 more minutes, then check again.
- The juices should run clear when the chicken is fully cooked.
Finishing Steps
- Rest the chicken.
- Using oven mitts, carefully remove the skillet from the oven.
- WARNING: The handle will be extremely hot – place a mitt or towel over it as a reminder.
- Using tongs, transfer the chicken to a clean cutting board or plate.
- Let the chicken rest for at least 5 minutes before cutting.
- This allows the juices to redistribute throughout the meat for maximum juiciness.
- Do not skip this step, or your chicken may be dry.
- Prepare the pan sauce (optional).
- While the chicken rests, you can make a quick sauce from the pan juices.
- Place the skillet back on the stovetop over medium heat.
- Add the juice from the remaining lemon half to the pan.
- Stir and scrape up any browned bits from the bottom of the pan.
- Let the sauce simmer and reduce slightly for 1-2 minutes.
- Remove from heat and set aside.
- Remove toothpicks and serve.
- After resting, carefully remove all toothpicks from the chicken.
- Count them to make sure you’ve removed the same number you put in.
- Slice the chicken breasts diagonally if desired, or serve whole.
- Spoon the pan sauce over the chicken.
- Garnish with additional fresh herbs or lemon slices if desired.
- Serve immediately while hot.
If you’re looking for another simple chicken dinner idea with less prep work, you might enjoy this One-Pan Chicken and Potatoes recipe when you want something equally delicious but with fewer steps.
Troubleshooting Tips
Common Issues and Solutions
- Chicken too pink inside?
- Return to oven in 3-minute increments until internal temperature reaches 165°F.
- Make sure your thermometer is calibrated correctly.
- Insert thermometer into the meat, not the filling.
- Filling falling out during cooking?
- Use more toothpicks next time and don’t overfill.
- Make sure toothpicks go through both layers of chicken.
- For now, spoon escaped filling over the top when serving.
- Next time, you can also seal the edges with flour-water paste.
- Chicken too dry?
- Likely overcooked. Use a meat thermometer for accuracy.
- Don’t skip the resting period.
- Add more broth to the pan next time.
- Reduce cooking time by 2-3 minutes next time.
- Bland flavor?
- Add more lemon juice and a pinch of salt before serving.
- Mediterranean cuisine relies on bright flavors.
- Let the chicken marinate with seasonings for 30 minutes before cooking next time.
- Try increasing herbs by 50%.
- Burnt exterior but undercooked interior?
- Your heat was too high during searing.
- Next time, lower the heat and sear more gently.
- If this happens, you can finish cooking at a lower oven temperature (325°F).
- Toothpicks won’t come out easily?
- Gently wiggle them while pulling.
- If stuck, use kitchen scissors to cut the visible part, then carefully remove the remainder.
- Next time, don’t insert them too deeply.
Variations to Try
Different Flavor Profiles
- Greek-Style:
- Add ¼ cup chopped Kalamata olives to the filling.
- Add 1 tablespoon chopped fresh dill to the filling.
- Sprinkle with crumbled feta after cooking.
- Italian Twist:
- Use 1 cup shredded mozzarella instead of feta.
- Replace oregano with fresh basil.
- Add 1 tablespoon of pesto to the filling.
- Serve with warm marinara sauce.
- Spicy Version:
- Add ¼ teaspoon red pepper flakes to the filling.
- Add ¼ teaspoon cayenne pepper to the seasoning mix.
- Serve with a side of spicy harissa or hot sauce.
- Herb Lover’s:
- Double all herbs.
- Add 1 tablespoon each of fresh thyme and rosemary.
- Make an herb oil for drizzling by mixing chopped herbs with olive oil.
Side Dish Pairings
- Light Option: Serve with a simple arugula salad with lemon vinaigrette.
- Traditional: Pair with roasted lemon potatoes and steamed green beans.
- Grain Option: Serve over Mediterranean couscous or quinoa.
- Low-Carb: Offer with roasted cauliflower and a Greek salad.
Storage & Reheating
- Refrigeration:
- Cool completely before storing.
- Place in an airtight container.
- Store in refrigerator for up to 3 days.
- Keep any extra sauce in a separate container.
- Freezing:
- Wrap individual cooked chicken breasts in plastic wrap, then foil.
- Label with date and contents.
- Place in a freezer-safe bag or container.
- Freeze for up to 2 months.
- For best results, freeze before adding any final sauce.
- Reheating from refrigerated:
- Microwave: Place on a microwave-safe plate and cover with a damp paper towel. Heat for 2 minutes, turning halfway through.
- Oven: Preheat to 350°F. Place chicken in a baking dish with 2 tablespoons of water or broth. Cover with foil and heat for 10-15 minutes until warmed through.
- Add a tablespoon of water or broth when reheating to restore moisture.
- Reheating from frozen:
- Thaw overnight in refrigerator (safest method).
- Once thawed, follow refrigerated reheating instructions above.
- If reheating directly from frozen, add 50% more time and check temperature.
Safety Notes & Important Tips
- Food Safety:
- Always wash hands with soap and water for 20 seconds before and after handling raw chicken.
- Use separate cutting boards and utensils for raw chicken and other ingredients.
- Disinfect all surfaces that come into contact with raw chicken.
- Never place cooked food on a plate that previously held raw chicken.
- Cross-Contamination:
- Designate specific tools for raw chicken handling.
- Wash tools thoroughly with hot, soapy water after use.
- Consider color-coded cutting boards (red for meat/poultry, green for vegetables).
- Temperature Check:
- Don’t skip using a meat thermometer – visual cues can be misleading.
- Chicken must reach 165°F (74°C) to be safe to eat.
- Check multiple spots, especially the thickest parts.
- Make Ahead Tips:
- Stuff chicken up to 24 hours in advance and refrigerate until ready to cook.
- Store prepared but uncooked chicken wrapped tightly in plastic in the coldest part of your refrigerator.
- Let refrigerated stuffed chicken sit at room temperature for 15 minutes before cooking.
- Serving Suggestions:
- Pair with a simple Greek salad and roasted potatoes for a complete meal.
- For a lighter option, serve with a side of steamed vegetables or a Mediterranean grain salad.
- A dollop of tzatziki sauce on top adds extra flavor and moisture.
- Leftovers Idea:
- Slice cold leftover chicken and add to salads or wraps for lunch the next day.
- Chop and mix into a pasta salad with Greek dressing.
- Dice and use as a pizza topping with feta and olives.
For a completely different flavor profile while still working with chicken, try Chicken Nanban, a sweet and tangy Japanese-style fried chicken that makes another great option for your weekly menu rotation.
Beginner’s Note: Don’t be intimidated by all these steps! Take your time, follow each step carefully, and remember that even if it doesn’t look perfect, it will still taste amazing. Cooking is about learning and having fun in the process!