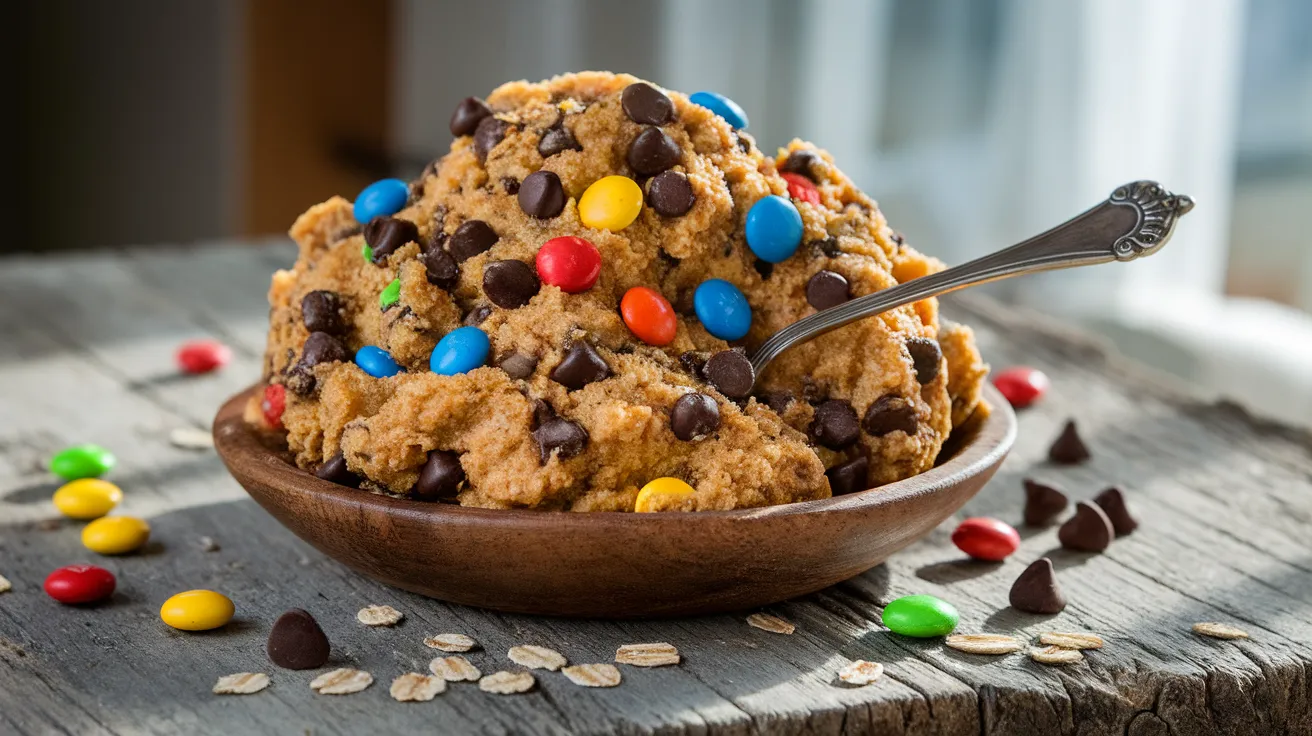
Craving that classic monster cookie flavor without turning on the oven? This monster cookie dough combines peanut butter, oats, and M&Ms into an egg-free, safe-to-eat dessert that’s ready in just 20 minutes. Perfect for movie nights, parties, or satisfying your sweet tooth, this monster cookie dough delivers all the nostalgic flavors you love with zero baking required.
SERVES: 4 | PREP: 15 MIN | COOK: 0 MIN | TOTAL: 15 MIN
Why This Monster Cookie Dough Works
Traditional monster cookies pack a flavor punch with their peanut butter-oat-chocolate combo. This edible monster cookie dough version keeps all those beloved flavors while making it safe to eat raw.
The secret? Heat-treating your flour and using no eggs. You get that satisfying cookie texture without any food safety concerns.
Ingredients
Base Ingredients
| Ingredient | Measurement |
|---|---|
| All-purpose flour | ¾ cup |
| Quick oats | 1 cup |
| Creamy peanut butter | ½ cup |
| Unsalted butter (softened) | 4 tablespoons |
| Light brown sugar | ⅓ cup |
| Granulated sugar | 3 tablespoons |
| Whole milk | 2 tablespoons |
| Vanilla extract | 1½ teaspoons |
| Salt | ¼ teaspoon |
Mix-Ins
| Ingredient | Measurement |
|---|---|
| Mini M&Ms | ½ cup |
| Semi-sweet chocolate chips | ⅓ cup |
| Additional M&Ms for topping | 2 tablespoons |
Step-by-Step Instructions
Phase 1: Heat-Treating the Flour (5 minutes)
Step 1: Preheat your oven to 350°F (175°C). This temperature kills any potential bacteria in the raw flour without browning it. Spread your ¾ cup flour evenly across a baking sheet lined with parchment paper. The thinner the layer, the more evenly it heats.
Step 2: Bake for exactly 5 minutes, stirring once at the 3-minute mark. The flour should look exactly the same as when you started—no color change means you did it right. Remove from oven and let cool completely on the counter for 10 minutes. Hot flour will melt your butter later, so patience pays off here.
Safety Tip: Never skip this step. Raw flour can harbor bacteria that causes serious illness. Heat-treating makes it safe to eat.
Phase 2: Preparing Your Oats (2 minutes)
Step 3: Measure 1 cup of quick oats into a small bowl. If you only have old-fashioned rolled oats, pulse them 3-4 times in a food processor to break them down. Monster cookie dough needs smaller oat pieces for the right texture—too chunky and it won’t hold together properly.
Step 4: Set oats aside near your mixing area. Having everything within reach makes the mixing process much smoother.
Phase 3: Creaming the Base (4 minutes)
Step 5: In a large mixing bowl, combine your softened butter (4 tablespoons) with both sugars (⅓ cup brown sugar and 3 tablespoons granulated sugar). Use a wooden spoon or hand mixer on medium speed to cream them together for 2 full minutes. You’re looking for a lighter, fluffier texture—this creates air pockets that give your dough that authentic cookie feel.
Visual Cue: The mixture should turn from separated ingredients into a smooth, creamy paste that’s slightly pale in color.
Step 6: Add your ½ cup peanut butter to the creamed mixture. Stir vigorously for 1 minute until fully incorporated. The mixture will look thick and almost paste-like—that’s exactly what you want. Natural peanut butters work too, but they’ll make your dough slightly looser.
Why This Matters: Properly creaming creates structure in your dough, mimicking what eggs would do in traditional cookie recipes.
Phase 4: Building the Dough (3 minutes)
Step 7: Pour in your 2 tablespoons milk and 1½ teaspoons vanilla extract. Mix until the liquid disappears completely into the base, about 30 seconds. The vanilla brings warmth while the milk helps everything bind together.
Step 8: Add your cooled, heat-treated flour and ¼ teaspoon salt all at once. Fold gently with a sturdy spatula, scraping the bottom and sides of your bowl. Mix just until no white streaks remain—about 1 minute. Overmixing develops gluten and makes your dough tough and chewy instead of tender.
Beginner Tip: If your dough feels too dry and crumbly, add milk 1 teaspoon at a time. Too wet and sticky? Add flour 1 tablespoon at a time.
Step 9: Fold in your prepared oats using broad, sweeping motions. This takes about 45 seconds. You want the oats evenly distributed but not pulverized into the dough. Those visible oat pieces give monster cookie dough its signature chunky texture.
Phase 5: Adding the Magic (2 minutes)
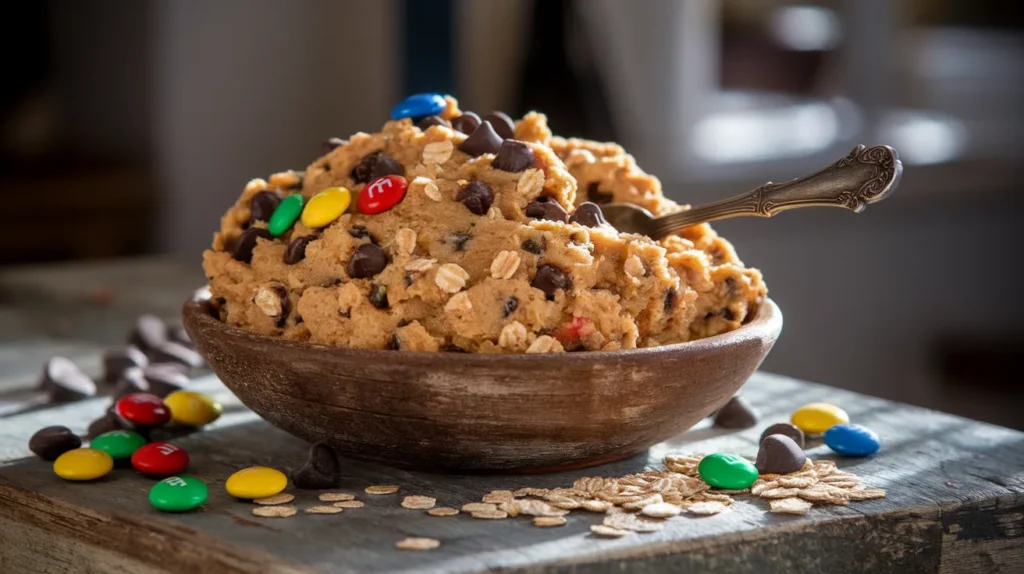
Step 10: Gently fold in your ½ cup mini M&Ms and ⅓ cup chocolate chips. Use a light touch—aggressive stirring breaks the candy shells and bleeds color into your dough. 8-10 gentle folds should do it. You want colorful pops of candy throughout, not a muddy brown mixture.
Visual Cue: Your dough should look like a Jackson Pollock painting—random bursts of color distributed throughout tan dough.
Step 11: Reserve those 2 tablespoons of M&Ms for topping. Press them gently into the surface of your dough. This makes it Instagram-worthy and lets everyone know exactly what flavor they’re getting.
Phase 6: Finishing Touches (1 minute)
Step 12: Cover your bowl tightly with plastic wrap and refrigerate for at least 30 minutes before serving. Chilling firms up the butter and peanut butter, transforming your mixture from soft paste into scoopable cookie dough. Cold dough also tastes better—the flavors meld together and the chocolate gets pleasantly firm.
Make-Ahead Option: This dough keeps in the fridge for up to 5 days, actually improving in flavor as it sits. The oats soften slightly and absorb the peanut butter essence.
Chef’s Notes
Peanut Butter Selection: Natural peanut butter creates a slightly looser, more rustic monster cookie dough. Traditional processed peanut butter (like Jif or Skippy) gives firmer, more scoopable results. Choose based on your texture preference.
Oat Texture: Quick oats are essential for authentic monster cookie dough texture. Rolled oats stay too chewy even after sitting. Steel-cut oats are too hard and won’t incorporate properly.
Candy Choices: While M&Ms are classic, you can substitute with Reese’s Pieces for extra peanut butter punch. Mini candies work better than regular-sized because they distribute more evenly throughout each bite.
Temperature Matters: Serve this dough cold for the best texture and flavor. Room temperature makes it too soft and the peanut butter flavor becomes overwhelming instead of balanced.
Nutrition Information (Per Serving)
- Calories: 485
- Protein: 11g
- Carbohydrates: 58g
- Fat: 24g
- Fiber: 4g
- Sugar: 35g
Creative Variations
Chocolate Lover’s Monster Cookie Dough
Replace the peanut butter with chocolate hazelnut spread and use all chocolate chips instead of M&Ms. Add 2 tablespoons cocoa powder to the dry ingredients for ultra-chocolate intensity.
Gluten-Free Monster Magic
Swap regular flour for your favorite gluten-free 1:1 baking blend (heat-treat it the same way). Use certified gluten-free oats. The texture stays remarkably similar to the original. If you’re exploring gluten-free desserts, try our red sugar cookie for another safe-to-eat option.
White Chocolate Almond Joy
Replace peanut butter with almond butter, swap chocolate chips for white chocolate chips, and add ¼ cup sweetened shredded coconut. The tropical twist transforms this into something completely new.
Protein-Packed Power Dough
Mix in 3 tablespoons vanilla protein powder with your dry ingredients and reduce sugar to 3 tablespoons total. Add an extra tablespoon of milk to compensate for the protein powder’s absorbency. For more protein-rich treats, check out our amaretti cookie recipe.
Storage & Reheating
Refrigerator Storage: Keep your monster cookie dough in an airtight container for up to 5 days. Press plastic wrap directly against the surface before sealing to prevent a dry skin from forming. The flavors actually improve after 24 hours as everything melds together.
Freezer Storage: Scoop dough into individual portions using a cookie scoop, place on a parchment-lined tray, and freeze solid (about 2 hours). Transfer frozen scoops to a freezer bag for up to 3 months. Thaw individual portions in the fridge for 30 minutes before eating.
Not Recommended: Don’t leave this dough at room temperature for more than 2 hours. The butter and peanut butter become too soft, and the texture suffers dramatically.
Serving from Frozen: Some people love eating the frozen scoops like cookie dough ice cream bites. They’re firm enough to hold their shape but soft enough to bite through.
Troubleshooting Common Problems
Problem 1: Dough Is Too Dry and Crumbly
Solution: You either used natural peanut butter (which is drier) or your flour was packed too tightly when measuring. Add milk 1 teaspoon at a time, mixing thoroughly between additions, until the dough holds together when squeezed. Usually 1-2 teaspoons fixes this completely.
Problem 2: Dough Is Too Wet and Sticky
Solution: Your butter was too soft or you measured too much milk. Refrigerate for 30 minutes—often this firms everything up sufficiently. Still too sticky? Add flour 1 tablespoon at a time (make sure to heat-treat any additional flour first for 5 minutes at 350°F).
Problem 3: M&Ms Are Bleeding Color
Solution: You mixed too aggressively or used regular M&Ms instead of minis. The smaller candies have proportionally thicker shells that resist cracking. Next time, use gentler folding motions. If it’s already happened, embrace the tie-dye look—it still tastes amazing.
Problem 4: Dough Tastes Too Sweet
Solution: Reduce granulated sugar to 2 tablespoons next time. You can also add an extra pinch of salt (⅛ teaspoon) to balance the sweetness. Some people prefer using crunchy peanut butter, which adds savory nutty bits that cut through the sugar.
Problem 5: Oats Are Too Chewy
Solution: You used old-fashioned oats instead of quick oats, or didn’t let the dough rest long enough. The resting period allows oats to absorb moisture and soften. Let your dough sit for a full hour (or overnight) in the fridge. The oats will soften considerably and blend better with the other ingredients.
Equipment Essentials
- Baking sheet (for heat-treating flour)
- Parchment paper (prevents flour from burning)
- Large mixing bowl (3-quart minimum)
- Wooden spoon or hand mixer (for creaming)
- Measuring cups and spoons (accurate measuring is crucial)
- Rubber spatula (for thorough mixing)
- Cookie scoop (optional, for uniform portions)
- Airtight container (for storage)
Shopping List
Baking Aisle
- All-purpose flour
- Quick oats
- Granulated sugar
- Light brown sugar
- Vanilla extract
Dairy Section
- Unsalted butter
- Whole milk
Nut Butter Section
- Creamy peanut butter
Candy Aisle
- Mini M&Ms (plus extra for topping)
- Semi-sweet chocolate chips
Spice Aisle
- Salt
Success Secrets
1. Temperature Control Is Everything Your butter should be soft enough to indent with your finger but not melting or greasy. Too hard and it won’t cream properly. Too soft and your dough becomes soup. The sweet spot is 65-68°F—pull it from the fridge 30-45 minutes before starting.
2. Heat-Treat Flour Every Single Time This isn’t optional or overly cautious. Raw flour recalls happen regularly because of bacterial contamination. Five minutes in the oven eliminates risk completely. Mark your heat-treated flour container if storing for later use.
3. Let the Dough Rest Fresh monster cookie dough tastes good. Dough that’s rested for at least 2 hours (or overnight) tastes incredible. The oats soften, the flavors blend, and the texture becomes perfectly scoopable instead of paste-like. Patience rewards you here.
4. Use a Cookie Scoop for Perfect Portions A standard 2-tablespoon cookie scoop gives you 12-14 perfect portions from this recipe. Uniform size means everyone gets an equal treat, and they look professional instead of haphazard. Plus, scooping from chilled dough is way easier than trying to cut or spoon it.
5. Customize to Your Taste This recipe is a flexible template. Hate peanut butter? Try sunflower seed butter or cookie butter. Don’t like M&Ms? Use all chocolate chips, butterscotch chips, or chopped peanut butter cups. The base formula works with almost any mix-in you can imagine, so make it your own signature version.
Enjoy your homemade monster cookie dough straight from the bowl, rolled into energy balls, or even spread between graham crackers for cookie dough sandwiches. However you serve it, this safe-to-eat treat delivers big monster cookie flavor in just 15 minutes!