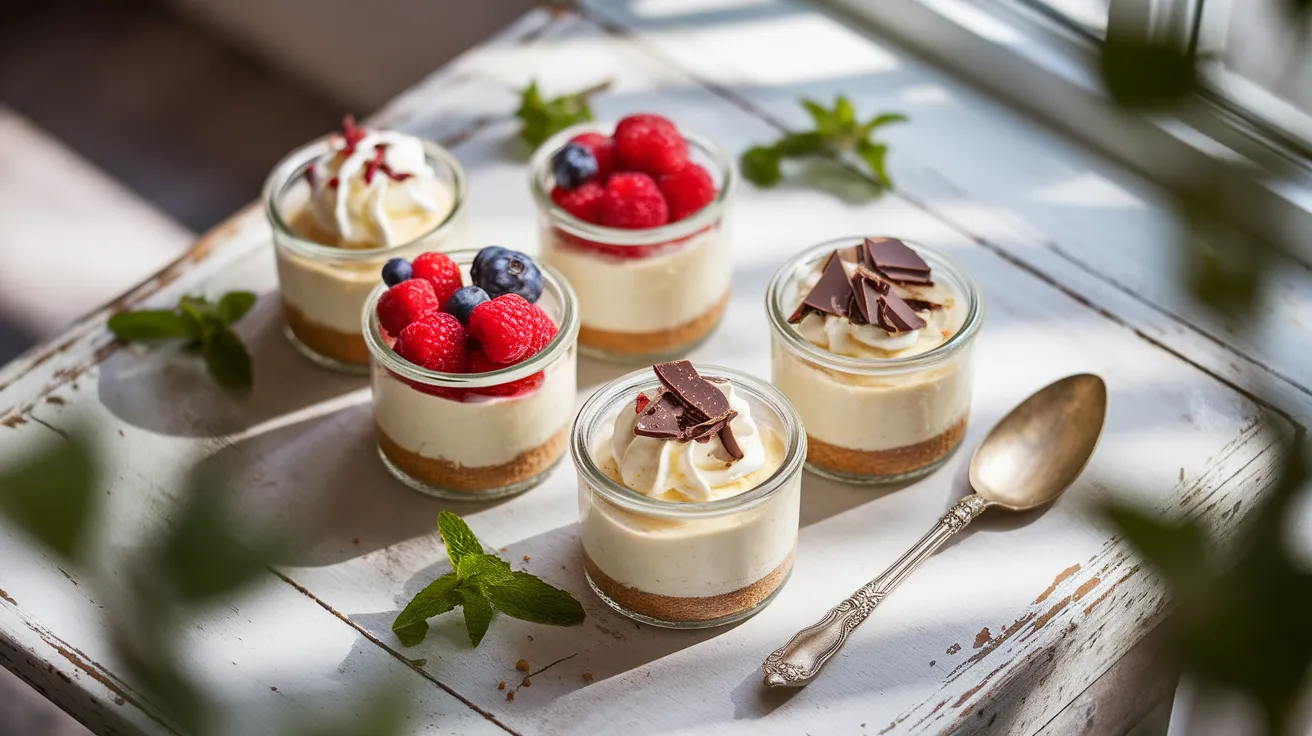
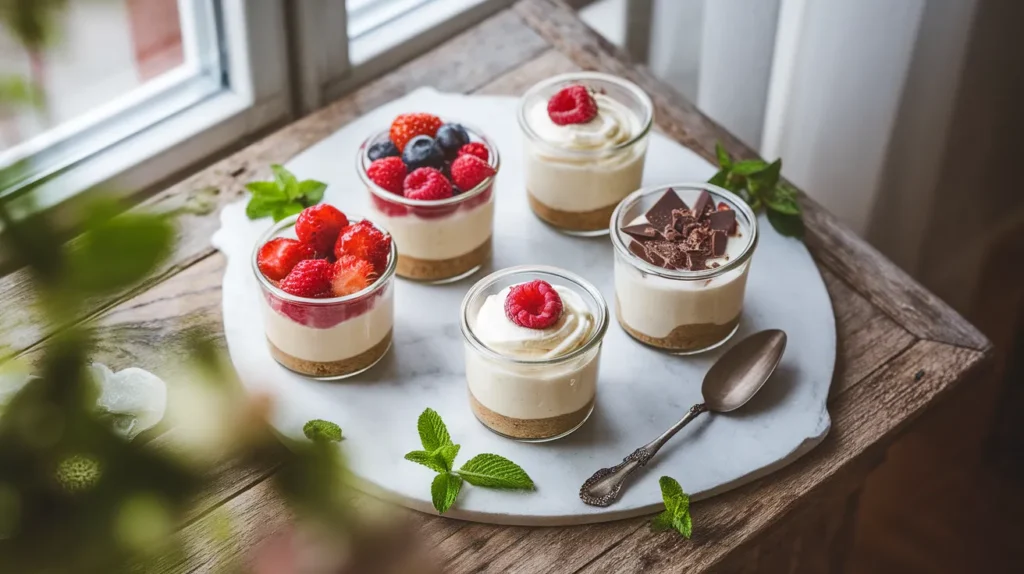
These adorable no-bake mini cheesecake cups are the ultimate crowd-pleaser—creamy, tangy, and ready without ever turning on your oven. Whether you’re hosting a dinner party or just craving something sweet, this no-bake mini cheesecake recipe delivers bakery-quality results with minimal effort and maximum wow factor.
SERVES: 4 | PREP: 20 MIN | COOK: 0 MIN | TOTAL: 30 MIN (plus 2 hours chilling)
Why This No-Bake Mini Cheesecake Recipe Works
Traditional cheesecakes intimidate home bakers with water baths and crack prevention techniques. This recipe eliminates all that stress. No oven means no cracks, no guesswork, and no anxiety. The individual portions make serving effortless—no slicing required.
The secret? Cold-set cream cheese filling that firms up beautifully in your fridge. You’ll get that signature tangy richness without any baking skills required.
These mini treats are perfect for beginners. If you’ve never made cheesecake before, this is your gateway recipe.
Ingredients
For the Crust
| Ingredient | Amount |
|---|---|
| Graham cracker crumbs | 1 cup (about 8 crackers) |
| Unsalted butter, melted | 4 tablespoons |
| Granulated sugar | 2 tablespoons |
| Salt | Pinch |
For the Cheesecake Filling
| Ingredient | Amount |
|---|---|
| Cream cheese, softened | 16 ounces (2 blocks) |
| Powdered sugar | ¾ cup |
| Vanilla extract | 2 teaspoons |
| Fresh lemon juice | 1 tablespoon |
| Heavy whipping cream | 1 cup, cold |
| Sour cream | ¼ cup |
For the Topping (Optional)
| Ingredient | Amount |
|---|---|
| Fresh berries | 1 cup mixed |
| Whipped cream | For garnish |
| Chocolate shavings | 2 tablespoons |
Step-by-Step Instructions
Phase 1: Prepare Your Workspace (5 minutes)
Step 1: Take your cream cheese out of the refrigerator 30 minutes before starting. Room temperature cream cheese is crucial—cold cream cheese creates lumps that won’t smooth out, ruining your silky texture. Press the blocks with your finger; they should indent easily.
Step 2: Gather four 8-ounce jars, ramekins, or cups. Glass containers work beautifully because you can see the gorgeous layers. Line them up on a small baking sheet or tray for easy refrigerator transfer later.
Step 3: Get all your ingredients measured and ready. This French technique called “mise en place” prevents scrambling mid-recipe. Trust me, it makes everything smoother.
Phase 2: Build the Crust Foundation (8 minutes)
Step 4: Crush your graham crackers into fine crumbs. Place them in a zip-top bag and roll with a rolling pin, or pulse in a food processor for 10 seconds. You want the texture of coarse sand—no large chunks. Why this matters: Large pieces create an uneven crust that doesn’t hold together.
Step 5: Pour the graham cracker crumbs into a medium bowl. Add the melted butter, sugar, and a tiny pinch of salt. Stir with a fork until the mixture looks like wet sand and clumps when squeezed. The test: Pinch a bit between your fingers. If it holds together, you’re ready. If it crumbles apart, add another teaspoon of melted butter.
Step 6: Divide the crust mixture evenly among your four containers—about 3 tablespoons per cup. Use the bottom of a small glass or measuring cup to press the crumbs down firmly. Press hard. You want a compact, solid base that won’t fall apart when you dig in with a spoon. Pay special attention to the edges where the crust meets the glass.
Step 7: Place your containers in the refrigerator while you make the filling. This 10-15 minute chill time helps the butter solidify, creating a sturdy foundation that won’t mix into your creamy layer.
Phase 3: Create the Silky Filling (12 minutes)
Step 8: In a large mixing bowl, beat the softened cream cheese with an electric mixer on medium speed for 2 minutes. Stop and scrape down the sides twice during this process. You’re aiming for completely smooth cream cheese with zero lumps. If you see any lumps, keep beating. This step determines your final texture, so don’t rush it.
Step 9: Add the powdered sugar gradually—about ¼ cup at a time. Beat on low speed for 30 seconds after each addition to prevent a sugar cloud in your kitchen. Why powdered sugar? Granulated sugar won’t dissolve properly in this no-bake recipe, leaving you with a gritty texture. Once all the sugar is incorporated, increase to medium speed and beat for 1 minute until fluffy.
Step 10: Pour in the vanilla extract, lemon juice, and sour cream. The lemon juice brightens the flavor and cuts through the richness—it’s not optional. Beat on medium speed for 1 minute. Scrape down the bowl again. That cream cheese loves to hide on the sides.
Step 11: In a separate bowl, whip the cold heavy cream with clean beaters on high speed. Start on low to prevent splattering, then increase to high. Beat for 2-3 minutes until stiff peaks form. The test: Lift the beaters out. The cream should stand up straight without drooping. Under-whipped cream creates a soft, mousse-like filling instead of a firm cheesecake texture.
Step 12: Add one-third of the whipped cream to your cream cheese mixture. Fold gently with a rubber spatula using a swooping motion from the bottom of the bowl up and over. This first addition lightens the mixture, making it easier to incorporate the rest without deflating those precious air bubbles.
Step 13: Add the remaining whipped cream and fold gently until no white streaks remain. Use a light touch—you’re not stirring, you’re folding. Each stroke should lift and turn the mixture. Stop as soon as it’s combined. Over-mixing deflates the whipped cream and creates a dense, heavy filling instead of that signature light and airy texture.
Phase 4: Assemble Your Masterpieces (5 minutes)
Step 14: Remove your chilled crusts from the refrigerator. Using a spoon or piping bag, divide the filling evenly among the four containers. Fill each cup to about ½ inch from the top, leaving room for toppings later. Smooth the tops with the back of a spoon for that professional bakery look.
Step 15: Gently tap each container on the counter 2-3 times. This releases any air bubbles trapped in the filling. You might see tiny bubbles rise to the surface—that’s exactly what you want.
Step 16: Cover each container with plastic wrap, pressing it directly onto the surface of the filling to prevent a skin from forming. Refrigerate for at least 2 hours, but preferably 4 hours or overnight. The longer they chill, the firmer they become. At 2 hours, they’ll be spoonable and creamy. At 4+ hours, they’ll slice cleanly if you make them in a pan.
Phase 5: Final Touches (5 minutes before serving)
Step 17: Just before serving, add your toppings. Fresh berries add color and cut through the richness beautifully. A dollop of whipped cream and chocolate shavings make them Instagram-worthy. Don’t add toppings too early—berries release juice that can make your cheesecake watery.
Chef’s Notes
Temperature is everything with this no-bake mini cheesecake recipe. Room temperature cream cheese blends smoothly, while cold cream cheese creates lumps that ruin the silky texture. Set it out 30-45 minutes early.
Make-ahead magic: These mini cheesecakes actually taste better the next day as flavors meld together. Make them up to 2 days ahead and store covered in the refrigerator.
Piping bag trick: Transfer the filling to a large zip-top bag, snip off one corner, and pipe into containers for mess-free assembly and a cleaner presentation.
Flavor boost: Add a teaspoon of lemon zest to the filling for extra brightness, or swap half the vanilla for almond extract for a sophisticated twist.
Nutrition Information (Per Serving)
- Calories: 520
- Protein: 8g
- Carbohydrates: 42g
- Fat: 37g
- Saturated Fat: 22g
- Fiber: 1g
- Sugar: 32g
Creative Variations
Chocolate Lover’s Version: Replace ½ cup of the cream cheese with melted and cooled dark chocolate. Stir it in during Step 10. Use chocolate cookie crumbs instead of graham crackers for a double chocolate experience. If you love rich desserts, try our indulgent million dollar brownie for another decadent treat.
Oreo Dream: Swap graham crackers for crushed Oreo cookies (filling and all). Mix mini chocolate chips into the cheesecake filling for cookies and cream perfection. Top with more crushed Oreos before serving.
Tropical Paradise: Use vanilla wafer crumbs for the crust. Add ½ cup crushed pineapple (drained extremely well) and ½ teaspoon coconut extract to the filling. Top with toasted coconut flakes and fresh mango.
Japanese-Inspired: Reduce the sugar to ½ cup and add 2 tablespoons of matcha powder to the filling for a beautiful green tea version. For another Asian-inspired dessert, check out our light and fluffy Japanese cotton cheesecake that melts in your mouth.
Storage & Reheating Guide
Refrigerator storage: Cover each no-bake mini cheesecake tightly with plastic wrap or lid. They’ll stay fresh for up to 5 days. The texture actually improves after the first day as everything sets completely.
Freezer storage: These freeze beautifully for up to 2 months. Wrap each container in plastic wrap, then aluminum foil. Thaw overnight in the refrigerator—never at room temperature, which creates condensation and a watery texture.
Serving temperature: Let them sit at room temperature for 10 minutes before serving. This slight softening makes them creamier and enhances the flavor. Straight from the fridge, they taste muted.
Topping timing: Always add fresh toppings right before serving. Berries release juice, bananas brown, and whipped cream deflates when stored on top.
Troubleshooting Common Problems
Problem 1: Lumpy filling texture Your cream cheese was too cold. It must be truly soft—leaving it out for 30 minutes isn’t enough in a cold kitchen. Microwave it for 10 seconds if needed, but don’t melt it. Prevention: Press the cream cheese block—if your finger doesn’t create a deep indent easily, it needs more time at room temperature.
Problem 2: Runny filling that won’t set You under-whipped the heavy cream or over-folded the mixture, deflating all the air. The whipped cream provides structure in this no-bake recipe. Solution: Pop them in the freezer for 30 minutes, which firms them up quickly. Prevention: Whip cream to true stiff peaks and fold gently.
Problem 3: Crust falling apart or mixing into filling Not enough butter, or you didn’t press it firmly enough. The crust needs pressure to compact. Solution: Next time, add an extra tablespoon of melted butter and really press down hard with the back of a measuring cup. Also ensure you chill the crust before adding filling.
Problem 4: Too sweet or too tangy Adjust the sugar and lemon juice balance next time. For less sweetness, reduce powdered sugar to ½ cup. For less tang, use only 2 teaspoons of lemon juice or omit the sour cream. Taste your filling before assembling and adjust.
Problem 5: Watery layer on top after chilling This happens when ingredients aren’t at room temperature or when toppings with high water content are added too early. The cream cheese and sour cream must be the same temperature for proper emulsification. Solution: Blot the water with a paper towel and add fresh whipped cream on top. Always top right before serving.
Equipment Essentials
Must-have tools:
- Electric hand mixer or stand mixer
- Four 8-ounce glass jars, ramekins, or cups
- Rubber spatula for folding
- Small baking sheet or tray
- Plastic wrap
- Measuring cups and spoons
- Two mixing bowls (one large, one medium)
Nice-to-have tools:
- Food processor (for crushing graham crackers)
- Piping bag or large zip-top bag (for neat filling)
- Small offset spatula (for smoothing tops)
Shopping List by Store Section
Dairy Case:
- Cream cheese (16 oz)
- Unsalted butter (1 stick)
- Heavy whipping cream (1 cup)
- Sour cream (small container)
Baking Aisle:
- Graham crackers (1 box)
- Powdered sugar
- Granulated sugar
- Vanilla extract
Produce:
- Fresh berries (optional, for topping)
- Lemon (for 1 tablespoon juice)
Optional toppings:
- Whipped cream
- Chocolate bar (for shavings)
Success Secrets from Professional Bakers
1. Temperature synchronization is key. Every dairy ingredient should be at room temperature except the heavy whipping cream. This creates a smooth, lump-free filling that sets perfectly. Cold cream cheese + cold sour cream = lumpy disaster.
2. Whip your cream to true stiff peaks. This isn’t negotiable in a no-bake recipe. The whipped cream provides all the structure since there’s no gelatin or baking. Under-whipped cream means runny cheesecake. When you lift the beaters, peaks should stand straight up without any drooping.
3. Fold, don’t stir. When combining whipped cream with the cream cheese mixture, use a gentle folding motion. Cut through the center, scrape along the bottom, and lift up and over. Stirring or beating deflates those air bubbles you worked so hard to create.
4. Give them time to set properly. Two hours is the minimum, but 4+ hours or overnight gives you the best texture and flavor. The filling firms up significantly, and the flavors develop and meld together beautifully. Patience pays off.
5. Use quality cream cheese. This recipe is simple, so ingredient quality matters. Full-fat cream cheese from a brick (not a tub) creates the richest, smoothest texture. Store brands work fine, but avoid reduced-fat versions—they contain stabilizers that create a gummy texture.
This no-bake mini cheesecake recipe proves that impressive desserts don’t require professional skills or fancy equipment. Just four containers, simple ingredients, and a little patience create restaurant-quality individual desserts. The best part? You can customize each serving to different tastes—top two with berries, two with chocolate, and everyone’s happy. Make a batch this weekend and watch them disappear faster than you can say “no-bake.”