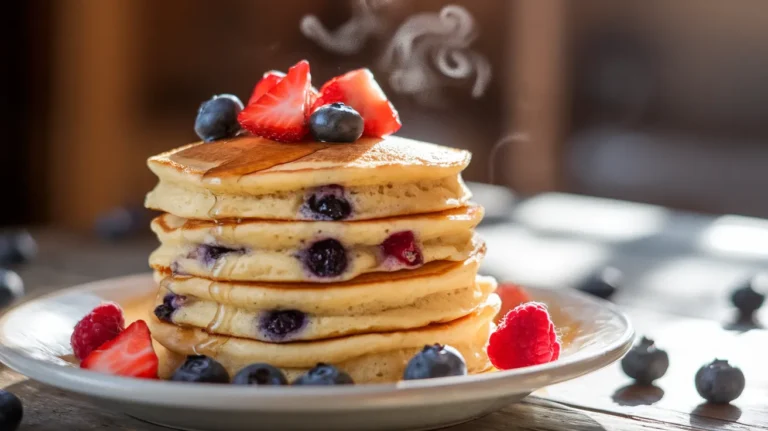
These incredible no egg bisquick pancakes create the fluffiest breakfast experience without requiring a single egg. Using simple pantry ingredients and foolproof techniques, you’ll master golden, tender pancakes that taste like pure weekend magic. Whether you’re dealing with egg allergies or simply ran out of eggs, these no egg bisquick pancakes deliver restaurant-quality results every time.
SERVES: 4 | PREP: 8 MIN | COOK: 15 MIN | TOTAL: 23 MIN
Ingredients You’ll Need
Dry Mix Foundation
| Ingredient | Amount | Purpose |
|---|---|---|
| Bisquick mix | 2 cups | Base flour and leavening |
| Sugar | 2 tablespoons | Sweetness and browning |
| Baking powder | 1 teaspoon | Extra lift without eggs |
Wet Ingredients
| Ingredient | Amount | Purpose |
|---|---|---|
| Milk | 1⅓ cups | Moisture and richness |
| Vanilla extract | 1 teaspoon | Flavor enhancement |
| Vegetable oil | 2 tablespoons | Fat for tenderness |
Complete Step-by-Step Instructions for No Egg Bisquick Pancakes
Phase 1: Preparing Your Workspace (2 minutes)
1. Set Up Your Station Clear a clean workspace near your stove. Gather all ingredients and place them within arm’s reach. This prevents scrambling mid-recipe and ensures smooth cooking flow. Have your measuring cups ready and double-check you have everything listed above.
2. Choose the Right Bowl Select a mixing bowl that holds at least 3 quarts. Too small creates messy overflow when mixing, while the right size gives you room to stir without splashing batter everywhere. Glass or stainless steel works best for easy cleaning.
Phase 2: Creating the Dry Mix (3 minutes)
3. Measure Bisquick Accurately Spoon 2 cups Bisquick mix into your measuring cup without packing it down. Level off the top with a knife for precise measurement. Too much Bisquick creates heavy pancakes, while too little makes them fall apart.
4. Add Sugar and Baking Powder Sprinkle 2 tablespoons granulated sugar and 1 teaspoon baking powder over the Bisquick. The extra baking powder is crucial – it replaces the lift that eggs normally provide in pancake batter.
5. Whisk Dry Ingredients Thoroughly Use a wire whisk to blend everything for 45-60 seconds. Make sure no pockets of baking powder remain visible. This step prevents uneven rise and bitter spots in your finished no egg bisquick pancakes.
Phase 3: Preparing Wet Ingredients (2 minutes)
6. Measure Milk at Room Temperature Pour 1⅓ cups milk into a liquid measuring cup. Room temperature milk (about 70°F) mixes more easily than cold milk and prevents lumps. If your milk is cold, microwave for 20-30 seconds to take the chill off.
7. Add Flavor Enhancers Stir 1 teaspoon pure vanilla extract and 2 tablespoons vegetable oil into the milk. The oil replaces the fat content eggs would normally contribute, creating tender, moist pancakes instead of dry ones.
Phase 4: Combining and Mixing (3 minutes)
8. Create a Well in Dry Ingredients Use your whisk handle to make a shallow depression in the center of your dry mix. This well helps wet and dry ingredients combine more evenly without overmixing.
9. Pour Wet into Dry Gradually Add about half the milk mixture first, stirring gently with a wooden spoon. Add remaining liquid slowly while stirring. This gradual approach prevents lumps better than dumping everything at once.
10. Stir Until Just Combined Mix for 60-90 seconds until ingredients are just moistened. Your batter should look lumpy with some dry flour still visible. Perfectly smooth batter means overmixed, tough pancakes. Stop stirring when you can’t see any dry Bisquick powder.
11. Rest the Batter Let batter sit undisturbed for 3-4 minutes while you heat the pan. This resting time allows the Bisquick to fully hydrate, creating fluffier no egg bisquick pancakes with better texture.
Phase 5: Pan Preparation (2 minutes)
12. Heat Your Cooking Surface Place a 10-12 inch non-stick pan or griddle over medium heat for 2-3 minutes. Medium heat (around 350°F on electric griddles) cooks pancakes evenly without burning the outside before the inside sets.
13. Test Pan Temperature Sprinkle 3-4 drops of water on the surface. They should immediately sizzle and evaporate within 2-3 seconds. If water just sits there, the pan needs more time. If it evaporates instantly, lower the heat slightly.
14. Grease Lightly Add 1 teaspoon butter or spray with cooking oil. Spread it evenly with a paper towel, leaving just a thin film. Too much fat creates uneven browning and greasy pancakes.
Phase 6: Cooking Perfect Pancakes (12 minutes)
15. Pour Consistent Portions Use a ¼ cup measuring cup to scoop batter for each pancake. Hold the cup 2-3 inches above the pan and pour in one smooth motion to create round 4-inch pancakes. Space them 2 inches apart to prevent merging.
16. Watch for Surface Changes Don’t touch or move pancakes for the first 2-3 minutes. Watch the surface carefully as tiny bubbles begin forming around the edges, then spread across the entire surface. This bubbling indicates the bottom is setting properly.
17. Check Bubble Formation After 3-4 minutes, you’ll see bubbles forming and popping on the surface, leaving small holes that don’t immediately fill back in. The edges should look slightly dry and set. These are your visual cues that flipping time approaches.
18. Test Edge Firmness Gently lift one edge with your spatula tip. The bottom should be golden brown and release easily from the pan. If it’s pale or sticks, give it another 30-60 seconds before attempting to flip.
19. Execute the Perfect Flip Slide your thin spatula completely under the pancake, supporting the entire surface. Flip with one confident, quick motion – hesitation creates broken pancakes. The second side needs only 1-2 minutes since it cooks faster than the first.
20. Check Doneness The second side is ready when it springs back lightly when touched in the center and sounds hollow when tapped gently. The color should match the first side’s golden brown hue.
Phase 7: Finishing and Serving (3 minutes)
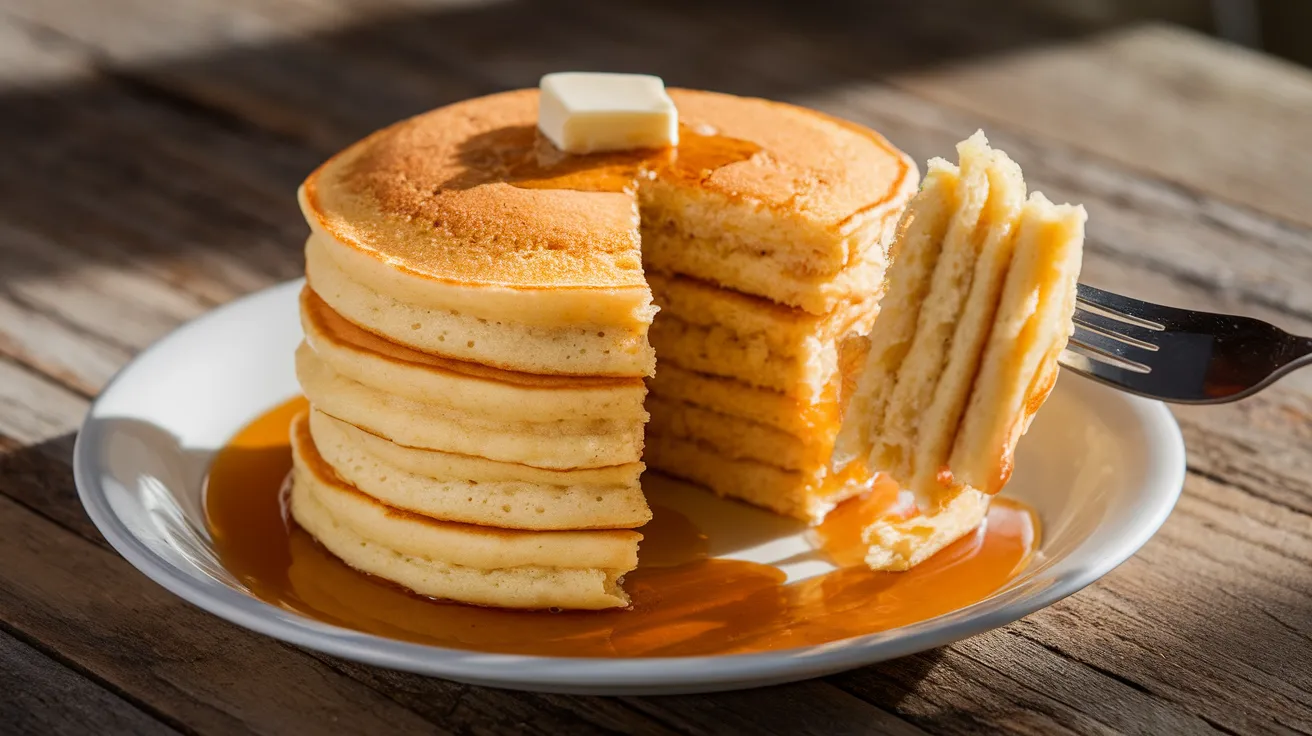
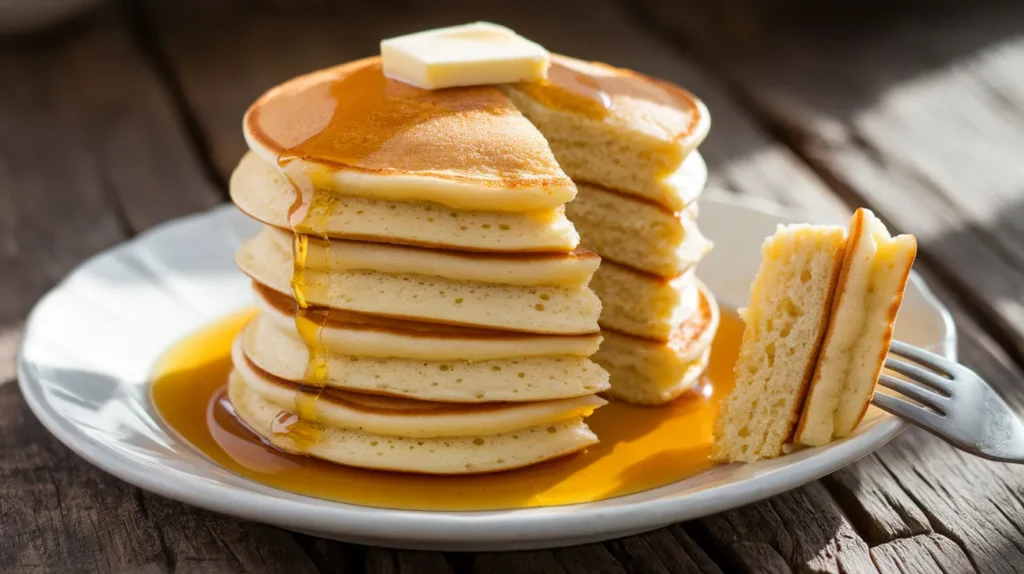
21. Keep Pancakes Warm Transfer finished no egg bisquick pancakes to a baking sheet in a 200°F oven. This maintains serving temperature without continuing to cook them. Don’t stack them directly – use parchment paper between layers.
22. Continue Cooking Process Repeat steps 15-20 with remaining batter, re-greasing the pan lightly between batches. You should get 8-10 pancakes total from this recipe, perfect for serving four people generously.
Chef’s Professional Notes
Temperature Control: Consistent medium heat prevents the common mistake of burned outsides with raw centers. If your pan gets too hot, remove it from heat for 30 seconds to cool down.
Batter Consistency: Perfect no egg bisquick pancakes batter should pour easily but hold its shape on the pan. If too thick, add milk one tablespoon at a time. If too thin, sprinkle in more Bisquick.
Fresh Results: These pancakes taste absolutely amazing fresh but lose their fluffy texture when reheated. Time your cooking so the last batch finishes as you’re ready to serve.
Visual Cues Matter: Trust what you see more than strict timing. Pan temperature, altitude, and humidity all affect cooking times, but visual cues remain consistent.
Nutrition Information (Per Serving)
- Calories: 285
- Protein: 8g
- Carbohydrates: 42g
- Fat: 9g
- Fiber: 2g
- Sugar: 8g
- Sodium: 680mg
Creative Variations for No Egg Bisquick Pancakes
Berry Bliss Version: Gently fold ¾ cup fresh blueberries or sliced strawberries into the completed batter just before cooking. The fruit adds natural sweetness and beautiful color bursts.
Double Chocolate Delight: Mix 2 tablespoons cocoa powder into the dry ingredients and add ½ cup mini chocolate chips to the finished batter. Kids absolutely adore this weekend special.
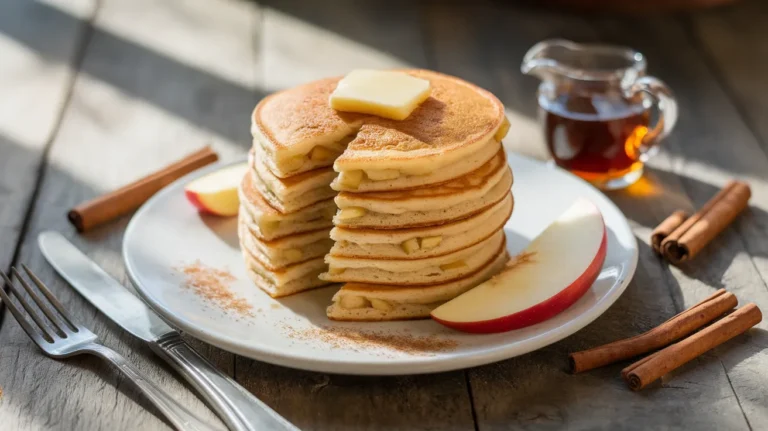
Warm Spice Comfort: Blend 1 teaspoon cinnamon, ¼ teaspoon nutmeg, and pinch of cardamom into your dry mix for cozy, bakery-style flavor that pairs perfectly with maple syrup.
Citrus Sunshine: Replace vanilla extract with orange or lemon extract and add 1 tablespoon fresh citrus zest for bright, refreshing pancakes. These complement our orange cream pancakes beautifully for a citrus-themed breakfast feast.
Storage & Make-Ahead Tips
Immediate Storage: Cool completely before storing leftover no egg bisquick pancakes in airtight containers. Layer parchment paper between pancakes to prevent sticking and maintain texture.
Refrigerator Method: Properly stored pancakes last 3-4 days refrigerated. Reheat individual pancakes in the toaster for 2 minutes or microwave for 45 seconds until warmed through.
Freezer Storage: Wrap individual pancakes in plastic wrap, then place in freezer bags for up to 3 months. Label clearly with contents and date for easy identification.
Batter Prep: Mix dry ingredients the night before and store covered at room temperature. Add wet ingredients in the morning for ultra-quick preparation.
Troubleshooting Common Issues
Problem: Dense, Heavy Pancakes Solution: Your baking powder is likely expired or you’ve overmixed the batter. Fresh baking powder is essential for lift in no egg bisquick pancakes, and gentle mixing preserves fluffiness.
Problem: Pancakes Fall Apart Solution: Batter too thin or insufficient mixing. Add 1-2 tablespoons more Bisquick, or ensure wet and dry ingredients are properly combined without overmixing.
Problem: Uneven Browning Pattern Solution: Pan temperature inconsistent or too much oil. Maintain steady medium heat and use minimal greasing between batches for even golden color.
Problem: Sticking to Pan Surface Solution: Pan not hot enough, insufficient greasing, or batter too thick. Ensure proper preheating, light even greasing, and correct batter consistency.
Problem: Raw Centers Solution: Heat too high or pancakes too thick. Reduce to medium heat and use slightly less batter per pancake for thorough, even cooking.
Essential Equipment List
- Large mixing bowl (minimum 3-quart capacity)
- Wire whisk for dry ingredient blending
- Wooden spoon for gentle batter mixing
- Liquid and dry measuring cups for accuracy
- Measuring spoons for precise portions
- Non-stick pan or griddle (10-12 inch ideal)
- Thin, flexible spatula for easy flipping
- Paper towels for pan maintenance
Organized Shopping List
Baking Aisle Essentials
- Bisquick original pancake mix
- Pure vanilla extract
- Granulated sugar
- Double-acting baking powder
Dairy Section
- Whole milk (2% works too)
- Butter for greasing
Pantry Staples
- Vegetable oil or canola oil
- Cooking spray (optional alternative)
Five Success Secrets
1. Perfect Temperature Testing: Master the water drop test – proper heat makes drops dance and disappear in 2-3 seconds. This ensures golden browning without burning.
2. Bubble Reading Skills: Wait for surface bubbles to form, pop, and leave holes that stay open. This visual cue guarantees the bottom is properly set and ready for flipping.
3. Single Flip Philosophy: Flip each pancake exactly once. Multiple flips create tough, dense results instead of the light, fluffy texture you want.
4. Consistent Sizing: Use the same ¼ cup measure for every pancake. Uniform sizes ensure even cooking times and professional-looking results.
5. Warm Holding Technique: Keep finished no egg bisquick pancakes in a 200°F oven to maintain serving temperature without overcooking or drying out.
These foolproof no egg bisquick pancakes prove that missing ingredients don’t mean sacrificing quality or taste. With detailed techniques and careful attention to visual cues, even complete beginners can create restaurant-worthy breakfast magic in their own kitchens.
The secret lies in understanding why each step matters and recognizing the signs that indicate perfect timing. From the gentle mixing that preserves tenderness to the patient waiting for proper bubble formation, every detail contributes to pancakes that are light, fluffy, and absolutely delicious.
For another unique pancake adventure, explore our mochi pancakes that offer a completely different but equally satisfying chewy texture. Both recipes showcase how creative substitutions and proper techniques can transform simple ingredients into memorable breakfast experiences that bring families together around the table.