Key Takeaways
- Ono (wahoo) fish offers a mild, sweet flavor with a firm texture perfect for grilling, baking, or pan-searing
- Prep takes just 15 minutes with 20 minutes cooking time for a quick weeknight meal
- This recipe serves 4 people with only 290 calories per serving
- Ono fish is high in protein and omega-3 fatty acids while being low in carbs
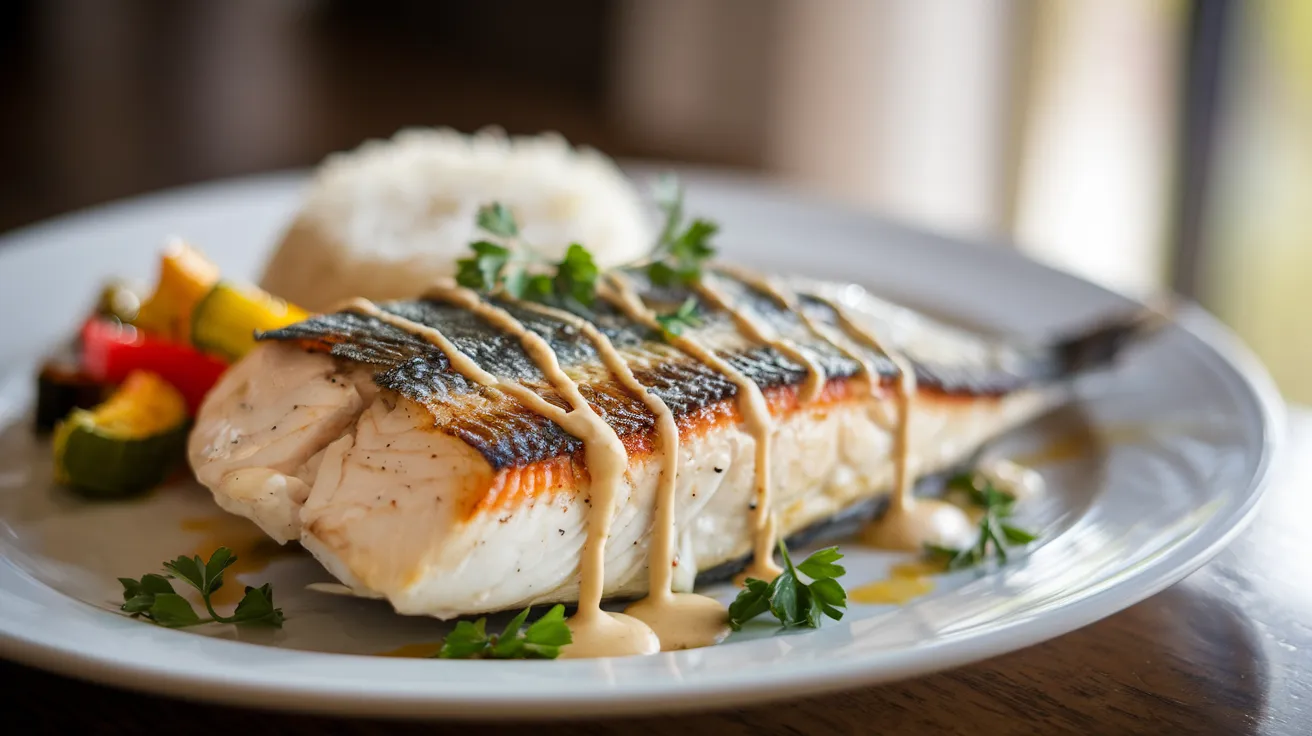
The Perfect Ono Fish Recipes for Busy Weeknights
Ever stared at fish at the market and felt lost about what to do with it? Ono fish (also called wahoo) is your answer.
This delicious white fish has a mild, sweet flavor that even picky eaters love. The firm texture means it won’t fall apart when cooking – perfect for beginners!
Our Ono fish recipes take just 35 minutes from start to finish. You’ll get a restaurant-quality dish without the hefty price tag. If you enjoy Asian-inspired seafood, you might also like our Japanese simmered fish recipe that uses similar cooking techniques.
Let’s learn how to make this Hawaiian favorite that’s packed with protein and good fats.
Nutrition Comparison
| Nutrient | Ono Fish (4 oz) | Salmon (4 oz) | Chicken Breast (4 oz) |
|---|---|---|---|
| Calories | 120 | 206 | 124 |
| Protein | 25g | 22g | 26g |
| Fat | 2g | 12g | 1g |
| Omega-3s | High | Very High | Low |
| Vitamin D | Good source | Excellent source | Poor source |
| Sodium | 60mg | 56mg | 70mg |
Equipment & Ingredients
Kitchen Tools
| Tool | Purpose |
|---|---|
| Non-stick skillet | For searing the fish |
| Sharp knife | For slicing ingredients |
| Cutting board | For prep work |
| Measuring spoons | For precise seasoning |
| Tongs | For flipping fish safely |
| Instant-read thermometer | For checking doneness |
| Citrus juicer | For fresh lime juice |
Ingredients (Serves 4)
| Ingredient | Amount | Purpose |
|---|---|---|
| Ono fish fillets | 1½ pounds (4 fillets) | Main protein |
| Olive oil | 2 tablespoons | For cooking |
| Garlic | 3 cloves, minced | Flavor base |
| Lime | 2, juiced and zested | Acidity |
| Fresh thyme | 1 tablespoon, chopped | Aromatics |
| Sweet paprika | 1 teaspoon | Color and mild heat |
| Salt | 1 teaspoon | Seasoning |
| Black pepper | ½ teaspoon | Seasoning |
| Unsalted butter | 2 tablespoons | Finishing richness |
| Fresh parsley | 2 tablespoons, chopped | Garnish |
Substitutions
- No Ono fish? Use mahi-mahi, swordfish, or halibut instead
- No fresh thyme? Use 1 teaspoon dried thyme or 1 tablespoon fresh rosemary
- Dairy-free? Replace butter with 1 tablespoon olive oil and 1 teaspoon lemon juice
- No lime? Substitute with lemon juice and zest
Prep Time & Planning
- Prep Time: 15 minutes
- Cook Time: 20 minutes
- Total Time: 35 minutes
- Servings: 4 people
- Calories: 290 per serving
Step-by-Step Ono Fish Recipes Instructions
Preparation Phase
- Take fish out of refrigerator
- Remove the Ono fish from the refrigerator 15 minutes before you plan to start cooking
- Place the fillets on a plate on your counter to come to room temperature
- Why this matters: Cold fish cooks unevenly and tends to stick to the pan
- Beginner tip: Don’t leave fish out longer than 20 minutes for food safety reasons
- Gather all ingredients and tools
- Place all ingredients on your counter
- Set out all tools including your skillet, knife, cutting board, measuring spoons, tongs, and thermometer
- Why this matters: Having everything ready prevents rushing while cooking
- Beginner tip: Read through the entire recipe once before starting
- Prepare the fish
- Place fish fillets on a clean plate or cutting board
- Take several paper towels and press firmly on both sides of each fillet
- Continue patting until the paper towels no longer pick up moisture
- Why this matters: Dry fish gets a better sear and doesn’t steam in the pan
- Beginner tip: Look closely at the fish surface – it should look matte, not shiny with moisture
- Check for bones
- Place one fillet on your cutting board
- Run your fingertips very gently across the surface of the fish, going against the grain
- If you feel any hard points sticking up, these are bones
- Use clean tweezers or fish pliers to grasp each bone at its base and pull straight up
- Repeat with all fillets
- Why this matters: Removing bones prevents choking hazards
- Beginner tip: Work in good lighting so you can see any bones clearly
- Mix the dry seasoning
- Take a small mixing bowl
- Add exactly 1 teaspoon salt (use measuring spoon)
- Add ½ teaspoon black pepper (use measuring spoon)
- Add 1 teaspoon sweet paprika (use measuring spoon)
- Why this matters: Measuring ensures balanced flavor
- Beginner tip: Level off each measuring spoon with the back of a knife for accuracy
- Zest the lime
- Wash 1 lime thoroughly under cold water
- Dry it completely with a paper towel
- Hold a fine grater or microplane over your seasoning bowl
- Gently rub the lime against the grater, turning it as you go
- Only grate the green outer layer (the white pith underneath is bitter)
- Continue until you’ve removed most of the green zest
- Why this matters: Lime zest contains aromatic oils that add flavor
- Beginner tip: If you accidentally grate the white pith, discard that portion
- Prepare the aromatics
- Place 3 garlic cloves on your cutting board
- Using the flat side of your knife, press down firmly on each clove to crush it
- Remove the papery skin completely
- Mince the garlic by chopping it repeatedly until it’s in very small pieces (about the size of grains of rice)
- Why this matters: Properly minced garlic distributes flavor evenly
- Beginner tip: Keep your knife tip on the board and rock the blade up and down for efficient mincing
- Prepare the herbs
- Rinse thyme sprigs under cold water and pat dry with paper towels
- Hold the stem at the thicker end with one hand
- With your other hand, pinch the stem and pull against the direction of growth to strip off the leaves
- Discard the woody stems
- Chop the leaves by rocking your knife back and forth until they’re finely cut
- Measure 1 tablespoon of the chopped thyme
- Repeat the same process with parsley to get 2 tablespoons chopped
- Set both herbs aside separately
- Why this matters: Fresh herbs add brightness and flavor
- Beginner tip: If the herbs are still wet, they’ll stick to your knife – make sure they’re completely dry
- Juice the limes
- Cut 2 limes in half across the middle (not lengthwise)
- Using a citrus juicer, press down and twist each half to extract all the juice
- If you don’t have a juicer, you can squeeze by hand while using a fork to press into the flesh
- Strain out any seeds
- Measure out ¼ cup of juice
- Why this matters: Fresh juice has brighter flavor than bottled
- Beginner tip: Roll the limes firmly on the counter before cutting to release more juice
- Reserve some seasoning
- Take 1 tablespoon of your mixed dry seasoning and set it aside in a separate small bowl
- This will be used for the sauce later
- Why this matters: Adding seasoning at different stages builds flavor depth
- Beginner tip: Use clean measuring spoons to avoid contamination
Cooking Phase
- Season the fish
- Place your fish fillets on a clean surface
- Pour ½ tablespoon olive oil into your hands and rub it lightly over both sides of each fillet
- Sprinkle half of your remaining seasoning mix evenly over the top side of all fillets
- Turn the fillets over and sprinkle the remaining seasoning on the other side
- Use your fingertips to gently pat the seasoning into the flesh
- Why this matters: The oil helps the seasoning stick and prevents sticking to the pan
- Beginner tip: Try to distribute the seasoning evenly across all fillets
- Heat the pan properly
- Place your non-stick skillet on the stove
- Turn heat to medium-high
- Add 1 tablespoon olive oil to the pan
- Wait 2-3 minutes for the pan to heat properly
- How to know it’s ready: The oil will spread easily across the pan and shimmer with slight movement
- Beginner warning: If you see smoke, the pan is too hot – remove from heat momentarily and reduce to medium
- Why this matters: Starting with a properly heated pan prevents sticking
- Beginner tip: Hold your hand 6 inches above the pan – you should feel strong heat radiating
- Place fish in pan correctly
- Using tongs or your hands, carefully place each fillet in the hot pan
- If the fillets have skin, place them skin-side down first
- Leave at least 1 inch of space between fillets
- If your pan is too small, cook in batches rather than crowding
- Why this matters: Crowding causes steaming instead of searing
- Beginner tip: Place fish away from you to avoid oil splatter
- Press down firmly
- Using a spatula or the back of your tongs, press down gently but firmly on each fillet for 10 seconds
- Apply even pressure across the surface
- Why this matters: This prevents the fish from curling up and ensures even cooking
- Beginner tip: If you hear a sizzling sound, that’s good! It means your pan was properly heated
- Let fish cook undisturbed
- Once all fillets are in the pan, do not move them
- Set a timer for 4 minutes
- Resist the urge to peek underneath or move the fish
- Why this matters: Moving too early prevents a good crust from forming
- Beginner tip: Use this time to clean up your prep area
- Check for proper sear
- After 4 minutes, use a thin spatula to gently lift one edge of a fillet
- Look for a golden-brown crust
- If it’s not browned yet, cook for another 30-60 seconds
- If it’s sticking to the pan, it likely needs more time to release naturally
- Why this matters: A proper sear adds flavor and texture
- Beginner tip: The fish will release more easily from the pan when it’s properly seared
- Flip the fish carefully
- Once seared, slide a fish spatula completely under one fillet
- In one swift, confident motion, flip the fish over
- Repeat with each fillet
- Why this matters: Proper flipping prevents breaking the fish
- Beginner tip: If you’re nervous, you can use a second spatula to help stabilize during flipping
- Cook second side
- Set timer for 3 minutes
- Again, let fish cook undisturbed
- Why this matters: The second side typically cooks faster than the first
- Beginner tip: The fish will shrink slightly and become more opaque as it cooks
- Check for doneness
- After 3 minutes, insert an instant-read thermometer into the thickest part of the largest fillet
- For safety, the temperature should read 145°F
- If you don’t have a thermometer, use a fork to gently twist in the middle of the thickest part
- The fish should flake easily and be opaque throughout
- If needed, cook for an additional 1-2 minutes
- Why this matters: Properly cooked fish is both safe and delicious
- Beginner tip: Fish continues to cook slightly after removing from heat, so take it off when it’s just done
- Remove and rest the fish
- Once done, use your spatula to transfer each fillet to a clean plate
- Loosely cover with aluminum foil (tent it so it’s not touching the fish)
- Let rest for 3-5 minutes
- Why this matters: Resting allows juices to redistribute for moist fish
- Beginner tip: Don’t seal the foil tightly or the fish will steam and become soggy
- Make the sauce (same pan)
- Return the same pan to the stove
- Reduce heat to medium-low
- Add 2 tablespoons unsalted butter
- Swirl the pan as the butter melts
- Why this matters: Using the same pan captures all the flavorful browned bits from cooking the fish
- Beginner tip: The butter should melt but not brown – if it starts to brown, reduce heat immediately
- Add aromatics to sauce
- Once butter is melted, add all the minced garlic
- Stir constantly for exactly 30 seconds using a wooden spoon or heat-resistant spatula
- Why this matters: Garlic burns easily and becomes bitter
- Beginner warning: Watch carefully – if garlic starts to brown, proceed immediately to next step
- Add liquid and reduce sauce
- Pour in all of the lime juice you prepared earlier
- Add all of the chopped thyme
- Use your spoon to scrape the bottom of the pan, loosening any browned bits
- Let bubble gently for 1 minute
- Why this matters: This creates a flavorful sauce while deglazing the pan
- Beginner tip: The sauce should reduce slightly but not completely evaporate
- Finish the sauce
- Add the 1 tablespoon of reserved seasoning mix you set aside earlier
- Stir to combine thoroughly
- Let cook for 30 more seconds
- Why this matters: Adding seasoning at the end provides a fresh flavor boost
- Beginner tip: Taste a tiny amount of sauce (careful, it’s hot!) and add a pinch more salt if needed
- Return fish to pan
- Gently place the fish fillets back into the pan with the sauce
- Using a spoon, scoop sauce over each fillet several times
- Heat for just 30 seconds to warm through
- Why this matters: This coats the fish with flavor without overcooking
- Beginner tip: Be gentle to avoid breaking the fillets
- Garnish the dish
- Turn off the heat
- Sprinkle all of the chopped parsley evenly over the fish
- Why this matters: Fresh herbs add color and a final flavor accent
- Beginner tip: Sprinkle from a height for more even distribution
Serving Suggestions
- Plate the dish properly
- Using a fish spatula, carefully transfer one fillet to each of four dinner plates
- Spoon 1-2 tablespoons of the pan sauce over each fillet
- Why this matters: Proper plating enhances the dining experience
- Beginner tip: Wipe any drips or spills from the edge of the plate with a clean paper towel
- Complete the meal
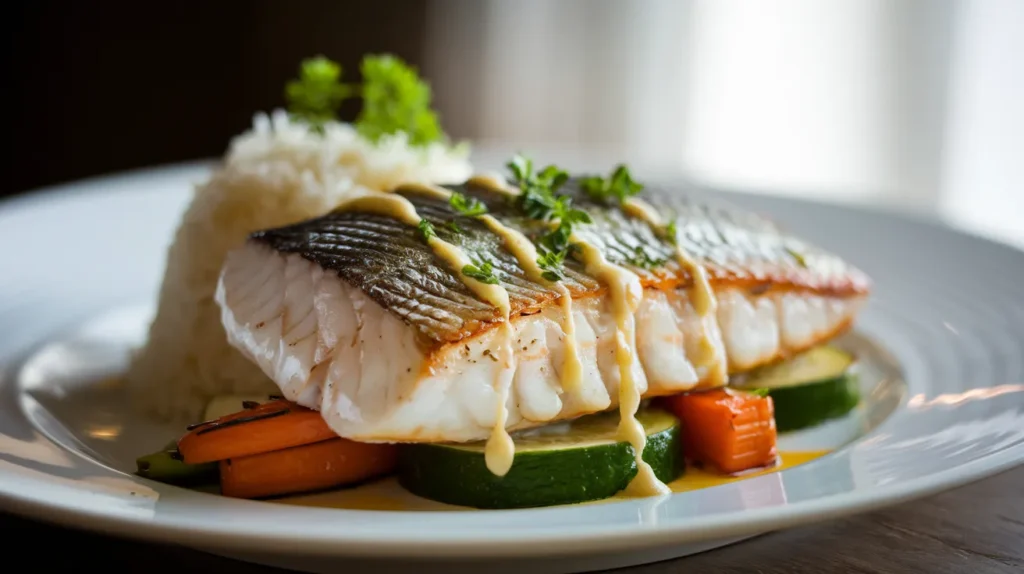
- Serve immediately with your choice of sides:
- Simple option: Steamed white rice and lemon wedges
- Colorful option: Roasted vegetables (bell peppers, zucchini, cherry tomatoes)
- Impressive option: Mango salsa and coconut rice
- Light option: Mixed green salad with vinaigrette
- Why this matters: The right sides complement the fish without overpowering it
- Beginner tip: Choose one starch and one vegetable for a balanced plate
- Serve immediately with your choice of sides:
Troubleshooting Common Ono Fish Recipes
Common Problems & Solutions
Problem: Fish sticking to the pan
- Solution:
- Make sure your pan is fully preheated before adding fish
- Pat fish completely dry with paper towels
- Use enough oil to coat the pan surface
- Don’t try to flip too early – fish will release naturally when properly seared
- Use a proper fish spatula with a thin, flexible edge
Problem: Fish is dry and overcooked
- Solution:
- Use a timer – don’t guess on cooking times
- Invest in an instant-read thermometer (fish is done at 145°F)
- Remember fish continues cooking after removal from heat
- Look for visual cues – fish should be just opaque, not shrunken or tough
- If cooking multiple batches, the pan gets hotter, so reduce cooking time for later batches
Problem: Sauce is too thin
- Solution:
- Simmer sauce longer to reduce more liquid
- Mix 1/2 teaspoon cornstarch with 1 teaspoon cold water, then stir into sauce
- Add an extra 1/2 tablespoon butter at the end and swirl to incorporate
- If desperate, remove fish, reduce sauce by half, then return fish
Problem: Sauce is too thick or reduced too much
- Solution:
- Add 2-3 tablespoons of water or chicken broth
- Add an extra squeeze of lime juice
- Add another small pat of butter
Problem: Seasoning isn’t sticking to fish
- Solution:
- Make sure fish is completely dry before seasoning
- Lightly oil fish before applying seasoning
- Press seasoning gently into flesh with fingers
- Season just before cooking, not too far in advance
Problem: Garlic burned in the sauce
- Solution:
- Start over with the sauce using fresh garlic
- Next time, reduce heat further before adding garlic
- Keep garlic moving constantly while cooking
- Mix garlic with butter before adding to pan
Variations & Substitutions
Delicious Ono Fish Recipes Variations
- Tropical Ono
- Add 1 tablespoon honey and 1/4 cup diced pineapple to the sauce
- Garnish with chopped cilantro instead of parsley
- Serve with coconut rice and grilled pineapple slices
- For a complementary starter, try our corn and fish maw soup which pairs wonderfully with this tropical flavor profile
- Spicy Cajun Ono
- Replace paprika with 1 tablespoon Cajun seasoning
- Add 1/4 teaspoon cayenne pepper for extra heat
- Add a dash of hot sauce to the finished sauce
- Serve with dirty rice and coleslaw
- Mediterranean Ono
- Use lemon instead of lime
- Add 1 tablespoon capers and 1/4 cup halved cherry tomatoes to the sauce
- Add 2 tablespoons chopped olives
- Garnish with fresh basil
- Serve with roasted potatoes and steamed green beans
- Asian-Inspired Ono
- Replace lime with orange juice
- Add 1 tablespoon soy sauce and 1 teaspoon grated ginger
- Add 1/2 teaspoon sesame oil at the end
- Garnish with sliced green onions and sesame seeds
- Serve with steamed jasmine rice and bok choy
- Herb Garden Ono
- Add a mixture of fresh herbs: 1 tablespoon each of dill, chives, and tarragon
- Use white wine (1/4 cup) instead of lime juice
- Finish with a splash of cream (2 tablespoons)
- Serve with roasted fingerling potatoes and asparagus
Storage & Reheating
Proper Storage
- Refrigeration:
- Allow fish to cool completely (no longer than 1 hour at room temperature)
- Place in an airtight container with sauce
- Store in coldest part of refrigerator (usually the back)
- Consume within 2 days for best quality
- Beginner tip: Label container with date and contents
- Freezing:
- Not recommended for cooked Ono as the texture becomes mushy when thawed
- If you must freeze, use within 1 month
- Thaw overnight in refrigerator, never at room temperature
Reheating Methods
- Gentle Microwave Method
- Place fish on a microwave-safe plate
- Drizzle 1 teaspoon water or broth over fish
- Cover with a damp paper towel
- Heat on 50% power for 30-second intervals
- Check temperature between intervals
- Stop heating when just warm throughout (about 1 minute total)
- Warning: Full power will dry out and ruin the fish
- Beginner tip: Arranging fish in a circle (with space in center) heats more evenly
- Stovetop Method (Best Option)
- Heat a non-stick skillet over low heat
- Add 1 tablespoon olive oil or butter
- When just warm, place fish in pan
- Add 1-2 tablespoons water, broth, or white wine
- Cover pan with lid
- Warm for 2-3 minutes until heated through (internal temp of 125°F is sufficient for reheating)
- Beginner tip: This method better preserves moisture and texture
- Oven Method
- Preheat oven to 275°F (low temperature is key)
- Place fish in a baking dish
- Add 1-2 tablespoons of water or broth to the dish
- Cover tightly with foil
- Heat for 10-15 minutes until just warmed through
- Beginner tip: Spray foil with non-stick spray to prevent sticking to fish
Safety Notes & Tips
Food Safety
- Fish must reach 145°F internal temperature for safe consumption
- Never leave raw fish at room temperature for more than 20 minutes
- Wash hands with soap for 20 seconds before and after handling raw fish
- Use separate cutting boards for fish and other ingredients (color-coded boards help)
- Sanitize all surfaces that contact raw fish with diluted bleach solution or kitchen sanitizer
- Refrigerate leftovers within 1 hour of cooking
- Beginner warning: Do not refreeze previously frozen fish
Pro Tips
- For Perfect Searing:
- Make sure fish is completely dry before seasoning
- Test your pan’s heat by sprinkling a few drops of water – they should dance and evaporate immediately
- Don’t overcrowd the pan – cook in batches if needed
- Let fish cook undisturbed until it releases naturally from the pan
- Beginner tip: Use a timer rather than guessing cooking times
- For Even Cooking:
- Choose fillets of similar thickness and size
- If fillets have a thin end, fold it under for even thickness
- Let fish come to room temperature before cooking
- Use a thermometer to check doneness in the thickest part
- Beginner tip: If fillets vary in thickness, start thicker pieces 1-2 minutes before thinner pieces
- For Best Flavor:
- Buy the freshest fish possible – it should smell like the ocean, not “fishy”
- Fresh fish eyes should be clear, not cloudy
- Store raw fish on ice in the refrigerator until ready to use
- Use fresh herbs and freshly squeezed citrus for brightest flavor
- Beginner tip: If using frozen Ono, thaw completely in the refrigerator overnight, never under warm water
- For Beginners:
- Start with slightly lower heat if you’re nervous
- Use a non-stick pan for your first attempts
- Have all ingredients prepped before heating the pan
- Taste as you go (except raw fish, of course)
- Don’t be afraid of seasonings – fish can handle bold flavors
- It’s better to slightly undercook than overcook – you can always cook it a bit more