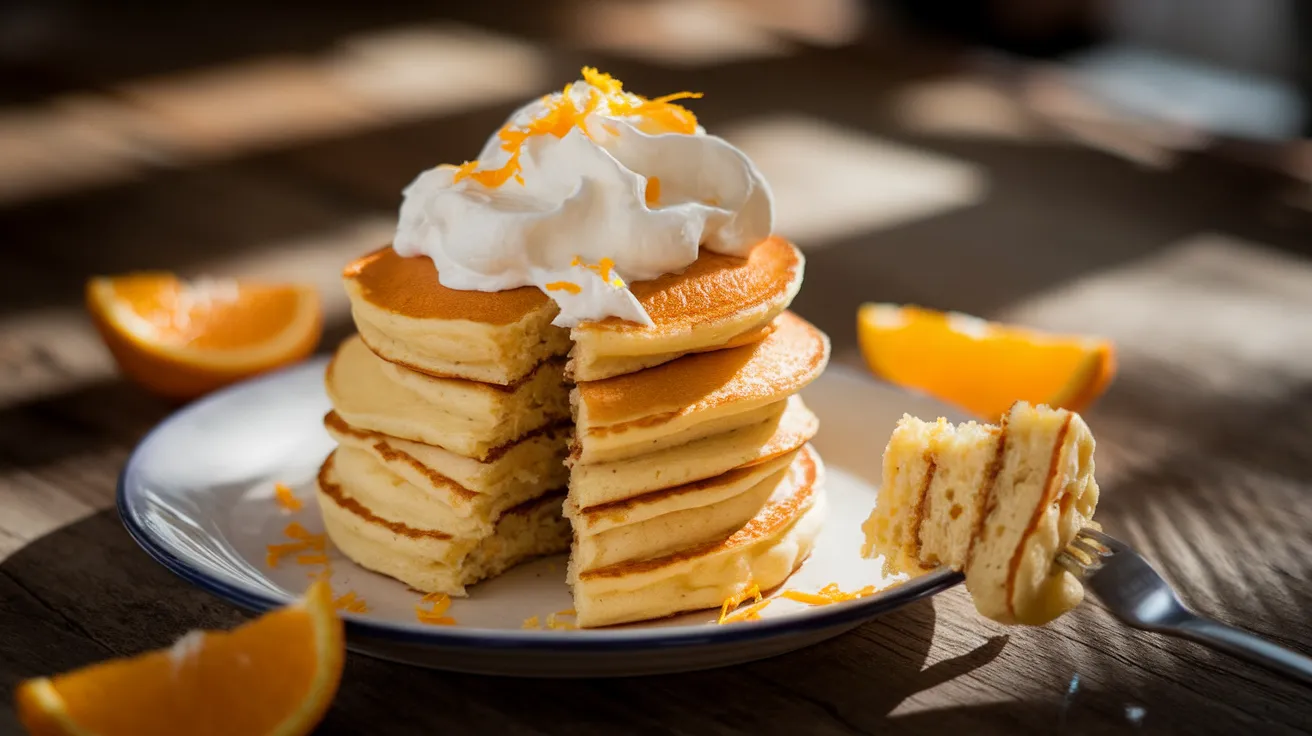
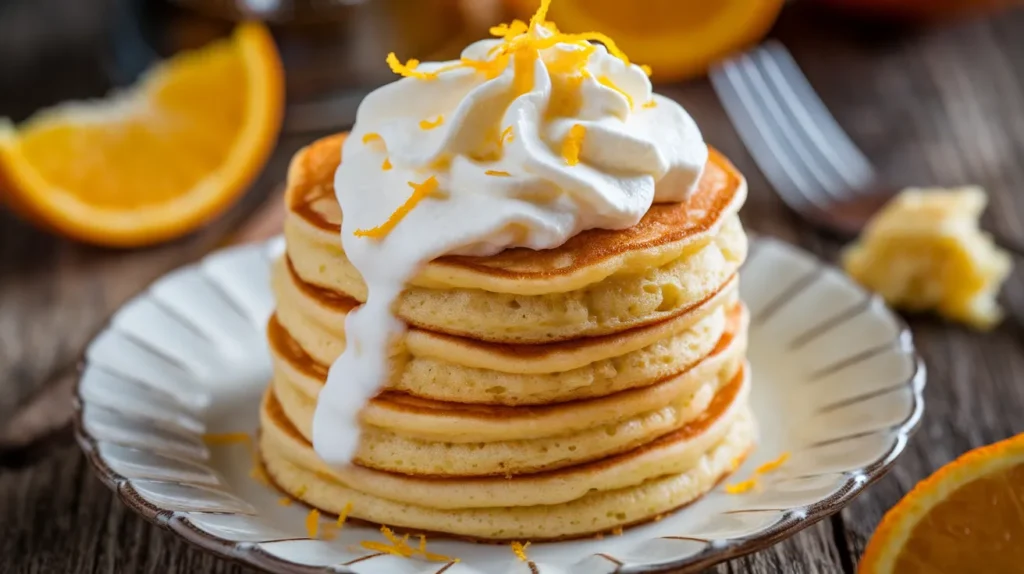
These heavenly orange cream pancakes combine the bright, zesty flavor of fresh oranges with rich, creamy textures that melt in your mouth. Perfect for weekend brunches or special occasions, these orange cream pancakes deliver restaurant-quality results using simple ingredients you likely have at home.
SERVES: 4 | PREP: 20 MIN | COOK: 25 MIN | TOTAL: 45 MIN
Ingredients for Perfect Orange Cream Pancakes
Pancake Base
| Ingredient | Amount | Notes |
|---|---|---|
| All-purpose flour | 2 cups | Sifted for extra fluffiness |
| Granulated sugar | 3 tablespoons | Balances the citrus |
| Baking powder | 2 teaspoons | Fresh for best rise |
| Salt | 1/2 teaspoon | Enhances all flavors |
| Large eggs | 2 | Room temperature works best |
| Whole milk | 1 1/4 cups | Creates tender texture |
| Heavy cream | 1/2 cup | The secret to richness |
| Fresh orange juice | 1/3 cup | From 2 large oranges |
| Orange zest | 2 tablespoons | Packed with citrus oils |
| Vanilla extract | 1 teaspoon | Pure vanilla preferred |
| Melted butter | 3 tablespoons | Plus extra for cooking |
Orange Cream Topping
| Ingredient | Amount | Purpose |
|---|---|---|
| Heavy cream | 1 cup | Whips to perfection |
| Powdered sugar | 3 tablespoons | Sweetens without grittiness |
| Orange zest | 1 tablespoon | Fresh citrus punch |
| Vanilla extract | 1/2 teaspoon | Rounds out flavors |
Detailed Step-by-Step Instructions for Orange Cream Pancakes
Phase 1: Kitchen Setup and Preparation (8 minutes)
1. Set up your workspace properly Clear your counter space and gather all ingredients. Place a large mixing bowl on your left, measuring cups in the center, and ingredients on your right. This setup prevents mistakes and makes cooking smoother.
2. Preheat your cooking surface Turn your electric griddle to 350°F or place a large skillet over medium heat. Wait 5-7 minutes for even heating. Uneven heat creates pancakes that are burnt on one side and raw on the other.
3. Prepare your oranges like a pro Wash 2 large oranges under cold water and pat dry. Using a microplane grater, grate only the orange skin (avoid the white pith underneath – it’s bitter). You need 2 tablespoons of zest total. After zesting, cut oranges in half and squeeze out 1/3 cup fresh juice. Strain out any seeds using a fine mesh strainer.
4. Bring ingredients to room temperature Take eggs and milk from the refrigerator 15 minutes before cooking. Cold ingredients don’t blend well and can create lumpy batter. If you forgot this step, place eggs in warm water for 5 minutes to warm them quickly.
Phase 2: Creating the Perfect Dry Mix (5 minutes)
5. Measure flour correctly Use the spoon-and-level method: spoon flour into measuring cups without packing, then level with a knife. Scooping directly from the bag packs flour, making dense pancakes instead of fluffy orange cream pancakes.
6. Combine dry ingredients thoroughly In your large mixing bowl, whisk together 2 cups flour, 3 tablespoons sugar, 2 teaspoons baking powder, and 1/2 teaspoon salt. Whisk for 30 seconds to ensure even distribution. Uneven mixing creates pockets of salty or bland bites.
7. Create a mixing well Use a spoon to create a crater-like depression in the center of your flour mixture. This well helps prevent overmixing when you add wet ingredients – the key to tender pancakes.
Phase 3: Wet Ingredient Mastery (7 minutes)
8. Beat eggs properly Crack 2 eggs into a medium bowl. Using a whisk, beat vigorously for 30 seconds until the mixture becomes slightly frothy and lightens in color. This incorporates air, making your orange cream pancakes lighter.
9. Add dairy ingredients gradually Pour in 1 1/4 cups milk and 1/2 cup heavy cream slowly while whisking. The cream might look slightly thick – this is normal and creates the rich texture that makes these pancakes special.
10. Incorporate citrus elements carefully Add your 1/3 cup fresh orange juice and 2 tablespoons orange zest. Stir gently but thoroughly. The mixture might look slightly curdled when citrus meets dairy – don’t worry, this is completely normal and won’t affect the final result.
11. Add flavor enhancers Stir in 1 teaspoon vanilla extract until evenly distributed. Vanilla enhances both the orange and cream flavors without overpowering them.
12. Handle melted butter correctly Melt 3 tablespoons butter in the microwave for 30 seconds or in a small saucepan over low heat. Let it cool for 2 minutes – hot butter will cook your eggs. Add the cooled butter to your wet mixture while whisking constantly to prevent it from solidifying into chunks.
Phase 4: The Critical Mixing Step (3 minutes)
13. Combine wet and dry ingredients properly Pour ALL the wet ingredients into the flour well at once. Using a whisk, start mixing from the center and work outward in gentle circular motions. This technique prevents flour from flying everywhere.
14. Stop mixing at the right moment Mix only until ingredients are just combined – you should still see small streaks of flour throughout the batter. The mixture will look lumpy and rough. This is perfect! Smooth batter means you’ve overmixed, which creates tough, chewy orange cream pancakes.
Phase 5: Cooking Your Orange Cream Pancakes (18 minutes)
15. Test your griddle temperature Sprinkle a few drops of water on your cooking surface. The water should dance and sizzle, evaporating within 2-3 seconds. If it evaporates immediately, your heat is too high. If it just sits there, increase the temperature and wait 2 more minutes.
16. Grease the cooking surface correctly Use a paper towel to spread a thin layer of butter across the griddle. Too much grease creates uneven browning and greasy-tasting pancakes. Re-grease lightly between each batch.
17. Pour perfect portions Use a 1/4 cup measuring cup to portion batter. Hold the cup close to the griddle surface and pour steadily in one spot – don’t spread the batter around. Leave at least 2 inches between pancakes as they’ll spread naturally.
18. Watch for the first-side signals Cook without touching for 2-3 minutes. Look for these signs: edges will look set and slightly dry, bubbles will form across the entire surface, and when those bubbles pop, they should stay open (not close back up). The center might still look slightly wet – this is perfect timing.
19. Master the flip technique Slide a thin spatula completely under the pancake in one smooth motion. Flip quickly but gently – don’t press down afterward. Pressing squashes the fluffy texture you’ve worked to create.
20. Perfect the second side Cook the second side for 1-2 minutes only. It cooks faster because the pancake is already hot. Look for golden brown color matching the first side. The pancake should spring back lightly when touched.
21. Keep pancakes warm properly Place finished pancakes on a baking sheet in a 200°F oven. Don’t stack them directly – this creates soggy bottoms. If you must stack, place parchment paper between layers.
Phase 6: Creating Orange Cream Topping (5 minutes)
22. Prepare your whipping equipment Use a clean, dry bowl and beaters. Any trace of grease or water prevents proper whipping. Chill the bowl in the freezer for 5 minutes if your kitchen is very warm.
23. Whip cream to perfect consistency Start beating 1 cup heavy cream on medium speed until it begins to thicken (about 1 minute). Gradually increase to high speed. Stop when soft peaks form – they should hold their shape but still look creamy, not stiff.
24. Sweeten and flavor the cream Add 3 tablespoons powdered sugar, 1 tablespoon orange zest, and 1/2 teaspoon vanilla extract. Fold these ingredients in gently with a spatula using an up-and-over motion. Overmixing at this stage turns your cream into butter.
Chef’s Notes for Orange Cream Pancakes
Temperature Consistency: Medium heat throughout cooking is crucial for these orange cream pancakes. High heat burns the sugars in the orange juice, while low heat creates pale, tough results.
Fresh Orange Impact: The difference between fresh and bottled orange juice is remarkable in these pancakes. Fresh juice contains natural enzymes and oils that create brighter, more complex flavors.
Cream Integration: Using heavy cream in both the batter and topping creates layers of richness that make these orange cream pancakes restaurant-quality.
Timing Strategy: Start your orange cream topping while the last batch cooks. Fresh whipped cream has the best texture when served immediately.
Nutrition Information (Per Serving)
- Calories: 485
- Protein: 12g
- Carbohydrates: 52g
- Fat: 26g
- Fiber: 2g
- Sugar: 18g
Creative Orange Cream Pancakes Variations
Double Orange Cream: Add cream cheese to your batter by beating 4 oz softened cream cheese with the eggs before adding other wet ingredients. This creates ultra-rich orange cream pancakes with tangy depth.
Chocolate Orange Dreams: Fold 1/4 cup mini chocolate chips into the finished batter. The combination tastes like breakfast candy – perfect for special occasions.
Tropical Orange Stack: Replace half the orange juice with pineapple juice and add 1/4 cup shredded coconut to the batter. For more creative pancake ideas, check out these no-egg Bisquick pancakes for dietary alternatives.
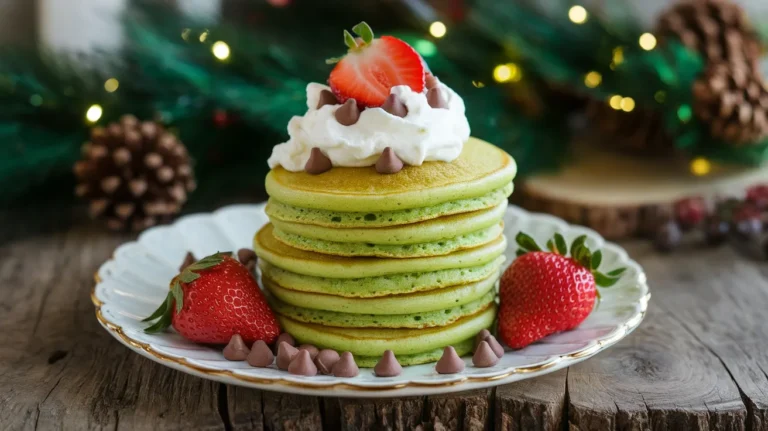
Holiday Orange Presentation: Stack your orange cream pancakes in festive shapes like these pancake Christmas trees and dust with powdered sugar for memorable holiday breakfasts.
Storage & Reheating Your Orange Cream Pancakes
Refrigerator Storage: Cool pancakes completely on wire racks (about 15 minutes). Layer between parchment paper in airtight containers. Properly stored orange cream pancakes stay fresh for 3 days.
Freezer Storage: Wrap individual pancakes tightly in plastic wrap, then place in freezer bags with air removed. Label with the date – they maintain quality for 2 months.
Best Reheating Methods:
- Toaster: Creates crispy edges closest to fresh-made texture
- Microwave: Place on microwave-safe plate, cover with slightly damp paper towel, heat 30 seconds per pancake
- Oven: Preheat to 350°F, wrap pancakes in foil, heat 5-7 minutes
Orange Cream Topping Storage: Fresh whipped cream stays fluffy for 24 hours when refrigerated in airtight containers. Re-whisk briefly before serving to restore texture.
Troubleshooting Common Orange Cream Pancakes Problems
Dense, Heavy Pancakes: This happens from overmixing batter or using too much flour. Mix only until ingredients just combine – lumpy batter is actually perfect for fluffy results.
Pale, Unappetizing Color: Your cooking temperature is too low. Increase heat slightly and wait 2 minutes before testing with water drops again.
Burnt Outside, Raw Inside: Heat is too high for these orange cream pancakes. Lower temperature and cook longer on the first side until bubbles form properly.
Flat Pancakes That Don’t Rise: Check your baking powder freshness by mixing 1 teaspoon with hot water – it should fizz vigorously. Replace if over 18 months old.
Tough, Chewy Texture: Usually caused by overmixing or measuring flour incorrectly. Always spoon flour into measuring cups and level – never scoop or pack.
Essential Equipment for Orange Cream Pancakes
- Large mixing bowls (2 minimum)
- Wire whisk
- Measuring cups and spoons
- Microplane grater for orange zest
- Electric griddle or large skillet
- 1/4 cup measuring scoop
- Thin, flexible spatula
- Electric mixer for whipped cream
- Fine-mesh strainer
Organized Shopping List
Dairy Section
- Heavy cream (1 pint container)
- Whole milk (half-gallon)
- Large eggs (dozen)
- Butter (1 stick needed)
Produce Section
- Fresh oranges (2 large for juice and zest)
Baking Aisle
- All-purpose flour
- Fresh baking powder
- Granulated sugar
- Powdered sugar
- Pure vanilla extract
- Table salt
Success Secrets for Perfect Orange Cream Pancakes
1. Temperature Matters: Room temperature ingredients blend more smoothly and create more tender orange cream pancakes. Remove dairy from refrigerator 30 minutes before cooking.
2. Zest First, Juice Second: Always zest oranges before juicing them. The oils from zesting coat your grater, making cleanup easier and maximizing flavor extraction.
3. Rest Your Batter: Let mixed batter sit for 5 minutes before cooking. This resting period allows flour to fully hydrate, creating more tender, fluffy orange cream pancakes.
4. Maintain Consistent Heat: Steady medium heat produces evenly golden pancakes. If using a stovetop, adjust temperature between batches to maintain that perfect water-drop sizzle.
5. Timing Is Everything: Start your orange cream topping during the last batch of pancakes. Fresh whipped cream has the best texture and these orange cream pancakes taste incredible when everything comes together hot and fresh.