Key Takeaways:
- Perfect, juicy chicken breasts every time with this foolproof method
- Simple seasoning that enhances flavor without overpowering
- Ready in just 30 minutes from start to finish
- Works for meal prep – stays juicy when reheated
Why Most Chicken Breasts Turn Out Dry (And How We Fix That)
Dry, rubbery chicken breasts are the worst. You spend time cooking, only to end up with something you need to drown in sauce to enjoy.
But it doesn’t have to be that way.
This oven baked chicken breast recipe solves the dry chicken problem once and for all. By using the right temperature, quick cooking time, and a simple brining technique, you’ll get perfectly juicy chicken every single time.
If you’ve tried other oven baked chicken breast recipes without success, don’t worry. The secret lies in a few simple techniques that make all the difference. Unlike some complicated recipes, this oven baked chicken breast recipe is designed for beginners and experienced cooks alike.
Let’s make chicken that actually tastes good.
Nutrition Facts
| Nutrient | Amount Per Serving |
|---|---|
| Calories | 165 |
| Protein | 31g |
| Fat | 4g |
| Saturated Fat | 1g |
| Carbohydrates | 1g |
| Fiber | 0g |
| Sugar | 0g |
| Sodium | 350mg |
What You’ll Need
Ingredients (Serves 4)
| Ingredient | Amount |
|---|---|
| Boneless, skinless chicken breasts | 4 (about 2 pounds total) |
| Olive oil | 2 tablespoons |
| Salt | 1 tablespoon (for brine) + 1 teaspoon (for seasoning) |
| Black pepper | 1 teaspoon |
| Garlic powder | 1 teaspoon |
| Paprika | 1 teaspoon |
| Italian seasoning | 1 teaspoon |
| Water | 4 cups (for brining) |
Kitchen Tools
| Tool | Purpose |
|---|---|
| Large bowl | For brining chicken |
| Baking sheet | For cooking chicken |
| Parchment paper or foil | To line baking sheet |
| Measuring spoons | For measuring seasonings |
| Meat thermometer | To check doneness |
| Tongs | For handling chicken |
| Paper towels | For drying chicken |
| Small bowl | For mixing seasonings |
| Pastry brush or spoon | For applying oil |
| Timer or clock | For tracking brining time |
Substitutions
No olive oil? Use avocado oil, canola oil, or melted butter.
No Italian seasoning? Mix equal parts dried basil, oregano, and thyme.
No paprika? Try chili powder (use half the amount) or skip it.
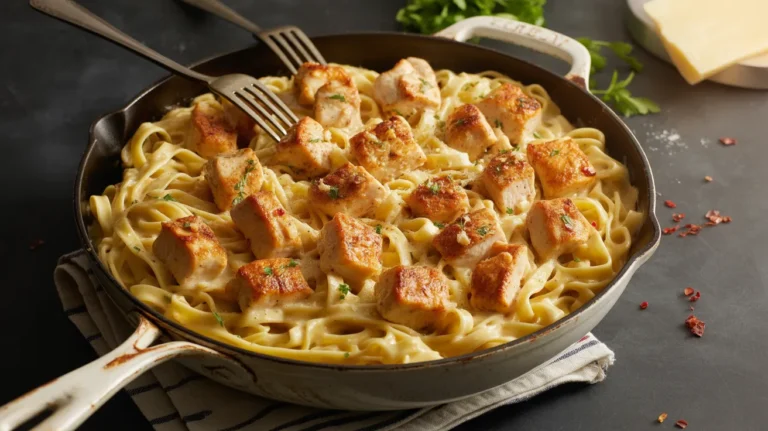
If you enjoy chicken dishes with a lemony twist, you might also want to try my baked lemon butter chicken recipe after mastering this basic version.
Super Detailed Oven Baked Chicken Breast Recipe Instructions for Beginners
Prep Time: 10 minutes
Cook Time: 20 minutes
Total Time: 30 minutes
Preparation Phase
- Create a quick brine:
- Take out a large bowl that can fit all 4 chicken breasts with room to spare.
- Measure exactly 4 cups of cool water and pour into the bowl.
- Measure 1 tablespoon of salt (table salt or kosher salt both work fine).
- Add the salt to the water.
- Using a spoon, stir the water for about 30 seconds until you can’t see any salt granules and the salt is completely dissolved.
- Beginner tip: The brine doesn’t need to be cold, room temperature water dissolves salt more easily.
- Prepare the chicken:
- Remove the chicken breasts from their packaging.
- Check for and remove any excess fat or unwanted bits with kitchen scissors if needed.
- Place all 4 chicken breasts into the salt water mixture, making sure they’re fully submerged.
- Set a timer for exactly 15 minutes.
- Beginner tip: Don’t brine longer than 15-20 minutes or the chicken might become too salty.
- Preheat your oven:
- While the chicken is brining, turn on your oven.
- Set the temperature to 425°F (220°C).
- Make sure the oven rack is positioned in the middle of the oven (not too high, not too low).
- Beginner tip: Most ovens take about 10-15 minutes to fully preheat, which is perfect timing with your brining step.
- Prepare your baking sheet:
- Take out a baking sheet (a flat pan with a small rim).
- Cut a piece of parchment paper to fit the size of your baking sheet, or tear off a piece of aluminum foil large enough to cover it.
- Place the parchment paper or foil on the baking sheet, making sure it covers the entire surface.
- Beginner tip: Parchment paper is slightly better than foil as chicken is less likely to stick to it.
- Mix your seasonings:
- Take out a small bowl.
- Using measuring spoons, add these seasonings to the bowl:
- 1 teaspoon salt (that’s about 1/3 of a tablespoon)
- 1 teaspoon black pepper
- 1 teaspoon garlic powder
- 1 teaspoon paprika
- 1 teaspoon Italian seasoning
- Using a fork or small spoon, mix all the seasonings together until they’re evenly combined and the mixture looks uniform in color.
- Beginner tip: You can adjust these seasonings to your taste, but this combination works really well for most people.
Assembly Steps
- Remove chicken from brine:
- When your 15-minute timer goes off, take the chicken breasts out of the salt water.
- Hold each chicken breast under cold running water for about 5-10 seconds to rinse off excess salt.
- Place the rinsed chicken on a plate lined with paper towels.
- Take additional paper towels and thoroughly pat each chicken breast dry on all sides. Press firmly but gently to absorb all surface moisture.
- Beginner tip: This drying step is VERY important! Wet chicken won’t brown properly in the oven.
- Season the chicken:
- Pour the 2 tablespoons of olive oil into a small bowl.
- Using a pastry brush (or the back of a spoon if you don’t have a brush), apply olive oil to both sides of each chicken breast. Make sure to coat the entire surface.
- Hold one chicken breast in your hand over the bowl of seasoning mix.
- Using your other hand, pick up some of the seasoning mix with your fingers and sprinkle it evenly over the top side of the chicken.
- Flip the chicken over and repeat on the other side.
- Gently rub the seasonings into the chicken with your fingertips to help them stick.
- Repeat with all 4 chicken breasts.
- Beginner tip: Keep one hand “wet” (for handling the chicken) and one hand “dry” (for handling the seasonings) to avoid cross-contamination and mess.
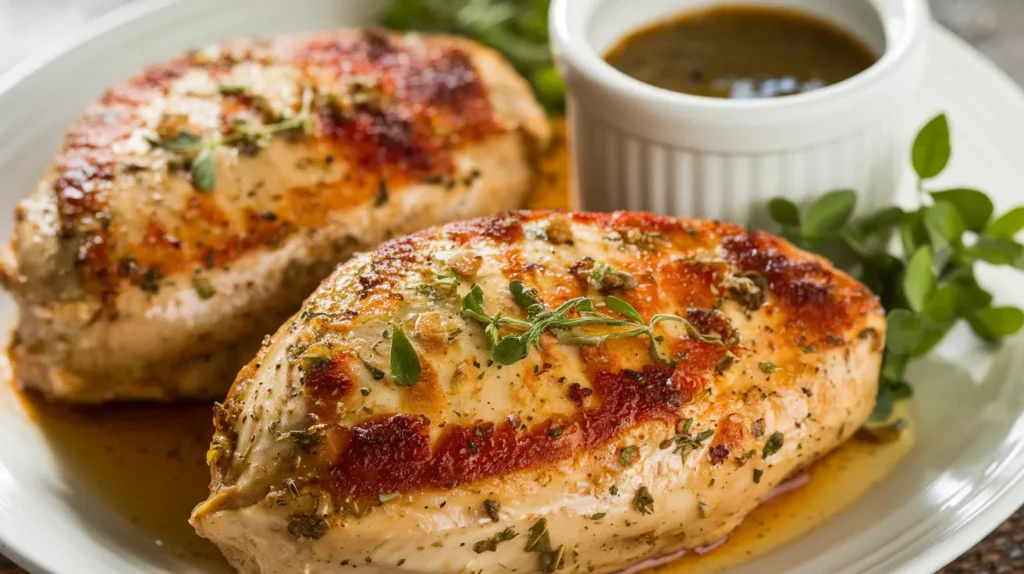
- Arrange on baking sheet:
- Place each seasoned chicken breast on the prepared baking sheet.
- Position them so there’s at least 1 inch of space between each piece.
- If some chicken breasts are thicker than others, place the thicker ones toward the outside edges of the pan.
- If any chicken breasts have a thinner end, tuck that end under slightly so the piece has a more even thickness.
- Beginner tip: Proper spacing ensures even cooking and allows hot air to circulate around each piece of chicken.
Cooking Phase
- Bake the chicken:
- Check that your oven has reached 425°F (most ovens have an indicator light or sound when preheated).
- Using oven mitts, open the oven door and slide the baking sheet onto the middle rack.
- Close the oven door immediately to keep heat from escaping.
- Set a timer for 16 minutes (for average thickness chicken breasts).
- Beginner tip: Cooking time depends on thickness:
- Thin chicken breasts (1/2 inch): 14-16 minutes
- Medium chicken breasts (3/4 inch): 16-18 minutes
- Thick chicken breasts (1 inch+): 18-22 minutes
- Check for doneness:
- When the timer goes off, put on oven mitts and carefully remove the baking sheet from the oven.
- Take your meat thermometer and insert the probe into the thickest part of the largest chicken breast.
- The thermometer should read at least 165°F (74°C) when the chicken is safe to eat.
- If the temperature is below 165°F, put the chicken back in the oven for 2 more minutes, then check again.
- Continue this process until the chicken reaches the safe temperature.
- Beginner tip: If you don’t have a meat thermometer (though it’s highly recommended), cut into the thickest part of the chicken. The meat should be completely white with no pink areas, and the juices should run clear.
Finishing Steps
- Rest the chicken:
- Once the chicken has reached 165°F, remove the baking sheet from the oven.
- Place the baking sheet on a heat-safe surface or cooling rack.
- Let the chicken sit undisturbed for 5 full minutes – set a timer if needed.
- During this time, the juices inside the chicken redistribute, making for juicier meat.
- Beginner tip: This resting step is absolutely essential for juicy chicken! If you cut into the chicken too soon, the juices will run out onto your cutting board instead of staying in the meat.
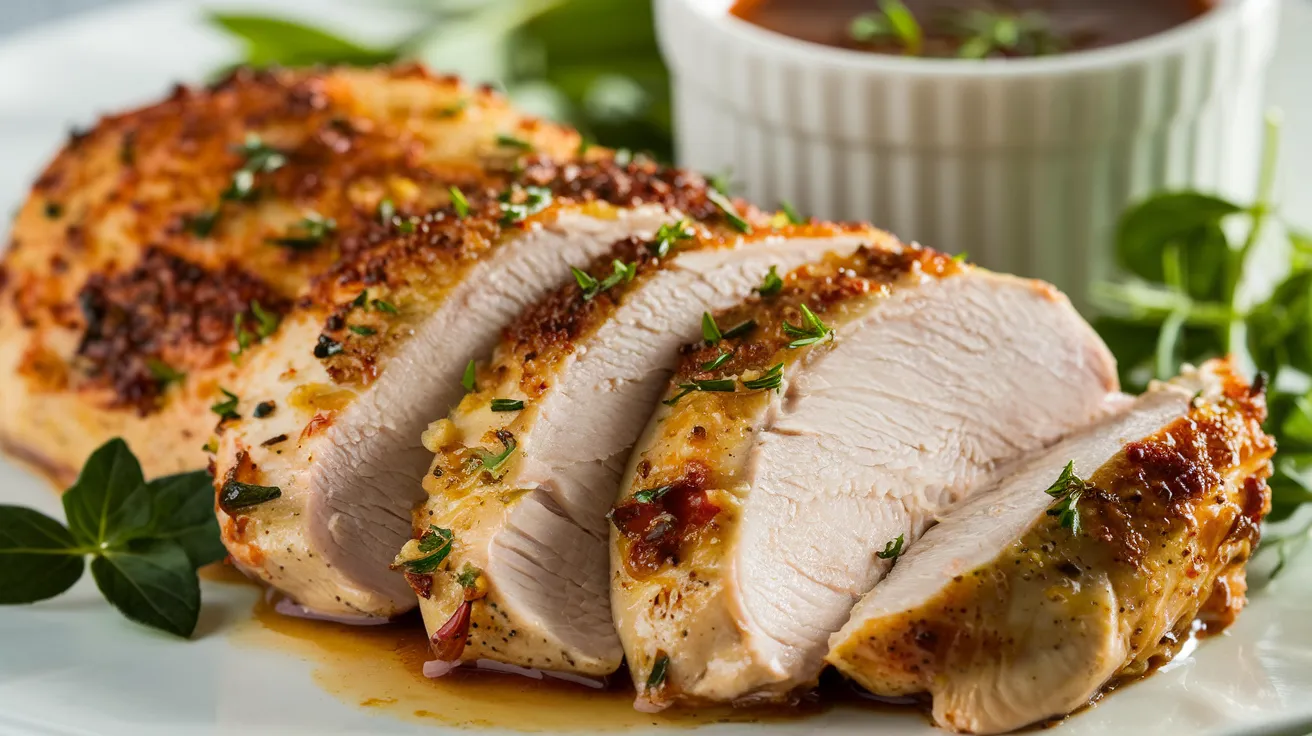
- Slice and serve:
- After 5 minutes of resting, transfer the chicken to a cutting board.
- Look for the direction of the muscle fibers in the chicken (they look like lines running through the meat).
- Using a sharp knife, cut across these lines (perpendicular to them), not along them.
- Cut the chicken into slices about 1/2 inch thick.
- Transfer to plates and serve immediately.
- Beginner tip: Cutting “against the grain” (across the muscle fibers) makes each bite more tender and easier to chew.
Once you master this basic oven baked chicken breast recipe, you might want to try something with more complex flavors like my Chicken Nanban which has a delicious sweet and tangy sauce.
Troubleshooting Common Problems
Chicken came out dry
- Cause: Overcooked or no brining step
- Fix: Next time, check temperature earlier. Remember that chicken continues cooking slightly after removal from oven.
- Beginner tip: If your chicken is dry this time, slice it thinly and serve with a sauce, gravy, or in a sandwich with mayo to add moisture.
Chicken is undercooked
- Cause: Oven temperature too low or chicken breasts too thick
- Fix: For very thick breasts, butterfly them (cut horizontally almost all the way through and open like a book) or pound to even thickness before cooking.
- Beginner tip: If you discover undercooked chicken after cutting into it, you can safely put it back in the oven to finish cooking.
Seasoning tastes too salty
- Cause: Not rinsing after brining or over-salting
- Fix: Always rinse chicken thoroughly after brining and pat dry.
- Beginner tip: If you’ve already cooked overly salty chicken, serve it with something unsalted like plain rice or potatoes to balance the flavor.
Not browning properly
- Cause: Chicken wasn’t dried well enough after brining or oven not hot enough
- Fix: Take extra time to pat chicken completely dry before adding oil and seasonings.
- Beginner tip: Make sure your oven is fully preheated before putting the chicken in. Some ovens take longer than others to reach full temperature.
Variations & Substitutions
Lemon Herb Chicken
- Add 1 tablespoon lemon zest to seasoning mix
- Replace Italian seasoning with 2 teaspoons fresh thyme and 1 teaspoon rosemary
Spicy Southwest Chicken
- Add 1/2 teaspoon cayenne pepper to seasoning mix
- Replace Italian seasoning with 1 teaspoon cumin and 1 teaspoon chili powder
Honey Mustard Chicken
- Mix 2 tablespoons honey with 1 tablespoon Dijon mustard
- Brush on chicken during the last 5 minutes of baking
Garlic Butter Chicken
- Melt 3 tablespoons butter with 4 minced garlic cloves
- Brush on chicken after it’s finished baking
If you’re looking for something even creamier, check out my creamy garlic chicken with spinach recipe which pairs beautifully with these same perfectly baked chicken breasts.
Storage & Reheating
Refrigerator Storage
- Allow chicken to cool completely (no more than 1 hour at room temperature)
- Store in an airtight container with a lid that seals well
- Keeps for up to 4 days in refrigerator
- Beginner tip: Write the date on the container with a piece of tape so you know when it was made.
Freezer Storage
- Allow chicken to cool completely
- Wrap each cooled chicken breast tightly in plastic wrap
- Wrap again in aluminum foil for extra protection
- Place in a freezer-safe zip-top bag
- Press out as much air as possible before sealing
- Write the contents and date on the bag with a permanent marker
- Keeps for up to 3 months in freezer
- Beginner tip: Freezing individual pieces makes it easier to thaw just what you need later.
Reheating Tips
- Microwave:
- Slice chicken first into 1/2-inch pieces
- Place on a microwave-safe plate
- Cover with a damp paper towel to add moisture
- Heat for 1 minute, then in additional 30-second intervals until warm
- Beginner tip: Microwaving whole chicken breasts often leads to rubbery edges before the middle is warm.
- Oven:
- Preheat oven to 350°F
- Place chicken in a baking dish
- Add 1-2 tablespoons of water or chicken broth to the dish
- Cover tightly with aluminum foil
- Heat for 10-15 minutes until the internal temperature reaches 165°F
- Beginner tip: The added liquid helps create steam that rehydrates the chicken.
- Skillet:
- Slice chicken thinly (about 1/4-inch thick)
- Heat a non-stick skillet over medium heat
- Add 1 tablespoon water or broth to the pan
- Add chicken slices in a single layer
- Cover with a lid and heat for 3-4 minutes until steaming hot
- Beginner tip: This method is fastest and often gives the best texture for reheated chicken.
Best Uses for Leftovers
- Slice for sandwiches or wraps
- Dice for salads
- Shred for soups, tacos, or pasta dishes
- Chop and add to fried rice
- Mix into a casserole
Safety Notes & Tips
Food Safety
- Always wash hands with soap and warm water for 20 seconds before and after handling raw chicken
- Use a separate cutting board for chicken that doesn’t touch other foods
- Sanitize all surfaces that have touched raw chicken with disinfectant or hot soapy water
- Never reuse marinades that have touched raw chicken unless you boil them first
- Cook chicken to 165°F internal temperature, no exceptions
- Refrigerate leftovers within 1 hour in hot weather, 2 hours otherwise
Best Tips for Success
- Even thickness matters: If chicken breasts have an uneven thickness, place them between two pieces of plastic wrap and gently pound the thicker parts with a meat mallet or heavy pan until even.
- Room temperature cooking: For even more consistent results, after brining and drying the chicken, let it sit at room temperature for 15 minutes before baking.
- Don’t overcrowd the pan: Each chicken breast needs its own space for proper cooking. Use two baking sheets if needed.
- Let it rest: The 5-minute rest after cooking is as important as the cooking itself for juicy chicken.
- Slice against the grain: Look for the lines in the muscle and cut across them, not along them, for the most tender bite.
- Check your oven temperature: If you have an oven thermometer, verify your oven is actually reaching the temperature it claims. Many ovens run hotter or cooler than their settings.
Make Ahead Tips
- Brine chicken up to 4 hours ahead, keeping refrigerated (but only in the salt water for 15-20 minutes, then rinse and store)
- Mix dry seasonings up to 1 month ahead and store in airtight container
- Fully cooked chicken can be made 1-2 days ahead and reheated when needed
- Prepare and season raw chicken up to 24 hours ahead, keeping covered in the refrigerator until ready to bake
Dietary Notes
- This oven baked chicken breast recipe is naturally gluten-free
- Low-carb and keto-friendly
- Dairy-free as written
- Paleo-friendly (check your specific seasoning ingredients)
- For lower sodium, reduce salt in both the brine and seasoning mix