Key Takeaways:
- Master the 3-step coating technique for perfectly crispy Pan Fried Fish
- Learn the exact temperature trick for golden results every time
- Discover how to keep Pan Fried Fish moist while achieving that crunch
- Create restaurant-worthy Pan Fried Fish with basic pantry ingredients
Why Your Pan Fried Fish Never Turns Out Right (Until Now)
Making Pan Fried Fish at home should be simple, but so often it ends in disappointment. The coating falls off, the fish sticks to the pan, or worse—it’s dry and flavorless.
I’ve perfected this Pan Fried Fish recipe after years of testing. The secret? Properly drying the fish, using the right dredging technique, and maintaining the perfect oil temperature.
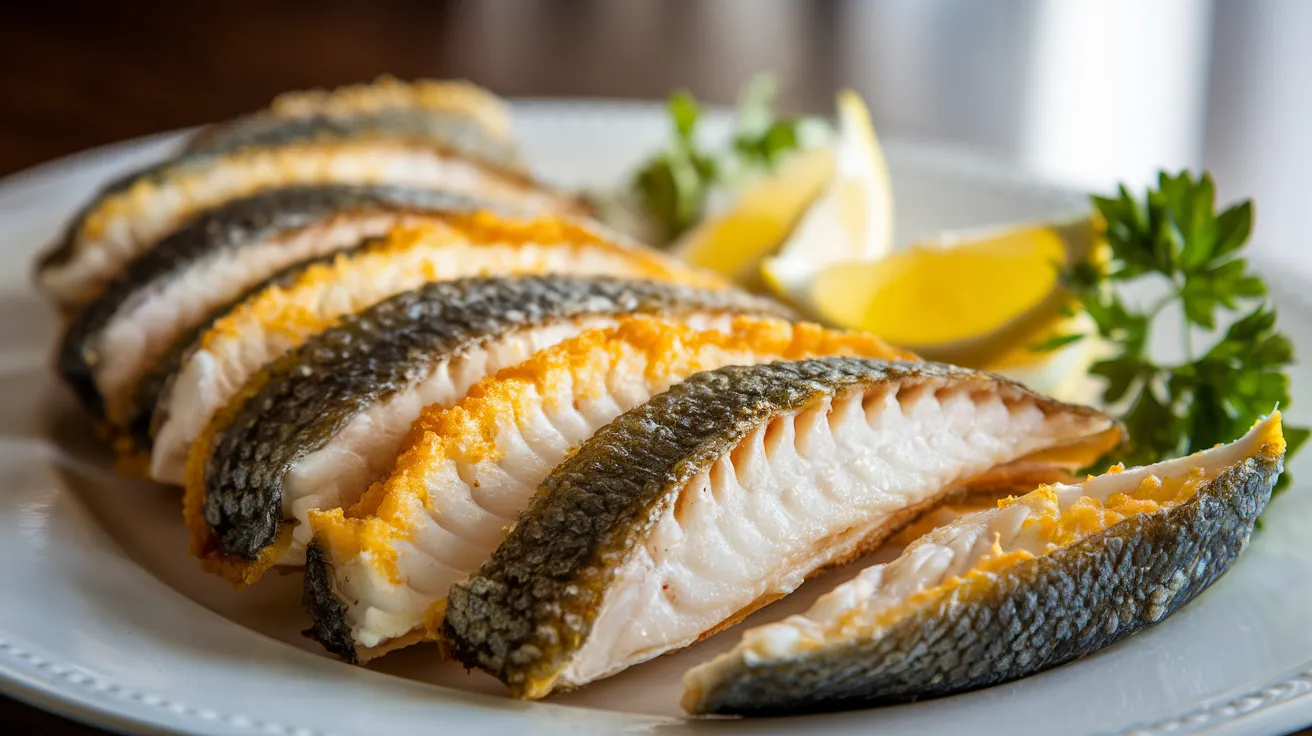
This Pan Fried Fish recipe works with any white fish, making it perfect for weeknight dinners or impressing guests. In just 20 minutes, you’ll have crispy, golden fillets that are tender and flaky inside—just like the pros make.
Nutrition Comparison
| Fish Type | Calories (per 4oz) | Protein | Fat | Omega-3s |
|---|---|---|---|---|
| Tilapia | 145 | 26g | 3g | Low |
| Cod | 120 | 24g | 1g | Medium |
| Halibut | 140 | 27g | 2g | High |
| Catfish | 160 | 22g | 7g | Medium |
What You’ll Need
Ingredients (Serves 4)
| Ingredient | Amount | Notes |
|---|---|---|
| White fish fillets | 1½ pounds (4 fillets) | Tilapia, cod, or halibut |
| All-purpose flour | ½ cup | For dredging |
| Eggs | 2 large | Beaten |
| Panko breadcrumbs | 1 cup | For extra crispiness |
| Salt | 1 teaspoon | Divided use |
| Black pepper | ½ teaspoon | Freshly ground |
| Vegetable oil | ¼ cup | For frying |
| Lemon | 1 medium | Cut into wedges for serving |
| Fresh parsley | 2 tablespoons | Chopped, for garnish |
Equipment
| Tool | Purpose |
|---|---|
| Large skillet | Non-stick or cast iron for even cooking (10-12 inch recommended) |
| Fish spatula | For flipping without breaking |
| 3 shallow dishes | For dredging station (pie plates or shallow bowls work well) |
| Paper towels | For draining excess oil |
| Meat thermometer | Optional but helpful for beginners |
| Cutting board | For preparation |
| Sharp knife | For checking/removing bones and prep |
| Kitchen tweezers | For removing small bones |
| Timer | To keep track of cooking time |
Possible Substitutions
- Fish: Any firm white fish works well. Try catfish, pollock, or snapper. For a more unique flavor similar to what you might find in this salt-cured fish roe recipe, you could try using sea bass.
- Breadcrumbs: Regular breadcrumbs can replace panko but won’t be as crispy.
- Flour: Gluten-free flour blend works for those with restrictions.
- Oil: Canola, avocado, or grapeseed oil can substitute for vegetable oil.
Preparation Time
- Prep time: 10 minutes
- Cook time: 10 minutes
- Total time: 20 minutes
Super-Detailed Step-by-Step Instructions for Beginners
1. Prepare Your Fish (5 minutes)
- Check your fish fillets:
- Remove fish from packaging and place on a clean cutting board
- Look at the fillets carefully in good lighting
- Run your fingertips gently over the flesh to feel for any small bones
- If you find bones, use kitchen tweezers to carefully pull them straight out
- BEGINNER TIP: Ask your fishmonger to remove all bones when purchasing
- Dry the fish thoroughly:
- Lay out 3-4 paper towels on your counter
- Place fish fillets on the paper towels
- Press additional paper towels firmly on top of the fish
- Replace with fresh paper towels if needed
- WHY THIS MATTERS: Excess moisture prevents crispy coating and causes oil to splatter
- Season the fish:
- In a small bowl, mix ½ teaspoon salt and ¼ teaspoon black pepper
- Sprinkle half of this mixture evenly over the top side of the fish
- Flip the fish over and season the other side with remaining mixture
- BEGINNER TIP: Season from 8-10 inches above the fish for more even distribution
2. Set Up Your Dredging Station (3 minutes)
- Prepare your workspace:
- Clear a counter space with about 2 feet of room
- Arrange 3 shallow dishes or pie plates in a row
- Place a clean plate at the end for your coated fish
- Have paper towels nearby
- Prepare the first dish (flour):
- Add ½ cup all-purpose flour to the first dish
- Add remaining ½ teaspoon salt and ¼ teaspoon pepper
- Use a fork to mix thoroughly
- BEGINNER TIP: The seasoned flour gives the first layer of flavor
- Prepare the second dish (egg):
- Crack 2 eggs into the second dish
- Add 1 tablespoon of water
- Beat with a fork until completely mixed and no clear egg white is visible
- WHY THIS MATTERS: The water thins the egg slightly for a better coating
- Prepare the third dish (breadcrumbs):
- Pour 1 cup panko breadcrumbs into the third dish
- Spread them out evenly
- BEGINNER TIP: Panko gives extra crispiness compared to regular breadcrumbs
3. Coat Your Fish (5 minutes)
- First coating (flour):
- Pick up one fish fillet by the narrow end
- Place it in the flour dish
- Use your dry hand to gently press flour onto all surfaces
- Lift and shake gently to remove excess flour
- WHY THIS MATTERS: Excess flour will make the coating gummy
- Second coating (egg):
- Transfer the floured fish to the egg mixture
- Use your other (“wet”) hand to ensure the fish is completely coated
- Lift and hold above the dish for 5 seconds to let excess egg drip off
- BEGINNER TIP: Keep one hand for dry ingredients and one for wet to avoid clumpy fingers
- Third coating (breadcrumbs):
- Place the egg-coated fish into the breadcrumb dish
- Use your dry hand to scoop breadcrumbs over the top
- Press gently but firmly to help breadcrumbs adhere
- Flip and repeat for the other side
- Transfer to the clean plate
- BEGINNER TIP: Really press the crumbs in for a coating that won’t fall off
- Repeat for all fillets:
- Coat each remaining fillet using the same process
- Keep them from touching on the plate
- CAREFUL: Don’t stack the coated fish or the coating will come off
4. Heat Your Pan (2 minutes)
- Select the right pan:
- Choose a heavy-bottomed skillet (10-12 inch size is ideal)
- Non-stick or well-seasoned cast iron works best
- BEGINNER TIP: A heavy pan distributes heat more evenly than a thin one
- Add the oil:
- Place pan on stove over medium-high heat
- Add ¼ cup vegetable oil to the pan
- Tilt the pan to spread oil evenly across the bottom
- The oil should be approximately ⅛-inch deep
- SAFETY TIP: Don’t overfill with oil to prevent dangerous spillovers
- Check oil temperature:
- Allow oil to heat for 2-3 minutes
- Watch for the oil to shimmer but not smoke
- Ideal temperature is around 350°F if using a thermometer
- BEGINNER TEST: Drop a few breadcrumbs into the oil – they should sizzle immediately and float, not sink or burn
5. Fry Your Fish (6-8 minutes total)
- Add fish to pan carefully:
- Using your fingers or a fish spatula, gently place 2 fillets into the pan
- Lay them away from you to prevent oil splashing toward you
- Leave space between fillets (don’t crowd the pan)
- SAFETY TIP: If oil splatters, use a splatter screen or partially cover with a lid
- Monitor the first side:
- Set a timer for 3 minutes
- Watch the edges of the fish – they’ll begin to turn golden brown
- Resist the urge to move or check the fish too early
- WHY THIS MATTERS: Moving too soon will tear the coating off
- Check for doneness on first side:
- After 3 minutes, gently lift an edge with your spatula
- The coating should be golden brown
- If still pale, cook for 30-60 seconds more
- BEGINNER TIP: If browning too quickly, reduce heat slightly
- Flip with proper technique:
- Slide a fish spatula completely under one fillet
- In one confident motion, flip the fish over
- Be careful of hot oil splashing
- TECHNIQUE TIP: Don’t flip with a quick jerking motion; use a smooth turn
- Cook the second side:
- Set timer for 2-3 minutes for second side
- Second side usually cooks faster than the first
- HOW TO CHECK DONENESS: Fish should flake easily with a fork
- For absolute certainty, internal temperature should reach 145°F
- Remove and drain:
- Line a plate with 2 layers of paper towels
- When fish is done, carefully remove with spatula
- Place on paper towels to drain excess oil
- BEGINNER TIP: Don’t stack hot fillets or they’ll lose crispiness
- Cook remaining fillets:
- Return pan to heat for 30 seconds if needed
- Add remaining fillets using same technique
- Monitor closely as the pan may be hotter for the second batch
- CONSISTENCY TIP: If oil looks dirty, carefully discard and use fresh oil
6. Final Touches and Serving (2 minutes)
- Prepare garnishes:
- While second batch cooks, cut lemon into 4 wedges
- Chop parsley if not already prepared
- Final seasoning:
- Sprinkle a tiny pinch of salt over fish while still hot
- TASTE TIP: This final seasoning enhances flavor and crunch
- Plate your dish:
- Transfer fish to serving plates (one fillet per person)
- Add a lemon wedge to each plate
- Sprinkle chopped parsley over fish
- PLATING TIP: Serve immediately while crispy, arranging the fish at the center of the plate
- Complete the meal:
- Serve with simple side dishes like:
- Steamed vegetables
- Corn and Fish Maw Soup for an Asian-inspired pairing
- Light salad with vinaigrette
- Roasted potatoes
- PAIRING TIP: Light, acidic sides help balance the richness of fried fish
- Serve with simple side dishes like:

Troubleshooting Common Issues
Problem: Fish falls apart when flipping
Solution:
- Make sure fish is completely dry before coating
- Don’t move the fish until it develops a crust (at least 2-3 minutes)
- Check that your spatula is thin enough to slide completely under the fish
- Consider using slightly firmer fish varieties like cod if you’re a beginner
Problem: Coating falls off during cooking
Solution:
- Press coating firmly onto fish before cooking
- Ensure oil is hot enough before adding fish (test with breadcrumbs)
- Don’t flip the fish too early
- Let the coated fish rest for 5 minutes before frying
- Make sure excess egg drips off before adding breadcrumbs
Problem: Fish is undercooked inside but brown outside
Solution:
- Use moderate heat rather than high heat
- Choose fillets of even thickness (about ¾ to 1 inch is ideal)
- For thicker fillets, finish in a 350°F oven for 5 minutes after browning
- Let the fish come to room temperature for 10 minutes before cooking
Problem: Greasy result
Solution:
- Drain properly on paper towels
- Make sure oil temperature stays consistent (350°F)
- Don’t overcrowd the pan
- Use fresh oil for each batch if making a large quantity
Problem: Bland flavor
Solution:
- Season the flour mixture more aggressively
- Add a pinch of garlic powder or paprika to the flour
- Season the fish directly before coating
- Serve with flavorful sauce like tartar sauce or lemon-herb butter
Variations & Substitutions
Herb-Crusted Pan Fried Fish
- Mix 2 tablespoons of chopped fresh herbs (dill, parsley, thyme) into the breadcrumbs
- Add 1 teaspoon of lemon zest for brightness
Spicy Pan Fried Fish
- Add 1 teaspoon of cayenne pepper or paprika to the flour mixture
- Include ½ teaspoon of garlic powder for depth of flavor
- Serve with a spicy mayo dipping sauce
- For a sandwich option, check out this Blackened Swordfish Sandwich recipe for spice blend ideas
Gluten-Free Pan Fried Fish
- Substitute gluten-free flour blend for all-purpose flour
- Use gluten-free panko breadcrumbs or crushed rice cereal
- Double-check all seasonings are gluten-free
Lighter Pan Fried Fish
- Skip the breadcrumbs and simply dredge in seasoned flour for a lighter crust
- Use half the oil and carefully watch temperature
- Consider pan-searing skin-on fillets, skin side down first
Storage & Reheating
Storage
- Refrigerator:
- Allow fish to cool completely
- Store in an airtight container with paper towels between layers
- Keep for up to 2 days maximum
- BEGINNER TIP: Refrigerated fried fish will lose some crispiness
- Freezer:
- Not recommended as texture will suffer significantly
- If necessary, wrap individual portions in plastic and foil
- Store for no more than 1 month
- HONEST ADVICE: Fish is best enjoyed fresh, if possible
Reheating
- Oven Method (Best for Maintaining Crispiness):
- Preheat oven to 350°F
- Place fish on a wire rack over a baking sheet
- Reheat for 10-12 minutes until warmed through
- WHY THIS WORKS: Allows air to circulate and crisp the coating
- Microwave (Quick But Not Ideal):
- Place fish on a microwave-safe plate
- Cover with a paper towel
- Heat on 50% power for 1 minute, then check
- HONESTY CHECK: This will make the coating soggy but works in a pinch
- Skillet Reheat:
- Heat a dry non-stick skillet over medium heat
- Add fish and heat for 2-3 minutes per side
- TIP: Add a tiny bit of fresh oil for improved crispiness
Safety Notes & Tips
Food Safety
- Fish should reach an internal temperature of 145°F
- Never reuse the flour, egg, and breadcrumb mixtures that have touched raw fish
- Wash hands thoroughly after handling raw fish
- Refrigerate leftover fish within 2 hours of cooking
- Clean all surfaces that contacted raw fish with hot, soapy water
Fire Safety
- Never leave hot oil unattended
- Keep a kitchen fire extinguisher nearby
- If oil smokes, carefully remove from heat immediately
- NEVER put water on an oil fire – use a lid to smother flames
Cooking Tips for Beginners
- Keep it dry: Pat fish very dry before coating for best results
- Don’t crowd the pan: Leave at least 1 inch between fillets for even cooking
- Oil temperature matters: Too hot burns the outside; too cool makes fish greasy
- One-handed method: Use one hand for dry ingredients and one for wet to avoid clumpy fingers
- Test for doneness: Fish should flake easily with a fork when done
- Taste as you go: Check your seasoning levels before cooking all fillets
Chef’s Notes
This Pan Fried Fish recipe is perfect for beginners but impressive enough for guests. The technique of proper drying and dredging is key to professional results.
For a stunning presentation, serve the fish over a bright vegetable purée or with a colorful slaw on the side. The contrasting textures make for an exciting meal that looks as good as it tastes.