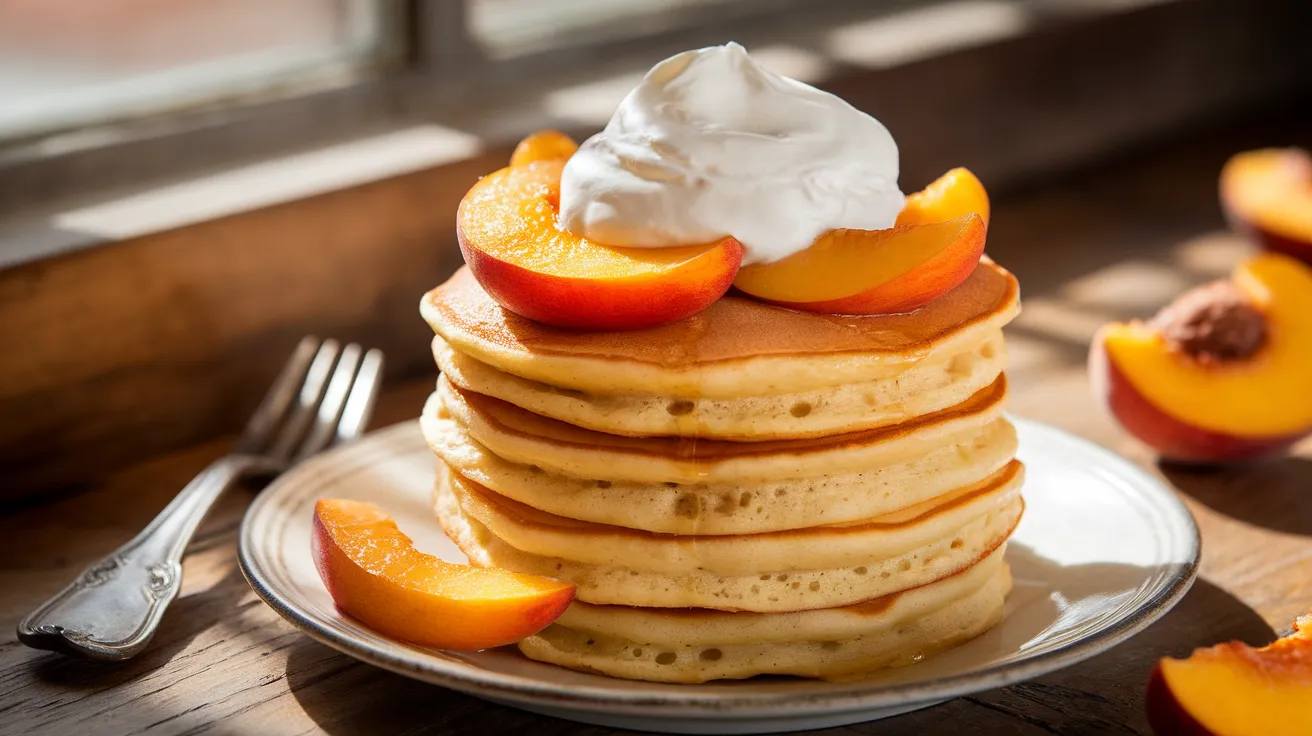
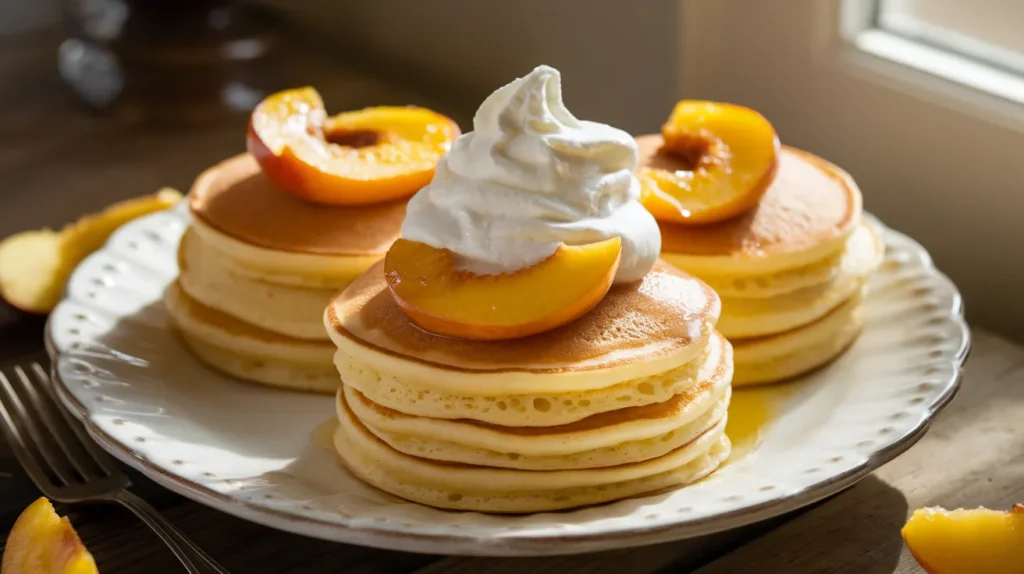
These fluffy peaches cream pancakes bring together the sweetness of caramelized peaches with billowy whipped cream for the ultimate breakfast indulgence. Master this simple recipe and you’ll have a go-to dish that transforms any morning into a special occasion with perfectly balanced flavors.
SERVES: 4 | PREP: 20 MIN | COOK: 25 MIN | TOTAL: 45 MIN
Ingredients
For the Pancakes:
| Ingredient | Amount |
|---|---|
| All-purpose flour | 2 cups |
| Sugar | 3 tablespoons |
| Baking powder | 2 teaspoons |
| Salt | 1/2 teaspoon |
| Large eggs | 2 |
| Whole milk | 1 3/4 cups |
| Unsalted butter, melted | 4 tablespoons |
| Vanilla extract | 1 teaspoon |
For the Peach Topping:
| Ingredient | Amount |
|---|---|
| Fresh peaches, sliced | 3 large (about 2 cups) |
| Brown sugar | 1/4 cup |
| Cinnamon | 1/2 teaspoon |
| Lemon juice | 1 tablespoon |
| Butter | 2 tablespoons |
For the Cream:
| Ingredient | Amount |
|---|---|
| Heavy whipping cream | 1 cup |
| Powdered sugar | 3 tablespoons |
| Vanilla extract | 1/2 teaspoon |
Detailed Step-by-Step Instructions for Peaches Cream Pancakes
Phase 1: Preparing Your Perfect Peach Topping (10-12 minutes)
- Select and prepare your peaches carefully. Choose peaches that feel slightly soft when you press them gently but aren’t mushy or bruised. Wash them under cool running water and pat completely dry with paper towels. Using a sharp paring knife, cut each peach in half by slicing around the pit, then twist the halves apart. Remove the pit with your fingers or a spoon. Cut each half into 4-6 wedges about 1/4-inch thick. You should have approximately 2 cups of sliced peaches for your peaches cream pancakes.
- Heat your skillet to the right temperature. Place a large, heavy-bottomed skillet (cast iron or stainless steel works best) on your stove over medium heat. Let it warm for 2 minutes. Add 2 tablespoons of butter to the center of the pan. You’ll know it’s ready when the butter melts immediately and starts to foam but doesn’t turn brown. This creates the perfect base for caramelizing your peaches.
- Add peaches strategically to avoid overcrowding. Carefully place your peach slices in the hot butter in a single layer, making sure pieces don’t overlap. If they’re touching slightly, that’s okay, but overlapping will cause uneven cooking. You should hear a gentle sizzling sound when they hit the pan—if there’s no sound, your pan isn’t hot enough yet.
- Let peaches develop golden caramelization. Resist the urge to stir or move the peaches for the first 3-4 minutes. This allows natural sugars to caramelize and creates those beautiful golden-brown edges that add incredible flavor. You’ll know they’re ready to move when you can slide a spatula underneath easily and see golden-brown color.
- Season and finish cooking the peaches. Sprinkle the brown sugar evenly over all peaches, followed by the cinnamon. Add the lemon juice in small drops across the pan—it prevents browning and adds brightness. Using a wooden spoon or spatula, gently stir to coat all pieces. Cook for another 2-3 minutes until peaches are tender when pierced with a fork but still hold their shape. Remove from heat and set aside in the same pan to keep warm.
Phase 2: Creating Silky Whipped Cream (6-8 minutes)
- Chill your equipment for best results. Place your mixing bowl and beaters (or whisk attachment) in the freezer for 5 minutes while you work on other tasks. Cold equipment helps cream whip faster and creates more stable peaks. If you forget this step, your cream will still whip but may take longer.
- Start whipping at the right speed. Remove your chilled bowl and pour in 1 cup of heavy whipping cream. Using an electric hand mixer or stand mixer, start beating on medium speed (setting 4-5 on most mixers). You’ll see the cream start to thicken after about 1 minute—it will look slightly foamy and coat the beaters lightly.
- Add sweeteners at the perfect moment. When cream begins to thicken but before it forms any peaks, add 3 tablespoons powdered sugar and 1/2 teaspoon vanilla extract. The powdered sugar dissolves easier than granulated sugar and won’t make your cream grainy.
- Achieve perfect soft peaks. Increase mixer speed to high (setting 8-10) and continue beating for 2-3 minutes more. Watch carefully—you want soft peaks that curl over when you lift the beaters. The cream should be thick enough to hold its shape but still look smooth and silky. Stop immediately when you reach this stage, as overbeaten cream turns into butter and can’t be fixed.
Phase 3: Mixing Perfect Pancake Batter (8-10 minutes)
- Combine dry ingredients thoroughly. In your largest mixing bowl, add 2 cups all-purpose flour, 3 tablespoons sugar, 2 teaspoons baking powder, and 1/2 teaspoon salt. Use a whisk to blend these ingredients completely, breaking up any lumps in the flour and ensuring even distribution of baking powder. This step is crucial because unevenly mixed baking powder creates pancakes with different textures.
- Create a well for easy mixing. Using your whisk or a large spoon, push the flour mixture toward the sides of the bowl, creating a deep well or crater in the center. This well will hold your wet ingredients and helps prevent overmixing when you combine everything.
- Prepare wet ingredients separately for consistency. In a medium bowl, crack 2 eggs and whisk them until completely smooth with no streaks of white or yolk visible. Add 1 3/4 cups whole milk, 4 tablespoons melted butter (cooled slightly so it doesn’t cook the eggs), and 1 teaspoon vanilla extract. Whisk until everything is completely combined and the mixture looks uniform.
- Combine wet and dry ingredients with minimal mixing. Pour all the wet ingredients into the well you created in the flour mixture. Using a wooden spoon or rubber spatula (not a whisk), gently stir from the center outward, incorporating flour gradually. Stop stirring as soon as you can’t see dry flour—the batter should look lumpy and slightly thick. Lumps are good! Smooth batter means you’ve overmixed and your peaches cream pancakes will be tough.
Phase 4: Cooking Your Peaches Cream Pancakes to Perfection (18-20 minutes)
- Heat your cooking surface to precise temperature. Place a large griddle or heavy skillet over medium heat and let it warm for 3-4 minutes. Test the temperature by flicking a few drops of water onto the surface—they should sizzle and evaporate within 2-3 seconds. If they sit there doing nothing, it’s too cool. If they disappear instantly, it’s too hot.
- Grease properly for easy flipping. Add a small amount of butter or cooking spray to your griddle, then use a paper towel to spread it evenly and remove excess. You want just enough to prevent sticking but not so much that pancakes fry instead of cook gently.
- Portion batter consistently for even cooking. Use a 1/4-cup measuring cup to scoop batter, filling it completely but not overflowing. Pour each portion onto the griddle, spacing pancakes at least 2 inches apart so they don’t run together. You should be able to fit 3-4 pancakes on a standard griddle.
- Watch for the perfect flip timing. Cook pancakes for 2-3 minutes on the first side. You’ll know they’re ready to flip when bubbles form across the entire surface and the edges look dry and set. The bubbles should pop and stay open rather than filling back in. Peek underneath one edge—it should be golden brown, not pale or dark brown.
- Execute the flip with confidence. Using a wide, thin spatula, slide it completely under each pancake in one smooth motion. Flip quickly but gently—pancakes should land flat on the griddle. Don’t press down on top after flipping, as this squeezes out air bubbles that make pancakes fluffy.
- Finish cooking the second side. Cook for 1-2 minutes more on the second side. This side cooks faster because the griddle is hotter and the pancake is already partially cooked. The second side is done when it springs back lightly when touched and is golden brown underneath.
- Keep pancakes warm while cooking remaining batches. Transfer cooked pancakes to a baking sheet and place in a 200°F oven. This keeps them warm and prevents them from getting soggy while you finish cooking. Re-grease your griddle between batches to prevent sticking.
Phase 5: Assembly and Serving Your Peaches Cream Pancakes
- Warm serving plates for best presentation. Place your serving plates in the warm oven for 1-2 minutes while you finish the last pancakes. Warm plates keep everything at the right temperature longer.
- Stack pancakes with intention. Place 2-3 pancakes on each warm plate, stacking them slightly off-center for a more appealing presentation. The stack should be stable but not perfectly aligned.
- Add toppings in the right order. First, spoon the warm peach mixture generously over and around the pancakes, including some of the delicious pan juices. Then add a generous dollop of whipped cream on top—the contrast between warm pancakes and cold cream is part of what makes these peaches cream pancakes so special.
- Serve immediately for best experience. Present these peaches cream pancakes while the pancakes are still hot, the peaches are warm, and the cream is cold. This temperature contrast creates the perfect bite every time.
Chef’s Notes for Perfect Peaches Cream Pancakes
Peach Selection Matters: The best peaches for these peaches cream pancakes yield slightly to pressure but aren’t soft or mushy. If yours are too firm, place them in a paper bag with a banana overnight to ripen faster.
Batter Consistency Secret: Lumpy batter equals fluffy pancakes. If you can’t see any dry flour, stop mixing immediately—overmixed batter creates dense, tough pancakes that won’t showcase your peach topping properly.
Temperature Control: Medium heat is crucial throughout the entire cooking process. Too high and pancakes burn outside while staying raw inside; too low and they become dense and gummy instead of light and fluffy.
Fresh vs. Canned: While fresh peaches create the best flavor for peaches cream pancakes, you can substitute with drained canned peaches in a pinch—just reduce the sugar by half since canned peaches are pre-sweetened.
Nutrition Information (Per Serving)
- Calories: 485
- Protein: 12g
- Carbohydrates: 58g
- Fat: 22g
- Fiber: 3g
- Sugar: 28g
Creative Variations for Peaches Cream Pancakes
Protein-Enhanced Version: Transform these into a post-workout treat by using our best protein pancakes recipe as your base, then adding the same luscious peach and cream toppings for a satisfying meal that builds muscle.
Decadent Dessert Style: Create an indulgent evening treat by starting with our Oreo pancake mix recipe and topping with the sweet peaches and cream for a dessert that rivals any restaurant offering.
Seasonal Berry Alternative: During peak summer months, substitute mixed berries for peaches in this same recipe—strawberries, blueberries, and raspberries all work beautifully with the cream topping.
Healthier Substitute: Replace the whipped cream with Greek yogurt mixed with honey and vanilla for added protein and probiotics while maintaining that creamy texture these peaches cream pancakes deserve.
Storage & Reheating Your Peaches Cream Pancakes
Refrigerator Storage: Store leftover pancakes in an airtight container for up to 3 days, placing parchment paper between layers to prevent sticking together.
Freezer Storage: Freeze cooked pancakes for up to 2 months in freezer-safe bags with air removed—they reheat beautifully and taste nearly as good as fresh.
Reheating Methods: Toast frozen pancakes directly in the toaster for best texture, or warm refrigerated ones in a 350°F oven for 5 minutes until heated through completely.
Topping Storage: Store the peach mixture separately in the refrigerator for up to 4 days, reheating gently in the microwave before serving over fresh or reheated pancakes.
Troubleshooting Common Peaches Cream Pancakes Problems
Dense, Heavy Pancakes: This almost always means overmixed batter. Mix just until you can’t see dry flour—lumps are perfectly normal and necessary for fluffy results.
Pancakes Stick to Griddle: Your cooking surface isn’t hot enough or needs more grease. Wait for proper temperature and add fresh butter between each batch of pancakes.
Uneven Browning: Your heat is too high or your griddle has hot spots. Lower the temperature and let it stabilize for 2-3 minutes before continuing to cook.
Cream Won’t Whip Properly: Your cream, bowl, or beaters are too warm. Chill everything for 10 minutes in the freezer and try again with properly cold equipment.
Peaches Too Watery: Pat fruit completely dry before cooking and don’t overcook them—excess liquid will make your peaches cream pancakes soggy when served.
Equipment Essentials
- Large mixing bowls (2)
- Medium mixing bowl
- Whisk and wooden spoon
- Electric hand mixer or stand mixer
- Large griddle or heavy skillet
- Wide, thin spatula for flipping
- 1/4-cup measuring cup
- Sharp paring knife
- Paper towels
Organized Shopping List
Produce Section:
- 3 large fresh peaches
- 1 lemon (for fresh juice)
Dairy Section:
- 2 dozen large eggs
- 1 quart whole milk
- 1 pint heavy whipping cream
- 1 pound unsalted butter
Pantry/Baking Aisle:
- 5-pound bag all-purpose flour
- Granulated sugar
- Brown sugar
- Powdered sugar
- Baking powder
- Salt
- Pure vanilla extract
- Ground cinnamon
Success Secrets for Amazing Peaches Cream Pancakes
- Master your griddle temperature—use the water droplet test every time to ensure consistent results with perfectly golden pancakes that cook evenly throughout.
- Embrace the lumps—smooth pancake batter is overworked batter, which creates dense, tough pancakes instead of the light, fluffy texture that makes peaches cream pancakes special.
- Never press down on cooking pancakes—this squeezes out the air bubbles that create fluffy texture and results in dense, flat pancakes.
- Timing is everything—serve immediately while pancakes are hot and cream is cold for the incredible temperature contrast that makes this dish memorable.
- Prep like a pro—measure all ingredients and prepare your peach topping before you start cooking pancakes so everything stays at the perfect temperature for serving.