This Pizza Dough Recipe makes enough for four 10-inch pizzas with perfect texture
Key Takeaways:
- Makes 4 individual-sized pizzas (serves 4 people)
- Only requires 6 basic ingredients
- Can be made ahead and frozen for up to 3 months
- No special equipment needed for amazing results
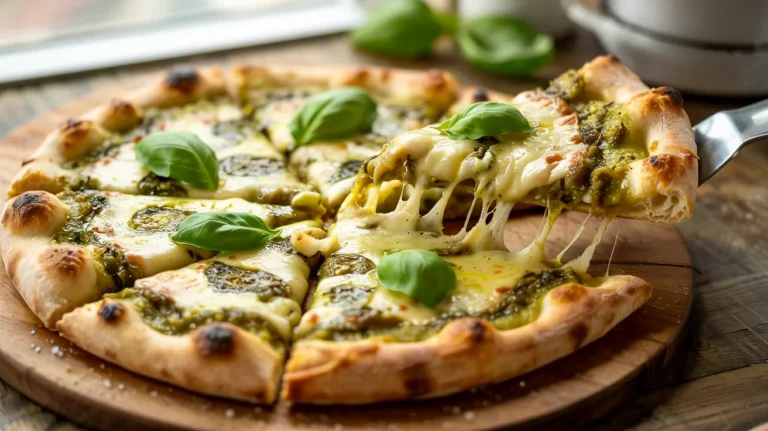
Have you ever tried making homemade pizza only to end up with a crust that’s either too tough, too soggy, or just plain flavorless? You’re not alone. The perfect Pizza Dough Recipe has been my quest for years, and I’m excited to share this foolproof method that delivers restaurant-quality results every time. This Pizza Dough Recipe creates the ideal balance of chewy interior and crispy exterior that will make you forget about delivery pizza forever!
Nutrition Information
| Nutrient (per serving) | Amount |
|---|---|
| Calories | 320 |
| Total Fat | 4g |
| Saturated Fat | 0.5g |
| Carbohydrates | 60g |
| Fiber | 2g |
| Protein | 8g |
| Sodium | 440mg |
Values are approximate per pizza crust without toppings
Time Requirements for This Pizza Dough Recipe
- Prep Time: 20 minutes
- Rise Time: 1 hour
- Total Time: 1 hour 20 minutes
- Servings: 4 (10-inch pizzas)
- Skill Level: Beginner-friendly
Equipment Needed for Pizza Dough Recipe
| Essential Tools | Optional Tools |
|---|---|
| Large mixing bowl | Stand mixer with dough hook |
| Measuring cups | Digital kitchen scale |
| Measuring spoons | Pizza stone |
| Clean kitchen towel | Bench scraper |
| Pizza pan or baking sheet | Pizza wheel |
| Wooden spoon | Pastry brush |
Pizza Dough Recipe Ingredients
| Ingredient | Amount | Purpose |
|---|---|---|
| All-purpose flour | 4 cups (500g) | Base structure |
| Active dry yeast | 2¼ tsp (1 packet) | Leavening agent |
| Warm water | 1½ cups (110-115°F) | Activates yeast |
| Olive oil | 2 tbsp + extra | Adds flavor, prevents sticking |
| Sugar | 1 tsp | Feeds yeast |
| Salt | 1½ tsp | Enhances flavor |
Optional Substitutions:
- Bread flour for all-purpose flour (for chewier crust)
- Instant yeast for active dry yeast (skip activation step)
- Honey for sugar (same amount)
- Whole wheat flour for up to 50% of white flour (for nuttier flavor)
Dietary Notes:
- Vegan-friendly
- Dairy-free
- Nut-free
- For gluten-free option, see variations section
Step-by-Step Pizza Dough Recipe Instructions
1. Activate the Yeast (10 minutes)
- Find a liquid measuring cup and fill with exactly 1½ cups water
- Check water temperature – it must be 110-115°F (too cold won’t activate yeast, too hot will kill it)
- If you don’t have a thermometer, test water on inner wrist – should feel warm but not hot
- Pour warm water into a large mixing bowl (glass or ceramic works best)
- Measure 1 teaspoon sugar with a measuring spoon (level it off)
- Add sugar to water and stir with a wooden spoon until completely dissolved
- Check your yeast packet expiration date to ensure freshness
- Open your yeast packet carefully – hold over bowl
- Sprinkle entire contents (2¼ teaspoons) evenly over water surface
- Do not stir – let the yeast float on top undisturbed
- Set a timer for 5-10 minutes (I recommend 7 minutes for reliability)
- Watch for changes – surface should become foamy and develop bubbles
- The foam layer should reach about ½ inch thickness when ready
- You may notice a slightly bread-like or beer-like smell – this is normal
- Beginner’s Visual Check: Should look like a tan-colored foam with small bubbles
- Warning: If mixture doesn’t foam or just sits flat, your yeast is likely dead – start over with fresh yeast
2. Mix the Pizza Dough (15 minutes)
- Once yeast is activated, measure 2 tablespoons olive oil (regular, not extra virgin)
- Add oil to the foamy yeast mixture in one pour
- Stir gently with wooden spoon about 10 strokes until combined
- Get a separate large bowl for your dry ingredients
- Measure 2 cups of all-purpose flour using proper technique:
- Fluff flour with a fork before measuring
- Spoon flour into measuring cup (don’t scoop)
- Level top with straight edge
- Add exactly 1½ teaspoons salt to the flour
- Whisk flour and salt together for 30 seconds to combine evenly
- Make a well (hole) in the center of the flour mixture using your fist
- Pour the wet yeast mixture into the well all at once
- Using wooden spoon, stir from the center outward in circular motion
- Start slowly to prevent flour from flying out
- Mix until no dry flour remains in this first addition (about 1 minute)
- Measure remaining 2 cups flour the same way as before
- Add remaining flour ½ cup at a time, stirring 20-30 seconds after each addition
- Texture Progression Guide:
- First addition: Very wet and sticky
- Second addition: Slightly less sticky, more structure
- Third addition: Shaggy dough forms
- Final addition: Dough pulls away from bowl sides
- Dough should be slightly sticky but manageable – may not need all flour
- Stop adding flour when dough forms a shaggy, somewhat unified ball
- Beginner’s Check: Poke dough with dry finger – should feel tacky but not coat finger with dough
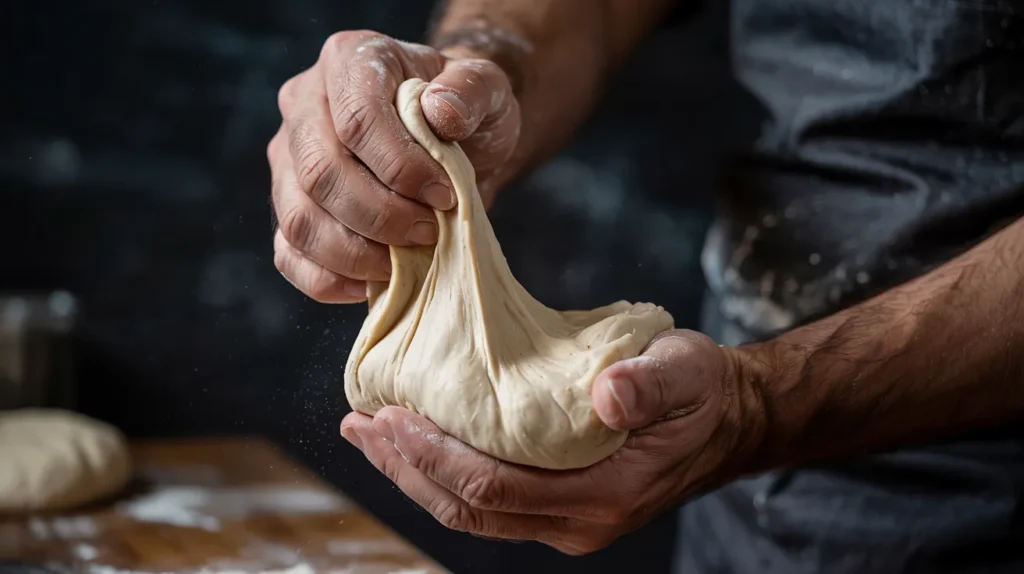
3. Knead the Pizza Dough (10 minutes)
- Clear and clean a 2-foot square space on your counter
- Sprinkle ¼ cup flour over counter surface in even layer
- Dust your hands thoroughly with flour to prevent sticking
- Use rubber spatula to scrape dough onto floured surface (get every bit)
- Dust top of dough lightly with 1 tablespoon flour
- Place hands on opposite sides of dough
- Fold dough in half toward you, like closing a book
- Push dough away with heels of your hands (apply firm pressure)
- Turn dough quarter turn clockwise
- Repeat folding, pushing, and turning in a steady rhythm
- Kneading Visual Pattern: Fold toward you, push away, turn right, repeat
- Kneading Sound: Listen for air bubbles popping – good sign of development
- If dough sticks to hands, add small amounts of flour (1 teaspoon at a time)
- If dough feels too dry and tears, wet hands slightly and continue
- Keep kneading for full 6-8 minutes (set a timer – don’t cut this short!)
- Multiple Ways to Test for Doneness:
- Window Pane Test: Pinch off small piece, stretch thin – should form translucent “window” without tearing
- Poke Test: Press finger 1/2 inch deep – should slowly spring back halfway
- Smooth Test: Surface should be smooth like a baby’s skin with slight tackiness
- Bounce Test: Dough should have elasticity and slight bounce when poked
- Stand Mixer Method Alternative:
- Place ingredients in stand mixer bowl
- Attach dough hook (not paddle attachment)
- Mix on low speed (1-2) until combined
- Increase to medium-low speed (2-3)
- Watch dough climb up hook then fall back
- Mix 5-6 minutes until smooth
- Dough should clear bowl sides but may stick slightly to bottom
4. First Rise for Pizza Dough (45-60 minutes)
- Find a clean bowl larger than your dough (at least 3 quart capacity)
- Pour 1 tablespoon olive oil into bowl
- Use paper towel or pastry brush to coat bowl sides completely with oil
- Pick up kneaded dough with both hands gently
- Form rough ball shape in your hands
- Place dough into oiled bowl smooth side down first
- Roll dough around to coat all surfaces with oil
- Flip dough so smooth side faces up
- Cover bowl completely with clean kitchen towel
- Dampen towel slightly (not dripping wet) to prevent dough from drying
- Place covered bowl in warm, draft-free location:
- Inside turned-off oven with light on (ideal)
- On top of refrigerator
- In sunny window
- On counter away from air conditioning vents
- Set timer for 45 minutes
- Check Points During Rise:
- After 15 minutes: Should show some expansion
- After 30 minutes: Dough should be noticeably larger
- After 45 minutes: Should be nearly doubled
- At 60 minutes: Should be fully doubled
- Visual Test Before and After: Place rubber band around bowl at starting dough height
- Touch Test: Gently press surface – should feel soft and leave slight indentation
- Done When: Dough has doubled in size and feels light and puffy
- Climate Notes:
- In warm kitchens (above 75°F): May rise faster
- In cool kitchens (below 70°F): May take full 60 minutes
- High humidity: Might need slightly more flour
- Dry climate: Might need slightly less flour
5. Shape the Pizza Dough (15 minutes)
- Once dough has doubled, dust counter with 2 tablespoons flour
- Uncover dough – surface may look bubbly (good sign!)
- Gently loosen dough from bowl edges with fingers
- Carefully invert bowl over floured counter
- Let gravity release dough onto counter (don’t pull)
- Press dough gently with flat palms to release air bubbles
- Do not punch or handle roughly – be gentle to maintain air structure
- Using bench scraper or sharp knife, cut dough into 4 equal pieces
- Measuring Tip: If available, weigh on kitchen scale for perfect portions
- Shape each piece into a ball:
- Flatten piece gently
- Fold outer edges into center like wrapping a package
- Turn dough over so seams face down
- Cup hands around dough like making a cage
- Rotate dough in circular motion on counter
- Apply gentle downward pressure while rotating
- Continue until ball has smooth, taut surface
- Arrange dough balls on floured surface with 4 inches between them
- Dust tops lightly with flour
- Cover with clean, slightly damp kitchen towel
- Rest 10-15 minutes to relax gluten (crucial step!)
- Visual Check: Balls may expand slightly during rest
6. Using Your Pizza Dough Recipe (15 minutes per pizza)
- Place oven rack in middle position
- Preheat oven to 450°F for at least 30 minutes (very important for proper baking)
- If using pizza stone, place in oven during preheat
- Prepare your pizza pan or baking sheet:
- Option 1: Dust with cornmeal (prevents sticking, adds texture)
- Option 2: Line with parchment paper (easiest for beginners)
- Option 3: Lightly oil surface with 1 teaspoon olive oil
- Shape each dough ball one at a time (keep others covered):
- Dust work surface and dough ball with flour
- Gently flatten ball into 6-inch disk with fingertips
- Press from center outward, leaving ½-inch border thicker for crust
- Lift dough and place over knuckles of both hands (like a DJ holding a record)
- Gently stretch dough by moving hands apart and rotating
- Let gravity help stretch dough evenly
- Aim for 10-inch circle (doesn’t need to be perfect)
- If dough resists and springs back, set it down and rest 5 minutes
- Never use rolling pin – destroys air bubbles
- Transfer shaped dough to prepared pan with decisive movement:
- Hold dough over pan, aligned with far edge
- Lay dough down from far edge to near edge
- Adjust position if needed by gently lifting edges
- Fix any holes by pinching dough back together
- Create thicker rim at edges by pinching and folding edge inward
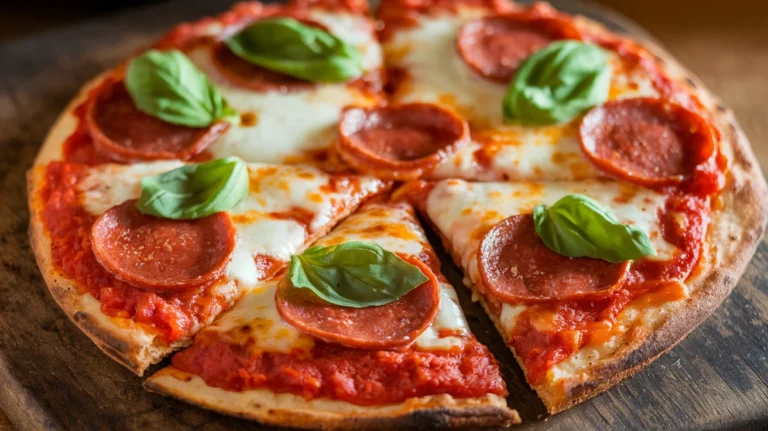
- Add toppings immediately (don’t let dough sit bare):
- Start with thin layer of sauce (3-4 tablespoons) – check out my tips for perfect pizza crust for best results
- Spread sauce to within ½ inch of edge
- Add cheese and toppings sparingly
- Beginner Warning: Don’t overload with toppings (causes soggy crust)
- Maximum 3-4 toppings for best results
- Bake one pizza at a time for even cooking:
- Place in fully preheated oven
- Bake 12-15 minutes (time varies by oven)
- Rotate halfway through if browning unevenly
- Look for these signs of doneness:
- Crust edges golden brown
- Bottom crust golden when lifted with spatula
- Cheese completely melted and slightly browned
- Remove from oven carefully using oven mitts
- Transfer to cutting board
- Let rest 2 minutes before cutting (allows cheese to set)
- Slice with sharp knife or pizza wheel
Troubleshooting Pizza Dough Recipe Problems
Dough too sticky to handle?
- Add flour 1 tablespoon at a time while kneading
- Keep hands and surface well-floured
- Use bench scraper to handle initially
- Dough should be tacky but not stick to clean, dry finger
- If desperate, refrigerate 30 minutes to firm up
Dough too dry and cracking?
- Add water 1 teaspoon at a time
- Mix completely between additions
- Knead longer to develop gluten
- Look for slightly sticky texture
- Mist with water spray bottle for surface moisture
Dough won’t stretch without tearing?
- Let rest 10-15 minutes to relax gluten (crucial step!)
- Make sure dough is fully room temperature
- Check that gluten is fully developed from sufficient kneading
- Pull from center outward, not just edges
- Use gravity with knuckle method rather than pulling
Yeast not foaming during activation?
- Check expiration date on yeast package
- Verify water temperature (110-115°F)
- Make sure sugar was added (yeast needs food)
- Try new package of yeast
- Ensure bowl is clean (residue can inhibit yeast)
Dough not rising properly?
- Find warmer location
- Extend rise time
- Check yeast freshness with activation test
- Make sure salt didn’t directly contact yeast
- Verify your flour isn’t expired
Pizza Dough Recipe Variations & Substitutions
Whole Wheat Pizza Dough
- Replace 2 cups all-purpose flour with whole wheat flour
- Add 2 extra tablespoons water to compensate for absorption
- Expect slightly denser texture
- Requires slightly more kneading time
Herb-Infused Pizza Crust
- Add 1 tablespoon dried Italian herbs to flour
- Try rosemary, basil, oregano, or thyme
- Add 1 teaspoon garlic powder for extra flavor
- Mix herbs with dry ingredients before adding liquids
Thin Crust Pizza Variation
- Use same recipe but divide into 5 portions instead of 4
- Roll thinner (about ⅛-inch thickness)
- Reduce rise time to 30 minutes
- Bake 10-12 minutes until crisp
- Poke surface with fork before baking to prevent bubbles
Thick Crust Pizza Option
- Divide dough into 3 portions instead of 4
- Shape into thicker rounds
- Let rise additional 15-30 minutes after shaping
- Perfect for deep dish style pizza lovers
- Bake at 425°F for 15-18 minutes
Gluten-Free Pizza Dough Alternative
- Replace flour with 4 cups gluten-free flour blend
- Add 1 teaspoon xanthan gum if not in blend
- Increase water to 1¾ cups
- Skip kneading – just mix well
- Expect different texture and handling properties
Storage & Reheating Pizza Dough
Refrigerator Storage:
- After first rise, punch down dough gently
- Divide into 4 portions
- Form into balls
- Wrap each tightly in plastic wrap (double layer)
- Place in zipper bag with air squeezed out
- Refrigerate up to 24 hours
- Remove from refrigerator 1 hour before using
- Let sit at room temperature before shaping
Freezer Storage:
- After first rise, punch down dough gently
- Divide into 4 portions
- Form into balls
- Wrap each portion tightly in plastic wrap
- Place wrapped balls in freezer bag
- Remove as much air as possible
- Label with date and contents
- Freeze up to 3 months
- Thaw overnight in refrigerator
- Let sit at room temperature 1 hour before using
Baked Crust Storage:
- Follow recipe through shaping
- Par-bake crusts 5-7 minutes until set but not browned
- Cool completely on wire rack
- Stack with parchment between layers
- Wrap tightly in plastic wrap, then foil
- Freeze up to 1 month
- Use directly from frozen, add toppings and bake 8-10 minutes
Pizza Dough Recipe Safety Notes & Tips
Food Safety:
- Always wash hands for 20 seconds before handling dough
- Keep work surfaces clean and sanitized
- Never consume raw dough (contains raw flour)
- Refrigerate leftover baked pizza within 2 hours
- Reheat leftover pizza to 165°F before eating
Common Mistakes to Avoid:
- Using cold water for yeast (kills yeast)
- Rushing the rise time (affects texture)
- Adding salt directly to yeast (inhibits growth)
- Overworking the dough (makes tough crust)
- Using expired yeast (won’t rise properly)
- Overloading with toppings (makes soggy crust)
- Opening oven door frequently (drops temperature)
Pro Tips for Perfect Pizza Dough:
- Be patient – good pizza dough takes time
- Preheat oven thoroughly (at least 30 minutes)
- Start with less flour, add more as needed
- Keep dough slightly tacky for best texture
- Let shaped dough rest before topping
- For crispier crust, preheat a baking sheet or pizza stone
- Bake on lowest oven rack for crispier bottom
Looking for creative topping ideas? Check out my collection of pizza recipes for endless inspiration!
This Pizza Dough Recipe was developed for home ovens and standard kitchen equipment. No bread machine or pizza stone required, though they can be used if available.