- Perfect grab-and-go option made with wholesome ingredients
- No refined sugar – sweetened naturally with prunes and a touch of honey
- Ready in just 30 minutes from start to finish
- Packed with fiber and protein to keep you full all morning
Why These Prune Breakfast Cookies Will Change Your Morning Routine
Mornings can be chaotic. Finding time for a nutritious breakfast feels impossible when you’re rushing out the door.
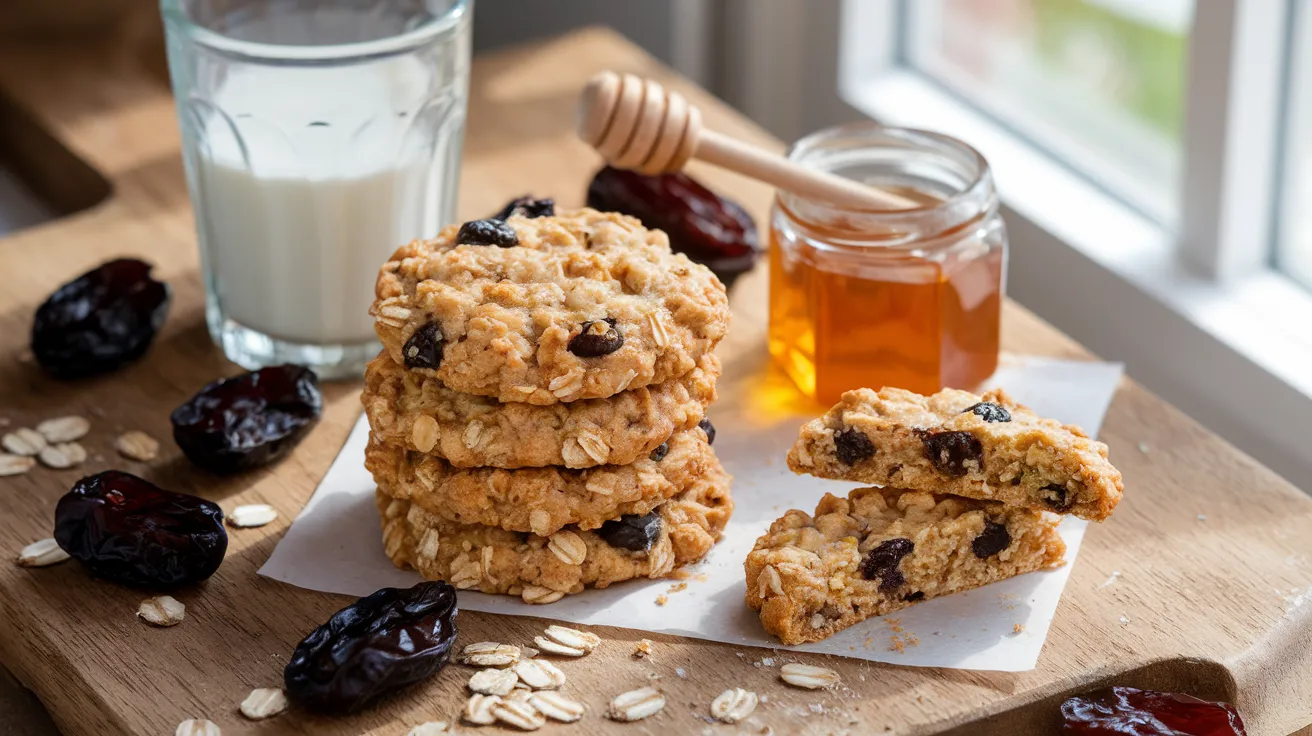
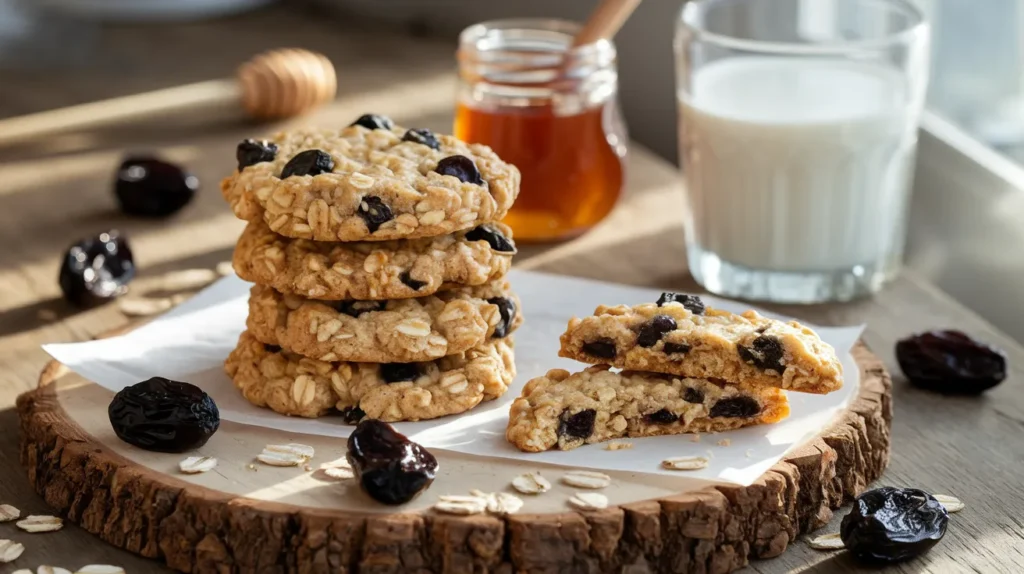
These prune breakfast cookies solve that problem. They’re portable, nutritious, and taste amazing.
Made with heart-healthy ingredients like oats, almonds, and California prunes, these cookies offer a perfect balance of fiber, protein, and natural sweetness. Unlike store-bought breakfast bars loaded with sugar, these homemade treats keep you satisfied without the crash later.
Nutrition Comparison
| Nutrient | Prune Breakfast Cookie | Store-Bought Breakfast Bar | Benefit |
|---|---|---|---|
| Calories | 180 | 230 | Fewer calories |
| Sugar | 12g (natural) | 18g (added) | Less sugar, natural sources |
| Fiber | 4g | 2g | Double the fiber |
| Protein | 5g | 3g | More protein for satiety |
| Fat | 8g (healthy) | 9g (processed) | Heart-healthy fats |
Equipment & Ingredients
Ingredients (Serves 4)
| Ingredient | Amount | Notes |
|---|---|---|
| Rolled oats | 2 cups | Use gluten-free if needed |
| California prunes | 1 cup | Whole |
| Almond butter | 1/3 cup | Room temperature |
| Honey | 2 tablespoons | Or maple syrup |
| Vanilla extract | 1 teaspoon | Pure, not imitation |
| Ground cinnamon | 1 teaspoon | |
| Salt | 1/4 teaspoon | |
| Optional mix-ins | 1/4 cup total | Pepitas, chopped nuts, dark chocolate chips |
Kitchen Tools
| Tool | Purpose |
|---|---|
| Food processor or blender | For pureeing prunes |
| Large mixing bowl | For combining ingredients |
| Measuring cups and spoons | For accurate measurements |
| Baking sheet | For baking cookies |
| Parchment paper | To prevent sticking |
| Cookie scoop or spoon | For portioning dough |
| Cooling rack | For cooling cookies |
| Airtight container | For storage |
Substitutions
- Nut-free option: Replace almond butter with sunflower seed butter
- Gluten-free option: Use certified gluten-free oats
- Vegan option: Use maple syrup instead of honey
Step-by-Step Instructions
Preparation Phase
Prep Time: 15 minutes | Cook Time: 12-15 minutes | Total Time: 30 minutes
- Gather all your ingredients and tools
- Place all ingredients on your counter so everything is within reach
- This prevents forgetting anything mid-recipe
- Let refrigerated items like almond butter come to room temperature (about 30 minutes) for easier mixing
- Preheat your oven to 350°F (175°C)
- Turn on your oven before you start mixing ingredients
- This ensures it reaches the right temperature by the time you’re ready to bake
- If using a convection/fan oven, reduce temperature to 325°F (165°C)
- Beginner tip: Use an oven thermometer if available, as many ovens run hotter or cooler than the setting indicates
- Prepare your baking sheet
- Take a rimmed baking sheet (cookie sheet)
- Cut a piece of parchment paper to fit the size of your baking sheet
- Place the parchment paper on the baking sheet, making sure it lies flat
- Beginner tip: You can secure the corners with a tiny dab of almond butter if the paper keeps curling up
- Prepare the prunes
- Open your package of prunes and measure out 1 cup (about 16-20 prunes)
- Check for and remove any pits if your prunes aren’t already pitted
- Place prunes in the food processor or blender
- Beginner tip: If prunes are very dry, soak them in warm water for 5 minutes, then drain well before processing
- Process the prunes
- Secure the lid on your food processor or blender
- Pulse in short 1-second bursts 10-15 times
- Stop and scrape down the sides with a spatula
- Continue pulsing until prunes are finely chopped but not completely pureed
- Beginner tip: You want small pieces about the size of raisins, not a smooth paste
- If you don’t have a food processor, finely chop the prunes with a sharp knife
Assembly Steps
- Measure and combine dry ingredients
- Place your large mixing bowl on the counter
- Using measuring cups, measure out 2 cups of rolled oats and add to the bowl
- Using measuring spoons, add 1 teaspoon ground cinnamon
- Add 1/4 teaspoon salt
- Mix these dry ingredients together with a spoon until evenly combined
- Add wet ingredients to the bowl
- Add the chopped prunes from the food processor
- Measure and add 1/3 cup almond butter (make sure to stir the almond butter in its jar first if it has separated)
- Measure and add 2 tablespoons honey (or maple syrup)
- Measure and add 1 teaspoon vanilla extract
- Beginner tip: For sticky ingredients like honey and almond butter, lightly coat your measuring utensils with cooking spray first for easier release
- Mix everything together thoroughly
- Using a sturdy wooden spoon or silicone spatula, stir all ingredients
- Press and fold the mixture repeatedly to ensure everything is well incorporated
- Continue mixing for about 2-3 minutes until no dry oats remain
- The mixture should be sticky and hold together when pressed between your fingers
- Beginner tip: If the mixture seems too dry and crumbly (not holding together when pressed), add 1 tablespoon of water at a time
- If the mixture seems too wet (sticks to your hands excessively), add 1-2 tablespoons more oats
- Check your dough consistency
- Take a small amount (about 1 tablespoon) of the mixture in your hand
- Press it together firmly
- If it holds its shape, your dough is ready
- If it falls apart, add 1 teaspoon more almond butter or honey
- Beginner tip: The dough should be sticky but manageable, similar to thick oatmeal
- Add optional mix-ins (if using)
- If you’re using any additional ingredients, measure out up to 1/4 cup total
- Add to the bowl:
- Toasted pepitas (pumpkin seeds)
- Chopped nuts (almonds, walnuts, or pecans work well)
- Dark chocolate chips (mini chips mix in more evenly)
- Gently fold these ingredients into the dough until evenly distributed
- Beginner tip: Don’t overmix after adding mix-ins to avoid breaking them into tiny pieces
Baking Phase
- Form the cookies
- Wash and slightly dampen your hands to prevent sticking
- Using a cookie scoop or measuring spoon, portion about 2 tablespoons of dough per cookie
- Roll the portion between your palms to form a ball
- Place on the prepared baking sheet, leaving about 2 inches between each cookie
- Gently press down with your palm or the bottom of a glass to flatten to about 1/2-inch thickness
- Beginner tip: These cookies won’t spread much during baking, so the shape you make now is close to the final result
- Check your cookie arrangement
- Make sure cookies are evenly spaced on the baking sheet
- You should be able to fit 12 cookies on a standard baking sheet
- If making the full recipe, you may need to bake in two batches
- Beginner tip: Take a photo of your unbaked cookies if you’re unsure about their appearance – you can compare with the finished result to learn for next time
- Bake the cookies
- Place the baking sheet on the middle rack of your preheated oven
- Set a timer for 12 minutes
- Beginner tip: Don’t open the oven door during the first 10 minutes of baking as this can cause temperature fluctuations
- Check for doneness
- After 12 minutes, check if the cookies are ready
- They should be lightly golden around the edges but still soft in the center
- If they’re not yet golden on the edges, bake for 1-2 minutes more
- Beginner tip: Unlike regular cookies, these will remain soft in the center even when fully baked
- Warning for beginners: These cookies won’t get crispy like traditional cookies – this is normal and desired!
Cooling & Finishing
- Remove from oven safely
- Using oven mitts, carefully remove the baking sheet from the oven
- Place the hot baking sheet on a heat-safe surface
- Beginner tip: The cookies will be very soft right out of the oven – this is normal
- Initial cooling period
- Let the cookies rest on the baking sheet for 5 minutes
- During this time, they’ll firm up enough to move
- Beginner tip: Don’t try to move the cookies immediately after baking as they may break apart
- Transfer to cooling rack
- After the 5-minute rest, use a thin spatula to carefully transfer each cookie to a wire cooling rack
- If you don’t have a cooling rack, transfer to a plate lined with a clean paper towel
- Allow to cool completely for about 10-15 minutes
- The cookies will continue to firm up as they cool
- Beginner tip: The cookies are ready to eat when they’re firm enough to pick up without breaking but still soft to the bite
- Final check and enjoy
- Once cooled, check that cookies have firmed up properly
- They should be solid enough to pick up but still chewy
- Enjoy immediately or store for later (see storage instructions below)
- Beginner tip: Try one cookie while still slightly warm – this is when they taste the most delicious!
Troubleshooting
| Problem | Cause | Solution |
|---|---|---|
| Cookies too crumbly | Not enough moisture | Add 1 tablespoon of water or applesauce to the remaining dough |
| Cookies too wet | Too much moisture | Add 1-2 tablespoons more oats and mix well |
| Cookies burning | Oven too hot | Lower temperature by 25°F and reduce baking time by 2 minutes |
| Cookies not golden enough | Oven too cool | Increase baking time by 2-3 minutes |
| Cookies not holding shape | Ingredients not well mixed | Process prunes more finely or add 1 teaspoon more almond butter |
| Mixture too difficult to stir | Almond butter too cold | Let almond butter warm to room temperature before mixing |
Variations & Substitutions
Sweet Variations
- Chocolate Prune: Add 2 tablespoons cocoa powder and 2 tablespoons dark chocolate chips
- Apple Cinnamon: Add 1/4 cup unsweetened applesauce and an extra 1/2 teaspoon cinnamon
- Orange Oat: Add 1 teaspoon orange zest and 2 tablespoons dried cranberries
- Banana Prune: Replace 1/4 cup of the prunes with 1/2 mashed ripe banana
Savory Variations
- Nutty Prune: Add 2 tablespoons toasted chopped walnuts and a pinch of sea salt on top
- Seed Medley: Replace nuts with a mix of pepitas, sunflower seeds, and hemp seeds
- Warm Spice: Add 1/4 teaspoon each of ginger and nutmeg along with the cinnamon
Storage & Reheating
Storage Options
- Room temperature:
- Store in an airtight container with parchment paper between layers
- Keeps fresh for 3-4 days
- Best for maintaining soft texture
- Refrigerator:
- Store in an airtight container with parchment paper between layers
- Keeps fresh for up to 1 week
- Cookies will become firmer when cold
- Freezer:
- Wrap each cookie individually in plastic wrap
- Place wrapped cookies in a freezer-safe bag or container
- Label with the date
- Freeze for up to 3 months
- Beginner tip: Flash-freeze cookies on a baking sheet for 1 hour before wrapping to prevent them from sticking together
Reheating Tips
- From room temperature:
- No need to reheat
- For a warm treat, microwave for 10 seconds
- From refrigerator:
- Let sit at room temperature for 10-15 minutes
- Or microwave for 15 seconds
- From frozen:
- Thaw overnight in refrigerator
- Or thaw at room temperature for 1-2 hours
- Or microwave for 30 seconds, then another 10 seconds if needed
- Beginner tip: Wrap a frozen cookie in a paper towel before microwaving to keep moisture in
Safety Notes & Tips
Food Safety
- Always wash hands with soap and water for 20 seconds before handling ingredients
- Check all ingredients for freshness before using
- Check expiration dates, especially on nuts and seeds which can go rancid
- Store leftover cookies properly to prevent spoilage
- If you have nut allergies, carefully clean all surfaces and tools when making the nut-free version
Tips for Success
- Measure accurately – Use proper measuring cups for dry ingredients and measuring spoons for smaller amounts
- Don’t overbake – Cookies should remain soft in the center
- Let cool completely before storing to prevent moisture buildup
- For easy morning prep, make a double batch and freeze extras
- Try warming a cookie for 10 seconds in the microwave for a nice warm cookie experience
- Beginner tip: Line an airtight container with paper towels when storing to absorb any excess moisture
- Beginner tip: These cookies make a great base for a quick breakfast parfait – crumble one over yogurt and add fresh fruit
These prune breakfast cookies are perfect for busy mornings, afternoon snacks, or even a healthy dessert alternative! With just a few simple ingredients, you’ll have a batch of nutritious treats ready to power you through your day.
Meta description: Make these easy prune breakfast cookies with just 5 ingredients for a quick, healthy breakfast option that’s perfect for busy mornings.
Suggested internal links: Healthy Snack Recipes, Oatmeal Breakfast Ideas, Sugar-Free Treats