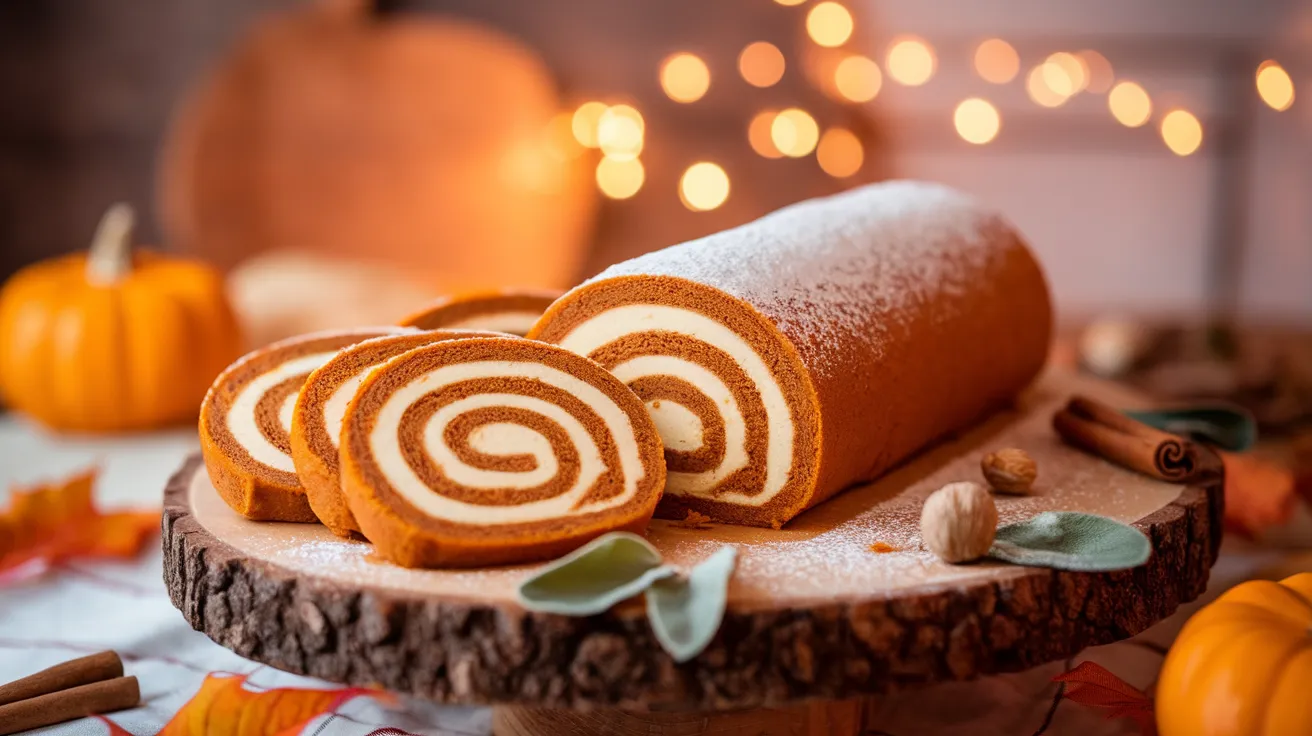
This classic pumpkin roll combines tender spiced cake with sweet cream cheese filling, creating an impressive dessert that tastes as amazing as it looks. Whether you’re hosting Thanksgiving dinner or just craving autumn flavors, this pumpkin roll recipe delivers bakery-quality results right from your home kitchen, and it’s easier to make than you’d think.
SERVES: 4 | PREP: 25 MIN | COOK: 15 MIN | TOTAL: 40 MIN (plus 2 hours chilling)
Ingredients You’ll Need
For the Pumpkin Cake:
| Ingredient | Amount |
|---|---|
| All-purpose flour | ¾ cup |
| Baking powder | 1 teaspoon |
| Baking soda | ½ teaspoon |
| Ground cinnamon | 1 teaspoon |
| Ground ginger | ½ teaspoon |
| Ground nutmeg | ¼ teaspoon |
| Salt | ¼ teaspoon |
| Large eggs | 3 |
| Granulated sugar | 1 cup |
| Pure pumpkin puree | ⅔ cup |
| Vanilla extract | 1 teaspoon |
| Powdered sugar | For dusting |
For the Cream Cheese Filling:
| Ingredient | Amount |
|---|---|
| Cream cheese | 8 oz (softened) |
| Unsalted butter | 4 tablespoons (softened) |
| Powdered sugar | 1 cup |
| Vanilla extract | ½ teaspoon |
Step-by-Step Instructions
Phase 1: Prep Work (5 minutes)
Step 1: Preheat your oven to 375°F (190°C). This higher temperature creates the thin, flexible cake texture you need for rolling without cracking.
Step 2: Line a 15×10-inch jelly roll pan with parchment paper, leaving 2 inches of overhang on each side. Spray the parchment with cooking spray and dust lightly with flour. Why this matters: The overhang helps you lift the cake out easily, and the spray prevents sticking.
Step 3: Prepare your rolling towel by laying out a clean kitchen towel and generously dusting it with powdered sugar (about ¼ cup). Set this aside—you’ll need it immediately when the cake comes out. Pro tip: Use a towel without a waffle texture to prevent imprinting the cake.
Phase 2: Making the Pumpkin Cake Batter (8 minutes)
Step 4: In a medium bowl, whisk together flour, baking powder, baking soda, cinnamon, ginger, nutmeg, and salt until completely combined. Sift this mixture if you see any lumps. This ensures even spice distribution throughout your pumpkin roll.
Step 5: In a large mixing bowl, beat the 3 eggs on high speed for 3-4 minutes until they’re thick, pale yellow, and have tripled in volume. You’ll know they’re ready when they fall in ribbons from the beaters.
Step 6: Gradually add 1 cup granulated sugar to the eggs while continuing to beat on medium speed. Beat for another 2 minutes until the mixture is fluffy and light.
Step 7: Fold in the pumpkin puree and vanilla extract using a rubber spatula. Use gentle folding motions rather than stirring to maintain the airiness you created by beating the eggs.
Step 8: Add the dry ingredients in three additions, folding gently after each addition. Stop folding as soon as you no longer see flour streaks. Warning: Overmixing creates a tough, dense cake that will crack when rolled.
Phase 3: Baking the Cake (15 minutes)
Step 9: Pour the batter into your prepared pan and spread it evenly using an offset spatula. Pay special attention to the corners—they should have the same thickness as the center. Tap the pan gently on the counter 3-4 times to release air bubbles.
Step 10: Bake for 13-15 minutes until the cake springs back when lightly touched and a toothpick inserted in the center comes out clean. Visual cue: The edges will just start pulling away from the pan sides. Don’t overbake—a dry cake will crack.
Phase 4: The Critical Roll (5 minutes)
Step 11: The moment your pumpkin roll cake comes out of the oven, run a knife around the edges to loosen it. Immediately flip the pan over onto your powdered sugar-dusted towel. This step is time-sensitive—waiting even 2 minutes makes rolling harder.
Step 12: Carefully peel off the parchment paper in one slow, steady motion. If any cake sticks, use a knife to gently release it.
Step 13: Starting from the short end, tightly roll the warm cake with the towel inside it. Roll away from you, keeping constant tension but not squeezing. Why roll with the towel? This “trains” the cake to hold its spiral shape without cracking later.
Step 14: Place the rolled cake seam-side down on a wire rack and let it cool completely for 45-60 minutes. Don’t rush this step—a warm cake will melt your cream cheese filling.
Phase 5: Making the Cream Cheese Filling (5 minutes)
Step 15: In a large bowl, beat the softened cream cheese and butter together on medium-high speed for 2-3 minutes until completely smooth and fluffy. Temperature matters: If they’re cold, you’ll have lumps. If too warm, the filling will be runny.
Step 16: Add powdered sugar and vanilla extract, then beat on low speed for 30 seconds (to prevent a sugar cloud), then increase to high speed for 2 minutes until light and creamy.
Phase 6: Assembly (7 minutes)
Step 17: Carefully unroll the cooled cake. It will want to stay curled—that’s perfect. Spread the cream cheese filling evenly over the entire surface, leaving a ½-inch border on all sides. Use an offset spatula for even distribution.
Step 18: Re-roll the cake without the towel this time, starting from the same short end. Roll slowly and deliberately, using the filling as “glue” to seal the spiral. Place seam-side down on your serving plate.
Step 19: Wrap the entire pumpkin roll tightly in plastic wrap and refrigerate for at least 2 hours or overnight. This chilling step is non-negotiable—it sets the filling and makes slicing clean and beautiful.
Step 20: Before serving, dust generously with powdered sugar. Use a serrated knife to slice with a gentle sawing motion, wiping the blade between cuts for picture-perfect slices.
Chef’s Notes
Temperature Control: Room temperature eggs whip up faster and create more volume than cold eggs. Set them out 30 minutes before starting your pumpkin roll recipe for best results.
Pumpkin Pointer: Use pure pumpkin puree, not pumpkin pie filling which contains added spices and sugar that will throw off your recipe’s balance.
Rolling Rescue: If your cake cracks slightly while rolling, don’t panic. The powdered sugar dusting and cream cheese filling hide minor imperfections beautifully.
Make-Ahead Magic: This pumpkin roll actually tastes better the next day after the flavors meld together. Make it up to 2 days ahead for stress-free entertaining.
Nutrition Information (Per Serving)
Calories: 485 | Protein: 8g | Carbohydrates: 68g | Fat: 21g | Fiber: 2g | Sugar: 52g | Sodium: 320mg
Creative Variations
Maple Pecan Pumpkin Roll: Replace half the powdered sugar in the filling with maple syrup and fold in ½ cup toasted chopped pecans. The nutty crunch adds incredible texture contrast to the soft cake.
Chocolate Chip Twist: Mix ½ cup mini chocolate chips into your cream cheese filling for a sweet surprise in every slice. Kids especially love this variation of the traditional pumpkin roll.
Gingerbread Style: Double the ginger and add ¼ teaspoon ground cloves to amp up the warm spice profile. This pairs beautifully with a molasses-spiked cream cheese filling, similar to the layered flavors in this upside down cake.
Light & Fluffy: For an airy texture reminiscent of Japanese cotton cheesecake, fold 2 tablespoons of whipped cream into your finished filling before spreading.
Storage & Reheating Guidelines
Refrigerator Storage: Wrap your pumpkin roll tightly in plastic wrap, then aluminum foil for extra protection. It stays fresh for 5 days when properly stored. The cream cheese filling must stay cold.
Freezing Instructions: Wrap the unfrosted, filled roll in plastic wrap, then foil, then place in a freezer bag. Freeze for up to 2 months. Thaw overnight in the refrigerator before dusting with powdered sugar and serving.
Best Serving Temperature: Remove from the refrigerator 10-15 minutes before serving. Slightly cool is perfect—not ice-cold, but not room temperature either.
Filling Separation Fix: If you notice the filling weeping slightly after storage, simply dab it gently with a paper towel before serving and dust with fresh powdered sugar.
Troubleshooting Common Problems
Problem 1: Cake Cracks When Rolling Solution: Your cake was either overbaked or you waited too long to roll it. The cake must be rolled while still warm and pliable—within 1-2 minutes of coming out of the oven. If it’s already cracked, embrace it as “rustic charm” and serve it with the seam side down.
Problem 2: Filling Oozes Out the Sides Solution: You used too much filling or didn’t leave enough border. Use exactly the amount specified and always leave that ½-inch border. Also ensure your cake is completely cool—warm cake melts the filling instantly.
Problem 3: Cake Sticks to Towel Solution: You didn’t use enough powdered sugar on the towel. Next time, be generous with the dusting—you can always brush off excess. Also ensure you’re using a smooth kitchen towel, not a textured one.
Problem 4: Dry, Dense Cake Texture Solution: You either overmixed the batter or overbaked the cake. Fold ingredients gently just until combined, and watch your baking time carefully. The cake is done when it just springs back when touched—don’t wait for deep browning.
Problem 5: Filling Is Too Soft or Runny Solution: Your cream cheese and butter were too warm when you mixed them. They should be softened but still cool to the touch. Also, make sure you’re using full-fat cream cheese—low-fat versions don’t set properly in this pumpkin roll recipe.
Equipment Essentials
- 15×10-inch jelly roll pan (also called a half sheet pan)
- Parchment paper (not wax paper—it will stick)
- Clean kitchen towel (smooth texture, not waffle weave)
- Wire cooling rack
- Electric hand mixer or stand mixer
- Rubber spatula for folding
- Offset spatula for spreading filling
- Serrated knife for clean slicing
- Fine-mesh sieve for dusting powdered sugar
Shopping List by Store Section
Baking Aisle:
- All-purpose flour
- Baking powder
- Baking soda
- Granulated sugar
- Powdered sugar
- Vanilla extract
- Ground cinnamon
- Ground ginger
- Ground nutmeg
Canned Goods:
- Pure pumpkin puree (15 oz can)
Dairy Section:
- Large eggs
- Cream cheese (8 oz block)
- Unsalted butter
Pantry Staples:
- Salt
- Cooking spray
Success Secrets from the Pros
1. The Egg Excellence Rule: Beat your eggs until they’re pale yellow and thick—this incorporates air that creates the tender, rollable texture essential for a perfect pumpkin roll. Under-beaten eggs produce a dense cake that cracks.
2. The Immediate Roll Technique: Roll the cake within 60 seconds of removing it from the oven. Set a timer when you put it in the oven so you’re ready with your powdered-sugar-dusted towel the moment it comes out.
3. The Filling Firmness Test: Your cream cheese filling should hold stiff peaks when you lift the beater. Too soft means it will ooze; too stiff means it will tear the cake when spreading.
4. The Sharp Knife Method: Always use a serrated knife and a gentle sawing motion to cut your pumpkin roll. A regular knife squishes the delicate spiral and makes messy slices.
5. The Patience Payoff: That 2-hour chill time isn’t optional—it’s when the magic happens. The filling sets, the flavors develop, and the roll becomes slice-able perfection. Overnight chilling delivers even better results.
Slice into this beautiful spiral and watch your guests’ faces light up. This pumpkin roll proves that impressive desserts don’t have to be complicated—just follow the steps, trust the process, and enjoy every spiced, creamy bite of fall perfection.