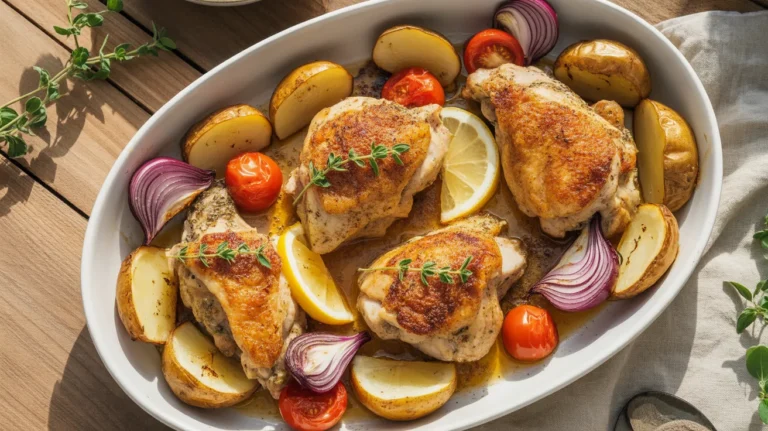
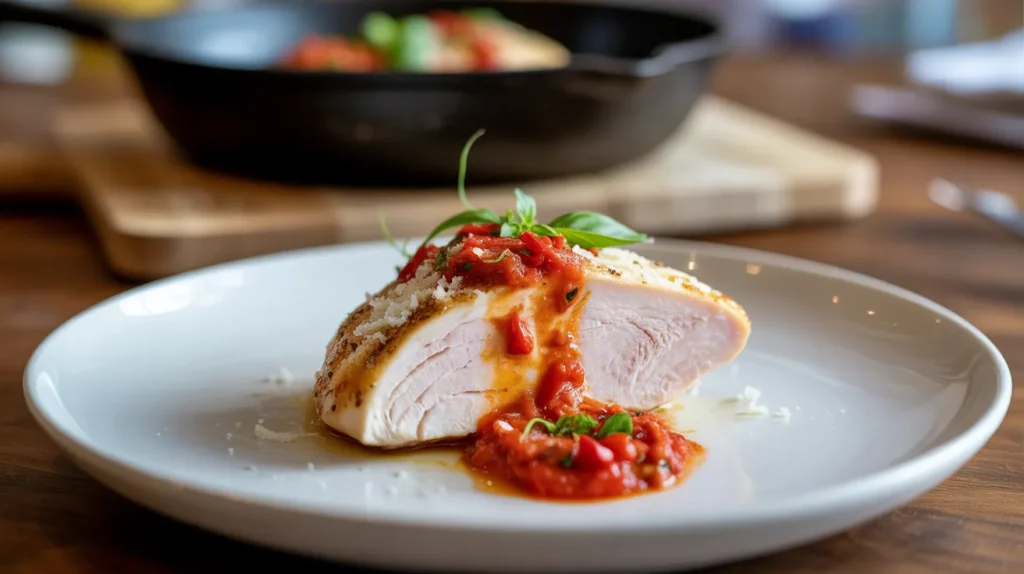
Craving a restaurant-quality red pepper chicken that comes together in under 45 minutes? This bold, flavor-packed red pepper chicken recipe delivers tender, juicy chicken breasts smothered in a vibrant roasted red pepper sauce that tastes like you’ve been cooking all day. Perfect for busy weeknights when you want something special without the fuss.
SERVES: 4 | PREP: 15 MIN | COOK: 28 MIN | TOTAL: 43 MIN
Ingredients You’ll Need
For the Chicken:
| Ingredient | Amount |
|---|---|
| Boneless, skinless chicken breasts | 4 medium (6 oz each) |
| Olive oil | 2 tablespoons |
| Paprika | 1 teaspoon |
| Garlic powder | 1 teaspoon |
| Salt | 1 teaspoon |
| Black pepper | ½ teaspoon |
For the Red Pepper Sauce:
| Ingredient | Amount |
|---|---|
| Roasted red peppers (jarred, drained) | 1½ cups |
| Heavy cream | ¾ cup |
| Chicken broth | ½ cup |
| Fresh garlic (minced) | 4 cloves |
| Butter | 2 tablespoons |
| Dried basil | 1 teaspoon |
| Red pepper flakes | ¼ teaspoon (optional) |
| Parmesan cheese (grated) | ⅓ cup |
For Garnish:
| Ingredient | Amount |
|---|---|
| Fresh basil (chopped) | 2 tablespoons |
| Extra Parmesan | As desired |
Step-by-Step Instructions
Phase 1: Preparing the Chicken (5 minutes)
Step 1: Remove your chicken breasts from the refrigerator and let them sit on the counter for 10 minutes.
Why this matters: Room temperature chicken cooks more evenly, preventing that dreaded raw-in-the-middle situation.
Step 2: Place each chicken breast between two sheets of plastic wrap or parchment paper.
Step 3: Using a meat mallet or heavy skillet, gently pound the thicker end of each breast until the whole piece is about ¾ inch thick.
This creates uniform thickness so everything cooks at the same rate. The thick end won’t be raw while the thin end dries out.
Step 4: Pat the chicken completely dry with paper towels.
Moisture is the enemy of a good sear. Dry chicken = golden crust.
Phase 2: Seasoning and Searing (10 minutes)
Step 5: In a small bowl, combine paprika, garlic powder, salt, and black pepper.
Step 6: Sprinkle this seasoning mixture evenly over both sides of each chicken breast, pressing gently so it sticks.
Step 7: Heat 2 tablespoons olive oil in a large skillet over medium-high heat for about 2 minutes.
Test if it’s ready: Flick a tiny drop of water into the pan. It should sizzle immediately.
Step 8: Carefully place the chicken breasts in the hot skillet, leaving at least 1 inch between each piece.
Don’t crowd the pan or they’ll steam instead of sear. Cook in batches if needed.
Step 9: Let the chicken cook undisturbed for 5-6 minutes.
No peeking! Resist the urge to move them around. You’re building that beautiful golden crust.
Step 10: Flip each piece using tongs and cook the second side for another 5-6 minutes until the internal temperature reaches 165°F on a meat thermometer.
Step 11: Transfer the cooked chicken to a clean plate and tent loosely with aluminum foil to keep warm.
Don’t stack them or they’ll steam and lose their crust.
Phase 3: Creating the Red Pepper Sauce (8 minutes)
Step 12: In the same skillet (don’t wash it—those brown bits are pure flavor!), reduce heat to medium and add 2 tablespoons butter.
Step 13: Once the butter melts and stops foaming, add the minced garlic and cook for 45 seconds, stirring constantly.
Your kitchen should smell incredible. If the garlic starts turning brown, it’s burning—pull the pan off heat immediately.
Step 14: Add your drained roasted red peppers to the skillet and stir them around for 1 minute to heat through.
Step 15: Pour in the chicken broth and use a wooden spoon to scrape up all those delicious brown bits stuck to the bottom of the pan.
This technique (called deglazing) adds massive flavor to your sauce.
Step 16: Add the dried basil and red pepper flakes (if using), stirring to combine.
Step 17: Carefully transfer the entire skillet contents to a blender.
Safety first: Remove the center cap from the blender lid and cover with a kitchen towel. Hot liquids expand when blended.
Step 18: Blend on high speed for 30-45 seconds until completely smooth and creamy.
No chunks should remain—the sauce should look like liquid silk.
Phase 4: Finishing the Dish (5 minutes)
Step 19: Pour the blended sauce back into your skillet over medium-low heat.
Step 20: Stir in the heavy cream and bring to a gentle simmer, stirring occasionally for 2-3 minutes.
The sauce should be bubbling lightly but not boiling aggressively. Boiling can cause the cream to separate.
Step 21: Add the grated Parmesan cheese and whisk constantly until it melts completely into the sauce, about 1 minute.
The sauce should coat the back of a spoon. If it’s too thick, add a splash of chicken broth. Too thin? Let it simmer another minute.
Step 22: Taste your red pepper chicken sauce and adjust seasoning with additional salt and pepper as needed.
Step 23: Return the chicken breasts to the skillet, spooning the sauce over the top to coat completely.
Step 24: Let everything heat together for 2 minutes so the flavors marry.
Step 25: Remove from heat, garnish with fresh basil and extra Parmesan, and serve immediately.
Chef’s Notes
Jarred vs. Fresh Roasted Peppers: Jarred roasted red peppers save massive time and taste nearly identical to homemade. Just make sure to drain them well and pat dry—excess liquid makes your sauce watery. This red pepper chicken recipe works beautifully with either option.
Cream Substitute: Can’t do dairy? Full-fat coconut cream creates an equally luscious sauce with a subtle tropical note that complements the peppers surprisingly well.
Spice Level Control: The red pepper flakes add gentle warmth without overwhelming heat. Start with less if you’re sensitive to spice, or double it if you love a kick in your red pepper chicken.
Wine Addition: For restaurant-level depth, deglaze with ¼ cup white wine before adding the broth. Let it reduce by half (about 2 minutes) before continuing.
Nutrition Information (Per Serving)
| Nutrient | Amount |
|---|---|
| Calories | 385 |
| Protein | 42g |
| Carbohydrates | 9g |
| Fat | 20g |
| Fiber | 2g |
| Sugar | 5g |
Delicious Variations to Try
Mediterranean Red Pepper Chicken: Swap heavy cream for Greek yogurt (stir in off-heat to prevent curdling), add 2 teaspoons dried oregano, ½ cup chopped Kalamata olives, and ¼ cup crumbled feta cheese. Serve over orzo for a complete Mediterranean feast that rivals any penne chicken alfredo for comfort food status.
Creamy Tomato-Red Pepper Fusion: Add ½ cup crushed San Marzano tomatoes to your sauce along with the cream for a stunning pink sauce that’s both tangy and sweet. The acidity balances the richness perfectly.
Smoky Chipotle Version: Blend in 1-2 chipotle peppers in adobo sauce with your roasted red peppers for a smoky, slightly spicy twist that transforms this into Southwestern comfort food. Add ½ teaspoon cumin to amplify those warm, earthy notes.
Herbed Red Pepper Chicken: Skip the Parmesan and instead finish your sauce with 2 tablespoons fresh thyme leaves and 1 tablespoon fresh rosemary for an herbaceous version that feels lighter. This variation pairs beautifully with the techniques you’d find in savory chicken recipes.
Storage & Reheating
Refrigerator Storage: Store leftover red pepper chicken in an airtight container for up to 4 days. Keep the sauce and chicken together so the meat stays moist.
Freezing Instructions: This dish freezes beautifully for up to 3 months. Let it cool completely, then transfer to freezer-safe containers, leaving ½ inch headspace for expansion. Label with the date.
Reheating from Refrigerator: Place in a covered skillet over medium-low heat with 2 tablespoons chicken broth or water. Heat gently for 8-10 minutes, stirring occasionally, until warmed through to 165°F. Never use high heat or the cream sauce will break.
Reheating from Frozen: Thaw overnight in the refrigerator, then reheat as directed above. In a rush? Microwave on 50% power in 2-minute intervals, stirring between each, until hot throughout.
Make-Ahead Tip: Prepare the sauce up to 2 days ahead and store separately from the chicken. When ready to serve, cook fresh chicken and reheat the sauce gently before combining.
Troubleshooting Common Problems
Problem 1: Sauce is Too Thin
Your cream might have been too light, or the sauce didn’t simmer long enough. Solution: Return the sauce to a gentle simmer and let it reduce for 3-5 more minutes, stirring frequently. Alternatively, whisk together 1 tablespoon cornstarch with 2 tablespoons cold water and stir into the simmering sauce until thickened.
Problem 2: Chicken is Dry
Overcooked chicken loses moisture fast. Solution: Always use a meat thermometer and pull the chicken at exactly 165°F—even 5 degrees higher makes a difference. Next time, try brining the chicken in saltwater (¼ cup salt per 4 cups water) for 30 minutes before cooking for guaranteed juiciness.
Problem 3: Sauce Separated or Looks Curdled
High heat or adding cold cream to hot sauce causes separation. Solution: Remove from heat immediately and whisk in 1 tablespoon cold butter piece by piece—the emulsification often saves it. Prevention: Always add cream to warm (not boiling) sauce and keep heat at medium-low.
Problem 4: Sauce Tastes Bland
Roasted peppers vary in flavor intensity between brands. Solution: Boost with 1 teaspoon balsamic vinegar for brightness, an extra pinch of salt, or ½ teaspoon smoked paprika for depth. Sometimes adding 2 tablespoons tomato paste with the garlic creates a richer, more complex flavor.
Problem 5: Chicken Won’t Brown Properly
Moisture on the surface prevents browning. Solution: Pat chicken completely dry before seasoning, ensure your pan is properly preheated (oil should shimmer), and avoid overcrowding. If your chicken keeps steaming, cook in two batches instead of cramming everything into one pan.
Equipment Essentials
- Large skillet (12-inch, preferably stainless steel or cast iron)
- Meat thermometer (instant-read digital recommended)
- Meat mallet or heavy skillet for pounding
- Blender (high-speed works best; immersion blender also works)
- Tongs for flipping chicken
- Wooden spoon for stirring
- Sharp knife and cutting board
- Measuring cups and spoons
- Small mixing bowl for seasoning blend
- Aluminum foil for tenting
Shopping List
Meat Department:
- 4 medium boneless, skinless chicken breasts (about 1½ lbs total)
Dairy Section:
- Heavy cream (¾ cup)
- Butter (2 tablespoons)
- Parmesan cheese, grated (⅓ cup plus extra for garnish)
Produce Section:
- Fresh garlic (4 cloves)
- Fresh basil (small bunch)
Pantry/Canned Goods Aisle:
- Roasted red peppers, jarred (12-oz jar, you’ll use about 1½ cups)
- Chicken broth (½ cup)
- Olive oil
- Paprika
- Garlic powder
- Dried basil
- Red pepper flakes (optional)
- Salt and black pepper
Success Secrets
1. Room Temperature Matters: Always let your chicken sit out for 10-15 minutes before cooking. Cold chicken hitting a hot pan contracts quickly, leading to uneven cooking and a rubbery texture. Room temperature chicken cooks faster and more evenly every single time.
2. Don’t Skip the Pounding: Even thickness is the secret to perfectly cooked chicken. That thick part at the top of the breast takes 3-4 minutes longer to cook than the thin tail end. Pounding to uniform thickness means everything finishes simultaneously.
3. Invest in a Meat Thermometer: Guessing doneness leads to dry, overcooked chicken more often than not. A $15 instant-read thermometer eliminates all guesswork. Stick it in the thickest part—when it hits 165°F, you’re done.
4. Use Those Brown Bits: The caramelized bits stuck to your pan after searing chicken (called fond) contain concentrated flavor gold. When you deglaze with broth and scrape them up, you’re adding restaurant-level depth to your red pepper chicken sauce.
5. Blend Hot Liquids Safely: Hot liquids expand when blended and can explode out of the blender if sealed too tight. Always remove the center cap from the lid, cover loosely with a kitchen towel, start on low speed, then increase gradually. Better yet, let the mixture cool for 5 minutes before blending if you’re nervous.
This red pepper chicken transforms simple ingredients into a meal that tastes like you ordered takeout from that fancy Italian place downtown. The velvety sauce clings to every bite, the chicken stays impossibly tender, and your family will absolutely ask for this on repeat. One pan, less than an hour, pure comfort food magic.