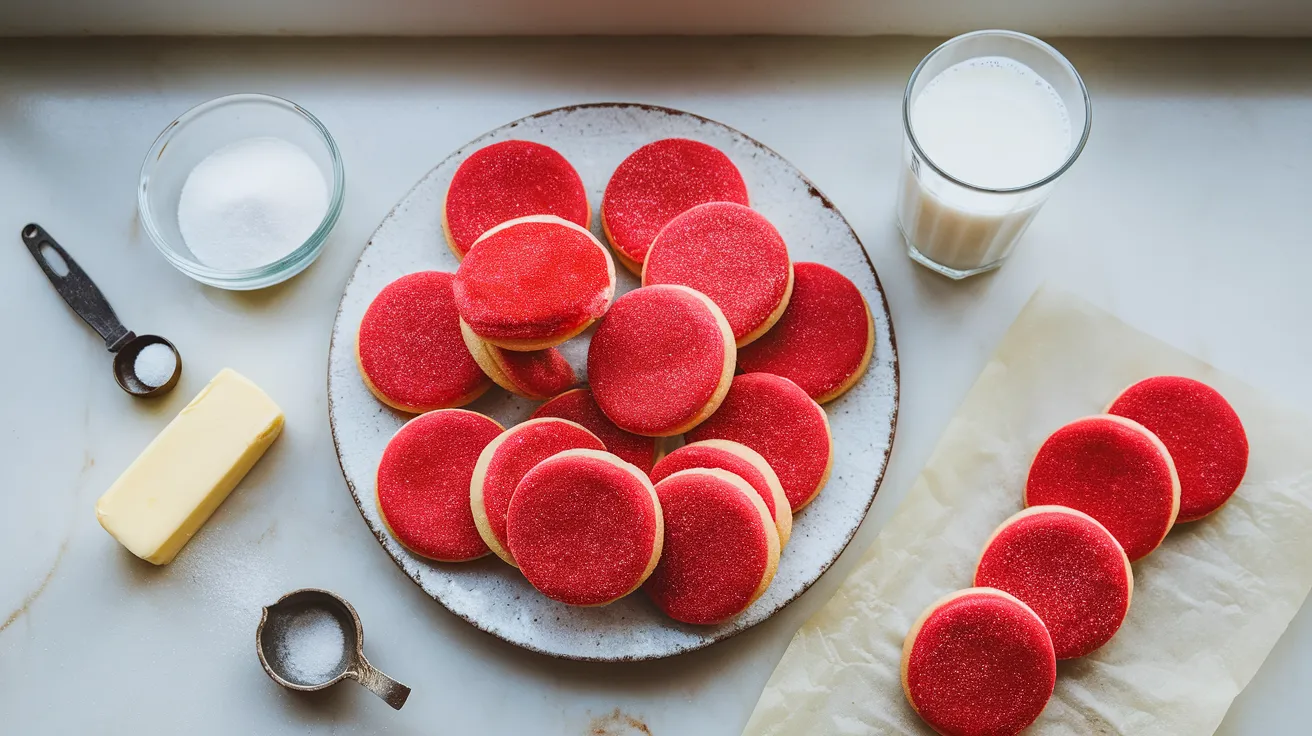
These vibrant red sugar cookies are the perfect blend of buttery sweetness and eye-catching color, making them ideal for Valentine’s Day, Christmas, or any celebration that calls for a pop of red. With their soft, chewy centers and slightly crisp edges, these red sugar cookie beauties will disappear from your cookie jar faster than you can say “batch number two.” Whether you’re a first-time baker or looking to add a colorful twist to classic sugar cookies, this foolproof recipe delivers bakery-quality results every single time.
SERVES: 4 | PREP: 15 MIN | COOK: 12 MIN | TOTAL: 27 MIN
Ingredients You’ll Need
Dry Ingredients
| Ingredient | Measurement |
|---|---|
| All-purpose flour | 1½ cups |
| Baking powder | ½ teaspoon |
| Salt | ¼ teaspoon |
Wet Ingredients
| Ingredient | Measurement |
|---|---|
| Unsalted butter (softened) | ½ cup (1 stick) |
| Granulated sugar | ¾ cup |
| Large egg | 1 |
| Vanilla extract | 1 teaspoon |
| Red gel food coloring | 1-2 teaspoons |
For Rolling
| Ingredient | Measurement |
|---|---|
| Granulated sugar | ¼ cup |
Step-by-Step Instructions
Phase 1: Prep Work (5 Minutes)
Step 1: Position your oven rack to the middle slot and set temperature to 350°F (175°C). This middle position ensures even heat circulation around your cookies, preventing burnt bottoms or undercooked tops.
Step 2: Line two baking sheets with parchment paper or silicone baking mats. Why this matters: This prevents sticking and makes cleanup a breeze. If you don’t have parchment, lightly grease the pans with butter.
Step 3: Take your butter out of the refrigerator if you haven’t already. It should be soft enough to leave a fingerprint when pressed, but not melted or greasy. Room temperature butter (around 65-68°F) creates the perfect cookie texture.
Phase 2: Mix the Dry Ingredients (3 Minutes)
Step 4: In a medium bowl, whisk together 1½ cups flour, ½ teaspoon baking powder, and ¼ teaspoon salt. Whisk for about 15-20 seconds to ensure everything is evenly distributed. Safety tip: Make sure your baking powder is fresh (check the expiration date) or your cookies won’t rise properly.
Step 5: Set this bowl aside. Common mistake to avoid: Don’t skip the whisking step—lumpy flour means unevenly textured cookies.
Phase 3: Cream Butter and Sugar (4 Minutes)
Step 6: In a large mixing bowl, add your ½ cup softened butter and ¾ cup sugar. Using an electric mixer on medium speed (or a wooden spoon if mixing by hand), beat for 2-3 minutes until the mixture looks pale, fluffy, and almost doubles in volume.
Step 7: Visual cue to watch for: The mixture should look like whipped frosting and feel light when you lift the beaters. This creaming process incorporates air, which makes your red sugar cookies tender and soft.
Phase 4: Add Wet Ingredients (3 Minutes)
Step 8: Crack your 1 egg into the butter mixture and add 1 teaspoon vanilla extract. Beat on medium speed for 30-45 seconds until completely combined and smooth.
Step 9: Add 1-2 teaspoons red gel food coloring. Start with 1 teaspoon for a pink-red shade, or use 2 teaspoons for a vibrant, true red. Pro insight: Gel coloring works better than liquid because it won’t thin your dough. Beat for another 30 seconds until the color is evenly distributed with no streaks.
Step 10: Troubleshooting note: If your dough looks curdled after adding the egg, don’t panic! It will smooth out once you add the flour.
Phase 5: Combine and Chill (3 Minutes)
Step 11: With your mixer on low speed (or stirring gently by hand), gradually add your flour mixture to the wet ingredients. Mix just until no white flour streaks remain, about 30-60 seconds. Critical warning: Overmixing develops gluten and makes tough, hard cookies instead of tender ones.
Step 12: Your dough should be soft, slightly sticky, and hold together when pressed. If it’s too sticky to handle, refrigerate for 10-15 minutes. Why this helps: Chilled dough is easier to roll and holds its shape better during baking.
Phase 6: Shape and Bake (10-12 Minutes)
Step 13: Pour your ¼ cup rolling sugar into a small shallow bowl. Using a tablespoon or cookie scoop, portion out dough pieces about 1½ tablespoons each (roughly the size of a walnut).
Step 14: Roll each portion between your palms to form smooth balls. Technique tip: Slightly damp hands prevent sticking without adding flour that could dry out your cookies.
Step 15: Roll each ball in the sugar until completely coated, then place on your prepared baking sheets 2 inches apart. These cookies will spread, so don’t crowd them! You should fit about 8-10 cookies per sheet for this 4-serving batch.
Step 16: Using the bottom of a glass or your palm, gently flatten each ball to about ½-inch thickness. Why flatten: This ensures even baking and that classic sugar cookie shape.
Step 17: Slide the baking sheet into your preheated oven and bake for 10-12 minutes. Visual doneness cue: Cookies are ready when edges just barely start to turn golden but centers still look slightly underdone and soft. They’ll be puffy when you remove them.
Step 18: Let cookies cool on the baking sheet for 5 minutes (this is crucial—they’re too soft to move immediately). What’s happening: The cookies continue cooking from residual heat and firm up during this resting time. Then transfer to a wire rack to cool completely.
Chef’s Notes
Butter temperature is everything. Your butter should be soft but still hold its shape—around 65°F is perfect. Too cold and it won’t cream properly; too warm and your red sugar cookies will spread too thin.
Gel food coloring beats liquid every time. Professional bakers use gel because it provides vibrant color without adding extra moisture that can throw off your dough consistency.
Don’t overbake these beauties. The difference between perfect red sugar cookies and dry hockey pucks is about 2 minutes. Pull them when they look slightly underdone—they firm up as they cool.
Measure flour correctly. Spoon flour into your measuring cup and level it off with a knife. Scooping directly from the bag packs in 20-30% more flour, resulting in dry, cakey cookies instead of tender ones.
Nutrition Information (Per Serving – 3 Cookies)
| Nutrient | Amount |
|---|---|
| Calories | 285 |
| Protein | 3g |
| Carbohydrates | 42g |
| Fat | 12g |
| Saturated Fat | 7g |
| Fiber | 0.5g |
| Sugar | 25g |
Creative Variations to Try
Valentine’s Heart Cookies
Use a heart-shaped cookie cutter to cut out your red sugar cookie dough before baking. Add white chocolate chips for extra romance.
Red Velvet Style
Add 1 tablespoon cocoa powder to your dry ingredients and reduce flour to 1⅓ cups. You’ll get that beloved red velvet flavor profile.
Sprinkle Party Cookies
Before baking, press festive sprinkles into the flattened dough. White sprinkles on red cookies look stunning for Christmas or Fourth of July. For more cookie inspiration, check out our monster cookie dough recipe.
Sandwich Cookies
Make your cookies slightly smaller and sandwich two together with cream cheese frosting. Similar to how we layer flavors in our banana pudding, these sandwich cookies create an impressive dessert.
Storage & Reheating
Room Temperature: Store cooled cookies in an airtight container for up to 5 days. Place parchment paper between layers to prevent sticking.
Freezing Baked Cookies: Freeze in a single layer on a baking sheet until solid, then transfer to freezer bags for up to 3 months. Thaw at room temperature for 15-20 minutes.
Freezing Cookie Dough: Roll dough into balls, freeze on a tray, then store in freezer bags for up to 2 months. Bake from frozen, adding 2-3 extra minutes to baking time.
Refreshing Cookies: If your red sugar cookies lose their softness, microwave for 8-10 seconds or place a slice of bread in the storage container overnight. The cookies will absorb moisture from the bread.

Troubleshooting Common Problems
Problem 1: Cookies Spread Too Much
Solution: Your butter was too warm or you didn’t chill the dough. Next time, chill shaped dough balls for 15 minutes before baking. Also ensure your baking powder is fresh.
Problem 2: Cookies Are Too Dry or Cakey
Solution: You likely added too much flour or overbaked them. Remember to measure flour by spooning and leveling, and pull cookies from the oven when centers still look slightly soft.
Problem 3: Uneven Color with White Streaks
Solution: You didn’t mix the food coloring long enough. Beat for a full 45-60 seconds after adding coloring. Gel food coloring also distributes more evenly than liquid.
Problem 4: Cookies Are Too Hard
Solution: Overbaking is the main culprit. Set a timer for 10 minutes and check every minute after that. Your red sugar cookies should look barely set when you remove them.
Problem 5: Flat, Greasy Cookies
Solution: Your butter was too melted. Butter should be soft enough to dent with your finger but still hold its shape. If your kitchen is warm, chill the dough for 20 minutes before shaping.
Equipment Essentials
- Electric mixer (or sturdy wooden spoon for hand mixing)
- Medium and large mixing bowls
- Whisk
- Measuring cups and spoons
- Two baking sheets
- Parchment paper or silicone baking mats
- Wire cooling rack
- Cookie scoop or tablespoon (optional but helpful)
Shopping List by Store Section
Baking Aisle
- All-purpose flour
- Granulated sugar
- Baking powder
- Vanilla extract
- Red gel food coloring
Dairy Section
- Unsalted butter
- Eggs
Pantry Staples
- Salt
Success Secrets from the Pros
1. Room temperature ingredients blend better. Let your butter and egg sit out for 30-60 minutes before starting. This creates a smoother dough that bakes more evenly.
2. Invest in an oven thermometer. Most home ovens run 25°F hotter or cooler than the dial suggests. Knowing your true temperature prevents baking disasters.
3. Rotate your baking sheet halfway through. At the 6-minute mark, turn your pan 180 degrees for perfectly even browning.
4. The toothpick test doesn’t work for sugar cookies. Unlike cakes, these should look slightly underdone when you pull them. Trust the visual cues and timing.
5. Quality ingredients make a difference. Real vanilla extract (not imitation) and name-brand butter create noticeably better-tasting red sugar cookies. Your taste buds will thank you.
Now you’re ready to bake the most beautiful red sugar cookies that’ll wow everyone at your next gathering!


