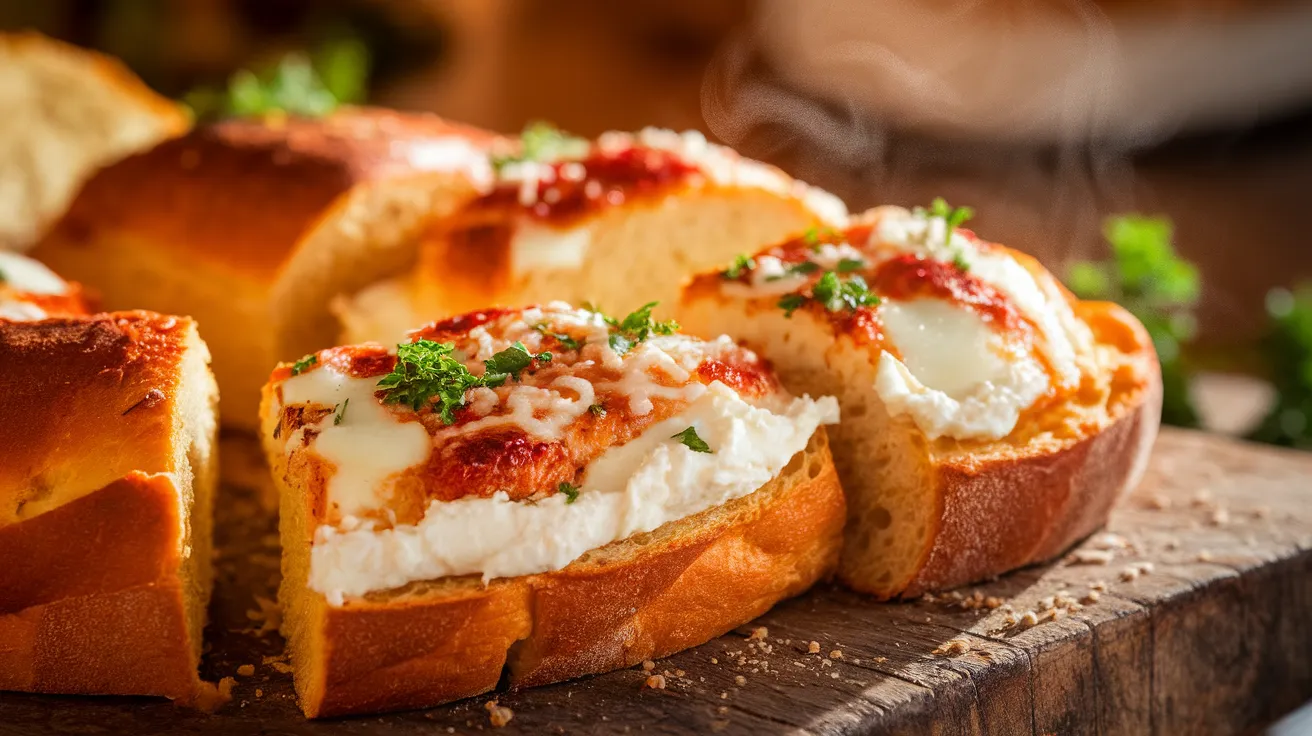
This homemade ricotta garlic bread transforms ordinary bread into an extraordinary side dish that’s creamy, garlicky, and absolutely irresistible. With fluffy ricotta cheese, aromatic herbs, and golden-brown perfection, this ricotta garlic bread recipe delivers restaurant-quality results in your own kitchen.
SERVES: 4 | PREP: 15 MIN | COOK: 12 MIN | TOTAL: 27 MIN
Ingredients
Base Ingredients
| Ingredient | Amount |
|---|---|
| Italian bread loaf | 1 large (about 12 inches) |
| Ricotta cheese | 1 cup, whole milk |
| Butter | 4 tablespoons, softened |
| Garlic cloves | 4 large, minced |
Flavor Enhancers
| Ingredient | Amount |
|---|---|
| Fresh parsley | 3 tablespoons, chopped |
| Parmesan cheese | 1/2 cup, grated |
| Mozzarella cheese | 1/2 cup, shredded |
| Salt | 1/2 teaspoon |
| Black pepper | 1/4 teaspoon |
| Red pepper flakes | 1/8 teaspoon (optional) |
Step-by-Step Instructions
Phase 1: Prep Work (5 minutes)
Step 1: Preheat your oven to 425°F (220°C). Position the rack in the upper third of your oven for optimal browning. This high heat ensures the bread gets crispy on the outside while staying soft inside.
Step 2: Line a large baking sheet with parchment paper or aluminum foil. This prevents sticking and makes cleanup easier later.
Step 3: Cut your Italian bread in half lengthwise using a sharp serrated knife. Place both halves cut-side up on your prepared baking sheet. The cut surface should be completely flat for even topping distribution.
Phase 2: Making the Ricotta Mixture (8 minutes)
Step 4: In a medium mixing bowl, combine the softened butter and minced garlic. Use a fork to mash them together until well combined. The butter should be soft enough to mix easily – if it’s too hard, microwave for 10-15 seconds.
Step 5: Add the ricotta cheese to the butter-garlic mixture. Stir gently with a wooden spoon until just combined. Don’t overmix, as this keeps the ricotta light and fluffy.
Step 6: Season the ricotta mixture with salt, black pepper, and red pepper flakes (if using). Mix in 2 tablespoons of the fresh parsley, saving the rest for garnish. Taste and adjust seasoning – you want a balanced, savory flavor.
Step 7: Add half of the Parmesan cheese to the ricotta mixture and fold it in gently. This adds extra flavor while keeping some cheese for the topping.
Phase 3: Assembly (2 minutes)
Step 8: Using a large spoon or offset spatula, spread the ricotta mixture evenly across both bread halves. Go all the way to the edges to prevent the crust from burning. The layer should be about 1/4-inch thick.
Step 9: Sprinkle the remaining Parmesan cheese over the ricotta mixture, followed by the mozzarella cheese. This double cheese layer creates the perfect golden-brown top.
Step 10: Gently press the cheese toppings into the ricotta mixture with the back of a spoon. This prevents the cheese from sliding off during baking.
Phase 4: Baking to Perfection (12 minutes)
Step 11: Place the baking sheet in the preheated oven on the upper rack. Bake for 10-12 minutes, watching carefully after the 8-minute mark. You’re looking for golden-brown cheese with lightly toasted edges.
Step 12: Check for doneness by looking for bubbling cheese and golden-brown spots across the surface. The edges of the bread should be crispy but not burnt. If needed, bake for 1-2 more minutes.
Step 13: Remove from the oven and immediately sprinkle with the remaining fresh parsley. The residual heat will release the herb’s aroma.
Phase 5: Serving (2 minutes)
Step 14: Let the ricotta garlic bread cool for 2-3 minutes before cutting. This prevents the hot cheese from sliding off when sliced.
Step 15: Using a sharp knife or pizza cutter, slice each half into 4 pieces, creating 8 total servings (2 pieces per person). Cut with a swift motion to avoid dragging the melted cheese.
Step 16: Serve immediately while hot and bubbly. The cheese should stretch beautifully when pulled apart, and the bread should have a crispy bottom with a creamy, flavorful top.
Chef’s Notes
Temperature Control: Keep your oven temperature steady at 425°F. Higher temperatures risk burning the cheese before the bread heats through, while lower temperatures won’t achieve that perfect golden crust.
Ricotta Quality Matters: Use whole milk ricotta for the best texture and flavor. Part-skim ricotta can make your garlic bread less creamy and satisfying.
Garlic Distribution: Mince your garlic finely and let it sit in the butter for 5 minutes before mixing with ricotta. This mellows the raw garlic bite while infusing maximum flavor.
Bread Selection: Choose a sturdy Italian bread with a firm crust. Soft sandwich bread won’t hold the ricotta mixture properly and may become soggy.
Nutrition Information (Per Serving)
- Calories: 385
- Protein: 16g
- Carbohydrates: 32g
- Fat: 22g
- Fiber: 2g
- Sodium: 680mg
Creative Variations
Mediterranean Ricotta Garlic Bread: Add chopped sun-dried tomatoes, fresh basil, and a drizzle of olive oil to the ricotta mixture. This variation pairs beautifully with Italian dishes and adds vibrant color.
Herb-Crusted Version: Mix dried oregano, thyme, and rosemary into the cheese topping for an aromatic herb crust that complements the creamy ricotta base perfectly.
Spicy Jalapeño Twist: Fold diced pickled jalapeños and a pinch of cayenne into the ricotta mixture for heat lovers. The creamy cheese balances the spice beautifully.
Sweet and Savory: Try this ricotta danish technique by adding a touch of honey to the ricotta mixture for a unique flavor profile that works surprisingly well with garlic.
Storage & Reheating
Refrigerator Storage: Wrap leftover ricotta garlic bread tightly in aluminum foil and refrigerate for up to 3 days. The ricotta topping may separate slightly but will come together when reheated.
Freezing Instructions: Freeze assembled but unbaked bread for up to 1 month. Wrap tightly in plastic wrap, then foil. Bake directly from frozen, adding 3-4 minutes to the cooking time.
Reheating Tips: Reheat in a 350°F oven for 8-10 minutes until heated through. Avoid the microwave, which makes the bread soggy and the cheese rubbery.
Make-Ahead Option: Prepare the ricotta mixture up to 24 hours in advance and store covered in the refrigerator. Bring to room temperature before spreading on bread.

Troubleshooting Guide
Problem: Ricotta mixture is too watery Solution: Drain the ricotta in a fine-mesh strainer for 15 minutes before using. Excess moisture makes the bread soggy and prevents proper browning.
Problem: Cheese burns before bread is heated through Solution: Lower oven temperature to 400°F and tent with foil if browning too quickly. The bread needs time to warm through completely.
Problem: Bread bottom stays soft Solution: Place bread directly on oven rack for the last 2-3 minutes of baking. This crisps the bottom while keeping the top from over-browning.
Problem: Garlic taste is too strong Solution: Sauté minced garlic in butter for 30 seconds before cooling and mixing with ricotta. This mellows the flavor significantly.
Problem: Toppings slide off bread Solution: Create shallow score marks in the bread surface with a knife before adding toppings. This gives the mixture something to grip onto.
Equipment Essentials
- Large baking sheet (at least 13×18 inches)
- Sharp serrated knife for clean bread cutting
- Medium mixing bowl for ricotta mixture
- Offset spatula or large spoon for spreading
- Fine-mesh strainer (if ricotta is watery)
- Parchment paper or aluminum foil for easy cleanup
Shopping List
Dairy Section
- Whole milk ricotta cheese (1 container)
- Butter (1 stick needed)
- Parmesan cheese, grated
- Mozzarella cheese, shredded
Produce Section
- Fresh garlic (1 head)
- Fresh parsley (1 bunch)
Bakery Section
- Italian bread loaf (12-inch)
Pantry Items
- Salt
- Black pepper
- Red pepper flakes (optional)
Success Secrets
1. Room temperature ingredients mix more easily and create a smoother ricotta mixture that spreads evenly across the bread surface.
2. Score the bread lightly with a knife before adding toppings – this prevents sliding and ensures every bite has the perfect ricotta-to-bread ratio.
3. Watch the last few minutes of baking carefully. The difference between perfectly golden and burnt happens quickly at high temperatures.
4. Let the finished ricotta garlic bread rest for 2-3 minutes before cutting. This sets the cheese slightly and prevents messy, sliding toppings.
5. For extra indulgence, brush the crust edges with garlic butter before baking. This creates an all-over garlic flavor that rivals your favorite restaurant’s version.
This ricotta garlic bread recipe elevates any meal from ordinary to extraordinary. Whether you’re serving it alongside pasta, soup, or enjoying it as a snack, the combination of creamy ricotta and aromatic garlic creates an irresistible side dish. For another creative ricotta application, try making cloud bread with ricotta cheese for a lighter alternative that’s equally delicious.