Wake up to protein-packed ricotta overnight oats that taste like dessert but fuel your morning like a champion. This creamy, no-cook breakfast combines the luxurious texture of ricotta cheese with hearty oats for a satisfying meal that’s ready when you are—no morning prep required.
SERVES: 4 | PREP: 10 MIN | COOK: 0 MIN | TOTAL: 8 HOURS 10 MIN (includes overnight refrigeration)
Why Ricotta Overnight Oats Will Change Your Morning Routine
I stumbled upon ricotta overnight oats during a chaotic week when I desperately needed breakfast solutions. The creamy ricotta transforms ordinary oats into something magical—like eating cheesecake for breakfast, but actually healthy.
This recipe delivers serious protein power. Traditional overnight oats leave you hungry by 10 AM, but the ricotta addition keeps you satisfied for hours. You’re getting 15 grams of protein per serving without protein powder’s chalky texture.
The best part? Zero morning effort. Mix everything the night before, grab your jar in the morning, and you’re out the door. It’s meal prep that doesn’t feel like work.
Ingredients for Ricotta Overnight Oats
Base Ingredients
| Ingredient | Amount | Notes |
|---|---|---|
| Rolled oats | 2 cups | Old-fashioned only—quick oats get mushy |
| Whole milk ricotta cheese | 1 cup | Full-fat creates the creamiest texture |
| Milk of choice | 1½ cups | Whole milk, almond, or oat work beautifully |
| Greek yogurt | ½ cup | Adds tang and extra protein |
| Honey | 3 tablespoons | Or maple syrup for vegan option |
| Vanilla extract | 2 teaspoons | Pure vanilla makes all the difference |
| Cinnamon | 1 teaspoon | Warmth and natural sweetness |
| Salt | ¼ teaspoon | Enhances all the flavors |
Topping Options
| Ingredient | Amount | Purpose |
|---|---|---|
| Fresh berries | 1 cup | Color, freshness, antioxidants |
| Sliced almonds | ¼ cup | Crunch factor |
| Chia seeds | 2 tablespoons | Extra fiber and omega-3s |
| Dark chocolate chips | ¼ cup | Because you deserve it |
Step-by-Step Instructions for Perfect Ricotta Overnight Oats
Phase 1: Building the Creamy Base (3 minutes)
Step 1: Whisk the ricotta mixture Grab a large mixing bowl and add your ricotta cheese, Greek yogurt, honey, vanilla extract, cinnamon, and salt. Whisk vigorously for 60 seconds until completely smooth with no lumps remaining. The ricotta should look like thick cream—this is what makes these oats incredibly luxurious. If you see any grainy bits, keep whisking. A smooth base means every bite will be perfectly creamy.
Step 2: Add the milk gradually Pour your milk into the ricotta mixture in two stages—half first, then the rest. This prevents lumps and creates a silky consistency. Whisk after each addition until fully incorporated. The mixture should now look like a thick milkshake. Too thick? Add a splash more milk. Too thin? Don’t worry—the oats will absorb excess liquid overnight.
Step 3: Fold in the oats Add your rolled oats to the creamy mixture and stir gently with a spatula—don’t whisk here. You want to coat every oat without breaking them down. Fold from the bottom of the bowl upward, about 15-20 gentle stirs. Each oat should be evenly coated with the ricotta mixture. This ensures uniform absorption and prevents dry spots in the morning.
Phase 2: Portioning and Storing (5 minutes)
Step 4: Choose your containers wisely Grab four mason jars, airtight containers, or meal prep bowls. Glass works best because it doesn’t absorb odors and lets you see those beautiful layers. Each container should hold at least 12 ounces to prevent overflow as the oats expand overnight.
Step 5: Divide the mixture evenly Use a large spoon or ice cream scoop to portion the ricotta overnight oats into your containers. Fill each container about ¾ full—the oats need room to expand. A kitchen scale helps if you’re particular about portions (roughly 10 ounces per serving). Tap each container gently on the counter to release air bubbles and settle the mixture.
Step 6: Create an airtight seal Secure lids tightly—any air exposure causes oxidation and color changes. Press plastic wrap directly onto the surface before adding the lid for maximum freshness. This prevents that unappetizing skin from forming on top. Write the date on each container with a marker if you’re making multiple batches.
Phase 3: The Overnight Magic (2 minutes prep, 8+ hours waiting)
Step 7: Refrigerate strategically Place your containers on a flat shelf in the middle of your refrigerator—not in the door where temperature fluctuates. The oats need consistent 36-40°F temperature for optimal texture. Minimum overnight time is 8 hours, but 12 hours creates an even creamier result. Maximum storage is 5 days, making Sunday prep totally doable.
Step 8: The patience game Resist checking them constantly! The oats need uninterrupted time to soften and absorb all that creamy goodness. Opening containers repeatedly introduces warm air and bacteria. Set a reminder on your phone for the next morning instead.
Phase 4: Morning Assembly and Customization (2 minutes)
Step 9: Give it a good stir Remove your jar from the fridge and let it sit at room temperature for 5 minutes—this takes the chill off. Stir thoroughly with a spoon, scraping the bottom and sides. The oats will have thickened considerably, creating that signature ricotta overnight oats texture. If it’s too thick for your liking, add a splash of milk and stir again.
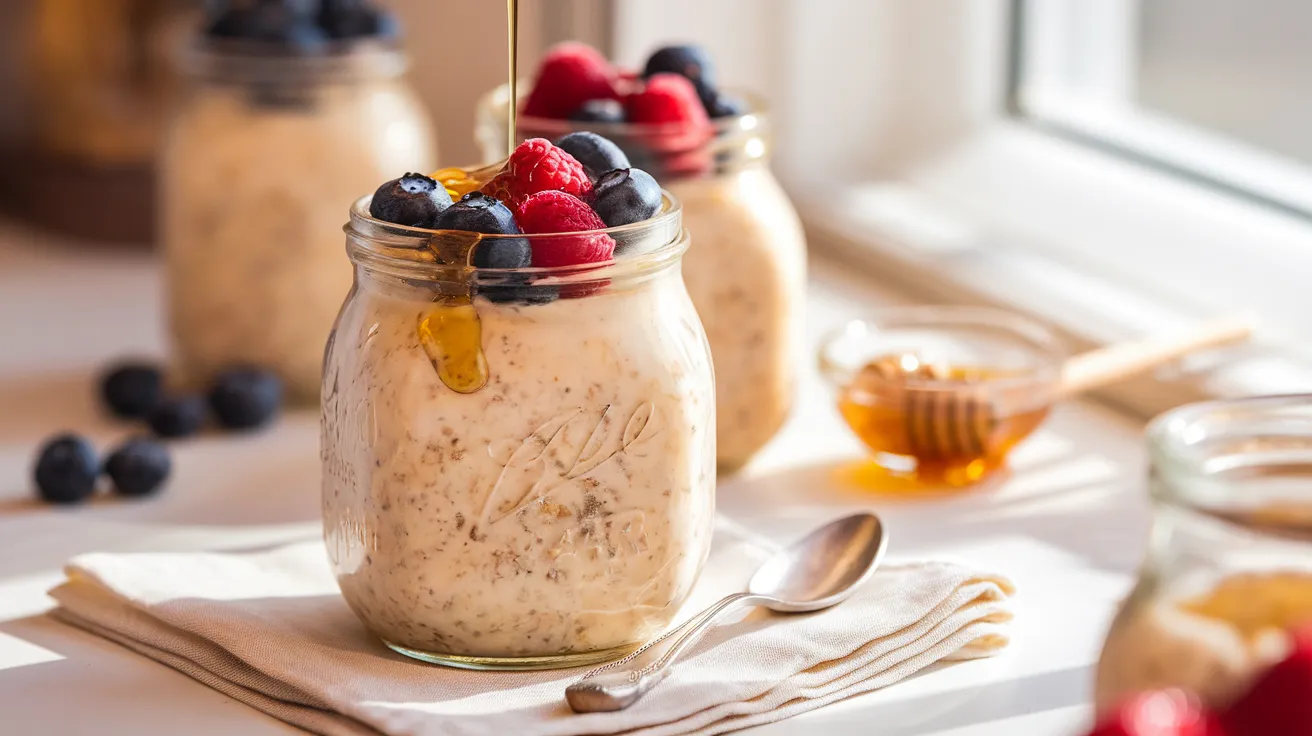
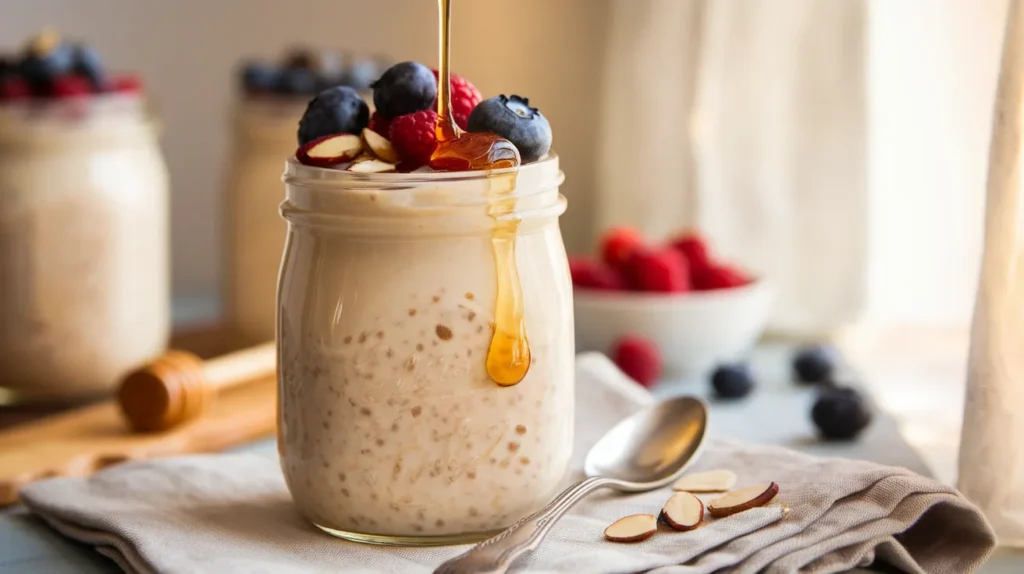
Step 10: Add your fresh toppings This is where ricotta overnight oats become Instagram-worthy! Layer your toppings strategically for maximum visual appeal and flavor distribution. Start with fresh berries pressed into the surface, add a sprinkle of nuts for crunch, then finish with a drizzle of honey or a few chocolate chips. The contrast of cold oats with fresh fruit is perfection.
Step 11: Temperature preference adjustment Most people love these cold, but you can warm them up if you prefer hot breakfast. Microwave for 30-45 seconds, stirring halfway through. Don’t overheat—you want them warm, not scalding. The ricotta creates an incredibly creamy, almost risotto-like texture when warmed. Just like you might warm up ricotta waffles for a cozy breakfast, these oats are delicious at any temperature.
Phase 5: Troubleshooting and Finishing Touches (ongoing)
Step 12: Texture adjustments Too thick? Add liquid one tablespoon at a time—milk, yogurt, or even fruit juice works. Too thin? Stir in a tablespoon of chia seeds and wait 10 minutes—they’ll absorb excess moisture like magic. Finding your perfect ricotta overnight oats consistency is personal, so don’t be afraid to experiment.
Safety tip: Never let these sit at room temperature for more than 2 hours. The ricotta and yogurt can harbor bacteria growth when warm.
Chef’s Notes: Insider Tips for Championship Ricotta Overnight Oats
Ricotta quality makes or breaks this recipe. I tested five brands, and whole milk ricotta with a smooth, creamy texture (not grainy or watery) produces the best results. Look for brands with only milk, whey, and salt in the ingredients.
The oats-to-liquid ratio is crucial. For ricotta overnight oats, use a 1:1.5 ratio (oats to total liquid). This creates perfectly tender oats that still have subtle chew—not mushy baby food texture.
Layer flavors thoughtfully. Add cinnamon to the base mixture, fresh fruit in the morning, and a pinch of flaky sea salt on top. Each layer contributes to the final flavor profile.
Make it truly make-ahead. These keep beautifully for 5 days in the refrigerator, making them perfect for Monday-Friday breakfast prep. The texture actually improves on days 2-3.
Nutrition Information (Per Serving)
Calories: 385 | Protein: 15g | Carbohydrates: 52g | Fat: 13g | Fiber: 6g | Sugar: 18g | Calcium: 25% DV | Iron: 12% DV
Based on using whole milk ricotta, 2% milk, and honey as sweetener
Creative Variations to Keep Things Exciting
1. Chocolate Lover’s Dream
Transform your ricotta overnight oats into dessert! Replace honey with 2 tablespoons cocoa powder and add dark chocolate chips. Tastes like brownie batter but keeps you full until lunch. Top with sliced bananas and a dollop of almond butter.
2. Tropical Paradise
Swap regular milk for coconut milk and add diced mango, toasted coconut flakes, and macadamia nuts. The ricotta’s creaminess pairs beautifully with tropical flavors. Add a squeeze of lime juice in the morning for brightness.
3. Apple Pie Perfection
Mix in 1 cup grated apple, extra cinnamon, and nutmeg to the base. Top with sautéed apple chunks, a drizzle of caramel, and crushed graham crackers. Similar to how ricotta omelette brings comfort food vibes, this variation satisfies dessert cravings healthily.
4. Protein Powerhouse
For an extra protein boost, add 2 scoops vanilla protein powder to the ricotta mixture. Increase the milk by ¼ cup to compensate for absorption. Top with nut butter and hemp seeds for post-workout fuel.
Storage and Reheating Guidelines
Refrigerator storage: Keep ricotta overnight oats in airtight containers for up to 5 days. The oats continue softening over time, reaching peak creaminess on day 2-3.
Freezing option: While not ideal, you can freeze these for up to 1 month. Freeze without toppings in individual portions. Thaw overnight in the fridge, then stir vigorously—the texture won’t be quite as creamy but still delicious.
Reheating instructions: Microwave cold oats for 30-45 seconds, stirring halfway through. Add a splash of milk if needed. Don’t overheat—the ricotta can separate if too hot.
Meal prep strategy: Make a double batch on Sunday. Store half with the base mixture only, adding different toppings throughout the week for variety without extra work.
Troubleshooting Common Ricotta Overnight Oats Problems
Problem 1: Oats are too thick and gluey
Solution: Your ricotta likely had less moisture than expected. Stir in milk one tablespoon at a time until reaching desired consistency. Next time, use slightly more liquid or a creamier ricotta brand. The oats should be thick but spoonable, not cement-like.
Problem 2: Watery separation on top
Solution: You used quick oats instead of rolled oats, or your ricotta was too watery. Drain excess liquid and stir in 1-2 tablespoons ground flax or chia seeds—they’ll absorb moisture in 10 minutes. Always use rolled oats for ricotta overnight oats.
Problem 3: Bland, no flavor depth
Solution: You forgot the salt! Salt amplifies sweetness and flavor—even in sweet recipes. Stir in ⅛ teaspoon salt and a bit more vanilla extract. Toast your nuts before adding for extra flavor dimension.
Problem 4: Grainy, curdled texture
Solution: The ricotta and yogurt separated due to temperature shock or low-quality ingredients. Always use room temperature ricotta when mixing. Whisk vigorously to emulsify. Invest in good ricotta—it’s the star ingredient.
Problem 5: Oats still too crunchy in the morning
Solution: Didn’t soak long enough or too little liquid. Ensure 8+ hours refrigeration and check your liquid ratios. Some oat brands absorb more—adjust by adding ¼ cup extra milk next time.
Equipment Essentials
Must-have tools:
- Large mixing bowl (at least 2 quarts)
- Wire whisk for smooth ricotta mixture
- Rubber spatula for folding
- Four 12-16 oz mason jars or meal prep containers with tight lids
- Measuring cups and spoons
- Kitchen scale (optional but helpful for consistency)
Nice-to-have additions:
- Immersion blender for ultra-smooth ricotta base
- Small measuring spoons for precise seasoning
- Jar funnel for mess-free filling
- Label maker or tape for dating containers
Shopping List by Store Section
Dairy Section:
- 1 container (15 oz) whole milk ricotta cheese
- 1 container (6 oz) plain Greek yogurt
- 1 quart milk (dairy or non-dairy)
Baking Aisle:
- 1 canister rolled oats (not quick oats!)
- Pure vanilla extract
- Honey or maple syrup
- Ground cinnamon
Produce Section:
- Fresh berries of choice
- Optional: bananas, apples, or seasonal fruit
Bulk/Snack Aisle:
- Sliced almonds
- Chia seeds
- Optional: dark chocolate chips, coconut flakes
Pantry Staples You Probably Have:
- Salt
Success Secrets for Perfect Ricotta Overnight Oats Every Time
1. Room temperature matters Take your ricotta out of the fridge 20 minutes before mixing. Room temperature ricotta blends smoother, creating that signature creamy texture without lumps. Cold ricotta resists incorporating properly.
2. The shake test After sealing your containers, give them a gentle shake to ensure no air pockets remain. This prevents dry oat clusters and ensures even moisture distribution throughout.
3. Strategic sweetening Add half the honey to the base mixture, half as a morning drizzle. This creates two distinct sweetness layers—subtle throughout, with a candy-like sweetness on top that hits your taste buds first.
4. The stirring sequence Mix ricotta + yogurt first until smooth, then add liquid, finally fold in oats. This specific order prevents clumping and creates the silkiest ricotta overnight oats texture possible.
5. Temperature serving options Experiment with temperature! Try one jar cold, one slightly warmed—you might discover a new preference. Warmed ricotta overnight oats taste like rice pudding, while cold versions feel refreshing and dessert-like.
These ricotta overnight oats have completely revolutionized my morning routine. The protein keeps me satisfied through morning meetings, the creamy texture feels indulgent, and the make-ahead convenience means I actually eat breakfast instead of grabbing sugary pastries. Make a batch tonight—tomorrow morning you’ll thank yourself when breakfast is waiting in your fridge, ready to fuel your day with zero effort required.