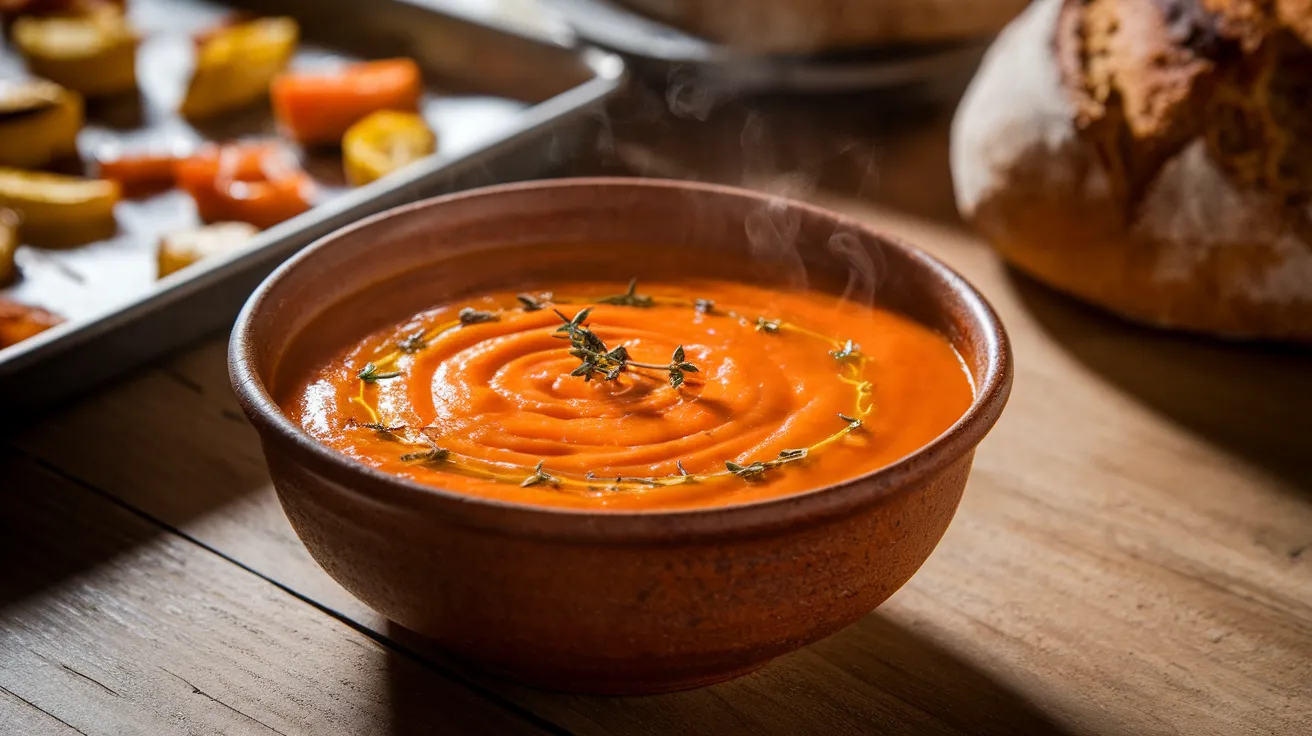
There’s something magical about roasted vegetable soup—the way caramelized vegetables transform into a velvety, comforting bowl of goodness. This roasted vegetable soup recipe brings restaurant-quality flavor to your kitchen with simple techniques that anyone can master.
SERVES: 4 | PREP: 25 MIN | COOK: 50 MIN | TOTAL: 75 MIN
Ingredients
For the Roasted Vegetables:
| Ingredient | Amount |
|---|---|
| Carrots, chopped into 1-inch pieces | 3 large |
| Red bell peppers, roughly chopped | 2 medium |
| Yellow onions, quartered | 2 large |
| Tomatoes, halved | 4 medium |
| Garlic cloves, unpeeled | 6 whole |
| Olive oil | 4 tablespoons |
| Salt | 1½ teaspoons |
| Black pepper | 1 teaspoon |
For the Soup Base:
| Ingredient | Amount |
|---|---|
| Vegetable broth | 4 cups |
| Fresh thyme | 3 sprigs |
| Heavy cream (optional) | ½ cup |
| Smoked paprika | 1 teaspoon |
| Butter | 2 tablespoons |
Step-by-Step Instructions
Phase 1: Preparing Your Vegetables (10 minutes)
Step 1: Preheat your oven to 425°F (220°C). Line two large baking sheets with parchment paper.
Why this matters: High heat creates those caramelized edges that give your soup incredible depth. The parchment prevents sticking and makes cleanup easier.
Step 2: Chop your carrots into uniform 1-inch pieces. Cut the bell peppers into large chunks (about 2 inches).
Visual cue: Your carrot pieces should be roughly the size of your thumb. Don’t worry about perfect cuts—rustic is good here.
Step 3: Quarter your onions, keeping the root end partially intact so the layers stay together during roasting.
Pro tip: Leave some of the papery skin on the outer layer. It adds color and peels off easily after roasting.
Step 4: Halve your tomatoes horizontally (through the equator, not top to bottom). Place them cut-side up on your baking sheet.
Why cut-side up: This prevents them from getting watery and helps concentrate their flavor.
Phase 2: Roasting for Maximum Flavor (40 minutes)
Step 5: Arrange all vegetables on your prepared baking sheets in a single layer. Tuck the unpeeled garlic cloves between the vegetables.
Safety note: Don’t overcrowd! Vegetables need space to roast, not steam. Use two sheets if needed.
Step 6: Drizzle the olive oil over everything. Use your hands to massage it into every piece, coating thoroughly.
The feel test: Vegetables should glisten but not swim in oil. Your hands should feel slick but not dripping.
Step 7: Sprinkle salt and black pepper evenly across both trays. Get your face close and really smell that fresh pepper—that’s flavor building!
Step 8: Roast for 40 minutes, rotating the pans halfway through. You’re looking for deep golden edges and slight charring.
Temperature check: Carrots should pierce easily with a fork, and tomatoes will be collapsed and jammy. Onions will have dark caramelized edges—those brown bits are liquid gold.
Phase 3: Building Your Soup (15 minutes)
Step 9: Remove pans from oven. Let cool for 5 minutes. Squeeze the roasted garlic from their skins—they’ll pop right out like butter.
Watch out: The garlic will be hot! Use a fork to hold the papery skin while squeezing.
Step 10: Transfer all roasted vegetables and garlic to your large pot or Dutch oven. Add the vegetable broth and fresh thyme sprigs.
Pro move: Scrape those browned bits stuck to your baking sheets into the pot. That’s pure flavor you don’t want to waste.
Step 11: Bring the mixture to a boil over high heat, then reduce to a simmer. Let it bubble gently for 10 minutes.
What you’ll see: The broth will turn a gorgeous orange-red color as the vegetables soften further.
Step 12: Remove thyme sprigs. Add butter and smoked paprika. Use an immersion blender to puree until completely smooth.
Blending alternative: Transfer in batches to a regular blender. Fill only halfway and hold the lid with a towel—hot liquid expands!
Step 13: Blend for 2-3 minutes until silky smooth. The soup should coat the back of a spoon thickly.
Texture goal: Think velvety, not watery. If it’s too thick, add broth ¼ cup at a time.
Step 14: Taste and adjust seasoning. Add more salt if needed (I usually add another ½ teaspoon at this point).
Step 15: If using cream, stir it in now. Heat through for 2 minutes but don’t boil.
Why not boil: Boiling can cause cream to separate and look curdled.
Chef’s Notes
The Roasting Game-Changer: High-heat roasting transforms ordinary vegetables into something extraordinary. The natural sugars caramelize, creating depth that raw vegetables simply can’t match.
Garlic Roasting Secret: Unpeeled garlic roasts to sweet, mellow perfection without burning. The paper skin protects it while it slowly caramelizes inside.
Broth Matters: Use good-quality vegetable broth. It’s the backbone of your roasted vegetable soup. Low-sodium gives you better control over seasoning.
Blend Time Counts: Three minutes of blending creates an ultra-smooth, restaurant-quality texture. Don’t rush this step.
Nutrition Information (Per Serving)
Calories: 245 | Protein: 4g | Carbs: 28g | Fat: 14g | Fiber: 6g | Sodium: 680mg
Creative Variations
Roasted Tomato Twist: Add 2 extra tomatoes and reduce carrots by one. This creates a soup that tastes similar to Japanese clear onion soup but with deeper, roasted notes.
Creamy Coconut Version: Swap heavy cream for coconut milk. Add fresh ginger and curry powder for an Asian-inspired bowl.
Spicy Kick: Roast 2 jalapeños alongside your vegetables. Remove seeds before blending for mild heat, or leave them in if you’re brave.
Chunky Country Style: After blending, stir in some reserved roasted vegetable chunks. This gives you the best of both worlds—smooth soup with textured bites. For more texture inspiration, check out this one pot creamy vegetable soup.
Storage & Reheating
Refrigerator: Store in an airtight container for up to 5 days. The flavor actually improves after day two.
Freezer: Pour cooled soup into freezer-safe containers, leaving 1 inch of headspace. Freeze for up to 3 months.
Reheating from Fridge: Warm over medium heat, stirring occasionally. Add a splash of broth if it’s thickened too much.
Reheating from Frozen: Thaw overnight in the fridge, or heat directly from frozen over low heat. Stir frequently to prevent scorching.
Make-Ahead Magic: Roast your vegetables up to 2 days ahead. Store in the fridge, then finish the soup when ready to serve.

Troubleshooting Guide
Problem: Soup tastes bland Solution: You likely undersalted. Add ¼ teaspoon salt at a time, tasting between additions. A squeeze of lemon juice also brightens flavor dramatically.
Problem: Soup is too thick Solution: Thin with vegetable broth or water, ¼ cup at a time. Warm through after each addition until you reach desired consistency.
Problem: Vegetables burned in the oven Solution: Your oven runs hot. Next time, reduce temperature to 400°F and check at 30 minutes. Also ensure vegetables aren’t touching for better air circulation.
Problem: Soup is grainy, not smooth Solution: Blend longer! A full 3 minutes makes all the difference. Strain through a fine-mesh sieve if you want ultra-silky texture.
Problem: Cream curdled when added Solution: Your soup was too hot. Let it cool slightly off heat before stirring in cream. Tempering helps—add a ladle of soup to cream first, then pour back into pot.
Equipment Essentials
- Two large rimmed baking sheets
- Parchment paper
- Large pot or Dutch oven (5-6 quart)
- Immersion blender (or regular blender)
- Chef’s knife and cutting board
- Measuring cups and spoons
- Wooden spoon for stirring
- Ladle for serving
Shopping List
Produce Section:
- Carrots (3 large)
- Red bell peppers (2)
- Yellow onions (2)
- Tomatoes (4 medium)
- Garlic (1 head)
- Fresh thyme (1 bunch)
Pantry Aisle:
- Olive oil
- Vegetable broth (32 oz box)
- Smoked paprika
- Salt
- Black pepper
Dairy Section:
- Butter
- Heavy cream (optional)
5 Success Secrets
1. Size matters for even roasting. Cut vegetables into similar sizes so everything finishes at the same time. Carrots take longest, so keep them slightly smaller than peppers.
2. Don’t skip the pan rotation. Ovens have hot spots. Rotating halfway through ensures even caramelization and prevents burning.
3. Taste before blending. If vegetables taste good roasted, your soup will be amazing. If they’re underseasoned, add more salt now—it’s easier than fixing it after blending.
4. Temperature control is everything. Low heat for simmering, high heat for roasting. Never blast your soup on high heat after adding cream.
5. Trust the color. Your finished soup should be deep orange with reddish undertones. Pale orange means you didn’t roast long enough or hot enough.
This roasted vegetable soup proves that simple ingredients, properly cooked, create something truly special. The roasting step takes extra time, but it’s completely hands-off—and that deep, caramelized flavor is worth every minute.