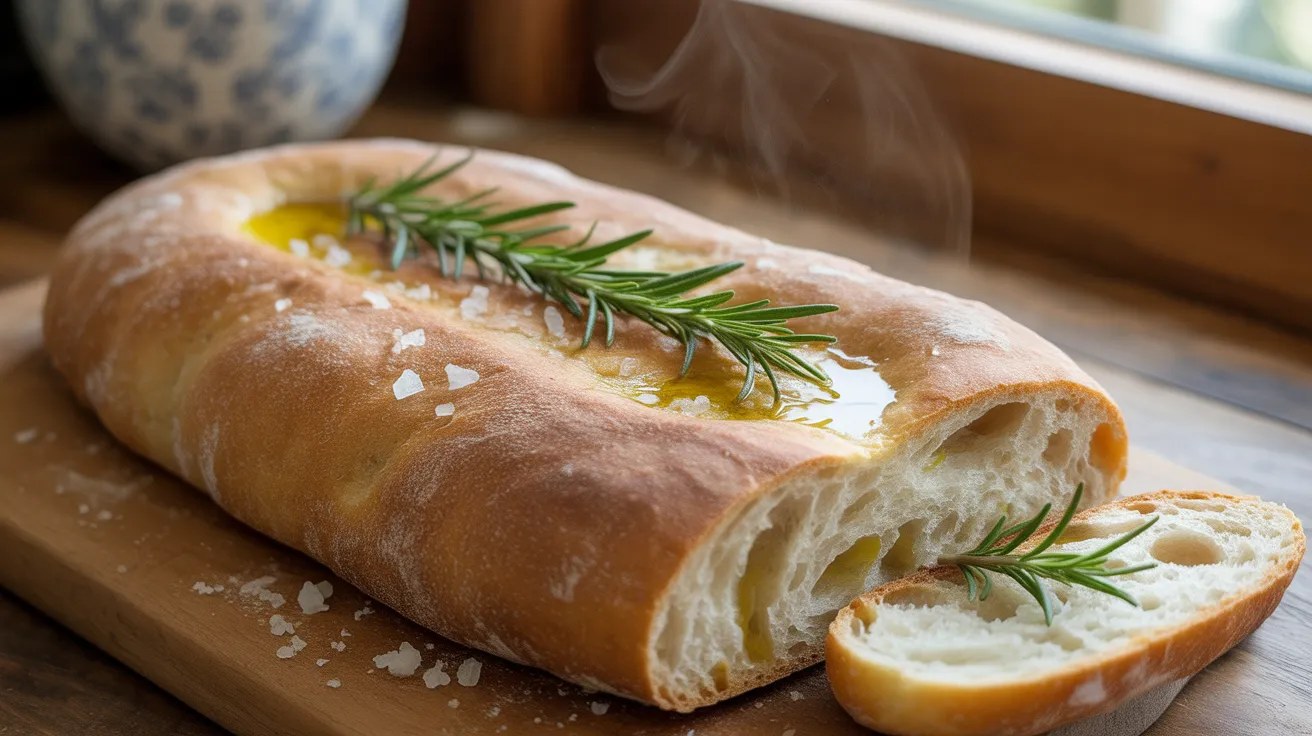
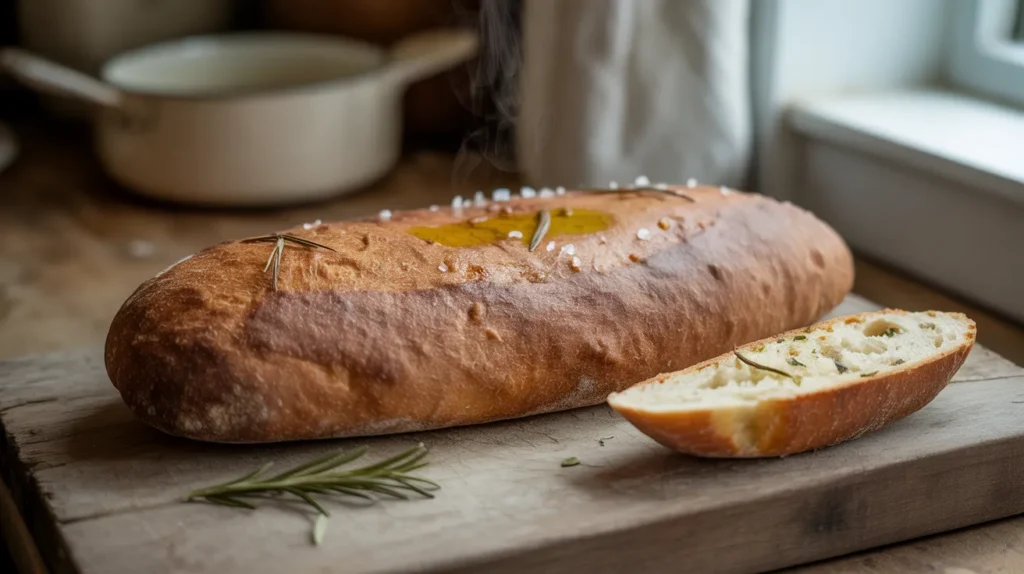
This rosemary ciabatta bread – gluten-free, vegan recipe transforms simple ingredients into bakery-quality bread with an irresistible herb aroma and perfect crusty exterior. Making this rosemary ciabatta bread – gluten-free, vegan at home is easier than you think, and the results will amaze everyone at your dinner table.
SERVES: 4 | PREP: 20 MIN | COOK: 25 MIN | TOTAL: 45 MIN
Ingredients for Perfect Rosemary Ciabatta Bread – Gluten-Free, Vegan
Dry Mix
| Ingredient | Amount | Notes |
|---|---|---|
| Gluten-free flour blend | 3 cups | Use one with xanthan gum |
| Xanthan gum (if not in flour) | 1 tsp | Provides structure |
| Active dry yeast | 2¼ tsp | Check expiration date |
| Sugar | 1 tbsp | Feeds the yeast |
| Salt | 1½ tsp | Enhances flavor |
| Fresh rosemary, chopped | 3 tbsp | Finely minced |
Wet Mix
| Ingredient | Amount | Notes |
|---|---|---|
| Warm water (110°F) | 1¼ cups | Test on wrist |
| Olive oil | ¼ cup | Extra virgin preferred |
| Apple cider vinegar | 1 tbsp | Creates tang |
For Topping
| Ingredient | Amount | Notes |
|---|---|---|
| Olive oil for brushing | 2 tbsp | For golden crust |
| Coarse sea salt | 1 tsp | Finishing touch |
| Fresh rosemary sprigs | 4-6 pieces | For decoration |
Complete Step-by-Step Instructions for Rosemary Ciabatta Bread – Gluten-Free, Vegan
Phase 1: Preparing Your Workspace and Activating Yeast (8 minutes)
- Gather all ingredients and equipment first. Place everything on your counter within easy reach. This prevents scrambling mid-recipe when your hands are floury. Get out: two large mixing bowls, measuring cups, wooden spoon, kitchen towel, and parchment paper.
- Check your yeast expiration date carefully. Expired yeast won’t foam, and your bread won’t rise. If your yeast is close to expiring, do a quick test: mix ¼ cup warm water with 1 tsp sugar and ½ tsp yeast. If it doesn’t foam within 5 minutes, buy fresh yeast.
- Heat your water to exactly 110°F using a thermometer. If you don’t have a thermometer, test the water on the inside of your wrist – it should feel barely warm, like a comfortable bath. Water that’s too hot (above 120°F) will kill the yeast instantly. Too cold (below 100°F) won’t activate it properly.
- Pour the warm water into your largest mixing bowl. Add the sugar and stir with a clean spoon until completely dissolved. The sugar provides food for the yeast, helping it become active and bubbly.
- Sprinkle the yeast evenly over the water surface. Don’t stir yet – just let it sit on top. Set a timer for 5 minutes. During this time, the yeast should start bubbling and creating a foamy layer on top. This foam tells you the yeast is alive and ready to make your rosemary ciabatta bread – gluten-free, vegan rise perfectly.
Phase 2: Creating the Flour Mixture (5 minutes)
- In your second large bowl, measure out the gluten-free flour blend. Use the spoon-and-level method: spoon flour into your measuring cup, then level with a knife. Don’t pack it down. Different flour blends absorb liquid differently, so measure carefully for the best rosemary ciabatta bread – gluten-free, vegan texture.
- Check if your flour blend contains xanthan gum. Read the ingredient list on the package. If it doesn’t list xanthan gum, add 1 teaspoon to your flour. Xanthan gum replaces the stretchy quality that gluten provides, giving your bread structure.
- Add salt to the flour mixture. Make sure to add it away from where you’ll pour the yeast mixture, as direct contact between salt and yeast can slow down rising. Mix the salt evenly through the flour with a fork.
- Wash and finely chop your fresh rosemary. Remove leaves from 3-4 sprigs and chop them very finely – pieces should be no larger than ¼ inch. Large pieces can create air pockets in your bread. Add the chopped rosemary to the flour mixture and stir to distribute evenly.
Phase 3: Combining Wet and Dry Ingredients (10 minutes)
- Check your yeast mixture after 5 minutes. You should see a thick, creamy foam on top that smells slightly sweet and yeasty. If there’s no foam, your yeast is dead – start over with fresh yeast and properly heated water. Good foam means you’re ready to continue making your rosemary ciabatta bread – gluten-free, vegan.
- Add olive oil and apple cider vinegar to the foamy yeast mixture. Stir gently with a wooden spoon. The vinegar adds a subtle tang that makes this bread taste like authentic Italian ciabatta. Don’t worry if the mixture looks slightly curdled – this is normal.
- Create a well in the center of your flour mixture. Use your spoon to push the flour toward the edges of the bowl, creating a crater in the middle. This technique helps ingredients combine more evenly.
- Pour the wet ingredients into the flour well all at once. Start stirring from the center, gradually incorporating flour from the edges. Keep stirring until no dry flour patches remain. The dough will look shaggy and much stickier than regular bread dough – this is exactly what gluten-free dough should look like.
- Knead the dough by hand for 4-5 minutes. Since this is gluten-free dough, you’re not developing gluten strands like regular bread. Instead, you’re ensuring all ingredients are well mixed and the xanthan gum is activated. The dough should hold together but remain sticky. If it’s too dry (cracking), add water 1 tablespoon at a time. If too wet (won’t hold shape), add flour 1 tablespoon at a time.
Phase 4: First Rise (25 minutes)
- Oil a clean large bowl with 1 tablespoon olive oil. Rub the oil all over the bottom and sides of the bowl. This prevents sticking and makes it easy to remove your risen dough later.
- Shape your dough into a rough ball. Don’t worry about making it perfectly round – just gather it together with your hands. Place it in the oiled bowl with the smoothest side facing up.
- Cover the bowl with a damp kitchen towel. The towel should be slightly moist but not dripping wet. This creates humidity that prevents the dough surface from forming a crust while rising. Alternatively, you can cover tightly with plastic wrap.
- Find the warmest spot in your kitchen for rising. Good options include: on top of the refrigerator, near (not on) a warm stove, or in an oven with just the light on. The ideal temperature is 75-80°F. Avoid drafty areas or places that are too hot (like a sunny windowsill).
- Let the dough rise for 20-25 minutes. Set a timer and resist the urge to peek too often. Your rosemary ciabatta bread – gluten-free, vegan dough should increase by about 50% in size. Unlike wheat bread, gluten-free dough rarely doubles in size, so don’t wait for that.
Phase 5: Oven Preparation and Shaping (15 minutes)
- Preheat your oven to 425°F with a baking stone or heavy baking sheet inside. Place the stone or sheet on the middle rack and let it heat for at least 15 minutes. This creates a hot surface that gives your bread a crispy bottom crust.
- Prepare your work surface with parchment paper. Cut a piece of parchment paper large enough to hold your shaped bread (about 15 inches long). Lightly dust it with gluten-free flour. The parchment will help you transfer the sticky dough to the oven.
- Gently turn out your risen dough onto the floured parchment. Use a spatula or your hands to ease it out of the bowl. Don’t punch it down – you want to keep as much air as possible in the dough.
- Shape the dough into a rustic oval with wet hands. Dip your hands in water to prevent sticking. Gently stretch and shape the dough into an oval about 12 inches long and 6 inches wide. Don’t worry about perfect edges – ciabatta is meant to look rustic and homemade.
- Create signature ciabatta dimples across the surface. Use your fingertips to press down into the dough, creating small wells about ½ inch deep and 1 inch apart. These dimples hold the olive oil and seasonings, and they’re what make ciabatta look authentic.
Phase 6: Final Preparation and Baking (30 minutes)
- Brush the entire surface with olive oil. Use a pastry brush or your fingers to coat the dough generously. Make sure the oil pools in the dimples you created. This creates the golden, crispy crust that makes rosemary ciabatta bread – gluten-free, vegan so irresistible.
- Sprinkle coarse sea salt evenly over the oiled surface. Use about 1 teaspoon, focusing on getting salt into the dimples. The coarse salt creates bursts of flavor and adds to the authentic texture.
- Arrange fresh rosemary sprigs decoratively on top. Press them gently into the dough so they won’t fall off during baking. These will become aromatic and slightly crispy, adding visual appeal and extra herb flavor.
- Let the shaped bread rest for 10 minutes. This final rest allows the dough to relax and helps prevent cracking during baking. Cover lightly with a kitchen towel if your kitchen is very dry.
- Create steam for a crispy crust (optional but recommended). Place an empty metal pan on the bottom oven rack. Have 1 cup of hot water ready to pour into this pan right after you put the bread in the oven. This steam creates an extra-crispy crust.
- Transfer the bread to the hot oven. Grab the parchment paper edges and carefully slide the whole thing onto your preheated baking stone or sheet. If using the steam method, quickly pour the hot water into the bottom pan and close the oven door immediately.
- Bake for 20-25 minutes until golden brown. The bread is done when it’s deep golden brown on top and sounds hollow when you tap the bottom. If you have a thermometer, the internal temperature should reach 200°F.
- Cool completely before slicing. Transfer to a wire rack immediately after baking. This is crucial – cutting too early will result in a gummy texture inside. Let your rosemary ciabatta bread – gluten-free, vegan cool for at least 15 minutes, though 30 minutes is even better for the perfect texture.
Chef’s Notes for Perfect Rosemary Ciabatta Bread – Gluten-Free, Vegan
Flour Selection is Critical: Use a high-quality gluten-free flour blend like Bob’s Red Mill 1-to-1 or King Arthur Gluten-Free Flour. Single-flour substitutes won’t give you the complex texture this rosemary ciabatta bread – gluten-free, vegan needs.
Moisture Management: Gluten-free dough requires more hydration than wheat dough. If your kitchen is particularly dry or humid, you may need to adjust liquid by 1-2 tablespoons.
Fresh Herbs Make a Difference: While dried rosemary works in a pinch (use 1 tablespoon instead of 3), fresh herbs provide the bright, aromatic quality that makes this bread special.
Steam Creates Professional Results: The steam technique in step 29 is what professional bakers use. It keeps the crust soft initially, allowing maximum rise, then creates incredible crispiness as it evaporates.
Nutrition Information (Per Serving)
- Calories: 285
- Protein: 6g
- Carbohydrates: 52g
- Fat: 8g
- Fiber: 3g
- Sodium: 590mg
Creative Variations for Your Rosemary Ciabatta Bread – Gluten-Free, Vegan
Mediterranean Herb Medley: Replace rosemary with equal amounts of fresh thyme, oregano, and basil for a different herb profile that’s equally delicious.
Olive and Sun-Dried Tomato: Fold in ½ cup chopped Kalamata olives and ¼ cup minced sun-dried tomatoes during kneading. This creates a savory bread that pairs beautifully with vegan chocolate chip banana bread for a complete brunch spread.
Garlic Lovers’ Version: Add 4 minced garlic cloves and 2 tablespoons nutritional yeast to create a cheesy, garlicky flavor without any dairy products.
Sweet Morning Twist: Reduce salt to ½ teaspoon and add 2 tablespoons maple syrup plus 1 teaspoon vanilla extract. This creates a lightly sweet bread that complements vegan Hawaiian sweet rolls perfectly for breakfast.
Storage & Reheating Your Rosemary Ciabatta Bread – Gluten-Free, Vegan
Same Day Storage: Keep covered with a kitchen towel at room temperature for up to 8 hours. The texture is absolutely best when eaten fresh and warm.
Short-Term Storage: Wrap tightly in plastic wrap and refrigerate for up to 3 days. To refresh, sprinkle with water and warm in a 350°F oven for 5-7 minutes.
Long-Term Storage: Slice the cooled bread and freeze in airtight freezer bags for up to 3 months. Individual slices can be toasted directly from frozen.
Reviving Day-Old Bread: Lightly spray or brush with water and heat in a 300°F oven for 8-10 minutes to restore the crispy exterior and soft interior.
Troubleshooting Common Issues
Dense, Heavy Texture: This usually means your yeast was inactive. Always check expiration dates and test yeast activation before proceeding with the full recipe.
Cracked or Splitting Top: Your dough was too dry during rising. Keep it properly covered and consider adding an extra tablespoon of water to the recipe next time.
Gummy, Undercooked Interior: You cut the bread too soon after baking. Gluten-free breads need longer cooling time than wheat breads to set properly.
Flat, Didn’t Rise Well: Could be overproofed, underproofed, or dead yeast. Watch for that 50% size increase rather than waiting for doubling like traditional bread.
Bland Flavor: Increase salt by ¼ teaspoon and make sure your rosemary is fresh. Also, let the dough rise slightly longer for better flavor development.
Equipment Essentials
- Two large mixing bowls (at least 3-quart capacity)
- Accurate measuring cups and spoons
- Kitchen scale (recommended for consistent results)
- Wooden spoon for mixing
- Clean kitchen towels
- Parchment paper (essential for transfer)
- Baking stone or heavy baking sheet
- Wire cooling rack
- Pastry brush for oil application
- Timer for accurate timing
Shopping List by Store Section
Baking Aisle
- Gluten-free flour blend (Bob’s Red Mill or King Arthur recommended)
- Xanthan gum (if not included in flour blend)
- Active dry yeast (check expiration dates)
- Granulated sugar
- Apple cider vinegar
Produce Section
- Fresh rosemary (2-3 large sprigs needed)
Pantry/Oil Section
- Extra virgin olive oil
- Coarse sea salt
- Fine salt for baking
Specialty/Health Food Section
- Additional gluten-free products if needed
Success Secrets for Perfect Results
- Weigh ingredients when possible – gluten-free baking is more precise than traditional baking. One cup of gluten-free flour should weigh approximately 140 grams.
- Create the perfect rising environment by preheating your oven to 200°F for 2 minutes, then turning it off and placing your covered bowl inside with the door slightly ajar.
- Don’t skip the resting periods – both the initial rise and the final 10-minute rest are crucial for proper texture development in gluten-free bread.
- Master the parchment paper transfer – this prevents the sticky dough from tearing and makes oven transfer foolproof.
- Trust the process and timing – this rosemary ciabatta bread – gluten-free, vegan recipe has been tested extensively, so follow the steps exactly for guaranteed success.
Making rosemary ciabatta bread – gluten-free, vegan at home brings the authentic flavors of Italian bakeries to your kitchen. With these detailed instructions, even beginning bakers can create professional-quality results that rival any artisan bread shop.