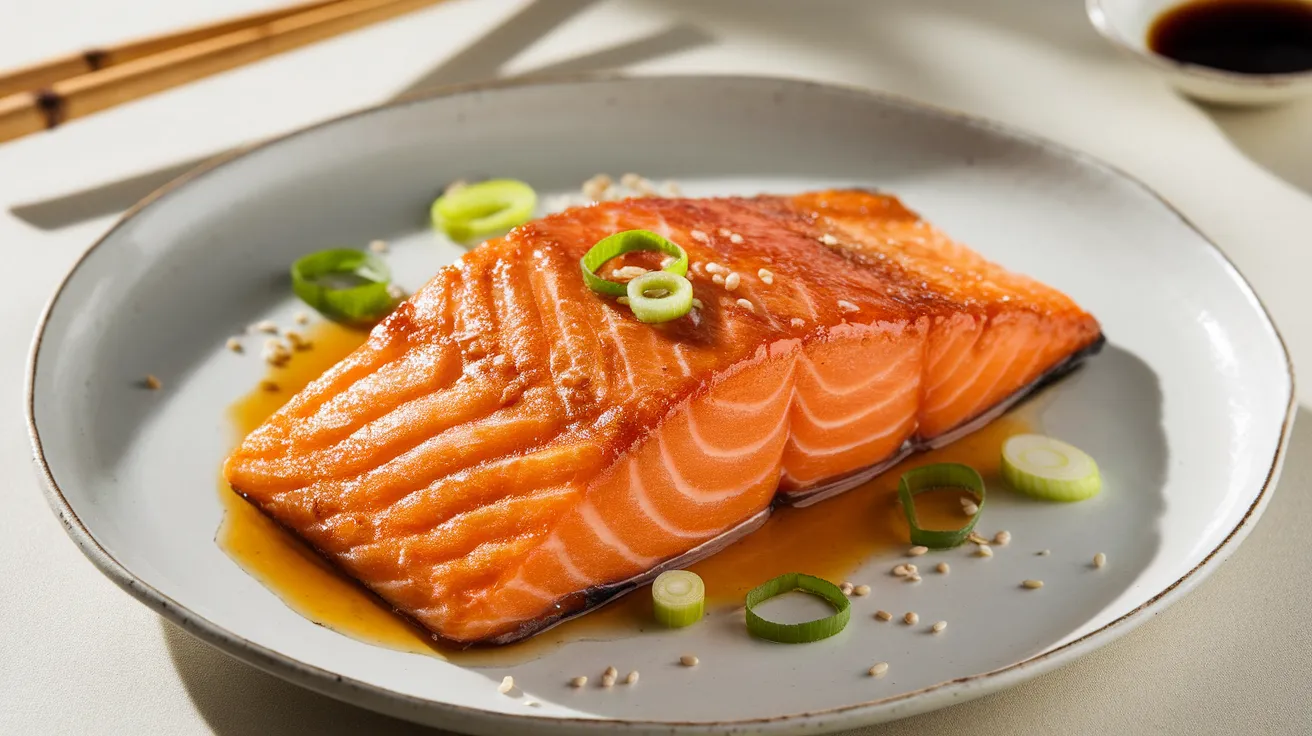
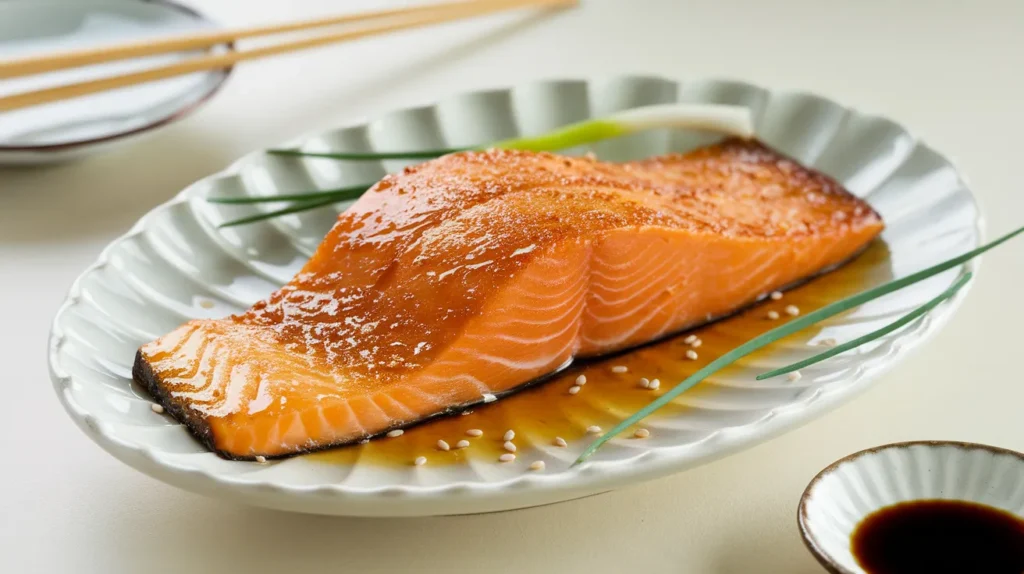
Discover the umami-rich magic of sake kasu in this incredibly flavorful glazed salmon that transforms ordinary fish into restaurant-quality perfection. This sake kasu recipe delivers deep, complex flavors with a beautiful caramelized finish that will have your dinner guests asking for seconds. The fermented rice paste creates an irresistible glaze that’s both sweet and savory, making this dish absolutely unforgettable.
SERVES: 4 | PREP: 10 MIN | COOK: 10 MIN | TOTAL: 20 MIN
Ingredients
Main Ingredients
| Ingredient | Amount |
|---|---|
| Salmon fillets (skin-on) | 4 pieces (6 oz each) |
| Sake kasu paste | 3 tablespoons |
| Mirin | 2 tablespoons |
| Soy sauce | 1 tablespoon |
| Brown sugar | 1 tablespoon |
Aromatics & Finishing
| Ingredient | Amount |
|---|---|
| Fresh ginger (grated) | 1 teaspoon |
| Garlic (minced) | 2 cloves |
| Sesame oil | 1 teaspoon |
| Green onions (sliced) | 2 stalks |
| Sesame seeds | 1 tablespoon |
Step-by-Step Instructions
Phase 1: Preparation (5 minutes)
- Remove salmon from refrigerator and let it sit for 10 minutes to reach room temperature. This ensures even cooking and prevents the fish from seizing up when it hits the hot pan.
- Pat salmon fillets completely dry using paper towels, paying special attention to the skin side. Any moisture will prevent proper searing and glaze adherence.
- Score the skin diagonally in 1-inch intervals, cutting about 1/8-inch deep. This prevents the skin from curling and creates beautiful presentation lines.
Phase 2: Glaze Preparation (3 minutes)
- Combine sake kasu and mirin in a small bowl, whisking vigorously until the paste becomes smooth and lump-free. The sake kasu should completely dissolve into the mirin.
- Add soy sauce, brown sugar, grated ginger, and minced garlic to the mixture. Whisk until the sugar completely dissolves and the glaze becomes glossy.
- Taste and adjust the glaze – it should be balanced between sweet, salty, and umami. Add more mirin for sweetness or soy sauce for saltiness if needed.
Phase 3: Cooking the Salmon (8 minutes)
- Heat a large non-stick or cast-iron skillet over medium-high heat for 2 minutes. The pan is ready when a drop of water sizzles immediately upon contact.
- Brush salmon fillets lightly with sesame oil on both sides. This prevents sticking and adds subtle nutty flavor that complements the sake kasu beautifully.
- Place salmon skin-side down in the hot pan, pressing gently with a spatula for 10 seconds to ensure full contact. You should hear an immediate sizzle – this means you’re getting proper searing.
- Cook undisturbed for 4 minutes until the skin becomes golden and crispy. Resist the urge to move the fish – patience here creates that perfect crispy skin.
- Flip salmon carefully using a thin spatula, supporting the fillet to prevent breaking. The skin should release easily when properly seared.
- Brush the cooked side generously with half of the sake kasu glaze while the flesh side cooks for 2 minutes. The glaze will start caramelizing immediately.
Phase 4: Glazing and Finishing (4 minutes)
- Flip salmon back to skin-side down and brush with remaining glaze. The heat will cause the glaze to bubble and thicken.
- Reduce heat to medium-low and cook for 2 more minutes, allowing the glaze to caramelize without burning. The surface should become glossy and slightly darkened.
- Check doneness by gently pressing the thickest part – it should feel firm but still give slightly. Internal temperature should reach 145°F.
- Remove from heat and let rest for 2 minutes. This allows the juices to redistribute and prevents the fish from falling apart.
- Garnish with sliced green onions and sesame seeds just before serving to add freshness and textural contrast.
Chef’s Notes
Temperature Control: Keep heat at medium-high for searing, then reduce to medium-low for glazing. Too high heat will burn the sake kasu before the salmon cooks through.
Sake Kasu Quality: Look for fresh, pliable sake kasu at Japanese markets. It should smell pleasantly yeasty and alcoholic, not sour or off-putting.
Glaze Consistency: The perfect sake kasu glaze should coat the back of a spoon but still flow easily. Add a splash of water if it becomes too thick.
Skin Crispness: Pat the skin completely dry and start cooking skin-side down for maximum crispiness. This creates a beautiful textural contrast to the tender flesh.
Nutrition Information (Per Serving)
- Calories: 285
- Protein: 35g
- Carbohydrates: 8g
- Fat: 12g
- Sodium: 420mg
Delicious Variations
Miso-Sake Kasu Fusion: Replace half the sake kasu with white miso paste for an even deeper umami profile that pairs beautifully with the salmon’s richness.
Spicy Sake Kasu Version: Add 1 teaspoon of rayu sauce to the glaze for a gentle heat that enhances the fermented flavors without overwhelming them.
Vegetarian Adaptation: Use this same sake kasu glaze on thick slices of eggplant or portobello mushrooms for a plant-based version that’s equally satisfying.
Traditional Nori Enhancement: Serve alongside nori tsukudani to create an authentic Japanese flavor combination that showcases the sake kasu beautifully.
Storage & Reheating Guide
Refrigeration: Store leftover glazed salmon in an airtight container for up to 3 days. The glaze will firm up but remains delicious cold.
Reheating Method: Warm gently in a 300°F oven for 8-10 minutes, covering with foil to prevent the glaze from burning.
Freezing Tips: Freeze uncooked glazed salmon for up to 1 month. Thaw overnight in refrigerator before cooking as directed.
Make-Ahead Strategy: Prepare the glaze up to 3 days ahead and store refrigerated. Let it come to room temperature before using.
Troubleshooting Common Issues
Problem: Sake kasu glaze burns before salmon cooks through
Solution: Reduce heat to medium-low and tent with foil. The glaze caramelizes quickly due to its sugar content.
Problem: Glaze won’t stick to the salmon
Solution: Ensure salmon is completely dry before cooking and apply glaze to hot fish for better adherence.
Problem: Salmon skin sticks to the pan
Solution: Make sure pan is properly preheated and don’t move the fish until the skin releases naturally after 4 minutes.
Problem: Glaze tastes too salty or too sweet
Solution: Balance with additional mirin for sweetness or a splash of rice vinegar for acidity to cut through richness.
Problem: Sake kasu paste won’t dissolve smoothly
Solution: Warm the mirin slightly before mixing, or press the paste through a fine-mesh strainer to remove lumps.
Equipment Essentials
- Large non-stick or cast-iron skillet
- Small mixing bowl for glaze
- Wire whisk
- Thin flexible spatula
- Instant-read thermometer
- Paper towels
- Small brush for glazing
Shopping List
Protein Section
- 4 salmon fillets (6 oz each, skin-on)
Asian Ingredients Aisle
- Sake kasu paste
- Mirin
- Soy sauce
- Sesame oil
- Sesame seeds
Produce Section
- Fresh ginger root
- Garlic bulbs
- Green onions
Pantry Items
- Brown sugar
Success Secrets
- Room Temperature Start: Always bring salmon to room temperature before cooking to ensure even heat distribution and prevent overcooking the exterior.
- Dry Surface Technique: Pat salmon completely dry and let it air-dry for 5 minutes – moisture is the enemy of both proper searing and glaze adherence.
- Glaze Timing: Apply the sake kasu glaze only when the salmon is nearly cooked through to prevent burning while still achieving beautiful caramelization.
- Heat Management: Start high for searing, then reduce heat for glazing – this two-stage approach creates the perfect balance of crispy skin and caramelized glaze.
- Fresh Sake Kasu Quality: Use fresh, high-quality sake kasu from a Japanese market for the best flavor – it should smell pleasantly alcoholic and feel pliable, not dry or crumbly.