Prep Time: 20 minutes | Curing Time: 2-4 weeks | Serves: 4 people
Key Takeaways
- This Salt Cured Fish Roe recipe transforms fresh roe into bottarga, a gourmet ingredient worth its weight in gold
- Making Salt Cured Fish Roe at home saves you $40+ per ounce compared to store-bought bottarga
- The curing process is simple but requires patience – plan for 2-4 weeks of curing time
- Once cured, your homemade Salt Cured Fish Roe will last for months in the refrigerator
What’s Bottarga and Why Make It at Home?
Ever spotted those tiny jars of orange-gold flakes at specialty stores with shocking price tags? That’s bottarga – Salt Cured Fish Roe that adds an incredible punch of flavor to pasta, salads, and eggs.
Making Salt Cured Fish Roe at home isn’t just smart for your wallet – it’s surprisingly easy. This ancient Mediterranean technique transforms fresh fish roe into a firm, savory delicacy that restaurants charge premium prices for.
With just fresh roe, salt, and time, you’ll create an umami-packed ingredient that makes everything taste better. Your homemade version will have a fresher, more complex flavor than anything you can buy pre-made.
Once you’ve mastered this Salt Cured Fish Roe recipe, you’ll never go back to store-bought. The process is similar to other preservation techniques I use for pan-fried fish but with a focus on the roe instead of the fillets.
Nutrition Facts
| Nutrient (per 1 oz serving) | Amount |
|---|---|
| Calories | 80 |
| Protein | 18g |
| Fat | 2g |
| Carbohydrates | 0g |
| Sodium | 890mg |
| Omega-3 Fatty Acids | 1.2g |
Equipment & Ingredients
Ingredients (Serves 4)
| Ingredient | Amount | Notes |
|---|---|---|
| Fresh fish roe sacs | 1 pound (about 2 large sacs) | Mullet, tuna, or cod roe work best |
| Coarse sea salt | 2 cups | Non-iodized salt is preferable |
| Freshly ground black pepper (optional) | 1 tablespoon | Adds subtle flavor |
| Lemon zest (optional) | From 1 lemon | For a citrusy note |
Kitchen Tools
| Tool | Purpose |
|---|---|
| Sharp knife | For cleaning the roe sacs |
| Cutting board | Prep surface |
| Large bowl | For salt mixture |
| Cheesecloth | For wrapping the roe |
| Kitchen twine | For securing the cheesecloth |
| Baking sheet | For the initial drying phase |
| Wire rack | To elevate roe during curing |
| Weights (cans work well) | To press excess moisture out |
| Refrigerator | For curing |
Substitutions
- Roe Type: If mullet roe is unavailable, try tuna, cod, or even salmon roe
- Salt: Any non-iodized salt works, but coarse sea salt provides the best texture
- Cheesecloth: In a pinch, use a clean cotton kitchen towel or muslin cloth
- Weights: Anything heavy and clean works – canned goods, a brick wrapped in foil, etc.
Extremely Detailed Step-by-Step Instructions for Beginners
Preparation Phase
- Source the freshest fish roe possible
- Ask your fishmonger for intact, fresh roe sacs – they should be firm and smell like the ocean, not “fishy”
- If they’re not on display, ask if they can order them for you
- Beginner tip: Call ahead to check availability and ask when they get fresh fish deliveries
- Fish roe is most abundant during spawning season, which varies by fish type
- Quality check: Fresh roe should have a translucent membrane with visible eggs inside
- Gather all your equipment before starting
- Set out your cutting board, knife, bowl, cheesecloth, and twine
- Line a baking sheet with several layers of paper towels
- Cut 4-5 pieces of cheesecloth, each about 12 inches square
- Fill a bowl with 1 cup of coarse sea salt, keeping the second cup nearby
- Why this matters: Once you start working with the delicate roe, you won’t want to stop mid-process to find equipment
- Prepare your work area
- Clean and sanitize your countertop
- Place a damp kitchen towel under your cutting board to prevent slipping
- Fill a small bowl with ice water (you’ll use this to rinse your hands if they get sticky)
- Have extra paper towels within reach
- Beginner tip: Work near your sink for easy cleanup
- Clear refrigerator space
- Make room on a dedicated shelf in your refrigerator
- Ideally, this should be the lowest shelf (usually the coldest part)
- The temperature should be between 34-38°F (1-3°C)
- Pro tip: Place a thermometer in your refrigerator a day before to verify the temperature
Cleaning and Initial Salting (Day 1)
- Gently clean the roe sacs – HANDLE WITH EXTREME CARE
- Fill a large bowl with cold water
- Carefully place the roe sacs in the water
- Very gently swish them around to remove surface debris
- DO NOT squeeze or apply pressure – the membrane is paper-thin!
- Lift the roe sacs out of the water (don’t pour the water out with them in it)
- Visual guide: The roe sac looks like a translucent pouch filled with tiny beads
- Remove any blood vessels without breaking the sac
- Place the roe on your cutting board
- Look for any red or dark blood vessels on the surface
- Using the tip of a paring knife, very carefully scrape them away
- If your fingers are wet, dry them completely before touching the roe
- Beginner warning: This is the step where most new cooks damage the sac – use minimal pressure
- If you accidentally break the sac, don’t panic! Just apply salt to the exposed area immediately
- Pat the roe completely dry
- Lay out several paper towels
- Gently place the roe sacs on the paper towels
- Cover with more paper towels
- Very gently press to absorb moisture – DO NOT RUB
- Replace with fresh paper towels and repeat until the towels come away mostly dry
- Why this matters: Excess moisture can lead to spoilage during curing
- Apply the first salt layer
- Pour half of your salt (1 cup) into a shallow dish, spreading it evenly
- Place the dried roe sacs on top of the salt bed
- Sprinkle the remaining salt over the roe, ensuring every part is covered
- Use your fingers to gently pat the salt onto any exposed areas
- The roe should be completely buried in salt
- Beginner tip: Imagine you’re burying something in sand – gentle but thorough coverage
- Allow initial moisture extraction
- Leave the salted roe at room temperature for exactly 2 hours
- Place it away from direct sunlight or heat sources
- You’ll notice liquid being drawn out – the salt will begin to look wet
- This is normal and means the curing process has started
- Science note: The salt is drawing moisture from the roe through osmosis, which is crucial for preservation
Wrapping and Pressing (Day 1, 2 hours later)
- Rinse the initial salt coating
- Fill a bowl with cold water
- Very gently lower the roe into the water
- Swish it around lightly to remove excess salt
- Lift it out carefully – don’t let the water pressure hit it directly
- Beginner tip: Think of the roe as delicate as a water balloon at this stage
- Pat completely dry again
- Place on fresh paper towels
- Cover with more paper towels
- Gently press to remove moisture
- Replace towels and repeat until they come away dry
- The roe will feel firmer now but still be somewhat pliable
- Visual check: The roe should look slightly more compact than before
- Prepare the cheesecloth wrapping
- Lay out a double layer of cheesecloth on your work surface
- If using optional seasonings (pepper or lemon zest), sprinkle them evenly over the cheesecloth
- Measurement guide: For a 1-pound roe sac, use about 1 tablespoon of additional seasonings total
- Beginner tip: Don’t overdo seasonings – they can overpower the natural flavor
- Wrap the roe carefully
- Place the roe in the center of the prepared cheesecloth
- Fold one side of the cloth over the roe
- Fold the opposite side over, slightly overlapping
- Fold the remaining two sides over
- Beginner technique: Think of wrapping a small, fragile gift
- The wrap should be snug but not tight enough to squash the roe
- Secure with kitchen twine
- Cut a piece of kitchen twine about 24 inches long
- Place the wrapped roe seam-side down
- Wrap the twine around the middle of the package
- Tie a secure knot (a square knot works well)
- Wrap around in the other direction and tie again
- Trim excess twine, leaving about 1-inch tails
- Visual check: Your package should look like a neatly wrapped, flat parcel
- Set up the pressing station
- Place a wire rack on a rimmed baking sheet
- Put your wrapped roe on the center of the rack
- The baking sheet will catch moisture that drips out
- Beginner tip: The wire rack allows air circulation around the entire package
- Apply gentle, even pressure
- Place a flat plate or small cutting board on top of the wrapped roe
- Add weight – two 15-oz cans work perfectly
- The pressure should be enough to compress slightly but not squash
- Exact measurement: You want about 1-2 pounds of pressure
- Common mistake: Too much weight can crush the delicate eggs
Curing Process (Days 1-28)
- Initial refrigeration (First 24 hours)
- Place the entire setup (baking sheet, rack, weighted roe) in the refrigerator
- Position it on your dedicated shelf
- Check after 12 hours – you should see liquid in the baking sheet
- Temperature check: Verify your refrigerator is between 34-38°F (1-3°C)
- First cheesecloth change (Day 2)
- Remove the weights and unwrap the roe
- Notice how the cheesecloth is damp – this is good!
- Have fresh cheesecloth ready
- Gently transfer the roe to the new cheesecloth
- Rewrap following the same technique as before
- Return to the rack with weights
- Beginner tip: Take a photo of how it looked before unwrapping to reference for rewrapping
- Second cheesecloth change (Day 3)
- Repeat the process of changing the cheesecloth
- You should notice less moisture than the previous day
- The roe will feel firmer now
- Visual change: The color should be deepening from translucent to more opaque
- Third cheesecloth change (Day 4)
- Change the cheesecloth one more time
- Very little moisture should come out now
- The roe should feel significantly firmer
- Touch test: When pressed gently with a finger, it should give slightly but not feel soft
- Transition to long-term curing (Day 5)
- Wrap in fresh cheesecloth one final time
- Return to the refrigerator but remove the weights
- Place it directly on the wire rack over the baking sheet
- Beginner question: “Why no more weights?” At this point, we want it to dry evenly rather than continue to press
- Weekly check-ins (Weeks 1-4)
- Once a week, check your bottarga’s progress
- No need to unwrap, just feel through the cloth
- It should continue to firm up week by week
- Color check: If you can see through the cheesecloth, the color should be deepening to amber
- Smell test: It should smell pleasantly oceanic, not sharply fishy or off
- Testing for doneness (Earliest at Week 2)
- After at least 2 weeks, perform the firmness test
- Press with your thumb – it should feel firm with minimal give
- The texture should be similar to a firm cheese like Parmesan
- Visual check: When held, it shouldn’t bend easily
- Timing note: Smaller roe sacs may be ready at 2 weeks, larger ones may need the full 4 weeks
Final Steps (When Ready)
- The unwrapping ceremony
- Place a clean cutting board on your work surface
- Carefully unwrap the cheesecloth
- The bottarga should be firm, dry, and waxy in appearance
- The color should be a deep amber-orange
- White salt crystals on the surface are normal and desirable
- Beginner tip: Take a moment to appreciate what you’ve created – this is culinary craftsmanship!
- Final air-drying
- Place the unwrapped bottarga on a clean wire rack
- Put the rack on a baking sheet
- Return to the refrigerator uncovered for 24 hours
- This creates a protective exterior layer
- Science note: This step forms a natural “pellicle” that helps preserve the bottarga
- Preparing for storage
- After the 24-hour air dry, your bottarga is ready to use and store
- For immediate use, see the usage instructions below
- For storage, follow the detailed storage instructions in that section
- Celebration tip: Save your first tasting for a special meal – you’ve earned it!
- First use instructions
- For your first taste, try a classic preparation:
- Cook 8 oz spaghetti according to package directions until al dente
- While pasta cooks, heat 3 tablespoons olive oil with 1 minced garlic clove over low heat
- Drain pasta, reserving ¼ cup cooking water
- Toss pasta with the garlic oil and 2 tablespoons of the reserved water
- Grate 1 teaspoon of bottarga over each serving
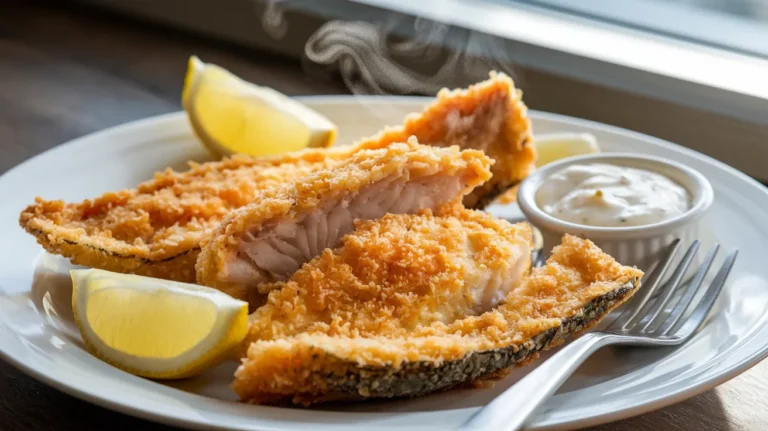
- For a complete meal, serve alongside beer-battered fish tacos with Baja sauce for a seafood feast
- Tasting note: The flavor is intense – start with a small amount!
- For your first taste, try a classic preparation:

Troubleshooting
Common Issues and Solutions
Problem: I see white or green spots appearing during curing
- Immediate action needed! White crystallization is normal, but green or blue spots are mold
- Solution: Remove the cheesecloth immediately
- Wipe the area with a cloth dampened with white vinegar
- Let air dry for 30 minutes in the refrigerator
- Rewrap in fresh cheesecloth
- Check daily for the next three days
- Prevention tip: Make sure your hands and all tools are completely clean when handling
Problem: My roe sac broke during cleaning
- Solution: Don’t panic! Gently reshape it as best you can
- Apply salt immediately to the broken area
- Proceed with the recipe, being extra gentle
- The final product may not be as neat but will still be delicious
- Beginner encouragement: Even professional chefs sometimes break the sacs
Problem: After 3 weeks, my bottarga still feels soft
- Solution: Your refrigerator may be too warm
- Move to the coldest part (usually the back) and continue curing
- Check the refrigerator temperature – should be 34-38°F (1-3°C)
- Give it another week
- Test method: When properly cured, you should be able to grate it with a microplane
Problem: My bottarga smells too fishy or has an ammonia-like smell
- Solution: If it’s just strongly fishy, it may still be okay
- If there’s an ammonia smell or it smells “off,” unfortunately, it’s not safe to eat
- Food safety first: When in doubt, throw it out
- Prevention: Always start with the freshest roe possible
Problem: My bottarga breaks or crumbles when slicing
- Solution: It may be over-dried
- For this batch, use it grated rather than sliced
- For future batches, check for doneness earlier
- Salvage tip: Crumbled bottarga works perfectly in pasta or sprinkled on dishes
Variations & Substitutions
Different Fish Varieties
Mullet Bottarga (Traditional)
- The classic choice with a rich, briny flavor
- Produces a firm, golden-orange bottarga
- Best for: Grating over pasta or vegetables
- Taste profile: Intensely savory with hints of the sea
Tuna Bottarga
- More intense flavor with a deeper red color
- Often preferred for pasta dishes where bottarga is the star
- Best for: Bold pasta dishes where you want the bottarga to dominate
- Taste profile: Robust and richly fishy, comparable to anchovies but more complex
Cod Bottarga
- Milder flavor profile, good for beginners
- Lighter in color with a more subtle oceanic taste
- Best for: Those new to bottarga or for dishes where you want a hint of sea flavor
- Taste profile: Gentle salinity with a clean finish
- Works well in corn and fish maw soup for an added depth of flavor
Flavor Additions
During the wrapping phase, you can add:
- Black Pepper Addition: 1 tablespoon freshly ground black pepper for a spicy kick
- Herb-Infused Version: 1 tablespoon dried herbs (thyme or oregano work well)
- Citrus-Scented Bottarga: Zest of 1-2 lemons for a bright citrus note
- Spicy Bottarga: 1 teaspoon chili flakes for heat
- Special Blend: Create your own signature mix with all the above in smaller amounts
- Beginner recommendation: For your first batch, try just a small amount of one addition or keep it traditional with just salt
Storage & Reheating
Storage Options
Whole Bottarga (Up to 6 Months)
- Wrap in parchment paper first (prevents sticking)
- Then wrap in aluminum foil
- Label with the date made
- Store in the refrigerator, ideally in the cheese drawer
- Why it works: This method protects from both moisture and absorbing other food odors
Grated Bottarga (2 Weeks)
- Once grated, store in an airtight container
- Keep refrigerated
- Use within 2 weeks for best flavor
- Tip: Grate only what you need – whole bottarga lasts much longer
- Never freeze grated bottarga – it loses its texture and flavor
Vacuum Sealed (For Longer Storage)
- For storage beyond 6 months, vacuum seal whole bottarga
- This can extend shelf life to almost a year
- Store in the refrigerator, not the freezer
- Equipment note: A home vacuum sealer works perfectly for this
Olive Oil Preservation (Alternative Method)
- Cut bottarga into 1-inch chunks
- Place in a clean jar
- Cover completely with good quality olive oil
- Refrigerate up to 4 months
- Bonus: The oil becomes flavored and is delicious on its own
How to Use Stored Bottarga
Serving from Cold Storage
- Remove from the refrigerator 15 minutes before using
- Room temperature bottarga has better flavor and grates more easily
- Only grate what you need – return the rest to storage immediately
- Serving size guide: For pasta, about ½ teaspoon per serving is plenty
Grating Techniques
- For fine powder: Use a microplane grater
- For thin slices: Use a truffle slicer or sharp knife
- For pasta: Grate directly over the hot dish just before serving
- Beginner tip: Grating frozen bottarga is easier but dulls the flavor – not recommended
Safety Notes & Tips
Food Safety
- Always use the freshest roe possible – it should smell clean and oceanic
- The curing process relies on salt and drying, not heat, to preserve the roe
- Wash hands thoroughly before handling bottarga at any stage
- Keep all equipment clean and sanitized
- If at any point your bottarga smells off, shows signs of mold, or has an ammonia odor, discard it
- People with seafood allergies should avoid bottarga
- Pregnant women should consult their doctor before consuming cured fish products
- Temperature control: Keep refrigerated at 34-38°F (1-3°C) throughout the process
Chef’s Tips for Success
- Salt quality matters – use non-iodized salt as iodine can impart a metallic taste
- Patience is crucial – rushing the curing process leads to inferior results
- Less is more when serving – bottarga has an intense flavor
- Temperature consistency is vital – fluctuations can affect the curing process
- Time management: Mark your calendar with cheesecloth change days and final curing date
- Clean hands: Always wash hands before handling to prevent introducing bacteria
- Documentation: Keep notes on your process for future batches
- Go easy on additions: The natural flavor of bottarga is its greatest asset
Best Ways to Enjoy Your Homemade Bottarga
- Classic Spaghetti alla Bottarga
- Cook 1 pound spaghetti al dente in heavily salted water
- While pasta cooks, warm ¼ cup olive oil with 2 cloves minced garlic (don’t brown)
- Drain pasta, reserving ½ cup cooking water
- Toss pasta with oil, garlic, and 2 tablespoons cooking water
- Finish with 1 tablespoon grated bottarga and chopped parsley
- Tip: Add the bottarga off the heat to preserve its flavor
- Bottarga Butter
- Soften 1 stick (½ cup) unsalted butter to room temperature
- Mix with 1 tablespoon finely grated bottarga
- Add ½ teaspoon lemon zest and a pinch of black pepper
- Form into a log using parchment paper and refrigerate
- Slice coins to melt over grilled fish or steak
- Make-ahead tip: This compound butter freezes well for up to 1 month
- Bottarga Scrambled Eggs
- Whisk 8 eggs with 2 tablespoons heavy cream
- Cook slowly over low heat, stirring constantly
- Just before eggs set completely, remove from heat
- Season with salt and pepper
- Plate and grate ½ teaspoon bottarga over each serving
- Texture tip: Keep eggs slightly runny for the best contrast with bottarga
- Avocado Toast Upgrade
- Mash 1 ripe avocado with juice of ½ lemon and a pinch of salt
- Spread on 4 slices of toasted crusty bread
- Top each with paper-thin shavings of bottarga (use a truffle slicer if you have one)
- Finish with a drizzle of good olive oil and fresh cracked pepper
- Presentation tip: Make the bottarga the star – arrange the shavings in a fan pattern on top