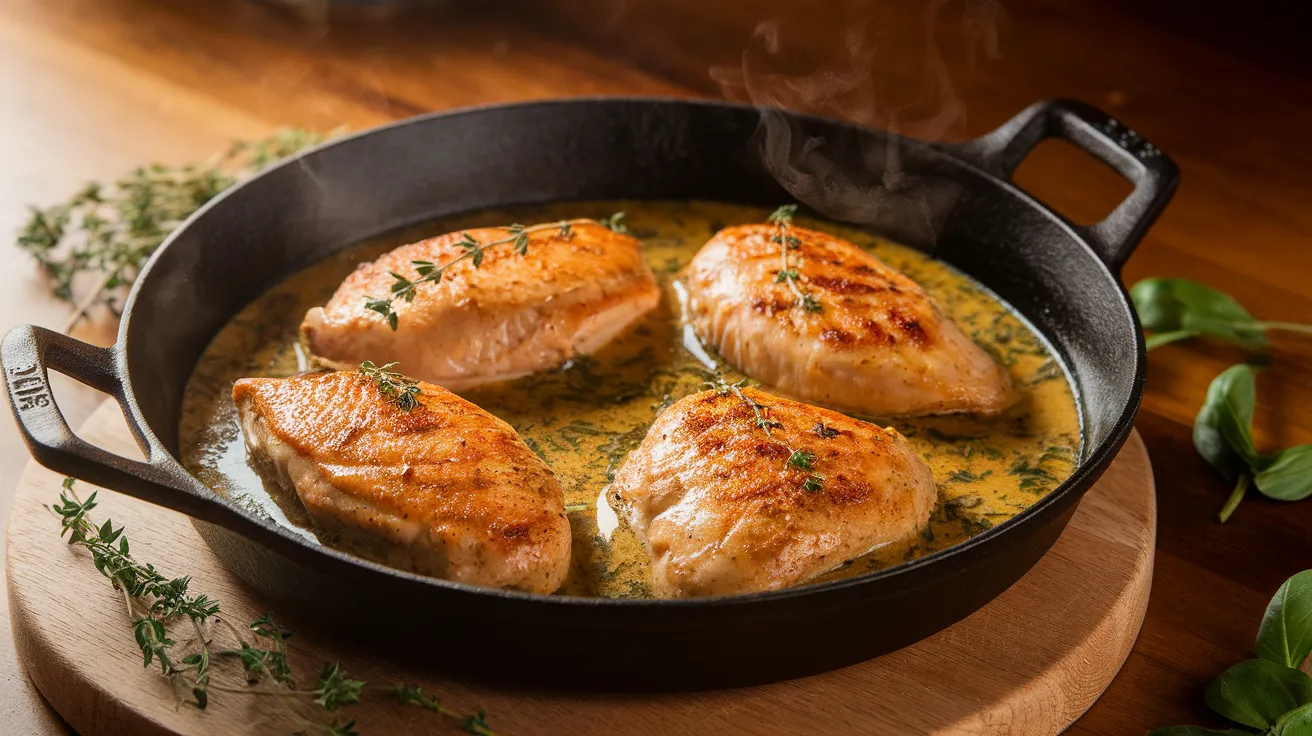
This foolproof sauce for baked chicken recipe transforms simple ingredients into a restaurant-quality meal that even kitchen beginners can master. Our creamy, herb-infused sauce for baked chicken keeps your meat incredibly moist while delivering rich, savory flavors that will have your family asking for seconds every time.
Recipe Info Bar
SERVES: 4 | PREP: 20 MIN | COOK: 25 MIN | TOTAL: 45 MIN
Ingredients
For the Sauce Base
| Ingredient | Amount |
|---|---|
| Unsalted butter | 4 tablespoons |
| All-purpose flour | 3 tablespoons |
| Low-sodium chicken broth | 1½ cups |
| Heavy cream | ½ cup |
| Fresh garlic cloves, minced | 4 cloves |
| Fresh thyme leaves | 2 teaspoons |
For the Flavor Enhancement
| Ingredient | Amount |
|---|---|
| Dijon mustard | 2 tablespoons |
| Dry white wine | ¼ cup |
| Fresh lemon juice | 2 tablespoons |
| Sweet paprika | 1 teaspoon |
| Fine sea salt | 1 teaspoon |
| Freshly ground black pepper | ½ teaspoon |
For the Chicken
| Ingredient | Amount |
|---|---|
| Boneless chicken breasts or thighs | 2 pounds |
| Extra virgin olive oil | 2 tablespoons |
| Fine sea salt | 1 teaspoon |
| Freshly ground black pepper | ½ teaspoon |
Complete Step-by-Step Instructions for Sauce for Baked Chicken
Phase 1: Kitchen Setup and Chicken Preparation (12 minutes)
- Position your oven rack in the center position and preheat to exactly 375°F. This temperature is crucial for even cooking – too high will dry out your chicken, too low won’t properly cook the sauce. Wait for the oven to fully preheat (about 15 minutes) before proceeding.
- Gather all your ingredients on your counter in the order you’ll use them. This prevents mistakes and ensures smooth cooking. Place a small bowl next to your stove for discarded paper towels.
- Remove chicken from refrigerator and let it sit on your counter for 15-20 minutes. Cold chicken placed directly in a hot pan will cook unevenly. Room temperature chicken sears better and cooks more uniformly throughout.
- Pat each piece of chicken completely dry using paper towels. Press firmly and don’t skip this step – any moisture will prevent proper browning and make your sauce watery. You should hear no sizzling moisture when the chicken hits the pan.
- Examine each chicken piece for any remaining fat or skin. Trim excess fat with kitchen shears, leaving just enough for flavor. If using chicken breasts, pound them to ¾-inch thickness using a meat mallet for even cooking.
- Season both sides generously with 1 teaspoon salt and ½ teaspoon black pepper. Use your hands to press the seasonings into the meat – this helps them adhere during cooking. Let seasoned chicken rest while you prepare your pan.
Phase 2: Preparing Your Cooking Equipment (5 minutes)
- Select a heavy-bottomed, oven-safe skillet that’s at least 12 inches wide. Cast iron works perfectly, but any oven-safe pan will do. The pan should be large enough that chicken pieces don’t touch each other.
- Test that your pan is oven-safe by checking for any plastic handles or non-oven-safe materials. If uncertain, wrap the handle in aluminum foil. Place the empty pan on your stovetop over medium-high heat.
- Heat the pan for 2-3 minutes until it’s properly preheated. You’ll know it’s ready when a drop of water sizzles and evaporates immediately. Don’t add oil until the pan is hot.
Phase 3: Searing the Chicken (10 minutes)
- Add olive oil to the hot pan and swirl to coat the bottom evenly. The oil should shimmer but not smoke. If it’s smoking, reduce heat slightly and wait for it to cool down.
- Carefully place chicken pieces in the pan skin-side down (if using skin-on pieces). Don’t overcrowd – leave at least 1 inch between pieces. You should hear an immediate, steady sizzle. If there’s no sizzle, your pan wasn’t hot enough.
- Do not move the chicken for 4-5 full minutes. Resist the urge to peek or adjust. The chicken will release naturally from the pan when properly browned. Moving it too early will tear the meat and prevent proper browning.
- Check for proper browning by gently lifting one edge with tongs. The bottom should be golden brown with crispy edges. If it’s still pale, cook for another 1-2 minutes before flipping.
- Flip each piece carefully using tongs, never a fork (which pierces the meat and releases juices). Cook the second side for 3-4 minutes until golden brown. The internal temperature should reach 145°F at this point.
- Transfer chicken to a clean plate and cover loosely with aluminum foil. Don’t worry if it’s not fully cooked – it will finish in the oven. The goal here is browning and flavor development.
Phase 4: Building the Perfect Sauce for Baked Chicken Base (8 minutes)
- Reduce heat to medium and examine your pan. You should see golden-brown bits (called fond) stuck to the bottom – these are pure flavor. Don’t clean the pan; these bits will enhance your sauce.
- Add butter to the hot pan and let it melt completely. The butter will foam initially, then settle. Swirl the pan to coat the bottom evenly with melted butter.
- Sprinkle flour evenly over the melted butter and immediately begin whisking with a wire whisk. This creates a roux – the thickening base for your sauce. Whisk constantly to prevent lumps.
- Cook the roux for exactly 2 minutes while whisking continuously. It should bubble gently and turn a very light golden color. This cooking removes the raw flour taste and ensures proper thickening power.
- Add minced garlic to the roux and whisk for 30-45 seconds until fragrant. The garlic should sizzle gently but not brown. If it starts to brown, reduce heat immediately.
Phase 5: Creating the Creamy Sauce (7 minutes)
- Remove the pan from heat temporarily. This prevents the sauce from cooking too quickly when you add liquids. Keep your whisk ready in your dominant hand.
- Slowly pour chicken broth in a thin, steady stream while whisking vigorously. Start with just ¼ cup, whisk until smooth, then gradually add the remaining broth. This prevents lumps from forming.
- Return pan to medium heat and bring the mixture to a gentle simmer. You should see small bubbles around the edges, not a rolling boil. Stir frequently to prevent sticking.
- Add white wine and whisk until combined. The alcohol will cook off, leaving behind rich flavor. If you don’t have wine, substitute with an additional ¼ cup chicken broth plus 1 tablespoon lemon juice.
- Stir in Dijon mustard until completely dissolved. The mustard adds tangy depth and helps emulsify the sauce. Make sure there are no visible mustard streaks.
- Slowly pour in heavy cream while stirring gently. Don’t whisk vigorously at this point, as it might cause the cream to curdle. The sauce should become noticeably lighter in color.
- Add thyme, paprika, lemon juice, salt, and pepper. Stir gently and taste for seasoning. The sauce should coat the back of a spoon but still flow easily.
Phase 6: Final Assembly and Baking (25 minutes)
- Nestle the seared chicken pieces back into the sauce, ensuring each piece is partially submerged. Use a spoon to coat the top of each piece with sauce for even flavor distribution.
- Check that your sauce covers at least half of each chicken piece. If needed, add ¼ cup more chicken broth to ensure proper coverage during baking.
- Transfer the skillet to your preheated oven. Place it on the center rack for even heat circulation. Set a timer for 20 minutes – don’t rely on memory.
- After 20 minutes, carefully remove the pan using oven mitts. Insert an instant-read thermometer into the thickest part of the largest chicken piece. It should read 165°F for safe consumption.
- If not fully cooked, return to oven for 3-5 minutes more. Check temperature again. Never guess – always verify with a thermometer for food safety.
- Remove from oven and let rest for 5 full minutes before serving. This resting period allows juices to redistribute and the sauce to thicken slightly for perfect consistency.
Phase 7: Final Touches and Serving (3 minutes)
- Taste the sauce and adjust seasoning if needed. Add ¼ teaspoon salt or 1 tablespoon lemon juice if it needs brightening. The sauce should be creamy, flavorful, and coat the chicken beautifully.
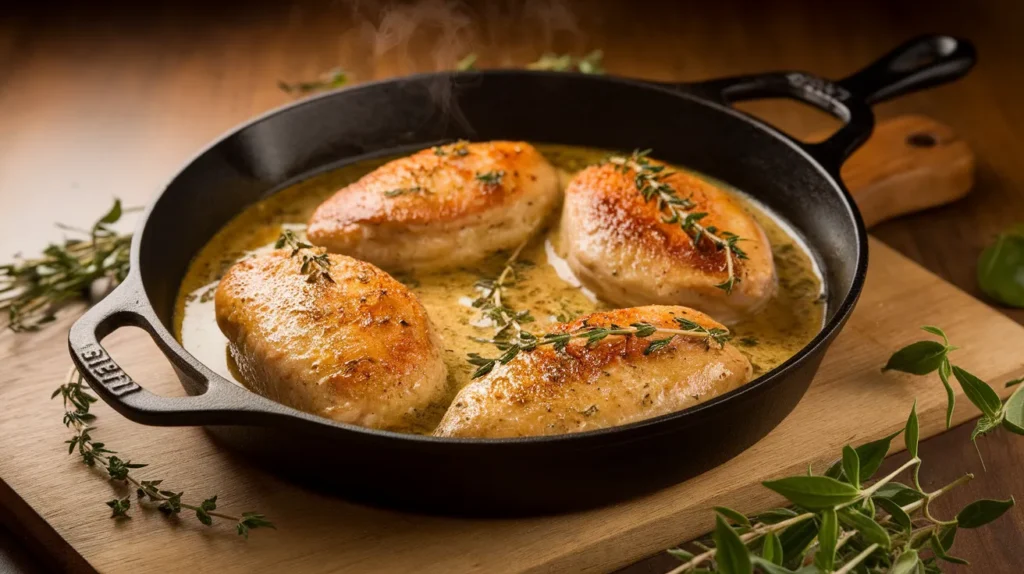
- Garnish with fresh thyme sprigs or chopped parsley for color and freshness. Serve immediately while hot for the best texture and flavor experience.
Chef’s Notes for Perfect Sauce for Baked Chicken
• Temperature is Everything: Your sauce for baked chicken should never boil once you add the cream. High heat causes curdling and ruins the smooth texture you’ve worked to create.
• Sauce Thickness Guide: The perfect consistency coats a spoon but flows easily when stirred. If too thick, whisk in warm chicken broth one tablespoon at a time until desired consistency is reached.
• Fresh vs. Dried Herbs: Fresh thyme provides the best flavor, but you can substitute 1 teaspoon dried thyme if needed. Add dried herbs earlier in the cooking process to allow proper flavor development.
• Wine Selection: Use a wine you’d actually drink. Cooking wine from the grocery store often contains too much salt and will negatively affect your sauce for baked chicken.
Nutrition Information (Per Serving)
- Calories: 485
- Protein: 42g
- Carbohydrates: 8g
- Fat: 28g
- Fiber: 1g
- Sodium: 890mg
Creative Variations for Your Sauce for Baked Chicken
Mediterranean Style
Transform your basic sauce by adding 2 tablespoons chopped sun-dried tomatoes, 1 tablespoon capers, and ¼ cup fresh basil during the final minutes of cooking. This creates a bright, herbaceous profile perfect for summer entertaining.
Mushroom Lovers Version
Before making your roux, sauté 8 ounces sliced mushrooms until golden brown. Set aside and add back to the finished sauce. The earthy mushrooms add meaty texture and complement the chicken beautifully.
Spicy Kick Variation
Include 1 teaspoon red pepper flakes and 1 tablespoon your favorite hot sauce for heat enthusiasts. This bold version pairs wonderfully with our sauce for zinger burger for those who crave spicy flavors.
Elegant Dinner Party Style
Incorporate 2 tablespoons fresh tarragon and 1 tablespoon quality brandy for a sophisticated twist. This elevated sauce rivals our sauce for chicken cordon bleu in restaurant-quality elegance.
Storage & Reheating Your Sauce for Baked Chicken
Refrigerator Storage: Allow your sauce for baked chicken to cool completely before transferring to airtight containers. Store chicken and sauce together for up to 4 days in the refrigerator.
Freezer Storage: Freeze sauce separately from chicken for best results. Store in freezer-safe containers for up to 3 months. Label with date and contents for easy identification.
Proper Reheating: Warm gently over low heat, whisking frequently to prevent separation. Add 2-3 tablespoons warm chicken broth if sauce appears too thick after refrigeration.
Make-Ahead Strategy: Prepare your sauce for baked chicken base through step 27, then refrigerate for up to 2 days. Reheat gently before adding chicken for baking when ready to serve.
Troubleshooting Your Sauce for Baked Chicken
Problem: Sauce has lumps despite careful whisking
Solution: Immediately strain through a fine-mesh sieve into a clean pan. Whisk in 2 tablespoons warm cream to restore smoothness. Next time, ensure your pan isn’t too hot when adding flour.
Problem: Sauce turned out too thin and watery
Solution: Create a slurry by mixing 1 tablespoon cornstarch with 2 tablespoons cold chicken broth. Whisk into gently simmering sauce and cook 2-3 minutes until thickened to desired consistency.
Problem: My sauce for baked chicken tastes bland
Solution: Gradually adjust seasoning with ½ teaspoon salt, ¼ teaspoon pepper, 1 tablespoon fresh lemon juice, and 1 teaspoon Dijon mustard. Taste after each addition.
Problem: Cream sauce curdled and looks broken
Solution: Remove from heat immediately. Whisk in 2 tablespoons cold butter one piece at a time until smooth. Prevention tip: never let cream-based sauces boil.
Problem: Chicken became dry during baking
Solution: Always check internal temperature at 20 minutes. Remove immediately when reaching 165°F. Cover with foil if sauce browns too quickly but chicken needs more time.
Essential Equipment for Sauce for Baked Chicken
• Large oven-safe skillet (12-inch cast iron preferred for even heat distribution) • Wire whisk (medium size for smooth sauce preparation) • Instant-read thermometer (essential for perfect doneness every time) • Liquid measuring cups (2-cup capacity for easy pouring) • Dry measuring spoons (for precise seasoning measurements) • Fine-mesh strainer (backup for achieving silky-smooth sauce) • Wooden spoon (for stirring without scratching your pan) • Paper towels (for properly drying chicken before cooking) • Tongs (for safely handling hot chicken pieces) • Oven mitts (heavy-duty for safe pan handling)
Organized Shopping List by Store Section
Meat Department
- 2 pounds boneless chicken breasts or thighs (your preference)
Dairy Section
- Unsalted butter (need 4 tablespoons)
- Heavy cream (need ½ cup)
Pantry Essentials
- All-purpose flour
- Low-sodium chicken broth (need 1½ cups)
- Dijon mustard
- Dry white wine (or additional broth)
- Extra virgin olive oil
- Sweet paprika
- Fine sea salt
- Black peppercorns (for fresh grinding)
Fresh Produce Section
- Fresh garlic bulb (need 4 cloves)
- Fresh thyme (need 2 teaspoons leaves)
- Fresh lemon (for 2 tablespoons juice)
Professional Success Secrets for Sauce for Baked Chicken
- Temperature Matters Most: Remove chicken from refrigerator 30 minutes before cooking. Room temperature chicken cooks evenly and prevents your sauce from cooling down when you add the meat back to the pan.
- Master the Fond: Those golden-brown bits left after searing chicken are flavor gold. Never wash them away – they become the foundation of your incredible sauce for baked chicken.
- Whisk Like a Pro: When adding liquids to your flour mixture, never stop whisking and always add liquids gradually. This single technique prevents lumpy sauce every single time.
- Taste and Adjust: Always taste your sauce before adding chicken back to the pan. It’s much easier to fix underseasoned sauce at this stage than after everything is combined and baked.
- Patience with Resting: Those final 5 minutes of resting time are crucial. The sauce thickens, flavors meld, and juices redistribute throughout the chicken for perfect texture and taste in every bite.
This comprehensive sauce for baked chicken recipe provides everything beginners need to create restaurant-quality results in their own kitchen. The detailed instructions eliminate guesswork while teaching proper technique. Master this foundational sauce, and you’ll have the confidence to tackle countless variations and impress your family with consistently delicious meals.