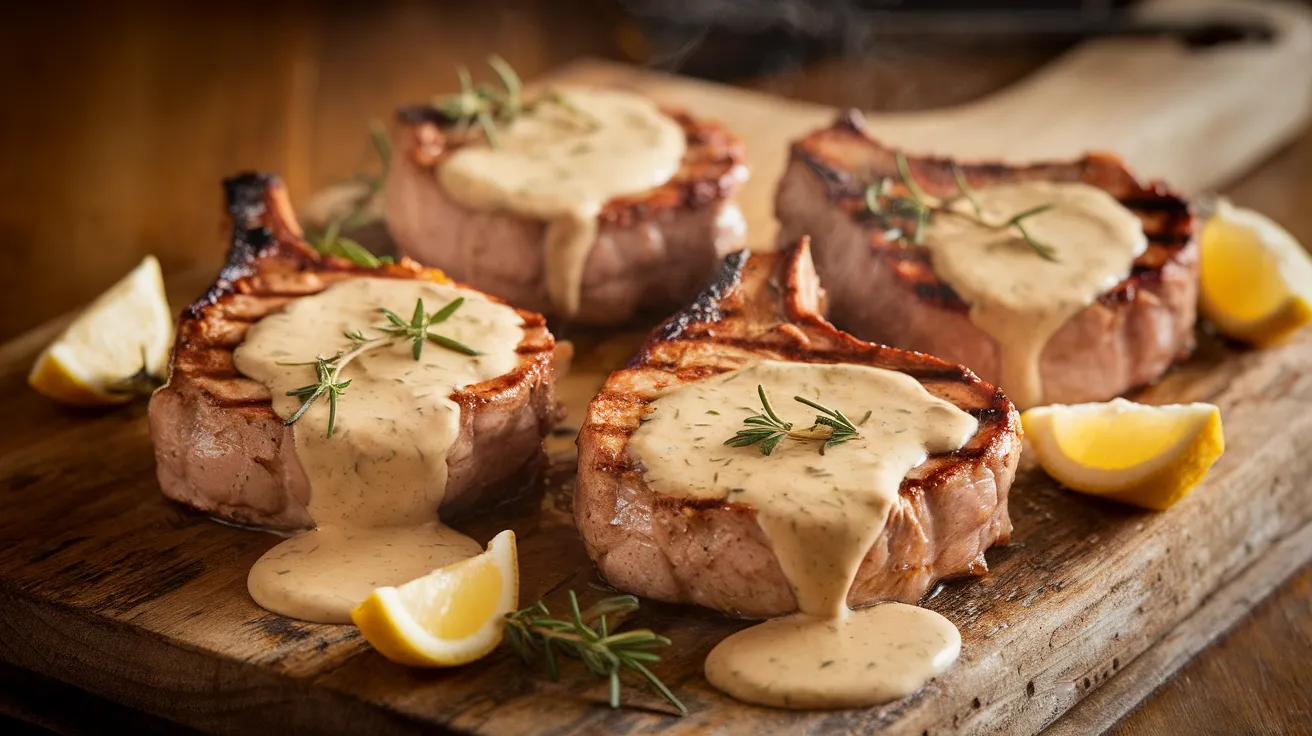
This foolproof sauce for grilled pork chops turns any weeknight dinner into something special. Made with simple pantry ingredients, this creamy herb sauce for grilled pork chops creates the perfect balance of tangy, savory, and rich flavors. Even complete beginners can master this versatile sauce that transforms ordinary pork chops into restaurant-quality meals your whole family will love.
SERVES: 4 | PREP: 15 MIN | COOK: 10 MIN | TOTAL: 25 MIN
Ingredients
For the Herb Base
| Ingredient | Amount | Notes |
|---|---|---|
| Fresh thyme leaves | 2 tablespoons | Strip leaves from stems |
| Fresh rosemary, minced | 1 tablespoon | Chop very finely |
| Garlic cloves, minced | 4 large | About 2 tablespoons when minced |
| Dijon mustard | 2 tablespoons | Regular yellow mustard works too |
For the Liquid Components
| Ingredient | Amount | Notes |
|---|---|---|
| Apple cider vinegar | 3 tablespoons | White vinegar substitutes fine |
| Chicken broth | 1/2 cup | Low-sodium preferred |
| Heavy cream | 1/4 cup | Half-and-half works in a pinch |
| Honey | 2 tablespoons | Maple syrup substitutes well |
For Seasoning & Finishing
| Ingredient | Amount | Notes |
|---|---|---|
| Unsalted butter | 3 tablespoons | Cut into small cubes |
| Salt | 1 teaspoon | Start with 1/2 teaspoon, taste |
| Black pepper | 1/2 teaspoon | Freshly ground preferred |
| Lemon juice | 1 tablespoon | Fresh squeezed only |
Detailed Step-by-Step Instructions for Beginners
Phase 1: Preparing Your Workspace and Ingredients (5 minutes)
1. Set up your station: Place all ingredients within arm’s reach of your stove. Cut butter into small 1/2-inch cubes and set aside. This preparation step, called “mise en place” by chefs, prevents mistakes and ensures smooth cooking.
2. Check your equipment: You’ll need a medium saucepan (2-3 quart size works perfectly), a wire whisk, and a wooden spoon. Make sure your whisk moves freely in the pan – this is crucial for creating smooth sauce for grilled pork chops.
3. Prepare fresh herbs properly: Hold thyme sprigs firmly and run your fingers against the stem direction to strip leaves. For rosemary, remove leaves from stems, then mince very finely with a sharp knife. Roughly chopped herbs won’t distribute evenly in your sauce.
Phase 2: Building the Aromatic Foundation (3-4 minutes)
4. Heat your pan correctly: Place your saucepan on the stove over medium heat (if your burner has numbers, use 5 out of 10). Let the empty pan warm for 1-2 minutes. You’ll know it’s ready when you can hold your hand 6 inches above and feel gentle warmth.
5. Add butter with precision: Drop 1 tablespoon of butter into the center of the warmed pan. It should melt immediately but not sizzle violently. If it’s browning quickly, reduce heat to medium-low. Watch for gentle foaming – this means the water in butter is evaporating normally.
6. Cook garlic like a pro: Add your minced garlic to the melted butter. Stir continuously with a wooden spoon for 45-60 seconds. The garlic should become fragrant and slightly softened but remain pale yellow. If it turns brown, it’s burnt and will taste bitter – start over if this happens.
7. Add herbs at the right moment: Sprinkle in thyme and minced rosemary. Stir constantly for 30 seconds exactly. You’ll smell the herbs “wake up” – they’ll become much more aromatic. This step releases essential oils that create the signature flavor of this sauce for grilled pork chops.
Phase 3: Creating the Sauce Base (4-5 minutes)
8. Incorporate mustard smoothly: Add Dijon mustard directly to the herb mixture. Using your whisk, stir vigorously for 30 seconds until completely smooth. The mixture will look thick and paste-like – this is exactly right. The mustard acts as an emulsifier, helping oil and water-based ingredients stay combined.
9. Add vinegar with technique: Pour apple cider vinegar in a thin, steady stream while whisking continuously. Don’t dump it all at once – the gradual addition prevents the mixture from separating. Whisk for 30 seconds until the mixture is completely uniform with no lumps.
10. Pour broth properly: Add chicken broth in three separate additions, whisking after each pour. First addition: 2-3 tablespoons, whisk until smooth. Second addition: another 2-3 tablespoons, whisk again. Final addition: remaining broth, whisk thoroughly. This gradual technique creates a silky-smooth base.
11. Dissolve honey completely: Drizzle honey into the mixture while whisking. It may clump initially – keep whisking for 1-2 minutes until completely dissolved. The mixture should look uniform without any honey streaks. Taste at this point – you should detect sweet, tart, and savory flavors in balance.
Phase 4: Simmering and Thickening (2-3 minutes)
12. Achieve the perfect simmer: Increase heat slightly to medium-high and watch the mixture carefully. Look for small bubbles forming around the edges of the pan – this is a gentle simmer. You don’t want a rolling boil, which would be too aggressive and could break your sauce later.
13. Monitor the consistency: Let the mixture simmer for 2 minutes, stirring occasionally. It should reduce slightly and coat the back of your spoon lightly. If you draw your finger across the spoon, the line should hold for 2-3 seconds before filling in.
Phase 5: Adding Cream and Final Touches (2-3 minutes)
14. Reduce heat for cream: Turn heat down to low (setting 3 out of 10). This is crucial – high heat will curdle the cream and ruin your sauce. Wait 30 seconds for the temperature to drop before proceeding.
15. Add cream with patience: Pour heavy cream in a very thin stream while whisking constantly. This should take 30-45 seconds to add completely. The mixture will turn creamy and lighten in color. If you see any curdling (small white lumps), remove from heat immediately and whisk vigorously.
16. Season thoughtfully: Add 1/2 teaspoon salt first, whisk, then taste with a clean spoon. Add remaining salt if needed. Add black pepper gradually – start with 1/4 teaspoon, taste, then add more. Remember, you can always add more seasoning, but you can’t take it back.
Phase 6: Finishing Like a Professional (1-2 minutes)
17. Remove from heat properly: Turn off the burner and move your pan to a cool burner or trivet. This stops the cooking process and prevents overcooking.
18. Mount with butter: This technique creates restaurant-quality richness. Add remaining 2 tablespoons butter one cube at a time. Whisk each cube until completely melted before adding the next. This creates a glossy, luxurious texture that coats pork chops beautifully.
19. Finish with acid: Add lemon juice and whisk for 10 seconds. The acid brightens all flavors and prevents the sauce from tasting heavy or flat. Taste one final time and adjust seasoning if needed.
20. Serve immediately: This sauce for grilled pork chops tastes best when served warm, not hot. The ideal serving temperature allows you to taste all the complex flavors without burning your tongue.
Professional Chef’s Notes
Temperature is Your Friend: Use a thermometer if you’re unsure about heat levels. The sauce should never exceed 180°F during cooking, or the cream will curdle and you’ll need to start over.
Timing with Pork Chops: Start your sauce for grilled pork chops when you remove the meat from the grill to rest. The 10-minute cooking time aligns perfectly with pork’s resting period.
Herb Substitution Guide: If you can’t find fresh herbs, use 1 teaspoon dried thyme and 1 teaspoon dried rosemary. Add them with the garlic, not later, as dried herbs need more time to release their flavors.
Consistency Control: Your finished sauce should coat a spoon but still pour easily. If it’s too thick, whisk in 1-2 tablespoons warm chicken broth. If too thin, simmer uncovered for 1-2 minutes more.
Nutrition Information (Per Serving)
- Calories: 145
- Protein: 2g
- Carbohydrates: 8g
- Fat: 12g
- Fiber: 0g
- Sodium: 420mg
Creative Sauce for Grilled Pork Chops Variations
Apple Cider Variation: Replace chicken broth with apple cider and add 1 tablespoon apple cider vinegar for a fall-inspired sauce that complements pork’s natural sweetness perfectly.
Mediterranean Herb Sauce: Substitute fresh oregano for thyme and add 2 tablespoons chopped sun-dried tomatoes for a bold, tangy variation that works beautifully with grilled meats.
Bourbon-Infused Version: Add 2 tablespoons bourbon with the broth and increase honey to 3 tablespoons for a sophisticated sauce with deeper, more complex flavors.
Spicy Jalapeño Style: Include 1-2 minced jalapeño peppers with the garlic for heat that builds gradually. This creates a perfect balance similar to our sauce for kielbasa recipe.
Storage & Reheating Your Sauce
Proper Storage: Cool completely before refrigerating in an airtight container for up to 4 days. Never leave cream-based sauces at room temperature for more than 2 hours.
Reheating Method: Warm gently in a small saucepan over low heat, whisking frequently. The sauce may look separated when cold – this is normal and will smooth out with gentle reheating.
Consistency Fixes: If reheated sauce seems too thick, whisk in warm chicken broth one tablespoon at a time until it reaches proper consistency.
Make-Ahead Tips: Prepare the sauce base (through step 13) up to 2 hours ahead. Finish with cream, butter, and lemon juice just before serving for best texture and flavor.

Troubleshooting Common Beginner Mistakes
Problem: Sauce looks curdled or separated Detailed Solution: This usually happens from too-high heat when adding cream. Remove from heat immediately, add 2-3 ice cubes, and whisk vigorously for 2 minutes. The cold temperature often fixes minor curdling. For severe separation, strain through fine mesh and start the cream step over.
Problem: Garlic tastes bitter Detailed Solution: Burnt garlic ruins the entire sauce. There’s no fix except starting over. Next time, keep heat lower and stir constantly. Garlic should smell fragrant, not sharp or acrid.
Problem: Sauce is too salty Detailed Solution: Add 1-2 tablespoons heavy cream and 1 teaspoon honey to balance excessive saltiness. If still too salty, double the recipe without adding more salt, then combine portions.
Problem: Herbs taste overwhelming Detailed Solution: Too much herb or cooking them too long creates bitterness. Strain out solids and add 1 tablespoon cream to mellow harsh flavors. Next time, measure herbs carefully and cook briefly.
Problem: Sauce won’t thicken Detailed Solution: Mix 1 teaspoon cornstarch with 2 tablespoons cold broth until smooth. Whisk this slurry into simmering sauce and cook for 1 minute. It will thicken as it cools slightly.
Essential Equipment for Perfect Results
Must-Have Items:
- Heavy-bottomed saucepan (2-3 quart capacity)
- Wire whisk (balloon whisk works best)
- Wooden spoon (won’t scratch your pan)
- Sharp chef’s knife (for mincing herbs and garlic)
- Cutting board (preferably plastic for garlic)
Nice-to-Have Tools:
- Fine-mesh strainer (for ultra-smooth texture)
- Small ladle (for neat serving)
- Instant-read thermometer (to monitor temperature)
Complete Shopping List
Dairy Section
- Heavy cream (buy small container – you only need 1/4 cup)
- Unsalted butter (1 stick is plenty)
Produce Section
- Fresh thyme (buy small package)
- Fresh rosemary (one sprig makes plenty)
- Garlic (buy whole bulb)
- Fresh lemons (you need 1 tablespoon juice)
Pantry Staples
- Dijon mustard
- Apple cider vinegar
- Honey
- Low-sodium chicken broth
- Salt and black pepper
Condiment Aisle
- Dijon mustard (if you don’t have it)
Five Success Secrets for Perfect Sauce
1. Master Your Heat Control: This sauce for grilled pork chops succeeds or fails based on temperature. When in doubt, go lower. You can always increase heat, but you can’t undo curdled cream or burnt garlic.
2. Embrace the Whisk: Constant whisking isn’t just busy work – it creates the smooth, professional texture that makes this sauce special. Your arm might get tired, but the results are worth it.
3. Taste and Adjust Continuously: Professional cooks taste at every step. After adding each major ingredient, take a small taste with a clean spoon. This helps you understand how flavors build and develop.
4. Time Your Preparation: Start this sauce when your pork chops come off the grill. The timing works perfectly – your meat rests while you create the perfect accompaniment.
5. Use Quality Ingredients: Fresh herbs make a dramatic difference over dried. Real butter, not margarine. Fresh lemon juice, not bottled. These small investments create restaurant-quality results that rival expensive sauces like our sauce for yellowfin tuna.
This comprehensive guide ensures that even absolute beginners can create an exceptional sauce for grilled pork chops that transforms simple weeknight dinners into memorable meals. The detailed instructions eliminate guesswork, while professional tips guarantee success every time you make this versatile, delicious sauce.