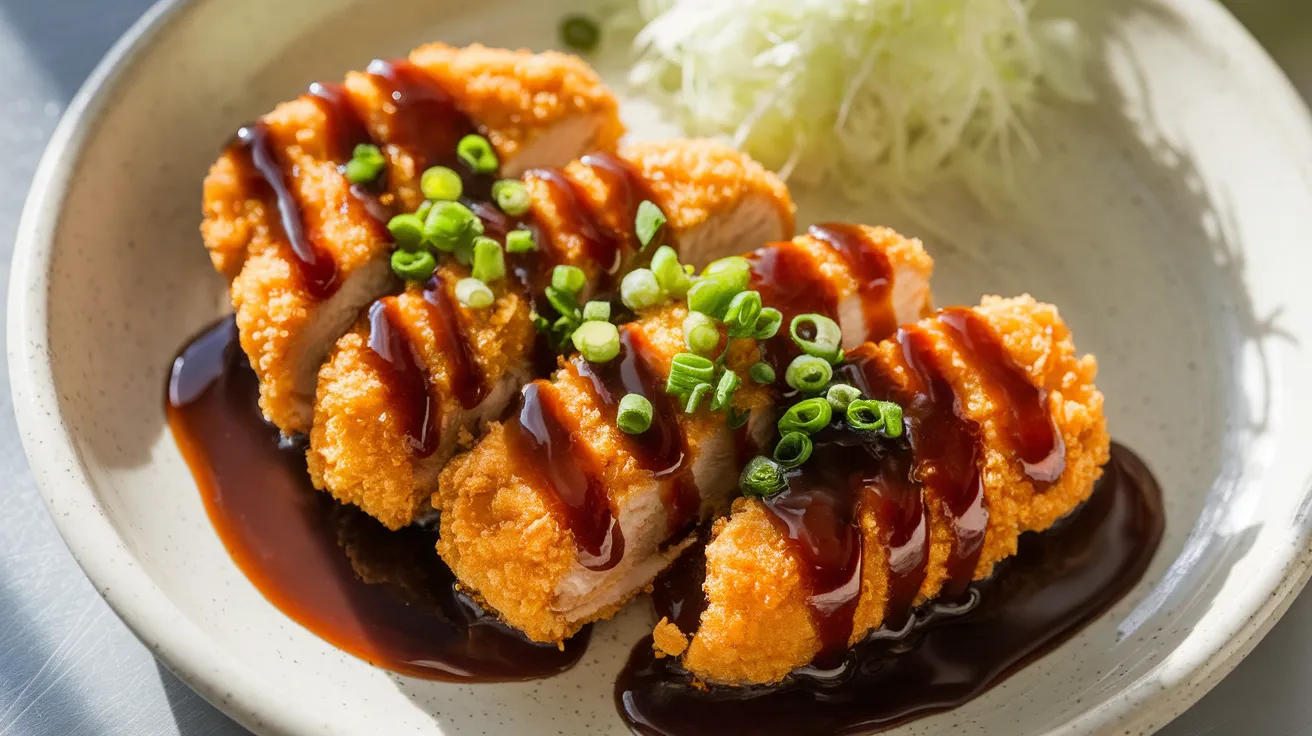
This authentic sauce for katsu chicken brings restaurant-quality flavor to your home kitchen with just eight simple ingredients. Our foolproof sauce for katsu chicken recipe creates that perfect glossy, sweet-tangy coating that makes crispy chicken cutlets irresistible. Even complete beginners can master this essential Japanese condiment in under 30 minutes.
SERVES: 4 | PREP: 15 MIN | COOK: 10 MIN | TOTAL: 25 MIN
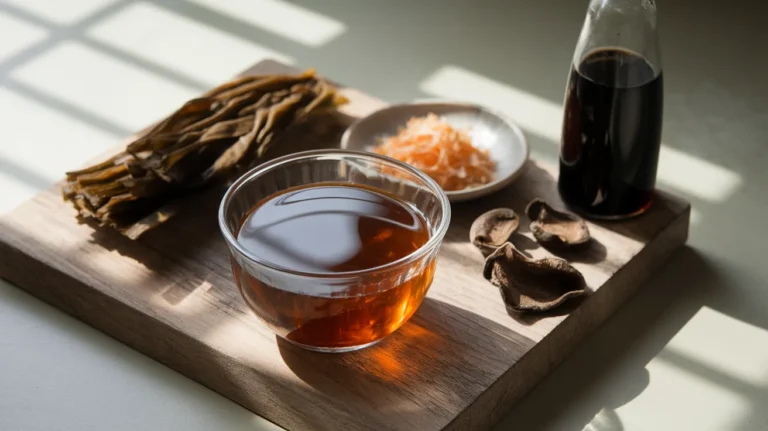
Ingredients for Perfect Katsu Chicken Sauce
Base Sauce Components
| Ingredient | Amount | Notes |
|---|---|---|
| Worcestershire sauce | 1/4 cup | Quality brand preferred |
| Ketchup | 1/4 cup | Regular or low-sodium |
| Soy sauce | 2 tablespoons | Low-sodium works best |
| Brown sugar | 2 tablespoons | Packed measurement |
| Rice vinegar | 1 tablespoon | White vinegar substitute |
| Honey | 1 tablespoon | Pure honey recommended |
| Garlic powder | 1/2 teaspoon | Fresh garlic optional |
| Ginger powder | 1/4 teaspoon | Ground ginger works |
Detailed Step-by-Step Katsu Chicken Sauce Instructions
Phase 1: Complete Preparation Setup (8 minutes)
Step 1: Organize Your Workspace Clear your counter space and place all ingredients within arm’s reach. Get out a medium saucepan, whisk, measuring cups, and measuring spoons. Having everything ready is crucial because this sauce for katsu chicken moves quickly once you start cooking.
Step 2: Measure Worcestershire and Ketchup Pour exactly 1/4 cup Worcestershire sauce into your saucepan first. The dark color helps you see the measurement clearly. Add 1/4 cup ketchup directly to the same pan. These two ingredients form the base of authentic katsu sauce.
Step 3: Initial Mixing Use your whisk to blend the Worcestershire and ketchup completely. Whisk for 30-45 seconds until the mixture is uniform brown-red color with no streaks. Any lumps now will affect your final sauce texture.
Step 4: Add Liquid Seasonings Measure 2 tablespoons soy sauce and pour it slowly into the mixture while whisking. The soy sauce adds essential umami depth. Follow with 1 tablespoon rice vinegar, which provides the tangy brightness that balances sweetness.
Step 5: Incorporate Sweeteners Add 2 tablespoons packed brown sugar to the liquid mixture. “Packed” means press the sugar firmly into your measuring spoon. Whisk vigorously for 1 full minute until no sugar granules are visible. Sugar lumps will create gritty texture.
Step 6: Final Seasoning Addition Drizzle in 1 tablespoon honey while whisking continuously. The honey adds complexity beyond regular sugar. Sprinkle 1/2 teaspoon garlic powder and 1/4 teaspoon ginger powder evenly over the surface, then whisk thoroughly for another 30 seconds.
Phase 2: Heat Application and Cooking (12 minutes)
Step 7: Begin Gentle Heating Place your saucepan over medium-low heat – this is crucial for success. Medium-low means about setting 3-4 on most stovetops. High heat will burn the sugars and ruin your sauce for katsu chicken. You should be able to hold your hand 6 inches above the pan comfortably.
Step 8: Initial Stirring Phase Stir the mixture constantly with your whisk as it warms. For the first 2-3 minutes, you’ll notice the honey and brown sugar dissolving completely. The sauce will become more liquid as it heats. Keep stirring – never stop during this phase.
Step 9: Watch for First Bubbles Continue stirring and watch for tiny bubbles forming around the edges of the pan. This happens around minute 4-5 of heating. These small bubbles indicate your sauce is approaching a simmer. Do not let it reach a rolling boil.
Step 10: Achieve Proper Simmer When you see consistent small bubbles around the edges and occasional bubbles breaking the surface, you’ve reached the perfect simmer. Immediately reduce heat to low (setting 2-3 on most stoves). Your sauce for katsu chicken should barely bubble.
Step 11: Simmering and Thickening Maintain this gentle simmer for 3-4 minutes while stirring constantly. You’ll notice the sauce beginning to coat your whisk more heavily. The color will deepen to a rich, glossy brown. This is when the flavors meld and concentrate.
Step 12: Test for Proper Consistency Dip your whisk into the sauce and lift it up. The sauce should coat the whisk and drip off in a thin, steady stream rather than watery drops. If it’s still too thin, continue simmering for 1-2 more minutes while stirring.
Phase 3: Quality Control and Final Adjustments (5 minutes)
Step 13: Taste Testing Remove the pan from heat and let cool for 30 seconds. Dip a clean spoon into the sauce and taste carefully. The flavor should balance sweet, salty, and tangy elements. Note what needs adjustment – more sweetness, saltiness, or acidity.
Step 14: Flavor Adjustments
- Too bland: Add 1/4 teaspoon more soy sauce
- Too sweet: Add 1/2 teaspoon rice vinegar
- Too salty: Add 1/2 teaspoon honey
- Too thin: Return to low heat for 1-2 minutes
- Too thick: Whisk in 1 teaspoon water
Make one adjustment at a time and taste again. Perfect sauce for katsu chicken should make your mouth water slightly from the balanced flavors.
Step 15: Final Straining (Optional) For restaurant-smooth texture, pour the sauce through a fine-mesh strainer into a serving bowl. Press any remaining bits through with the back of a spoon. This step removes any undissolved spice particles.
Step 16: Cooling and Final Preparation Let your finished sauce for katsu chicken cool for 2-3 minutes before serving. Hot sauce can make chicken coating soggy. The sauce will thicken slightly as it cools to the perfect consistency for coating and dipping.
Chef’s Notes for Katsu Chicken Sauce Success
• Temperature Control: Keep heat at medium-low throughout cooking. High heat burns the sugars instantly and creates bitter flavors that cannot be fixed.
• Stirring Technique: Use figure-8 motions with your whisk to ensure even heating and prevent hot spots that cause burning.
• Make-Ahead Strategy: This sauce for katsu chicken actually improves after sitting. Make it 2-4 hours ahead and reheat gently before serving.
• Consistency Guide: Perfect sauce coats the back of a spoon but isn’t thick like syrup. It should flow smoothly over chicken without being watery.
Nutrition Information (Per Serving)
- Calories: 65
- Protein: 1g
- Carbohydrates: 16g
- Fat: 0g
- Sodium: 580mg
- Sugar: 14g
Creative Katsu Chicken Sauce Variations
Spicy Katsu Sauce Recipe
Add 1-2 teaspoons sriracha during Step 6 for heat without overwhelming the traditional flavors. This creates a similar complexity to our sauce for Jamaican jerk chicken with its balanced spice profile.
Citrus-Enhanced Katsu Sauce
Replace rice vinegar with 2 tablespoons fresh lemon juice in Step 4 for bright, zesty notes. This technique mirrors the fresh approach found in our popular sauce for lemon chicken recipe.
Smoky Katsu Sauce
Add 1/4 teaspoon smoked paprika and 1/8 teaspoon liquid smoke during Step 6 for barbecue-inspired depth.
Low-Sodium Katsu Sauce Version
Use low-sodium soy sauce and ketchup, reduce Worcestershire by half, and add extra garlic powder for flavor compensation.
Storage & Reheating Your Katsu Chicken Sauce
Proper Storage Methods
Refrigerate cooled sauce for katsu chicken in airtight glass container for up to 7 days. Glass prevents flavor absorption better than plastic containers.
Best Reheating Techniques
- Microwave Method: Heat in 15-second intervals, stirring between, until warm
- Stovetop Method: Use low heat with constant stirring to prevent burning
- Room Temperature: Let sit 20 minutes before serving for best consistency
Long-Term Storage
Freeze in ice cube trays for perfect portions. Frozen sauce for katsu chicken keeps 3 months and thaws quickly in microwave or refrigerator.

Troubleshooting Common Katsu Sauce Problems
Problem 1: Sauce Remains Too Thin
Solution: Return to low heat and simmer 2-3 additional minutes while stirring constantly. The natural sugars will concentrate and thicken the sauce properly.
Problem 2: Burnt or Bitter Taste Developed
Solution: Heat was too high during cooking. Unfortunately, burnt katsu sauce cannot be salvaged due to caramelized sugars. Start over with lower heat.
Problem 3: Grainy or Gritty Texture
Solution: Brown sugar wasn’t fully dissolved during mixing. Strain the sauce through fine mesh and reheat gently while whisking vigorously.
Problem 4: Overwhelming Sweetness
Solution: Balance with additional soy sauce (1/2 teaspoon at a time) or rice vinegar for necessary acidity to cut sweetness.
Problem 5: Sauce Separating or Curdling
Solution: Temperature shock caused ingredient separation. Remove from heat immediately, whisk vigorously, and return to much lower temperature.
Essential Equipment for Making Katsu Sauce
Must-Have Kitchen Tools
- Medium heavy-bottom saucepan for even heat distribution
- Wire whisk for smooth, lump-free mixing
- Accurate measuring cups and spoons
- Fine-mesh strainer for silky texture (optional)
Helpful Additional Equipment
- Silicone spatula for easy pan scraping
- Small ladle for neat serving
- Glass storage containers for refrigeration
- Digital timer for precise cooking times
Complete Shopping List for Katsu Chicken Sauce
Condiment Aisle Items
- Worcestershire sauce (1 bottle)
- Ketchup (1 bottle)
- Soy sauce (1 bottle)
- Rice vinegar (1 bottle)
Baking Section Ingredients
- Brown sugar (1 box)
- Pure honey (1 jar)
- Garlic powder (1 container)
- Ground ginger powder (1 container)
Top 5 Success Secrets for Perfect Katsu Sauce
1. Master Temperature Control: Always use medium-low to low heat settings. High temperatures destroy the delicate balance and create irreversible bitter flavors from burnt sugars.
2. Measure with Precision: This sauce for katsu chicken relies on exact ingredient ratios for authentic Japanese restaurant taste. Use proper measuring tools, not estimates.
3. Never Stop Stirring: Constant stirring prevents hot spots, ensures even thickening, and distributes flavors uniformly throughout the cooking process.
4. Taste and Adjust Early: Make flavor corrections during Step 14 while sauce is still adjustable. Final consistency changes make seasoning adjustments difficult.
5. Allow Proper Cooling Time: Let your finished sauce for katsu chicken cool 2-3 minutes before serving. This achieves the ideal coating consistency that won’t make breading soggy.
This homemade sauce for katsu chicken transforms ordinary breaded cutlets into restaurant-quality meals. The perfectly balanced sweet-savory profile complements crispy coatings beautifully while remaining simple enough for complete cooking beginners to master successfully.