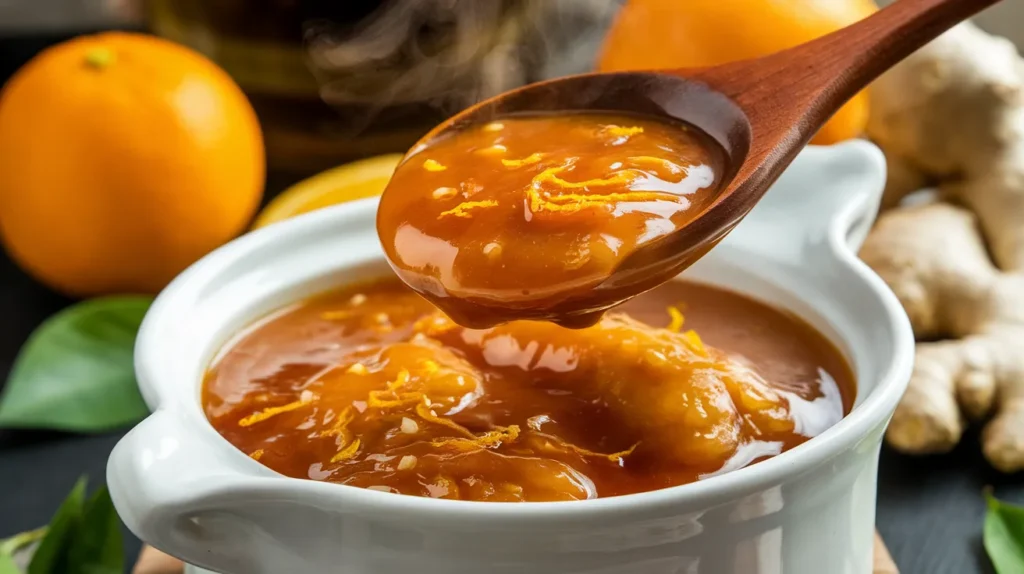
This vibrant sauce for orange chicken transforms ordinary chicken into a restaurant-quality masterpiece that’s sweet, tangy, and irresistibly sticky. Our foolproof sauce for orange chicken recipe delivers authentic Chinese-American flavors with simple pantry ingredients – no takeout required when you can create this glossy, citrus-packed perfection at home.
Recipe Info
SERVES: 4 | PREP: 15 MIN | COOK: 12 MIN | TOTAL: 27 MIN
Ingredients
For the Orange Sauce Base
| Ingredient | Amount |
|---|---|
| Fresh orange juice | 3/4 cup |
| Orange zest | 2 tablespoons |
| Rice vinegar | 1/3 cup |
| Soy sauce (low sodium) | 1/4 cup |
| Brown sugar (packed) | 1/2 cup |
| Honey | 3 tablespoons |
For the Thickening & Flavor
| Ingredient | Amount |
|---|---|
| Cornstarch | 3 tablespoons |
| Cold water | 3 tablespoons |
| Fresh garlic (minced) | 4 cloves |
| Fresh ginger (grated) | 1 tablespoon |
| Red pepper flakes | 1/2 teaspoon |
| Sesame oil | 1 teaspoon |
Step-by-Step Instructions for Sauce for Orange Chicken
Phase 1: Complete Preparation (8 minutes)
Step 1: Create the Perfect Cornstarch Slurry In a small bowl, add 3 tablespoons cornstarch. Pour 3 tablespoons cold water directly over the cornstarch. Using a fork or small whisk, stir vigorously for 30 seconds until the mixture is completely smooth and milky white. The slurry should have no lumps whatsoever – run your finger along the bottom of the bowl to check. If you feel any grittiness, keep whisking. Set this bowl aside but keep it nearby. Why this works: Cold water prevents the cornstarch from clumping when heated, creating a smooth thickening agent.
Step 2: Prepare Fresh Citrus Components Take 3-4 large oranges and wash them thoroughly under cold water. Using a microplane grater or the smallest holes on a box grater, carefully zest the oranges, avoiding the white pith underneath (it’s bitter). You need 2 tablespoons of bright orange zest. After zesting, cut the oranges in half and juice them through a fine-mesh strainer into a measuring cup until you have 3/4 cup fresh juice. Pro tip: Roll oranges on the counter while pressing down before juicing – this breaks down the pulp and releases more juice.
Step 3: Prep Your Aromatics Like a Pro Peel 4 garlic cloves and remove any green centers (they’re bitter). Using a sharp knife, mince the garlic as finely as possible – each piece should be smaller than a grain of rice. For the ginger, use a spoon to scrape off the skin from a 1-inch piece of fresh ginger root. Grate it on a microplane until you have 1 tablespoon of fresh grated ginger. Important: Fresh ginger and garlic create the authentic flavor base that bottled versions simply cannot match.
Phase 2: Building Your Sauce for Orange Chicken Base (5 minutes)
Step 4: Combine Your Liquid Foundation Place a medium saucepan (2-3 quart capacity) on your stovetop over medium heat. Pour in 3/4 cup fresh orange juice, 1/3 cup rice vinegar, and 1/4 cup low-sodium soy sauce. Stir gently with a wooden spoon to combine. Heat this mixture for 2-3 minutes until you see tiny bubbles forming around the edges – this is a gentle simmer, not a rolling boil. Why this step matters: Heating the liquids first helps the sugars dissolve more completely.
Step 5: Dissolve Your Sweeteners Completely Add 1/2 cup packed brown sugar and 3 tablespoons honey to the simmering liquid. Stir constantly with your wooden spoon, scraping the bottom of the pan to prevent the sugar from sticking and burning. Continue stirring for 2 full minutes until both sweeteners are completely dissolved – the liquid should be clear with no grainy texture. Taste the mixture – it should be sweet but balanced with the tangy vinegar. Visual cue: The mixture will become glossy and slightly thicker when the sugars are fully dissolved.
Step 6: Bloom Your Aromatics for Maximum Flavor Add your minced garlic, grated ginger, and 1/2 teaspoon red pepper flakes to the simmering sauce. Stir immediately and continuously for 1 minute. You’ll smell the garlic and ginger becoming fragrant – this is called “blooming” and it releases their essential oils into the sauce. The mixture might bubble more vigorously when you add the aromatics – this is normal. Safety note: Keep stirring to prevent the garlic from burning, which would make it bitter.
Phase 3: The Critical Thickening Process (4 minutes)
Step 7: Prepare for Thickening Success Reduce your heat to medium-low – this is crucial for preventing lumps. Give your prepared cornstarch slurry a vigorous stir with a fork because cornstarch separates quickly. The slurry should look milky and smooth again. Have your whisk ready in your dominant hand and the slurry bowl in the other. Critical point: Lower heat prevents the cornstarch from seizing up and creating lumps in your sauce for orange chicken.
Step 8: The Gentle Thickening Technique While whisking the simmering sauce constantly with one hand, use your other hand to pour the cornstarch slurry in a very thin, steady stream – imagine pouring honey. This should take 15-20 seconds to add completely. Never stop whisking during this process. The sauce will begin thickening immediately as you pour. Beginner tip: If you accidentally pour too fast and see lumps forming, strain the sauce through a fine-mesh sieve and start the thickening process again.
Step 9: Achieve Perfect Consistency Continue cooking the sauce while whisking constantly for 2-3 minutes. The sauce is ready when it coats the back of a spoon and holds its shape for 2-3 seconds before dripping off. To test: Dip a clean spoon into the sauce, lift it out, and run your finger across the back – the line should hold clearly. If the sauce seems too thick, whisk in 1 tablespoon orange juice. If too thin, cook 1 more minute while whisking. Perfect texture goal: The sauce should be glossy and thick enough to cling to chicken without being gluey.
Step 10: Final Flavor Touch Remove the saucepan from heat immediately once you achieve the right consistency. Add 1 teaspoon sesame oil and 2 tablespoons fresh orange zest you prepared earlier. Stir gently 10-15 times to distribute evenly. The sesame oil adds an authentic nutty aroma that completes this sauce for orange chicken. Taste and adjust – add more honey for sweetness, rice vinegar for tang, or red pepper flakes for heat. Important: Adding sesame oil off the heat preserves its delicate flavor and prevents bitterness.
Chef’s Notes for Perfect Sauce for Orange Chicken
Professional Tip 1: The perfect sauce for orange chicken should coat chicken without being gluey. If too thick, whisk in orange juice one tablespoon at a time while the sauce is still warm.
Professional Tip 2: Temperature control is everything – once you add the cornstarch slurry, never let the sauce boil vigorously or it will break and become watery.
Professional Tip 3: This sauce keeps its glossy finish when you avoid boiling after thickening. Gentle heat preserves the smooth texture that makes restaurant-style orange chicken so appealing.
Professional Tip 4: For restaurant-style authenticity, let the sauce cool for 2-3 minutes before tossing with crispy chicken – it adheres better and creates that perfect glossy coating.
Nutrition Per Serving
- Calories: 165
- Protein: 1g
- Carbohydrates: 42g
- Fat: 0.5g
- Sodium: 890mg
- Sugar: 38g
Creative Variations for Your Orange Chicken Sauce
Spicy Orange Sauce
Add 2 teaspoons sriracha and double the red pepper flakes for heat lovers. Perfect for those who enjoy bold flavors like our sauce for Nashville hot chicken.
Mandarin Ginger Twist
Substitute half the orange juice with mandarin juice and add 1 extra tablespoon fresh ginger for a more complex citrus profile.
Healthy Orange Sauce
Replace brown sugar with coconut sugar and honey with pure maple syrup for a refined sugar-free version.
Restaurant-Style Glaze
Add 1 tablespoon orange marmalade during the final minute for extra glossiness and concentrated orange flavor that rivals your favorite sauce for rotisserie chicken.
Storage & Reheating Your Sauce for Orange Chicken
Refrigerator: Store covered for up to 5 days. The sauce thickens when cold – perfectly normal.
Reheating: Warm gently over low heat, whisking in 1-2 tablespoons water to restore consistency.
Freezing: Freeze up to 3 months in ice cube trays for portion control. Thaw overnight before reheating.
Make-Ahead: Prepare up to 2 days ahead. The flavors actually improve overnight as the aromatics meld together.
Troubleshooting Guide
Problem 1: Sauce Too Thick
Solution: Whisk in warm orange juice, 1 tablespoon at a time, until desired consistency returns. Never add cold liquid to hot sauce.
Problem 2: Lumpy Sauce
Solution: Strain through fine-mesh sieve, then return to pan. Always whisk cornstarch slurry before adding and pour very slowly.
Problem 3: Too Sweet
Solution: Add 1-2 tablespoons rice vinegar and a pinch of salt to balance sweetness. Taste after each addition.
Problem 4: Lacks Orange Flavor
Solution: Add more fresh zest (not juice) – zest contains the essential oils that pack the most citrus punch.
Problem 5: Sauce Won’t Thicken
Solution: Mix 1 tablespoon cornstarch with 1 tablespoon cold water and whisk into simmering sauce. Cook 2 more minutes.
Equipment Essentials
- Medium saucepan (2-quart capacity)
- Wire whisk (prevents lumps)
- Microplane grater (for zest and ginger)
- Fine-mesh strainer (backup for smooth sauce)
- Measuring cups and spoons
- Small mixing bowl (for cornstarch slurry)
Shopping List
Produce Section
- 3-4 large oranges
- Fresh garlic bulb
- Fresh ginger root
Pantry Aisle
- Rice vinegar
- Low-sodium soy sauce
- Brown sugar
- Honey
- Cornstarch
- Red pepper flakes
- Sesame oil
Success Secrets
1. Fresh is best – bottled orange juice works, but fresh creates superior flavor depth and natural sweetness in your sauce for orange chicken.
2. Temperature control matters – keep heat at medium or below once thickening begins to prevent scorching and lumps.
3. Slurry technique – always mix cornstarch with cold liquid and whisk constantly when adding to prevent lumps.
4. Taste as you go – sweet, sour, and salty should be perfectly balanced in your finished sauce.
5. Timing is everything – add sesame oil at the very end to preserve its nutty aroma and prevent bitterness from heat.
This sauce for orange chicken recipe delivers restaurant-quality results every time. The glossy, flavorful coating transforms simple chicken into a crowd-pleasing favorite that’s ready in under 30 minutes with these detailed beginner-friendly instructions.