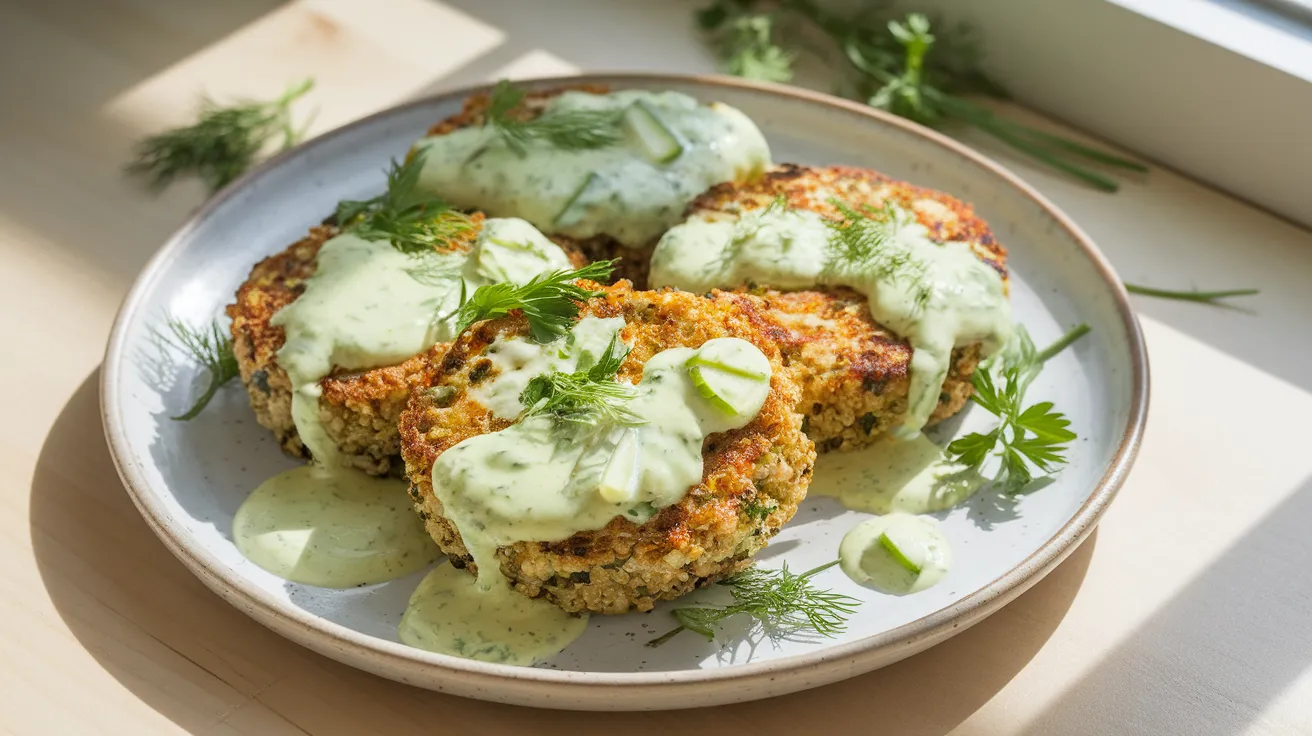
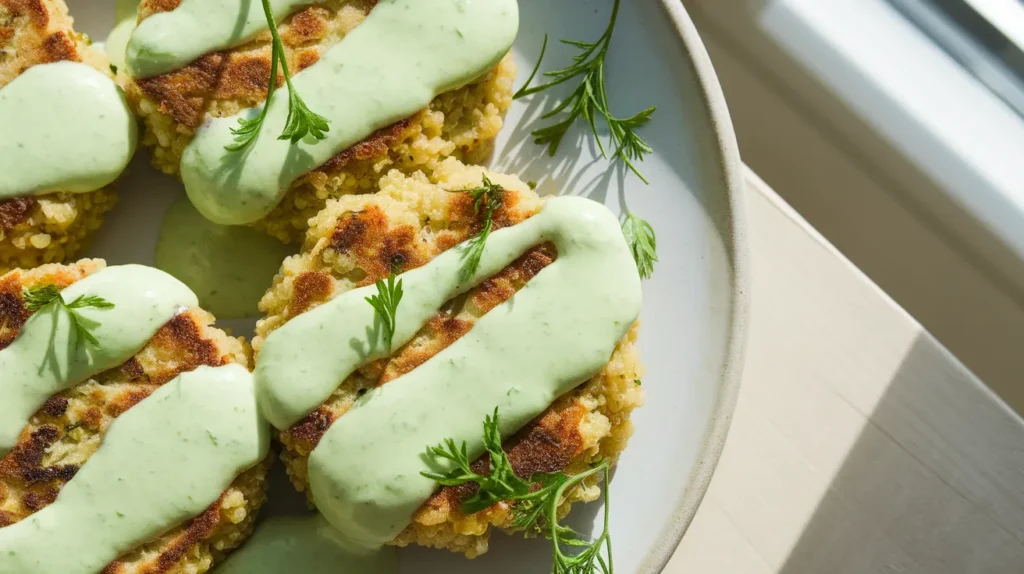
This luxurious sauce for quinoa patties elevates your homemade patties into a gourmet experience. Creamy Greek yogurt meets fresh herbs in this foolproof sauce for quinoa patties that beginners can master in just 25 minutes. Transform ordinary quinoa patties into restaurant-quality meals with this versatile, herb-packed sauce.
SERVES: 4 | PREP: 15 MIN | COOK: 10 MIN | TOTAL: 25 MIN
Ingredients
For the Creamy Herb Sauce for Quinoa Patties
| Ingredient | Amount |
|---|---|
| Greek yogurt (plain, full-fat) | 1 cup |
| Fresh lemon juice | 3 tablespoons |
| Garlic cloves (minced) | 2 cloves |
| Fresh dill (chopped) | 2 tablespoons |
| Fresh parsley (chopped) | 2 tablespoons |
| Fresh chives (chopped) | 1 tablespoon |
| Olive oil (extra virgin) | 2 tablespoons |
| Dijon mustard | 1 teaspoon |
| Honey | 1 teaspoon |
| Salt | ½ teaspoon |
| Black pepper (freshly ground) | ¼ teaspoon |
| Cucumber (finely diced) | ¼ cup |
Complete Step-by-Step Instructions for Sauce for Quinoa Patties
Phase 1: Essential Prep Work (8-10 minutes)
Step 1: Prepare Your Yogurt Base Take your Greek yogurt straight from the refrigerator. Line a fine-mesh strainer with a clean kitchen towel or double layer of paper towels. Set the strainer over a medium bowl, making sure there’s at least 2 inches of space between the bottom of the strainer and the bowl. Pour the yogurt into the lined strainer and let it drain for exactly 8 minutes. This removes excess whey (the watery liquid) that would make your sauce for quinoa patties thin and runny. You’ll notice about 2-3 tablespoons of clear liquid collecting in the bowl below – this is perfect.
Step 2: Master the Garlic Preparation Place 2 garlic cloves on your cutting board. Using the flat side of your chef’s knife, gently crush each clove. The papery skin will easily peel away. Remove all skin completely. Now, mince the garlic as finely as possible – aim for pieces smaller than rice grains. Sprinkle a pinch of salt over the minced garlic. Using the flat side of your knife, drag and press the garlic against the cutting board repeatedly. This creates a smooth garlic paste that distributes evenly throughout your sauce without creating chunks that might overwhelm individual bites.
Step 3: Herb Preparation Technique Fill a large bowl with cold water. Submerge your fresh dill, parsley, and chives completely and swish gently to remove any dirt or grit. Lift herbs out of the water (don’t pour through a strainer, which pushes dirt back onto the herbs). Shake off excess water. Lay herbs flat on paper towels and pat completely dry. Any remaining water will dilute your sauce for quinoa patties. Remove any thick stems from parsley and dill – only use the tender leaves and thin stems. Line up your herbs and chop with a sharp knife using a rocking motion. For dill and parsley, aim for pieces about ⅛-inch. For chives, cut into tiny rings using kitchen shears if you have them.
Step 4: Lemon Preparation Roll your lemon firmly on the counter while pressing down with your palm. This breaks down the internal membranes and releases more juice. Cut the lemon in half. Using a fork, pierce the cut surface several times, then squeeze firmly while twisting the fork. This technique extracts maximum juice. Strain the juice through a fine-mesh strainer into a small bowl to remove seeds and pulp. You need exactly 3 tablespoons – if you’re short, use the fork technique on the squeezed lemon halves to extract every last drop.
Phase 2: Building Your Sauce Base (4-5 minutes)
Step 5: Create the Perfect Yogurt Foundation Transfer your drained yogurt to a medium mixing bowl. The texture should now be noticeably thicker than when you started – almost like soft cream cheese. Using a whisk, stir the yogurt vigorously for 30 seconds. You’re breaking up any lumps and creating a perfectly smooth base. The yogurt should coat the whisk thickly and fall in ribbons when lifted. If you see any lumps, continue whisking until completely smooth.
Step 6: Incorporate Acid Gradually Pour your lemon juice into a small measuring cup. Add it to the yogurt slowly – about 1 tablespoon at a time – while whisking constantly. Don’t dump it all in at once, as this can cause the yogurt to seize and become grainy. After each addition, whisk vigorously until completely smooth before adding more. You’ll notice the mixture becomes slightly thinner and much brighter in color. This is the acid working with the proteins in the yogurt to create the perfect creamy texture for your sauce for quinoa patties.
Step 7: Build Flavor Complexity Add your garlic paste to the yogurt mixture. Whisk for 15 seconds until you can’t see any garlic pieces – it should be completely incorporated. Next, add the Dijon mustard. Whisk again until the yellow color is evenly distributed with no streaks. Finally, drizzle in the honey while whisking. The honey might resist mixing at first, but keep whisking – it will eventually dissolve completely. Taste your base now – you should detect tangy, garlicky, and slightly sweet notes.
Phase 3: Herb Integration and Oil Emulsion (3-4 minutes)
Step 8: Proper Herb Folding Technique Switch from your whisk to a rubber spatula. Add all your chopped herbs (dill, parsley, and chives) to the yogurt base. Here’s the crucial part: fold, don’t stir. Insert the spatula at the edge of the bowl, slide it under the mixture, and lift up and over, turning the mixture over itself. Rotate the bowl a quarter turn and repeat. Continue this motion for about 1 minute. You want the herbs evenly distributed but not bruised or crushed, which would turn your beautiful green herbs brown and muddy-looking.
Step 9: Create a Silky Oil Emulsion Measure your olive oil into a small measuring cup or spoon. Here’s the secret to professional texture: add the oil drop by drop while folding continuously with your spatula. Start with just a few drops, fold several times, then add a few more drops. After you’ve added about half the oil this way, you can add the rest in a thin, steady stream while folding constantly. This technique creates an emulsion – the oil bonds with the yogurt instead of separating, giving your sauce for quinoa patties a luxurious, silky mouthfeel.
Phase 4: Final Seasoning and Finishing Touches (3-4 minutes)
Step 10: Season Like a Professional Add ¼ teaspoon salt first (not the full amount). Fold it in completely, then taste using a clean spoon. The salt should enhance all the other flavors without being detectible as “salty.” Add more salt gradually – a pinch at a time – until the flavors pop. For pepper, start with just a few grinds of black pepper. Fresh-ground pepper is essential here; pre-ground pepper tastes like dust in comparison. Fold and taste after each addition.
Step 11: Perfect Your Flavor Balance Taste your sauce critically. It should be tangy but not sour, creamy but not heavy, herbaceous but not grassy. Too bland? Add more salt. Too tart? Add a touch more honey (¼ teaspoon at a time). Garlic too mild? You can’t add more raw garlic now, but you can add a tiny pinch of garlic powder. Not bright enough? Add lemon juice by the teaspoon. The goal is a sauce that makes you want another taste immediately.
Step 12: Add Textural Interest Dice your cucumber into pieces no larger than ¼-inch. Pat these pieces completely dry with paper towels – any water will thin your sauce. Fold the cucumber pieces in gently using your spatula. The cucumber adds a fresh crunch that contrasts beautifully with both the creamy sauce and the soft interior of quinoa patties. Don’t add the cucumber more than 30 minutes before serving, as it will release water over time.
Phase 5: Final Quality Check and Resting (2-3 minutes)
Step 13: Consistency and Color Assessment Your finished sauce for quinoa patties should coat the back of a spoon but still drip slowly. If it’s too thick, thin with cold water one teaspoon at a time. If too thin, you can thicken by whisking in an extra tablespoon of Greek yogurt. The color should be pale green with flecks of darker herbs throughout – no brown spots or muddy appearance.
Step 14: Optimal Resting Period Cover your bowl with plastic wrap, pressing the wrap directly onto the surface of the sauce to prevent a skin from forming. Refrigerate for at least 30 minutes but no more than 4 hours before first serving. This resting period allows the garlic to mellow, the herbs to infuse their flavors throughout, and the overall taste to harmonize. Your sauce for quinoa patties is now ready to transform ordinary patties into an extraordinary meal.
Chef’s Professional Tips for Sauce for Quinoa Patties
• Temperature matters: Always use cold ingredients from the refrigerator. Room temperature yogurt is more likely to separate when acid is added.
• Herb timing: This sauce for quinoa patties tastes best when herbs are added no more than 4 hours before serving to maintain their vibrant color and fresh flavor.
• Make-ahead strategy: Prepare the base (through Step 7) up to 2 days ahead. Add herbs and cucumber just before serving for optimal texture and color.
• Consistency control: If your sauce for quinoa patties becomes too thick after chilling, bring it back to the perfect consistency with a tablespoon of cold milk or water.
Nutrition Information (Per Serving)
- Calories: 85
- Protein: 6g
- Carbs: 6g
- Fat: 5g
- Fiber: 1g
- Sodium: 280mg
Creative Variations for Your Sauce for Quinoa Patties
Mediterranean Herb Sauce
Replace dill with fresh oregano and add 2 tablespoons crumbled feta cheese for a Greek-inspired sauce that pairs beautifully with quinoa bowl preparations.
Spicy Jalapeño Version
Blend in 1 seeded jalapeño and ½ teaspoon ground cumin for a sauce with gentle heat that complements southwestern-seasoned quinoa patties perfectly.
Avocado Green Goddess
Mash ½ ripe avocado into the yogurt base for an ultra-creamy, pale green sauce that’s both Instagram-worthy and incredibly delicious.
Asian Fusion Style
Swap traditional herbs for fresh cilantro and green onions, plus add 1 teaspoon sesame oil and ½ teaspoon rice vinegar for an Asian-inspired twist that works beautifully with rice and chicken dishes too.
Storage & Reheating Your Sauce for Quinoa Patties
Refrigeration: Store in an airtight container for up to 5 days. The sauce will thicken slightly when cold but returns to perfect consistency at room temperature.
Freezing: Not recommended as dairy-based sauces separate when frozen and thawed, ruining the smooth texture.
Serving temperature: Let chilled sauce sit at room temperature for 15 minutes before serving with warm quinoa patties for the best consistency and flavor release.
Portion control: Divide into small containers for easy weeknight quinoa patty meals throughout the week.
Troubleshooting Guide for Sauce for Quinoa Patties
Problem: Sauce tastes too tangy or acidic Solution: Add an extra teaspoon of honey or a tablespoon of plain yogurt to mellow the acidity. Taste and adjust gradually.
Problem: Sauce looks watery or thin Solution: Your yogurt wasn’t drained long enough. Strain through cheesecloth for 2 hours, or whisk in 1 tablespoon of cream cheese for immediate thickening.
Problem: Fresh herbs turned brown or black Solution: This indicates oxidation from excess moisture or rough handling. Always dry herbs completely and fold gently with a spatula, never stir vigorously.
Problem: Raw garlic taste is overwhelming Solution: Let the sauce rest for 1 hour refrigerated. Raw garlic mellows significantly over time, or add more yogurt base to dilute.
Problem: Sauce lacks overall flavor depth Solution: Check your salt levels first – undersalted food tastes flat. Then add a pinch of white pepper or a splash of white wine vinegar for complexity.
Equipment Essentials for Perfect Sauce for Quinoa Patties
- Fine-mesh strainer for draining yogurt effectively
- Medium mixing bowl (2-quart capacity) for combining ingredients
- Rubber spatula for gentle folding without bruising herbs
- Sharp chef’s knife for precise herb chopping
- Cutting board (preferably dedicated to herbs and aromatics)
- Measuring cups and spoons for accurate proportions
- Wire whisk for creating smooth, lump-free base
- Small bowls for organizing prepped ingredients
Complete Shopping List for Sauce for Quinoa Patties
Dairy Section
- Greek yogurt (plain, full-fat, 1 container)
Produce Section
- Fresh lemons (2 lemons for juice)
- Garlic bulb (1 head)
- Fresh dill (1 package)
- Fresh parsley (1 bunch)
- Fresh chives (1 package)
- Cucumber (1 medium)
Pantry Items
- Extra virgin olive oil
- Dijon mustard
- Honey
- Kosher salt
- Whole black peppercorns (for grinding)
Five Success Secrets for Perfect Sauce for Quinoa Patties
1. Always use full-fat Greek yogurt rather than regular or low-fat versions. The extra fat content creates the richest, most stable sauce that won’t separate or become watery when mixed with acidic ingredients.
2. Drain your yogurt even if the container says “Greek style” or appears thick. This crucial step removes excess whey and ensures your sauce for quinoa patties maintains perfect consistency throughout storage.
3. Prep herbs immediately before use and keep them as dry as possible. Wet herbs dilute flavor and create a watery sauce, while old herbs lose their vibrant color and fresh taste.
4. Build flavors gradually by tasting after each major addition. Your sauce should balance tangy, salty, sweet, and herbaceous elements – adjust each component slowly until harmony is achieved.
5. Allow proper resting time of at least 30 minutes before serving. This develops the complex flavors that make restaurant-quality sauce for quinoa patties that will impress family and friends every time.