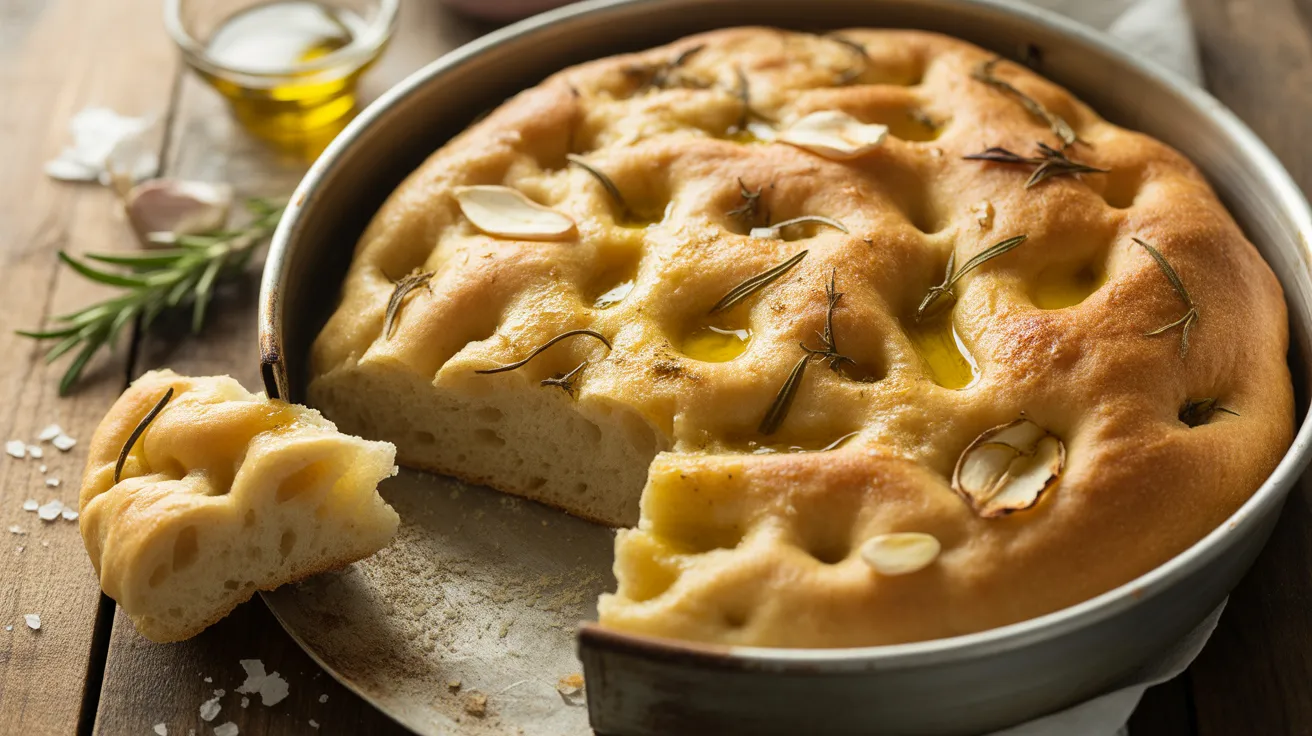
This sourdough focaccia recipe transforms your active starter into the most incredible Italian flatbread you’ll ever make. The airy, dimpled bread gets its signature texture from a wet dough that creates those perfect oil-filled pockets, while the sourdough adds complex flavor that regular focaccia just can’t match. I’m showing you exactly how to nail the technique so you get that crispy bottom, fluffy interior, and herb-topped perfection every single time.
SERVES: 4 | PREP: 30 MIN | COOK: 25 MIN | TOTAL: 10 HRS 55 MIN (includes fermentation)
Ingredients
For the Dough
| Ingredient | Amount | Notes |
|---|---|---|
| Active sourdough starter | 200g (about 1 cup) | Fed 4-6 hours prior, bubbly |
| Warm water | 350g (1½ cups) | 80-85°F |
| Bread flour | 500g (4 cups) | High protein preferred |
| Fine sea salt | 10g (2 tsp) | Don’t use table salt |
| Extra virgin olive oil | 25g (2 tbsp) | For dough |
For Topping & Baking
| Ingredient | Amount | Notes |
|---|---|---|
| Extra virgin olive oil | 60g (¼ cup) | High quality recommended |
| Flaky sea salt | 2 tsp | Maldon or similar |
| Fresh rosemary | 2 tbsp | Roughly chopped |
| Garlic cloves | 3 | Thinly sliced (optional) |
Step-by-Step Instructions
Phase 1: Mixing the Dough (10 minutes)
Step 1: Pour your 350g warm water into a large mixing bowl. The water should feel like a warm bath on your wrist—around 80-85°F. This temperature wakes up your sourdough starter without killing the beneficial bacteria.
Step 2: Add your 200g active sourdough starter to the warm water. Use a fork or your fingers to break it up completely until the water looks milky and there are no big chunks floating around. This takes about 30 seconds of stirring.
Step 3: Dump in all 500g bread flour at once. Don’t sift it—just pour it straight from the bag. Use a sturdy spoon or your hands to mix everything together until you don’t see any dry flour bits. The dough will look shaggy and rough. That’s exactly what you want right now.
Step 4: Cover the bowl with a damp kitchen towel or plastic wrap. Let it rest for 30 minutes. This autolyse period lets the flour fully hydrate and makes the next steps way easier. Set a timer so you don’t forget.
Step 5: After the 30-minute rest, sprinkle 10g salt and 25g olive oil over the dough. Now comes the fun part—stick your hand in and squeeze the dough between your fingers repeatedly for about 3-4 minutes. You’ll feel it transform from rough to smooth and elastic.
Phase 2: Bulk Fermentation & Folding (6-8 hours)
Step 6: Leave the dough in the bowl and perform your first stretch and fold. Wet your hands with water, grab one side of the dough, stretch it up about 8 inches, then fold it over itself. Rotate the bowl 90 degrees and repeat. Do this 4 times total, making a complete rotation.
Step 7: Cover the bowl again and let it rest for 30 minutes. During this time, the gluten is developing strength and the sourdough is starting its fermentation magic. You’ll repeat this stretch-and-fold process 3 more times over the next 2 hours.
Step 8: After completing 4 sets of stretches and folds (about 2 hours total), let the dough sit undisturbed for 4-6 hours. You’re looking for the dough to increase in size by about 50%. It should look puffy with some bubbles visible on the surface.
Step 9: Here’s how to test if bulk fermentation is done: gently poke the dough with a wet finger. If the indent slowly springs back halfway, you’re ready. If it springs back completely, it needs more time. If it doesn’t spring back at all, you’ve gone too far (but don’t worry, it’ll still taste good).
Phase 3: Shaping & Pan Prep (10 minutes)
Step 10: Generously coat a 9×13 inch baking pan with 2 tablespoons olive oil. Don’t be shy here—you want oil covering the bottom and sides completely. This creates that incredible crispy bottom crust.
Step 11: Scrape your dough onto a lightly floured counter. It will be very sticky and wet—this is normal for focaccia. Use floured hands to gently shape it into a rough rectangle. Don’t knead it or deflate it too much.
Step 12: Transfer the dough to your oiled pan. Press it gently toward the corners, but don’t force it all the way to the edges yet. The dough will be resistant. Cover with plastic wrap and let it rest for 15 minutes. This relaxes the gluten.
Step 13: After the rest, use oiled fingers to press the dough out to fill the entire pan. Push firmly but gently, working from the center outward. If it still won’t reach the corners, give it another 10-minute rest and try again.
Phase 4: Final Proof (1-2 hours)
Step 14: Once the dough fills the pan, cover it loosely with plastic wrap. Let it proof at room temperature for 1-2 hours. You’ll know it’s ready when it looks puffy, has grown noticeably in height, and jiggles like jello when you gently shake the pan.
Step 15: About 30 minutes before baking, preheat your oven to 425°F. Place a rack in the middle position. Don’t skip the preheating time—a hot oven is crucial for the perfect rise and crust.
Phase 5: Dimpling & Topping (5 minutes)
Step 16: This is the signature focaccia move: drizzle ¼ cup olive oil all over the surface of your proofed dough. Now press your fingertips straight down to the bottom of the pan all over, creating deep dimples. Get aggressive here—really push down. These dimples hold the olive oil and create texture.
Step 17: The oil should pool in all those dimples you just created. If some spots look dry, add a bit more oil. Sprinkle 2 teaspoons flaky sea salt evenly over the top. Scatter your chopped rosemary and sliced garlic (if using) across the surface, pressing them lightly into the dough so they don’t burn.
Phase 6: Baking (25 minutes)
Step 18: Slide your pan into the preheated 425°F oven. Bake for 20-25 minutes. You’re looking for a deep golden brown color on top with darker brown edges. The smell will be absolutely incredible at this point.
Step 19: Check doneness by lifting one corner with a spatula. The bottom should be golden and crispy, not pale or soft. If the top is browning too fast but the bottom isn’t done, lower the temperature to 400°F and bake another 5 minutes.
Step 20: Remove the pan from the oven and immediately transfer the focaccia to a wire cooling rack. Let it cool for at least 10 minutes before cutting. This lets the crumb set properly and keeps the bottom from getting soggy.
Chef’s Notes
Hydration is Key: This sourdough focaccia dough is intentionally wet at about 70% hydration. The high water content creates those beautiful open air pockets and tender crumb. Don’t be tempted to add more flour even though it feels sticky.
Starter Timing Matters: Your starter should be at peak activity—bubbly, doubled in size, and passing the float test. If your starter isn’t strong enough, the dough won’t rise properly and you’ll end up with a dense, flat result.
Temperature Control: Cooler kitchens (below 70°F) will slow fermentation significantly. If your house is cold, try placing the dough in your oven with just the light on, or extend bulk fermentation by 2-4 hours.
The Dimple Technique: Those characteristic dimples aren’t just for looks—they create pockets that trap olive oil and seasonings. Press firmly enough to reach the bottom of the pan, but the dough will puff back up slightly during baking.
Nutrition Information (Per Serving)
- Calories: 465
- Protein: 12g
- Carbohydrates: 68g
- Fat: 16g
- Fiber: 3g
- Sodium: 890mg
Creative Variations
Cherry Tomato & Basil Version
Press 15-20 halved cherry tomatoes cut-side up into the dimpled dough before baking. Add fresh basil leaves after baking for a summer-fresh twist. This variation brings bright acidity that cuts through the richness of the olive oil.
Caramelized Onion & Thyme Focaccia
Top your dimpled dough with 1 cup caramelized onions and fresh thyme sprigs. The sweet onions create an incredible contrast with the tangy sourdough. If you’re looking for more ways to use your sourdough starter in bread baking, try my sourdough sandwich loaf for a completely different texture and application.
Za’atar Spiced Middle Eastern Style
Replace the rosemary with 3 tablespoons za’atar spice blend mixed into the olive oil topping. Add 2 tablespoons sesame seeds for extra crunch. This gives your focaccia an earthy, nutty complexity.
Potato & Sage Focaccia
Layer 1 cup very thinly sliced potatoes across the dimpled dough with fresh sage leaves tucked between them. The potatoes crisp up beautifully in the oven. For another sourdough bread with amazing crust development, check out my sourdough baguette recipe that shares similar fermentation principles.
Storage & Reheating
Room Temperature: Store your focaccia wrapped in a clean kitchen towel or in a paper bag at room temperature for up to 2 days. Don’t use plastic—it makes the crust soft and chewy instead of crispy.
Refrigerator Storage: Wrap individual portions in plastic wrap, then place in an airtight container. Refrigerate for up to 5 days. The sourdough’s natural acids actually help preserve freshness longer than regular bread.
Freezing Instructions: Cut the focaccia into individual portions, wrap each piece tightly in plastic wrap, then aluminum foil. Freeze for up to 3 months. Thaw overnight in the fridge before reheating.
Reheating Method: Preheat your oven to 350°F. Unwrap the focaccia and place it directly on the oven rack for 8-10 minutes. This revives the crispy crust and fluffy interior. A microwave will make it soggy and tough—never use it for reheating.
Troubleshooting Common Problems
Problem 1: Dense, Flat Focaccia That Didn’t Rise
Solution: Your starter wasn’t active enough, or fermentation was too short. Make sure your starter passes the float test (drop a spoonful in water—it should float). Extend bulk fermentation until the dough increases by 50% and shows visible bubbles. Cold kitchens need 2-4 extra hours of fermentation time.
Problem 2: Dough Too Sticky to Handle
Solution: Focaccia dough is meant to be sticky, but if it’s unmanageable, you have two options. First, use more oil on your hands instead of flour when handling—it won’t toughen the dough. Second, try the “wet hands” technique where you dip your hands in water before each stretch and fold. Don’t add extra flour or you’ll end up with tough, dense bread.
Problem 3: Burnt Top But Undercooked Bottom
Solution: Your oven temperature is too high or the pan is too close to the heating element. Move your rack to the middle position and reduce temperature to 400°F. If the top browns too quickly, tent it loosely with aluminum foil for the last 10 minutes of baking. A dark-colored pan absorbs more heat—try using a light-colored aluminum pan instead.
Problem 4: Soggy Bottom Crust
Solution: Not enough oil in the pan, or you didn’t let it cool on a rack. Use a full 2-3 tablespoons of oil to coat the pan bottom—this creates a fried effect that crisps the base. Always transfer to a wire rack immediately after baking so steam can escape from underneath. Leaving it in the pan traps moisture.
Problem 5: Dimples Disappear During Baking
Solution: You dimpled too early before the final proof was complete, or you didn’t press deep enough. Wait until the dough is fully proofed and puffy before dimpling. Press your fingers all the way to the bottom of the pan—be aggressive. If dimples still puff out, your oven temperature might be too low. Make sure it’s fully preheated to 425°F.
Equipment Essentials

9×13 Inch Metal Baking Pan: This is the standard size that gives you the perfect focaccia thickness. Metal conducts heat better than glass for that crispy bottom.
Digital Kitchen Scale: Sourdough baking requires precision. Measuring by weight ensures consistent results every time. A $20 scale will change your baking game.
Plastic Bowl Scraper: Makes it easy to handle wet dough without making a mess. The curved edge conforms to your bowl shape perfectly.
Instant-Read Thermometer: For checking water temperature. The 80-85°F range is ideal for activating your starter without killing it.
Wire Cooling Rack: Essential for preventing a soggy bottom. Air circulation keeps the crust crispy.
Large Mixing Bowl: You need room for the dough to double in size during bulk fermentation. A 4-quart bowl works perfectly.
Shopping List
Baking Aisle
- 500g bread flour (high protein)
- 10g fine sea salt
- 2 tsp flaky sea salt (Maldon)
Oils & Vinegars
- 1 bottle extra virgin olive oil (you’ll need about ⅓ cup total)
Produce Section
- Fresh rosemary (1 bunch)
- Garlic (1 head)
Items You Should Already Have
- Active sourdough starter
- Warm water
Success Secrets
1. Feed Your Starter Properly: The biggest mistake is using starter that isn’t active enough. Feed it 4-6 hours before you plan to mix your dough. It should be bubbly, doubled in size, and smell pleasantly tangy—not sour or alcoholic.
2. Master the Windowpane Test: After mixing and folding, grab a small piece of dough and gently stretch it between your fingers. If you can stretch it thin enough to see light through it without tearing, your gluten is properly developed.
3. Don’t Rush Fermentation: Sourdough works on its own schedule, not yours. Watch the dough, not the clock. A 50% increase in volume with visible bubbles means it’s ready, whether that takes 6 hours or 10 hours.
4. Use Quality Olive Oil: Since olive oil is a star ingredient here, don’t cheap out. The flavor of your oil directly impacts the final taste. A fruity, peppery extra virgin olive oil makes a noticeable difference.
5. Embrace the Wet Dough: Resist adding flour when the dough feels sticky. High hydration creates those beautiful open air pockets that make focaccia special. Oil your hands instead of flouring them, and trust the process.