- Secret ingredient: Butternut squash puree creates incredibly moist pancakes while boosting nutrition
- Perfect balance: Natural sweetness from squash pairs beautifully with rich peanut butter
- Breakfast upgrade: These pancakes pack 12g protein per serving while tasting indulgent
- Make-ahead friendly: Batter keeps up to 24 hours in the refrigerator for quick morning meals
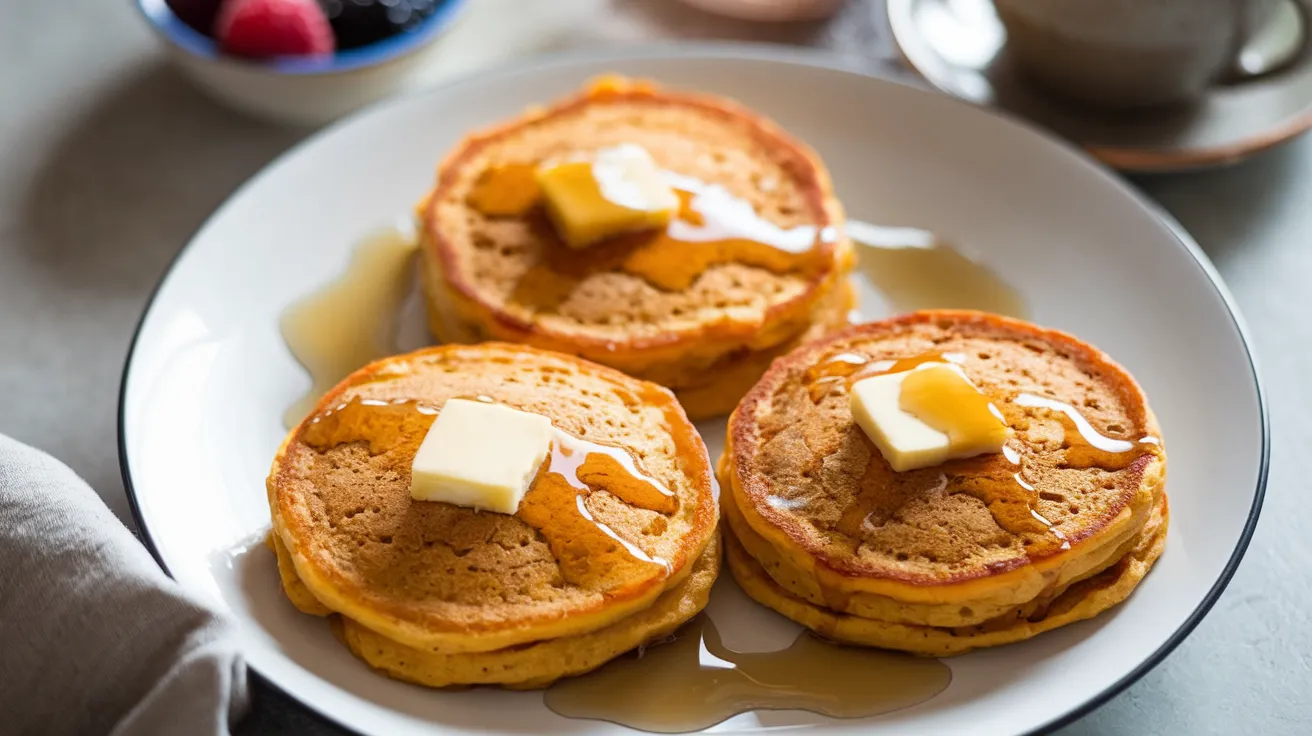
Transform Ordinary Breakfast into Something Special
Tired of boring breakfast options that leave you hungry an hour later? These Squash Peanut Butter Pancakes solve both problems at once.
The combination might sound unusual, but trust us – butternut squash and peanut butter create pancake magic. The squash adds moisture, natural sweetness, and nutrients while the peanut butter brings protein and rich flavor that keeps you satisfied. If you love creative breakfast ideas, check out our collection of unique pancake recipes for more inspiration.
Best of all, this recipe makes exactly enough for four people, with each serving delivering the perfect balance of flavor and nutrition.
Nutrition Comparison: How These Pancakes Stack Up
| Nutrient | Regular Pancakes | Squash Peanut Butter Pancakes | Benefit |
|---|---|---|---|
| Calories | 520 per serving | 410 per serving | 110 fewer calories |
| Protein | 7g per serving | 12g per serving | 71% more protein |
| Fiber | 2g per serving | 6g per serving | 3x more fiber |
| Vitamin A | 4% DV | 120% DV | 30x more vitamin A |
| Added Sugar | 12g per serving | 5g per serving | Less than half the sugar |
What You’ll Need: Ingredients & Equipment
Ingredients (Serves 4)
| Ingredient | Amount | Notes |
|---|---|---|
| Butternut squash puree | 1 cup | Fresh or canned works equally well |
| Creamy peanut butter | ⅓ cup | Natural, no sugar added preferred |
| Eggs | 2 large | Room temperature for better mixing |
| Milk | 1 cup | Any type works (dairy or non-dairy) |
| Vanilla extract | 1 teaspoon | Pure, not imitation for best flavor |
| All-purpose flour | 1½ cups | Measured by spooning into cups, then leveling |
| Baking powder | 2 teaspoons | Check expiration date for best rise |
| Ground cinnamon | 1 teaspoon | Ceylon cinnamon provides better flavor |
| Salt | ¼ teaspoon | Fine sea salt preferred |
| Maple syrup | 2 tablespoons | Grade B offers stronger flavor |
| Butter for cooking | 2 tablespoons | Divided for multiple batches |
| Optional toppings | As desired | See topping suggestions below |
Kitchen Tools
| Tool | Purpose | Alternative |
|---|---|---|
| Large mixing bowl | For dry ingredients | Any large bowl works |
| Medium mixing bowl | For wet ingredients | Any medium bowl works |
| Whisk | For thorough mixing | Fork works in a pinch |
| Measuring cups/spoons | For accurate measurements | Digital scale (more precise) |
| Large non-stick skillet | For cooking pancakes | Electric griddle (cook more at once) |
| Spatula (thin-edged) | For flipping pancakes | Fish spatula or offset spatula |
| ¼ cup measuring cup | For consistent pancake size | Ice cream scoop with release |
| Small ladle | Alternative to measuring cup | Any ladle with consistent pour |
Possible Substitutions
- Squash puree: Sweet potato or pumpkin puree works just as well
- Peanut butter: Any nut or seed butter (almond, sunflower, cashew)
- All-purpose flour: 1:1 gluten-free flour blend, whole wheat, or oat flour
- Maple syrup: Honey, agave, or brown sugar
- Milk: Any dairy or plant-based milk works perfectly
- Eggs: For each egg, substitute ¼ cup applesauce or a flax egg (1 Tbsp ground flaxseed + 3 Tbsp water) – perfect for making these vegan-friendly like our cornmeal pancakes
Beginner-Friendly Step-by-Step Instructions
Prep Time: 15 minutes
Cook Time: 20 minutes
Total Time: 35 minutes
Servings: 4 (makes 12 pancakes, 3 per person)
Preparation Phase (15 minutes)
- Set up your workspace
- Clear your countertop so you have plenty of room to work
- Place all ingredients on one side of your workspace
- Position your mixing bowls and measuring tools in the center
- Have a kitchen towel or paper towels nearby for quick cleanup
- Beginner tip: Read through the entire recipe once before starting
- Gather and measure all ingredients
- Take out the butternut squash puree (1 cup) and let it come to room temperature if refrigerated
- Measure the creamy peanut butter (⅓ cup) – spray your measuring cup with cooking spray first so it slides out easily
- Take out 2 large eggs from the refrigerator and let them sit on the counter to warm up
- Measure milk (1 cup) and pour into a small bowl or measuring cup
- Measure vanilla extract (1 teaspoon) and add it to the milk
- Beginner tip: Having all ingredients measured before mixing (called “mise en place”) prevents mistakes
- Prepare the dry ingredients
- Place your large mixing bowl on the counter
- Measure the all-purpose flour (1½ cups) by spooning it into your measuring cup, then leveling off with a knife
- Add the flour to your large bowl
- Add baking powder (2 teaspoons) to the flour
- Important check: Make sure your baking powder isn’t expired by placing ½ teaspoon in a small bowl with hot water – it should bubble vigorously
- Add ground cinnamon (1 teaspoon) to the bowl
- Add salt (¼ teaspoon) to the bowl
- Pick up your whisk and whisk all dry ingredients together for at least 30 seconds
- Visual cue: Mix until all ingredients look evenly distributed with no clumps
- Set this bowl aside
- Prepare the wet ingredients
- Place your medium mixing bowl on the counter
- Add the butternut squash puree (1 cup) to the bowl
- Add the peanut butter (⅓ cup) to the bowl
- Use your whisk to mix these together until completely smooth
- Visual cue: The mixture should be uniform in color with no streaks of peanut butter visible
- Beginner tip: If the peanut butter is too stiff to mix easily, microwave it for 10-15 seconds first
- Crack one egg into a small separate bowl (to check for shells), then add to your mixture
- Whisk until the egg is fully incorporated
- Repeat with the second egg
- Pour in the milk and vanilla mixture
- Add maple syrup (2 tablespoons)
- Whisk everything together until smooth and well combined
- Visual cue: The mixture should be a consistent light orange-brown color with no streaks
- Combine wet and dry ingredients
- Make a well (a hole) in the center of your dry ingredients using the back of a spoon
- Pour all of the wet mixture into this well
- Using a rubber spatula (not the whisk), gently fold the ingredients together
- Technique: Scrape from the bottom of the bowl and fold over the top, rotating the bowl as you go
- Visual cue: Stop mixing as soon as you no longer see dry flour – some small lumps are not only okay but good!
- Critical beginner tip: Overmixing will make tough, flat pancakes. The batter should look a bit lumpy, not perfectly smooth
- Rest the batter
- Set a timer for 5 minutes and let the batter rest
- This allows the flour to absorb the liquid and the baking powder to activate
- During this time, prepare your cooking station
Cooking Phase (20 minutes)
- Set up your cooking station
- Place your skillet on the stove
- Have your spatula and ¼ cup measuring cup ready
- Set an oven-safe plate nearby to hold cooked pancakes
- Get your butter ready for the pan
- Optional: Preheat your oven to 200°F (93°C) if you want to keep pancakes warm while cooking batches
- Heat your pan properly
- Turn your stove to medium heat
- Let the pan heat up for 3-5 minutes – this is crucial for even cooking
- Testing pan temperature: Sprinkle a few drops of water on the pan
- If the water sizzles gently and dances around, the pan is ready
- If the water disappears instantly with loud sizzling, the pan is too hot – lower the heat
- If the water just sits there without sizzling, the pan isn’t hot enough yet
- Prepare the pan for your first pancakes
- Add ½ tablespoon of butter to the hot pan
- Tilt and swirl the pan to coat the entire cooking surface
- Visual cue: The butter should melt quickly and coat the pan, but not burn
- If the butter browns immediately, your pan is too hot – wipe out butter, lower heat, and try again
- Cook your first pancake (test pancake)
- Use your ¼ cup measuring cup to scoop batter
- Pour the batter slowly in one spot in the pan
- Let it spread naturally into a circle about 4 inches wide
- Beginner tip: Always make a test pancake to check your batter consistency and pan temperature
- Watch for cooking indicators
- The pancake will initially look wet on top
- After about 1-2 minutes, bubbles will begin to form on the surface
- Wait until many bubbles have formed AND some of them have popped, leaving small holes that don’t fill back in
- The edges of the pancake will also look slightly dry and set
- Critical visual cue: You need both plenty of bubbles AND some popped bubbles that stay open before flipping
- Flip your pancake correctly
- Slide your spatula completely under the pancake from the edge
- In one quick, confident motion, flip the pancake over
- Beginner tip: Hesitant, slow flips often cause folding or splattering
- If you’re nervous, you can use two spatulas – one to lift and one to guide
- Cook the second side
- The second side needs less time – about 1-2 minutes
- Visual cue: The second side is done when it’s golden brown
- Touch test: Gently press the center of the pancake with your spatula – it should spring back when done
- If you’re unsure, it’s okay to peek by lifting an edge with your spatula
- Cook the remaining pancakes
- Now that your test pancake is successful, you can cook 2-3 pancakes at once
- Leave at least 1 inch between pancakes when pouring
- Follow the same indicators for when to flip
- Beginner tip: If your pancakes are cooking too quickly or browning too fast, lower your heat slightly
- Manage your batches
- Remove cooked pancakes to your prepared plate
- If keeping warm in the oven, place the plate in the preheated oven between batches
- Add more butter (about ½ tablespoon) to the pan before each new batch
- Troubleshooting: If your pan starts smoking between batches, turn off the heat, wipe the pan clean with a paper towel, and restart with fresh butter
- Know when your pancakes are perfect
- Perfect pancakes should be:
- Golden brown on both sides
- Slightly crisp at the edges
- Fluffy and light in the middle
- About ½ inch thick
- If your pancakes aren’t perfect, check the troubleshooting section below
- Perfect pancakes should be:
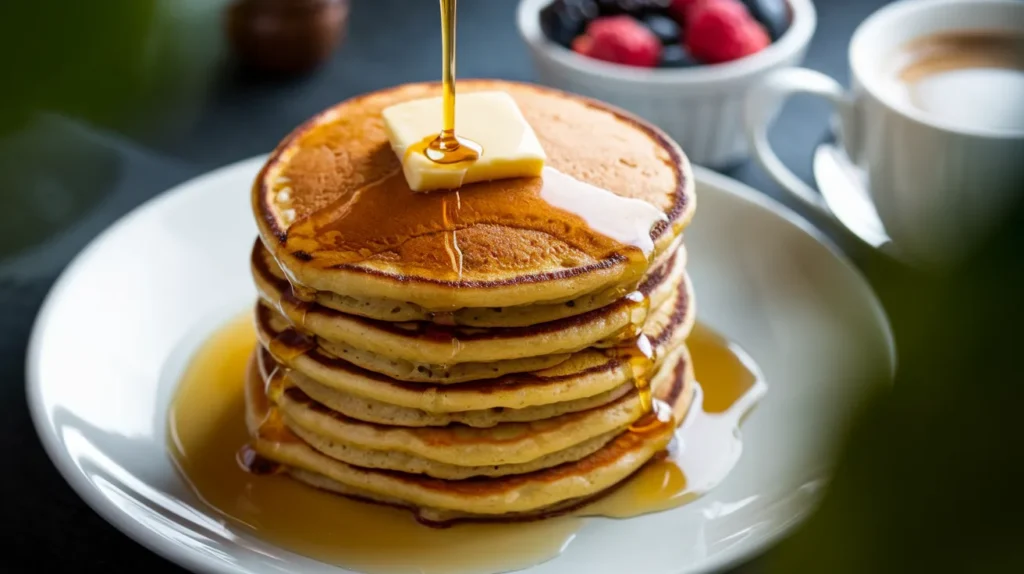
Serving Your Pancakes
- Basic serving method
- Place 3 pancakes on each plate in a stack
- Add a small pat of butter on top (optional)
- Drizzle with 1-2 tablespoons maple syrup
- Presentation tip: Dust with a tiny sprinkle of cinnamon for visual appeal
- Create a topping station (optional)
- Set out small bowls with:
- Extra maple syrup (warmed slightly for better pouring)
- Sliced bananas
- Fresh berries
- Chopped nuts
- Whipped cream
- Greek yogurt
- Let everyone customize their own pancakes
- Set out small bowls with:
- Complete the meal
- These pancakes pair beautifully with:
- Crispy bacon or breakfast sausage
- Fresh fruit salad
- Yogurt parfaits
- Hot coffee, tea, or milk
- These pancakes pair beautifully with:
Troubleshooting Common Pancake Problems
| Problem | Possible Cause | Solution |
|---|---|---|
| Pancakes too dense | Overmixed batter | Fold ingredients just until combined, leaving some small lumps |
| Pancakes not rising | Expired baking powder | Test baking powder before using (should bubble vigorously in hot water) |
| Uneven cooking | Pan temperature inconsistent | Maintain medium-low consistent heat; let pan reheat between batches |
| Burning before cooking through | Heat too high | Lower heat to medium-low; if smoking occurs, clean pan and restart |
| Batter too thick | Squash puree too thick or dry | Add 1 tablespoon milk at a time until batter flows slowly but steadily |
| Batter too runny | Too much liquid | Add 1 tablespoon flour at a time until batter thickens slightly |
| Pancakes difficult to flip | Flipped too early | Wait for bubbles to form, pop, and stay open; edges should look set |
| Pancakes sticking to pan | Pan not hot enough or not enough butter | Ensure pan is properly preheated and well-buttered before adding batter |
| Middle still raw when edges done | Pancakes too thick | Use slightly less batter per pancake; spread with back of measuring cup |
| Can’t get perfectly round shape | Pouring technique | Pour from low height in center of pan; use measuring cup with spout |
| First pancake always looks bad | Pan temperature not stabilized | Consider the first pancake your “test” – the rest will look better |
Variations To Try
Sweet Variations
- Chocolate Chip: Add ⅓ cup mini chocolate chips to batter
- Banana Nut: Add ½ cup mashed banana and ¼ cup chopped walnuts
- Apple Cinnamon: Add ½ cup diced apple and extra ½ teaspoon cinnamon
- Berry Blast: Add ¾ cup fresh or frozen berries (don’t thaw frozen berries)
Savory Twists
- Herb & Cheese: Reduce maple syrup to 1 teaspoon, add ¼ cup grated parmesan and 1 tablespoon chopped herbs
- Bacon & Scallion: Add ¼ cup cooked, crumbled bacon and 2 tablespoons chopped scallions
Storage & Reheating
Refrigerator Storage
- Allow pancakes to cool completely on a wire rack (about 30 minutes)
- Place pancakes in an airtight container with parchment paper between each layer
- Seal container tightly, pressing out excess air
- Store in refrigerator for up to 3 days
Freezer Storage
- Place cooled pancakes in single layer on a parchment-lined baking sheet
- Freeze uncovered until solid (about 2 hours)
- Transfer frozen pancakes to a freezer-safe zip-top bag
- Press out all air before sealing
- Label with date and contents
- Store in freezer for up to 3 months
Reheating Methods
- Microwave (quickest)
- Place 3 pancakes on microwave-safe plate
- Cover with damp paper towel to prevent drying out
- Heat on medium power (70%) for 30 seconds
- Check warmth and add 10-second intervals if needed
- Beginner tip: Don’t overheat or they’ll become tough
- For a completely different cooking method, try our air fryer pancakes recipe for extra crispy edges
- Toaster (best texture)
- Use the lowest toaster setting
- Place 1 pancake in each toaster slot
- Watch carefully to prevent burning
- You may need a second, brief toasting cycle
- Safety tip: Never force pancakes into toaster if they don’t fit easily
- Oven (best for large batches)
- Preheat oven to 350°F (175°C)
- Place pancakes in single layer on baking sheet
- Cover with aluminum foil to prevent drying
- Heat for 5-7 minutes (fresh) or 10 minutes (frozen)
- Visual cue: Pancakes should be warm throughout but not dried out
Safety Notes & Tips
Kitchen Safety
- Keep pancake batter containing eggs refrigerated if not using immediately
- Wash hands thoroughly with soap after handling raw eggs
- Never leave cooking pancakes unattended
- Keep pan handles turned inward to prevent accidental bumping
- Use oven mitts when handling hot plates of pancakes
Food Safety
- Refrigerate leftover pancakes within 2 hours of cooking
- Always check that pancakes are cooked through before serving (no wet batter in center)
- If using frozen pancakes, ensure they reach 165°F (74°C) when reheated
- Discard any batter left at room temperature for more than 2 hours
Pro Tips for Success
- Make ahead: Prepare batter night before and refrigerate (may need 1-2 extra tablespoons milk when ready to cook)
- Perfect portion: Use ice cream scoop with release mechanism for consistent pancakes
- Even cooking: Rotate pan if your stovetop heats unevenly
- Customize sweetness: Adjust maple syrup in batter based on natural sweetness of your squash
- Test run: Always cook one test pancake to check consistency and heat level before cooking full batch
- Kid-friendly: Let kids customize their pancakes with fun toppings or fruit arranged in smiley faces
- Multitasking: Cook bacon in oven while making pancakes to serve everything hot at once
Enjoy these wholesome, protein-packed Squash Peanut Butter Pancakes for a breakfast that satisfies and energizes!