Prep Time: 10 minutes | Cook Time: 15 minutes | Total Time: 25 minutes | Servings: 4
- Skip the takeout line! This homemade Sticky Honey Chicken delivers restaurant-quality flavor with pantry staples
- No deep fryer needed – our easy pan-frying method creates perfect crispy chicken every time
- Ready in just 25 minutes – perfect for busy weeknights when you need dinner on the table fast
- Kid-approved – the sweet and sticky sauce wins over even the pickiest eaters
Sweet Meets Savory: The Perfect Weeknight Solution
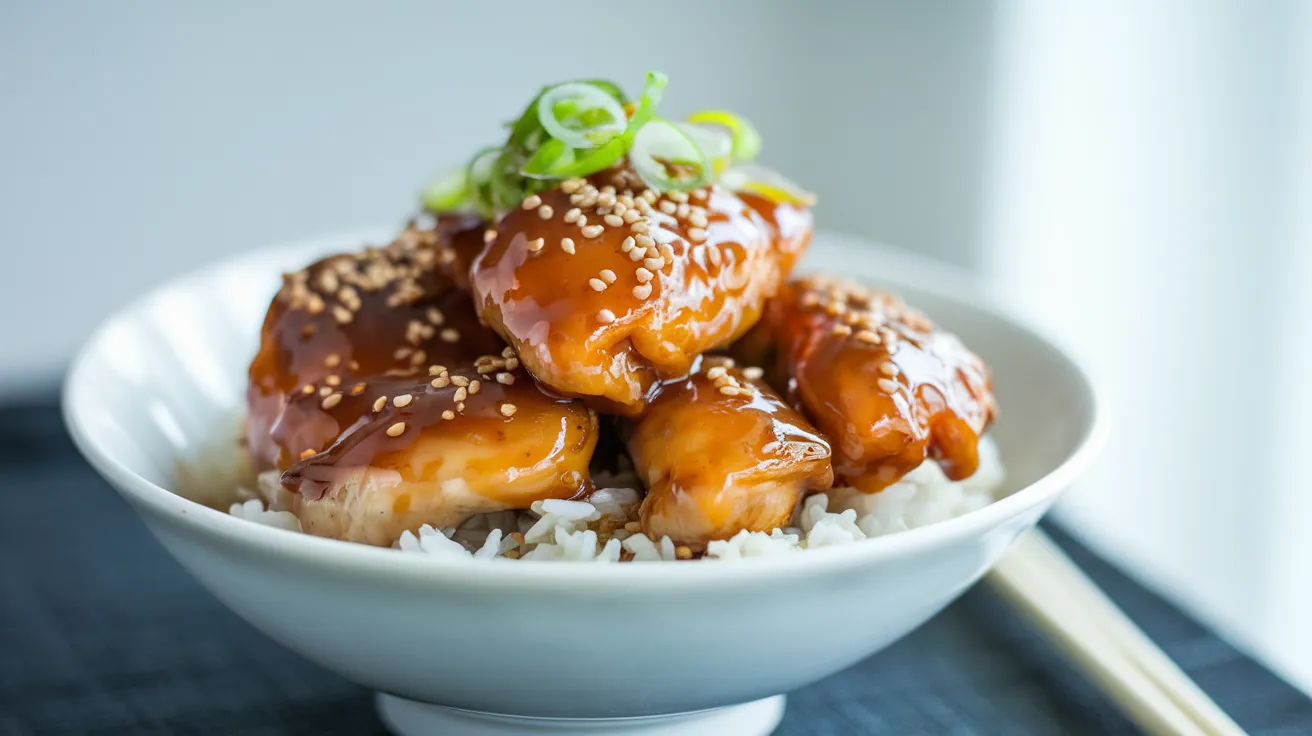
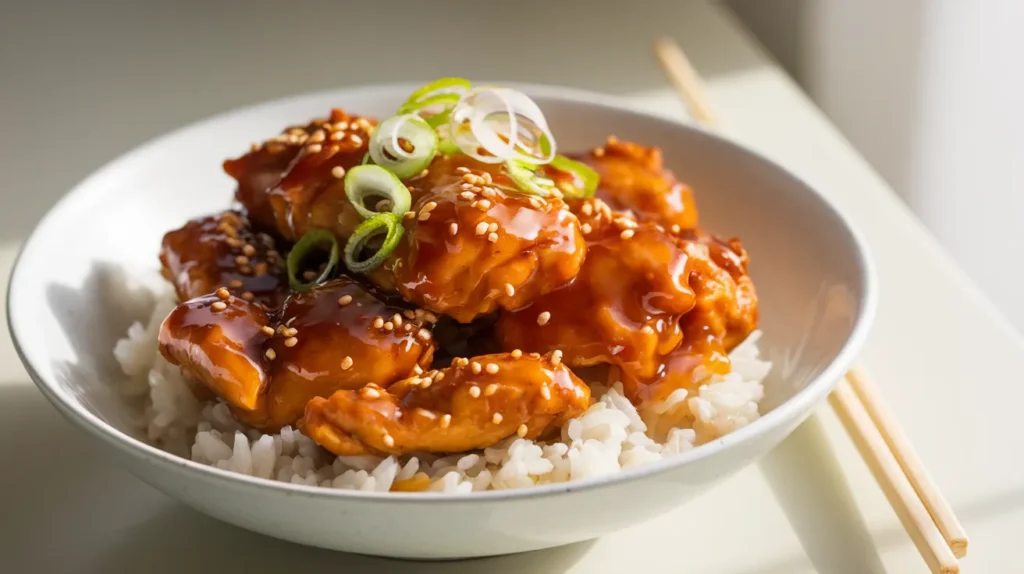
Ever craved that sweet-savory chicken from your favorite takeout spot but didn’t want to wait for delivery? This Sticky Honey Chicken solves that problem.
The golden, crispy chicken pieces coated in a glossy, sweet and savory sauce will satisfy your cravings without the wait. Perfect for busy weeknights, this recipe comes together in just 25 minutes using ingredients you likely already have in your pantry.
This Sticky Honey Chicken recipe serves four people and pairs perfectly with steamed rice and a simple vegetable side. For a similar flavor profile with Japanese-inspired flavors, you might also enjoy my Chicken Nanban recipe. Let’s get cooking!
Nutrition Facts Per Serving
| Nutrient | Amount | % Daily Value |
|---|---|---|
| Calories | 410 | |
| Total Fat | 12g | 15% |
| Saturated Fat | 2g | 10% |
| Cholesterol | 85mg | 28% |
| Sodium | 620mg | 27% |
| Total Carbohydrates | 45g | 16% |
| Dietary Fiber | 1g | 4% |
| Sugars | 32g | |
| Protein | 28g | 56% |
What You’ll Need: Ingredients & Equipment for Sticky Honey Chicken
Ingredients
| Ingredient | Amount | Notes |
|---|---|---|
| For the Chicken | ||
| Boneless, skinless chicken thighs | 1½ pounds | Cut into 1-inch pieces |
| Cornstarch | ⅓ cup | For coating the chicken |
| Salt | ½ teaspoon | |
| Black pepper | ¼ teaspoon | |
| Vegetable oil | 3 tablespoons | For frying |
| For the Sauce | ||
| Honey | ⅓ cup | |
| Soy sauce | 3 tablespoons | Low-sodium preferred |
| Garlic | 3 cloves | Minced |
| Ginger | 1 tablespoon | Fresh, grated |
| Rice vinegar | 1 tablespoon | |
| Cornstarch | 1 teaspoon | Mixed with 1 tablespoon water |
| For Serving | ||
| Green onions | 3 | Thinly sliced |
| Sesame seeds | 1 tablespoon | For garnish |
| Steamed rice | 2 cups | Cooked |
Equipment Needed
| Tool | Purpose |
|---|---|
| Large non-stick skillet | For frying chicken and making sauce |
| Mixing bowls (2) | For chicken and sauce preparation |
| Measuring cups and spoons | For accurate measurements |
| Sharp knife | For cutting chicken |
| Cutting board | For prep work |
| Whisk | For mixing sauce ingredients |
| Tongs | For turning chicken pieces |
| Small bowl | For cornstarch slurry |
| Paper towels | For draining chicken |
| Meat thermometer (optional) | For checking doneness |
Possible Substitutions
- Chicken thighs: Boneless chicken breast works too, but may cook faster and be slightly less juicy
- Honey: Maple syrup or brown sugar (¼ cup) can replace honey
- Soy sauce: Tamari or coconut aminos for gluten-free options
- Rice vinegar: Apple cider vinegar or white vinegar will work
- Fresh ginger: ½ teaspoon ground ginger can substitute in a pinch
- Vegetable oil: Any neutral oil like canola or avocado oil works well
Super-Detailed Step-by-Step Instructions for Sticky Honey Chicken
Preparation Phase (10 minutes)
- Set up your cooking station:
- Clear off your counter space so you have room to work
- Take out all ingredients from the refrigerator and pantry
- Gather all equipment and place within easy reach
- Set out a large plate and line it with 2-3 paper towels (this is for the cooked chicken)
- If you’re also making rice, start it now according to package directions
- Prepare your measuring tools:
- Set out your measuring cups and spoons
- You’ll need: 1/3 cup, 1 tablespoon, and 1 teaspoon measurements
- Have an extra bowl ready for any ingredient prep
- Prepare the chicken:
- Open the package of chicken thighs
- If there’s any excess liquid, drain it off in the sink
- Place the chicken thighs on a cutting board
- Using paper towels, pat each piece dry (this helps with browning)
- Locate any excess fat on the edges and trim it off with your knife
- Cut each thigh into approximately 1-inch cubes (they don’t need to be perfect, but try to keep them similar in size)
- TIP: It’s easier to cut chicken if your knife is very sharp. Be careful and cut away from your body.
- Make the cornstarch coating:
- In a medium bowl, add ⅓ cup cornstarch
- Add ½ teaspoon salt
- Add ¼ teaspoon black pepper
- Use a fork or whisk to mix these dry ingredients together
- TIP: The cornstarch might clump, so make sure to break up any lumps with your fork
- Coat the chicken:
- Place all the chicken pieces into the bowl with the cornstarch mixture
- Using clean hands or tongs, toss the chicken pieces until each one is completely coated with white powder
- Make sure to get into the crevices of each piece
- Set aside while you prepare the sauce
- BEGINNER TIP: If using hands, designate one “wet hand” for touching raw chicken and one “dry hand” for handling the cornstarch to avoid creating a sticky mess on your fingers
- Prepare the sauce ingredients:
- Peel the garlic cloves by pressing them firmly with the flat side of your knife, then removing the papery skin
- Mince the garlic cloves by cutting them into very small pieces (about the size of grains of rice)
- Peel the ginger using the edge of a spoon to scrape off the brown skin
- Grate the ginger using the small holes of a box grater or a microplane
- TIP: Ginger can be fibrous – grate across the fibers for best results
- Make the sauce:
- In a medium bowl, measure and add ⅓ cup honey (spray your measuring cup with a tiny bit of oil first so the honey slides out easily)
- Add 3 tablespoons soy sauce
- Add the minced garlic
- Add the grated ginger
- Add 1 tablespoon rice vinegar
- Whisk everything together until well combined
- TIP: If your honey is too thick, warm the jar in a bowl of hot water for a minute to make it easier to pour
- Prepare the cornstarch slurry:
- In a small separate bowl or cup, add 1 teaspoon cornstarch
- Add 1 tablespoon cold water
- Mix with a small spoon until completely smooth with no lumps
- Set aside (you’ll add this to the sauce later)
- BEGINNER TIP: This slurry is what thickens the sauce. Always mix cornstarch with cold water before adding to hot liquids to prevent lumps
- Prepare the garnishes:
- Rinse the green onions under cold water
- Pat them dry with a paper towel
- Cut off and discard the root ends and any wilted parts at the top
- Slice the green onions thinly (about ⅛-inch slices)
- Place sliced green onions in a small bowl
- Measure 1 tablespoon sesame seeds into another small bowl
Cooking Phase (15 minutes)
- Heat your pan:
- Place your large non-stick skillet on the stove
- Set heat to medium-high
- Add 3 tablespoons vegetable oil to the pan
- Allow the oil to heat for 2-3 minutes
- TEST FOR READINESS: Sprinkle a tiny bit of cornstarch into the oil – if it sizzles immediately, the oil is hot enough
- SAFETY TIP: Never leave hot oil unattended, and keep a lid nearby in case of flare-ups
- First batch of chicken (if needed):
- If your pan isn’t large enough for all the chicken at once, cook in 2 batches
- Using tongs, carefully place half the chicken pieces into the hot oil, one by one
- Arrange them so they’re not touching each other
- Let them cook WITHOUT STIRRING for 3-4 minutes
- VISUAL CUE: The edges should start turning golden brown
- BEGINNER TIP: Resist the urge to move the chicken too early – this helps form a crispy crust
- Turn the chicken pieces:
- Using tongs, carefully flip each piece of chicken to cook the other side
- Cook for another 3-4 minutes
- TEST FOR DONENESS: Cut into the largest piece – the inside should be white with no pink
- If you have a meat thermometer, the internal temperature should reach 165°F
- SAFETY TIP: Chicken must be fully cooked to prevent foodborne illness
- Remove first batch (if cooking in batches):
- Using tongs, transfer the cooked chicken pieces to the paper towel-lined plate
- The paper towels will absorb excess oil
- Arrange in a single layer so pieces don’t steam each other and lose crispness
- Cook second batch (if needed):
- Check if your oil level is still adequate (add a bit more if needed)
- Let the oil heat up again for 30 seconds
- Add remaining chicken pieces
- Repeat the same cooking process as the first batch
- Transfer to the paper towel-lined plate when done
- Prepare the pan for sauce:
- After all chicken is cooked, carefully pour off most of the oil from the pan
- Leave about 1 tablespoon of oil in the pan (no need to measure precisely)
- SAFETY TIP: Pour used oil into a heat-safe container, never down the drain
- Return the pan to the stove and reduce heat to medium
- Cook the sauce:
- Pour your prepared honey-soy sauce mixture into the pan
- Use a whisk to stir, scraping up any browned bits from the bottom of the pan
- Bring the sauce to a gentle simmer (small bubbles forming around the edges)
- Let it simmer for 1 minute
- VISUAL CUE: Sauce will start to bubble and may darken slightly
- Thicken the sauce:
- Give your cornstarch slurry another quick stir (it settles quickly)
- While whisking the simmering sauce constantly, slowly pour in the cornstarch slurry
- Continue whisking for 30-60 seconds
- VISUAL CUE: The sauce will change from watery to glossy and will coat the back of a spoon
- BEGINNER TIP: If sauce gets too thick, add 1 tablespoon water and stir
- Combine chicken and sauce:
- Return all the cooked chicken pieces to the pan with the sauce
- Using a wooden spoon or silicone spatula, gently toss to coat each piece with sauce
- Cook for 1 more minute, stirring gently
- VISUAL CUE: Every piece should be glistening with sauce
- Final sauce check:
- If sauce has become too thick, add 1-2 tablespoons water
- If sauce is too thin, cook for another minute to reduce
- Taste a small amount of sauce (be careful, it’s hot!)
- Adjust seasoning if needed (a bit more soy sauce for saltiness or honey for sweetness)
- Remove pan from heat when chicken is fully coated and sauce has reached desired consistency
Serving Phase (5 minutes)
- Prepare serving plates or bowls:
- Get out 4 plates or bowls
- If using rice, fluff the rice with a fork
- Divide the cooked rice evenly among the 4 plates/bowls (about ½ cup per serving)
- Create a small well in the center of each rice mound
- Plate the Sticky Honey Chicken:
- Using a large spoon, scoop the chicken pieces with sauce
- Distribute evenly over the rice on each plate
- Spoon any remaining sauce from the pan over the chicken and rice
- Add garnishes:
- Sprinkle the sliced green onions over each serving
- Add a light sprinkle of sesame seeds on top
- TIP: Reserve some green onions and sesame seeds for anyone who wants extra
- Final presentation check:
- Make sure each plate has an equal amount of chicken pieces
- Check that there’s enough sauce on each serving
- Wipe any drips from the edges of the plates with a clean paper towel
- Serve immediately:
- This dish is best enjoyed hot!
- Let everyone know the plate is hot if needed
- Provide serving spoons or forks depending on preference
Troubleshooting Common Issues with Sticky Honey Chicken
Chicken Not Crispy?
- Problem: Chicken turns out soggy instead of crispy
- Solution: Make sure your oil is hot enough before adding chicken. Don’t overcrowd the pan – cook in batches if needed.
- Prevention Next Time: Pat chicken even drier before coating, and make sure oil is very hot (but not smoking) before adding chicken.
Sauce Too Thin?
- Problem: Sauce isn’t thickening properly
- Solution: Mix another ½ teaspoon cornstarch with 1 teaspoon cold water and add to the simmering sauce.
- Prevention Next Time: Make sure sauce comes to a full simmer before adding cornstarch slurry.
Sauce Too Thick?
- Problem: Sauce becomes too gummy or thick
- Solution: Add 1-2 tablespoons of water or chicken broth and stir until desired consistency.
- Prevention Next Time: Use slightly less cornstarch in your slurry (¾ teaspoon instead of 1 teaspoon).
Chicken Too Dry?
- Problem: Chicken pieces are overcooked and dry
- Solution: Add more sauce and reduce cooking time in future batches.
- Prevention Next Time: Use chicken thighs rather than breast meat, and watch cooking time carefully.
Sauce Too Sweet?
- Problem: The honey flavor is overwhelming
- Solution: Add an extra tablespoon of soy sauce and a splash more vinegar to balance the sweetness.
- Prevention Next Time: Reduce honey to ¼ cup instead of ⅓ cup.
Sauce Burning?
- Problem: Sauce starts to burn or smoke
- Solution: Immediately remove from heat and transfer to a new pan if necessary.
- Prevention Next Time: Lower heat to medium-low when simmering sauce.
Cornstarch Clumping?
- Problem: White clumps appear in sauce
- Solution: Strain sauce through a fine mesh strainer, then return to pan and reheat.
- Prevention Next Time: Make sure cornstarch slurry is completely smooth before adding to sauce.
Variations & Substitutions
Spicy Honey Chicken
Add 1-2 teaspoons of sriracha or red pepper flakes to the sauce for a kick of heat. If you’re a fan of crispy chicken with a different flavor profile, my Homemade KFC Chicken recipe offers a spice-forward alternative that’s equally satisfying.
Orange-Honey Chicken
Add the zest and juice of half an orange to the sauce for a citrusy twist.
Gluten-Free Version
Substitute cornstarch for the coating and use tamari or coconut aminos instead of soy sauce.
Healthier Option
Skip the cornstarch coating and simply sauté chicken pieces in 1 tablespoon oil before adding the sauce.
Vegetarian Alternative
Replace chicken with firm tofu, pressed and cubed, or use cauliflower florets for a plant-based version.
Pineapple Honey Chicken
Add ½ cup diced pineapple to the sauce for a tropical flavor variation.
Sesame Honey Chicken
Add 1 tablespoon toasted sesame oil to the sauce for a nutty flavor boost. For a more sesame-forward recipe, check out my Honey Sesame Chicken that focuses on the delicious combination of honey and sesame flavors.
Storage & Reheating Instructions
Refrigerator Storage
- Allow leftovers to cool completely before storing (no more than 1 hour at room temperature)
- Transfer to an airtight container with a tight-fitting lid
- Store in the refrigerator for up to 3 days
- Keep rice stored separately from the chicken for best results
- SAFETY TIP: Never leave cooked food at room temperature for more than 2 hours
Freezer Storage
- Cool completely before freezing
- Portion into freezer-safe containers or heavy-duty freezer bags
- Label with the date and contents
- Freeze for up to 2 months
- Thaw overnight in the refrigerator before reheating
- TIP: Freeze rice and chicken separately for best texture when thawed
Reheating Methods
Microwave (Quick Option):
- Place a single serving in a microwave-safe dish
- Cover with a damp paper towel to prevent drying out
- Heat on 70% power (medium-high) for 1 minute
- Stir gently and check temperature
- Continue heating in 30-second intervals until heated through (165°F)
- Let stand for 1 minute before eating (the temperature continues to rise and even out)
- TIP: Add 1 tablespoon of water before reheating if the sauce looks too thick
Stovetop (Best for Texture):
- Place a non-stick skillet over medium-low heat
- Add 1-2 tablespoons of water or chicken broth to the pan
- Add the chicken mixture to the pan
- Cover with a lid to create steam
- Heat for 5-7 minutes, stirring gently every 2 minutes
- Check that the center of the largest pieces are hot
- The sauce will re-melt and coat the chicken again
- TIP: This method helps maintain the texture better than microwave reheating
Safety Notes & Tips
Food Safety
- Always wash hands with soap and warm water for 20 seconds before and after handling raw chicken
- Use separate cutting boards and utensils for meat and vegetables to prevent cross-contamination
- Chicken must reach an internal temperature of 165°F (74°C) to be safe to eat
- Don’t reuse marinades or sauces that have touched raw chicken
- Refrigerate leftovers within 1 hour in hot weather (90°F+) or within 2 hours in cooler weather
Beginner-Friendly Tips
- Read through the entire recipe before starting
- Prepare and measure all ingredients before turning on the stove (this is called “mise en place”)
- Keep a kitchen timer nearby to track cooking times
- Start with clean kitchen tools and workspace
- Have a trash bowl nearby for scraps to minimize movement around the kitchen
Time-Saving Tips
- Cut chicken and prepare sauce components ahead of time and refrigerate separately (up to 24 hours)
- Use pre-minced garlic and ginger from the grocery store if pressed for time
- Clean as you go to avoid a big mess at the end
- For super busy nights, the entire dish can be made 1-2 days ahead and reheated
Serving Suggestions
- Pair with steamed broccoli or sugar snap peas for a complete meal
- Serve in lettuce cups for a lighter option
- This Sticky Honey Chicken also works great in meal prep containers with rice and vegetables
- For a party, serve as appetizers with toothpicks and a small bowl of extra sauce for dipping
Kid-Friendly Adaptations
- Reduce the ginger for less intense flavor
- Serve sauce on the side for dipping
- Let kids help with safe tasks like measuring honey or sprinkling sesame seeds
- Cut chicken into smaller, bite-sized pieces for little ones
Dietary Notes
- This recipe contains soy, which is a common allergen
- For a dairy-free and egg-free main dish, this recipe works well as is
- The recipe is naturally nut-free, but check your sesame seeds to ensure they weren’t processed with nuts
- For a lower-sodium version, use low-sodium soy sauce and reduce the amount to 2 tablespoons