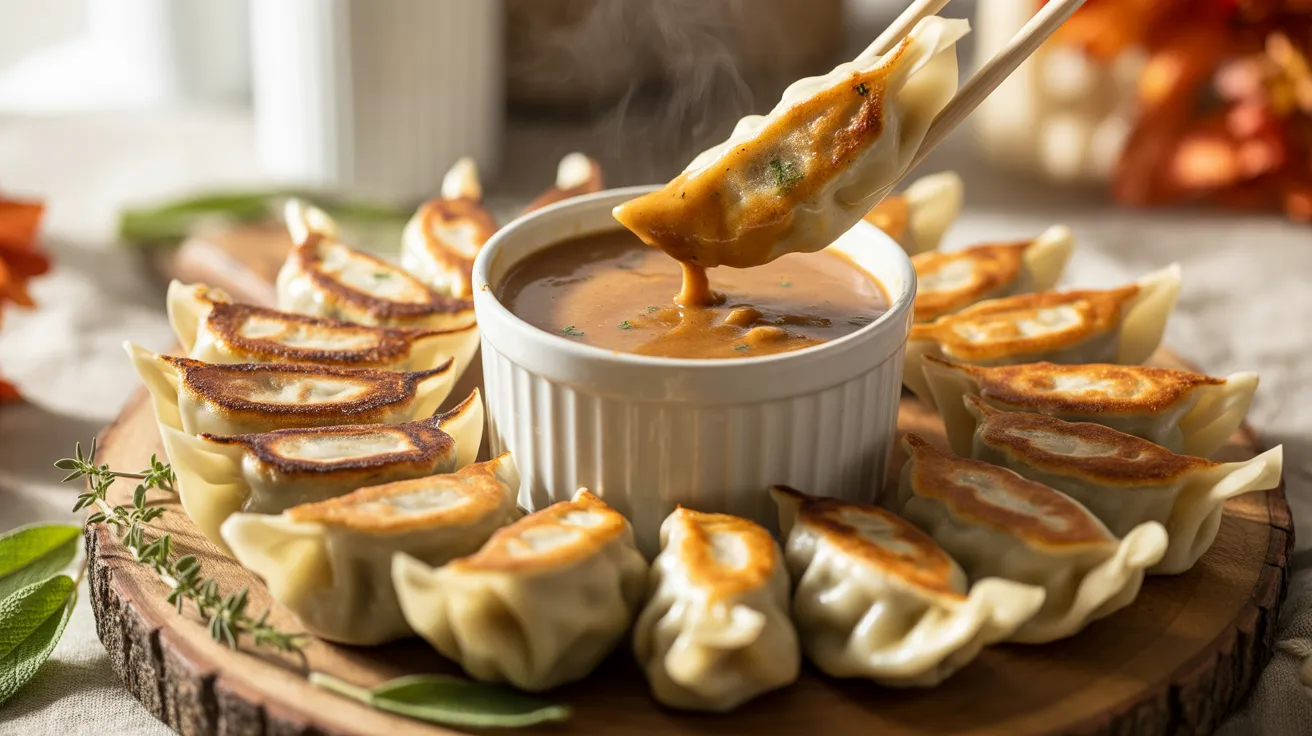
These stuffing-stuffed potstickers with gravy dip transform classic Thanksgiving flavors into crispy, pillowy dumplings perfect for any season. I discovered this recipe after hosting friends who couldn’t get enough of my leftover stuffing, and now these potstickers have become my most-requested appetizer year-round.
SERVES: 4 | PREP: 45 MIN | COOK: 25 MIN | TOTAL: 70 MIN
Ingredients
For the Stuffing Filling
| Ingredient | Amount |
|---|---|
| Day-old bread cubes | 3 cups |
| Butter | 4 tablespoons |
| Yellow onion, finely diced | 1 medium |
| Celery, finely diced | 2 stalks |
| Fresh sage, chopped | 2 tablespoons |
| Fresh thyme, chopped | 1 tablespoon |
| Chicken broth | 1/2 cup |
| Egg | 1 large |
| Salt | 3/4 teaspoon |
| Black pepper | 1/2 teaspoon |
For the Potstickers
| Ingredient | Amount |
|---|---|
| Round dumpling wrappers | 32-36 wrappers |
| Vegetable oil | 3 tablespoons |
| Water | 1/2 cup |
| Sesame oil | 1 teaspoon |
For the Gravy Dip
| Ingredient | Amount |
|---|---|
| Butter | 3 tablespoons |
| All-purpose flour | 3 tablespoons |
| Chicken broth | 2 cups |
| Heavy cream | 1/4 cup |
| Fresh sage, minced | 1 teaspoon |
| Salt and pepper | to taste |
Step-by-Step Instructions
Phase 1: Preparing the Stuffing Filling (20 minutes)
Step 1: Spread your 3 cups bread cubes on a baking sheet and let them sit at room temperature for 15 minutes if they’re not already stale. You want them dry enough to absorb liquid without getting mushy. Fresh bread will make your filling too wet and the potstickers will fall apart.
Step 2: Heat a large skillet over medium heat and add 4 tablespoons butter. Watch for the butter to melt completely and stop foaming. This means the water has cooked out and your butter is ready for the vegetables.
Step 3: Add your 1 medium diced onion and 2 stalks diced celery to the melted butter. Cook for 8-10 minutes, stirring every 2 minutes. The onion should turn translucent and soft, not brown. If they start browning, lower your heat immediately.
Step 4: Stir in 2 tablespoons chopped sage and 1 tablespoon chopped thyme. Cook for 1 minute until you smell the herbs releasing their oils. This step builds flavor depth that sets stuffing-stuffed potstickers apart from regular dumplings.
Step 5: Transfer the cooked vegetables to a large mixing bowl with your bread cubes. Pour in 1/2 cup chicken broth and toss everything together with a fork. The bread should be moist but not soggy.
Step 6: Beat 1 egg in a small bowl and pour it over the bread mixture. Add 3/4 teaspoon salt and 1/2 teaspoon black pepper. Mix thoroughly until everything sticks together when you squeeze a handful. Let this cool completely for 10 minutes before filling your wrappers.
Phase 2: Assembling the Potstickers (15 minutes)
Step 7: Set up your assembly station with a small bowl of water, your dumpling wrappers, and the cooled stuffing filling. Keep unused wrappers covered with a damp towel so they don’t dry out and crack.
Step 8: Place 1 wrapper in your palm and add 1 tablespoon stuffing filling to the center. Don’t overfill! Too much filling will burst through during cooking. I learned this the hard way during my first batch.
Step 9: Dip your finger in water and run it around the entire edge of the wrapper. This moisture activates the flour in the wrapper and creates a seal that won’t break open.
Step 10: Fold the wrapper in half to create a half-moon shape. Press the edges together firmly, then create 5-6 pleats along the sealed edge by folding small sections of dough. The pleats aren’t just decorative – they help the potsticker stand upright while cooking.
Step 11: Place each finished potsticker on a lightly floured plate or baking sheet, making sure they don’t touch each other. If they stick together, they’ll tear when you try to separate them. Repeat until you’ve used all your filling.
Phase 3: Making the Gravy Dip (8 minutes)
Step 12: While your potstickers rest, make your gravy dip. Melt 3 tablespoons butter in a medium saucepan over medium heat. Add 3 tablespoons flour and whisk constantly for 2 minutes. You’re making a roux, and it should smell nutty, not burnt.
Step 13: Slowly pour in 2 cups chicken broth while whisking continuously. Pour in a thin stream to prevent lumps from forming. If you get lumps anyway, don’t panic – just whisk harder and they’ll smooth out.
Step 14: Bring the gravy to a simmer and cook for 3-4 minutes until it thickens enough to coat the back of a spoon. Stir in 1/4 cup heavy cream and 1 teaspoon minced sage. Season with salt and pepper to your taste. Keep warm on low heat.
Phase 4: Cooking the Potstickers (12 minutes)
Step 15: Heat 2 tablespoons vegetable oil in a large nonstick skillet over medium-high heat. Wait until the oil shimmers and moves easily across the pan. Test with one potsticker first – it should sizzle immediately when it touches the pan.
Step 16: Arrange potstickers in the pan flat-side down, leaving 1/2 inch between each one. You’ll probably need to cook them in two batches. Let them cook undisturbed for 3-4 minutes until the bottoms turn deep golden brown. Fight the urge to peek too early!
Step 17: Pour 1/4 cup water into the pan and immediately cover with a tight-fitting lid. The water will create steam that cooks the tops of your stuffing-stuffed potstickers. You’ll hear loud sizzling – that’s normal.
Step 18: Steam for 4-5 minutes until the wrappers look translucent and the water has mostly evaporated. Remove the lid and let any remaining water cook off for 1 minute.
Step 19: Drizzle 1/2 teaspoon sesame oil over the potstickers and gently shake the pan to coat them. This adds flavor and helps release them from the pan.
Step 20: Use a thin spatula to transfer potstickers to your serving plate. Pour your warm gravy dip into a small bowl and serve immediately while everything’s hot and crispy.
Chef’s Notes
Temperature Control: Keep your pan at steady medium-high heat when frying. Too hot and the bottoms burn before the filling heats through. Too cool and you’ll get greasy, soggy potstickers instead of crispy ones. Your stuffing-stuffed potstickers need that perfect golden crust.
Make-Ahead Strategy: Assemble all your potstickers up to 4 hours ahead and keep them covered in the fridge. The wrappers actually seal better after resting. Just add 2 extra minutes to your steaming time if cooking from cold.
Wrapper Selection: Round dumpling wrappers work better than square wonton wrappers for this recipe. The round shape creates natural pleats that hold the stuffing filling securely. Look for them in the refrigerated section near the tofu.
Gravy Consistency: Your gravy dip should coat a spoon but still pour easily. If it gets too thick while sitting, whisk in 1-2 tablespoons warm broth to loosen it up. The gravy will thicken as it cools.
Nutrition Information (Per Serving – 8-9 potstickers)
Calories: 485 | Protein: 14g | Carbohydrates: 52g | Fat: 24g | Fiber: 3g | Sugar: 4g | Sodium: 890mg
Creative Variations
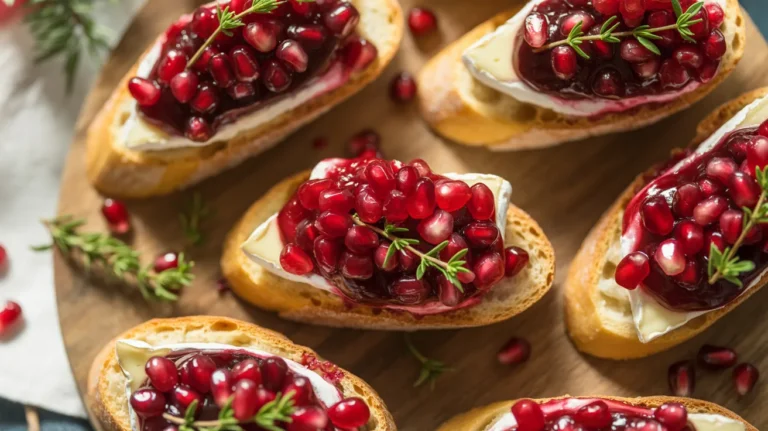
Thanksgiving Leftover Version: Mix 1 cup chopped roasted turkey and 1/4 cup dried cranberries into your basic stuffing filling. This transforms your stuffing-stuffed potstickers into a complete holiday meal in dumpling form. The sweet cranberries balance the savory gravy perfectly, similar to how cranberries complement these prosciutto-wrapped sage and onion batons at holiday gatherings.
Sausage and Apple Stuffing Potstickers: Add 1/2 pound cooked crumbled breakfast sausage and 1 small diced apple to your filling mixture. The apple adds sweetness and moisture while the sausage brings richness. Reduce the butter to 2 tablespoons since the sausage adds fat.
Mushroom Herb Version: Sauté 1 cup finely chopped mushrooms with your onion and celery base. Use a mix of cremini and shiitake mushrooms for deeper flavor. Add 1 extra tablespoon fresh thyme to complement the earthy mushroom taste.
Cheese-Stuffed Holiday Bites: Fold 1/2 cup shredded gruyere cheese into your cooled stuffing mixture. The melted cheese creates a creamy center that oozes when you bite in. This variation pairs beautifully with appetizers like cranberry and brie stuffing muffin bites for a festive spread.
Storage & Reheating
Refrigerator Storage: Store cooked potstickers in an airtight container for up to 3 days. Layer them between sheets of parchment paper to prevent sticking. The gravy dip keeps separately in a sealed container for 5 days.
Freezing Instructions: Freeze uncooked assembled potstickers on a baking sheet until solid, then transfer to freezer bags for up to 2 months. Cook from frozen, adding 3-4 extra minutes to the steaming time. Don’t thaw them first – the wrappers will get soggy.
Reheating Crispy: Skip the microwave! Reheat potstickers in a 350°F oven for 8-10 minutes or in a skillet with 1 tablespoon oil over medium heat. This brings back the crispy bottom. Warm your gravy dip gently on the stovetop, whisking in a splash of broth if needed.
Make-Ahead Assembly: Prepare your stuffing filling up to 2 days ahead and store it in the fridge. Assemble potstickers the morning of serving for best texture. The wrappers stay tender and pliable when freshly filled.
Troubleshooting Common Problems
Problem: Wrappers Keep Tearing Your filling is probably too wet or you’re overfilling. Squeeze out excess moisture from your stuffing mixture before filling. Use only 1 tablespoon filling per wrapper, even though it seems small. Also check that your wrappers haven’t dried out – keep them covered while working.
Problem: Potstickers Stick to the Pan Make sure your pan is properly preheated and the oil is hot enough before adding potstickers. Use a good nonstick pan or a well-seasoned cast iron skillet. Don’t move them during the initial frying phase – let that crust form fully before steaming.
Problem: Filling Tastes Bland Season your stuffing mixture generously. Remember that the wrapper itself has no flavor, so your filling needs extra seasoning. Taste and adjust before assembling. Don’t be shy with the sage and thyme – herbs are what make stuffing-stuffed potstickers taste authentic.
Problem: Gravy Dip Has Lumps Pour your broth very slowly into the roux while whisking constantly. If you still get lumps, pour the gravy through a fine-mesh strainer into a clean pot. Prevention is easier than fixing, so take your time with the whisking step.
Problem: Bottoms Burn Before Filling Heats Through Your heat is too high. Reduce to medium heat and give the steaming phase an extra 2 minutes. You can also try adding the water slightly earlier in the cooking process. The steam cooks the filling while protecting the bottom from burning.
Equipment Essentials

- Large nonstick skillet with lid (12-inch works best)
- Medium saucepan for gravy
- Large mixing bowl for filling
- Whisk for lump-free gravy
- Thin metal spatula for releasing potstickers
- Sharp knife for chopping vegetables
- Cutting board
- Small bowl for water when sealing
- Baking sheet for holding assembled potstickers
- Measuring cups and spoons
Shopping List by Store Section
Produce Section:
- Yellow onion (1 medium)
- Celery (2 stalks)
- Fresh sage (1 bunch)
- Fresh thyme (1 bunch)
Bakery:
- Day-old bread (enough for 3 cups cubes)
Dairy Case:
- Butter (1 stick)
- Heavy cream (small carton)
- Eggs (1 large)
Refrigerated Asian Foods:
- Round dumpling wrappers (1 package, 32-36 count)
Pantry/Dry Goods:
- All-purpose flour
- Vegetable oil
- Sesame oil
- Black pepper
- Salt
Canned/Jarred:
- Chicken broth (at least 3 cups total)
Success Secrets
1. Use Stale Bread: Day-old or slightly stale bread cubes absorb liquid perfectly without turning mushy. If your bread is fresh, dry it in a 250°F oven for 15 minutes before using. This small step dramatically improves your stuffing-stuffed potstickers.
2. Don’t Skip the Pleats: Those decorative folds actually serve a purpose – they create a flat base so potstickers stand upright during cooking. Aim for 5-6 pleats per dumpling. They don’t have to be perfect, just consistent.
3. Test Your First Batch: Cook one test potsticker before assembling all of them. Check if the filling tastes properly seasoned and if the wrapper seals well. It’s easier to adjust your filling mixture now than to redo 30 dumplings later.
4. Control Your Steam: When you add water to the hot pan, immediately cover it to trap the steam. This steam is what cooks the filling and the top of your wrapper. Too little steam means raw filling; too much means soggy wrappers.
5. Serve Immediately: These taste best within 10 minutes of cooking when the bottoms are still crispy and the filling is hot. If you need to hold them, keep them warm in a 200°F oven on a wire rack – never a plate, which will steam away that crispy crust.
These stuffing-stuffed potstickers with gravy dip bring together the comfort of traditional stuffing with the fun of handheld dumplings. I make them for game days, holiday parties, and whenever I’m craving that cozy stuffing flavor without roasting a whole turkey. The crispy-bottom, tender-top texture combined with rich gravy dip creates an appetizer that disappears fast every single time.