Key Takeaways:
- Ready in just 35 minutes – faster than delivery!
- Crispy exterior, juicy interior – restaurant-quality results at home
- Simple pantry ingredients – no specialty store needed
- Foolproof technique – works perfectly even for beginners
Are you tired of soggy takeout chicken that loses its crunch before you even get it home? This Ta Chien Chicken recipe solves that problem with a crazy-crisp coating that actually stays crunchy. The secret? A double-fry technique that Chinese chefs have perfected over centuries.
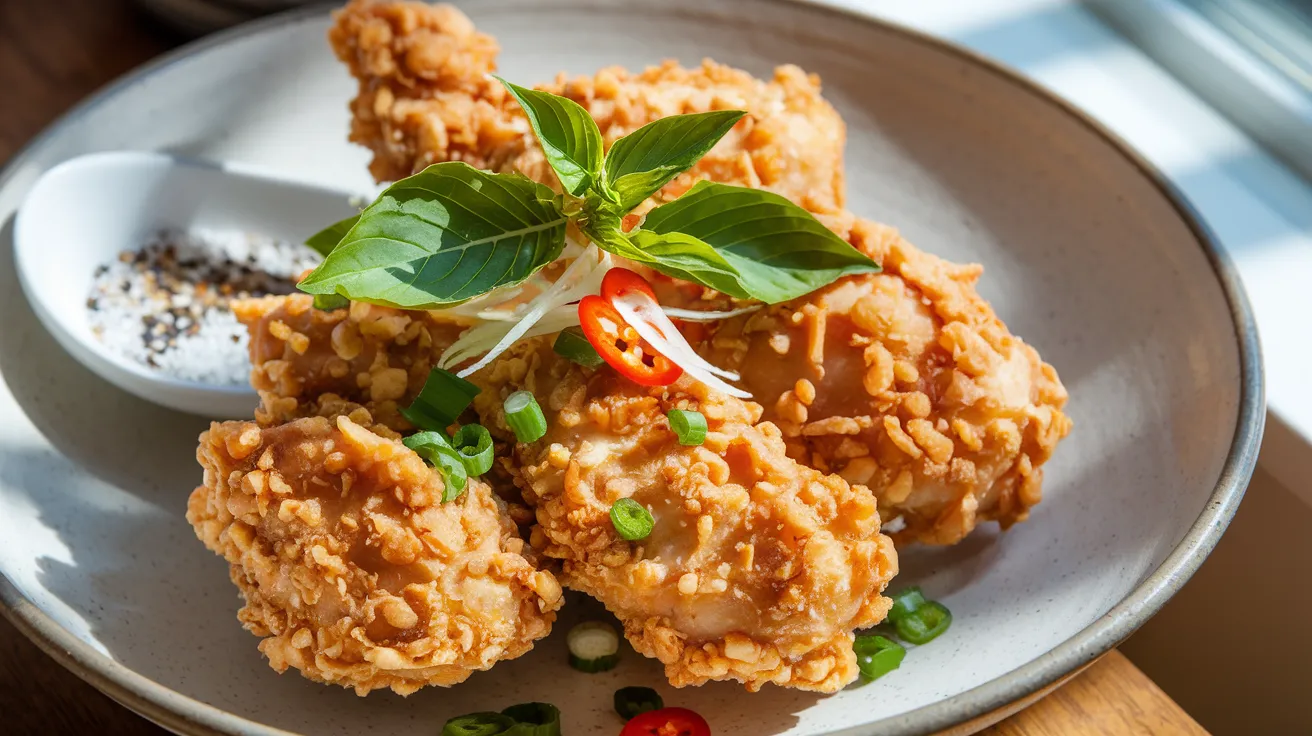
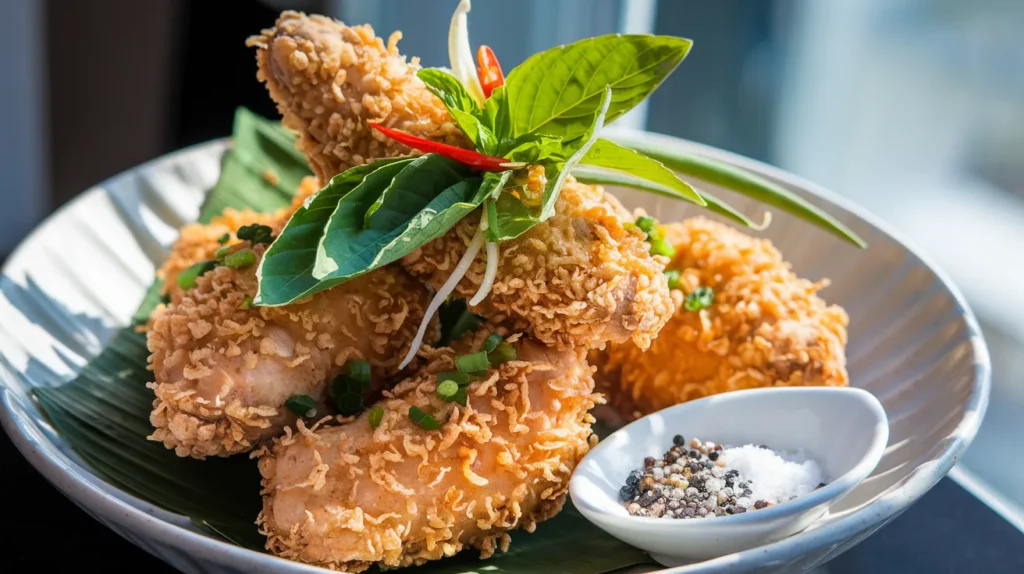
Ta Chien Chicken (also known as Taiwanese popcorn chicken or salt and pepper chicken) features bite-sized pieces of juicy chicken coated in a flavorful marinade, then twice-fried for that perfect crunch. If you’ve mastered making chicken tenders and fries, this Ta Chien Chicken takes your crispy chicken game to the next level. We’ve sized this recipe for four hungry people and broken it down into simple steps that anyone can follow.
Nutrition Information (Per Serving)
| Nutrient | Amount |
|---|---|
| Calories | 385 |
| Protein | 28g |
| Carbohydrates | 22g |
| Fat | 19g |
| Fiber | 1g |
| Sugar | 2g |
| Sodium | 650mg |
Prep Time: 15 minutes
Cook Time: 20 minutes
Total Time: 35 minutes
Servings: 4 persons
What You’ll Need
Ingredients
| Ingredient | Amount |
|---|---|
| Boneless chicken thighs | 1½ pounds |
| Shaoxing wine (or dry sherry) | 2 tablespoons |
| Soy sauce | 1 tablespoon |
| Sugar | 1 teaspoon |
| White pepper | ½ teaspoon |
| Five-spice powder | ¼ teaspoon |
| Garlic, minced | 2 cloves |
| Fresh ginger, grated | 1 teaspoon |
| Cornstarch | ½ cup |
| All-purpose flour | ¼ cup |
| Baking powder | ½ teaspoon |
| Salt | 1 teaspoon |
| Vegetable oil (for frying) | 4 cups |
| Thai basil leaves (optional) | ¼ cup |
| Garlic, thinly sliced | 4 cloves |
| Red chili, thinly sliced | 1 small |
| White pepper (for seasoning) | ¼ teaspoon |
| Green onions, chopped | 3 stalks |
Kitchen Tools
| Tool | Purpose |
|---|---|
| Large mixing bowl | For marinating chicken |
| Medium bowl | For dredging mixture |
| Dutch oven or heavy pot | For frying |
| Thermometer | To monitor oil temperature |
| Slotted spoon | For removing chicken from oil |
| Paper towel-lined plate | For draining excess oil |
| Knife and cutting board | For prep work |
| Measuring spoons and cups | For accurate measurements |
| Wire rack (optional) | For holding dredged chicken |
Substitutions
- Shaoxing wine: Use dry sherry or white wine
- Five-spice powder: Mix equal parts cinnamon, star anise, and cloves
- Thai basil: Regular basil or omit entirely
- Chicken thighs: Chicken breast works but will be less juicy
- Cornstarch: Potato starch works great too
How to Make Ta Chien Chicken: Step-by-Step Instructions for Beginners
Preparation Phase
- Gather all ingredients and tools
- Read through the entire recipe first
- Place all ingredients on your counter organized by use order
- Make sure you have all required tools clean and ready
- Check that you have enough oil for frying
- Set up a designated “clean” area for handling raw chicken
- TIP: Having everything ready before you start will make the process much smoother
- Prepare your work area
- Line a large plate or tray with several layers of paper towels for draining the chicken
- Have an extra plate ready for holding the chicken before frying
- If you have a splatter screen, keep it nearby for the frying step
- Clear counter space for your cooling rack if using
- TIP: A clean, organized workspace prevents cross-contamination and makes cooking more enjoyable
- Cut the chicken
- Unwrap chicken thighs and place on a clean cutting board
- Use paper towels to thoroughly pat the chicken dry (this is VERY important for crispy results)
- With a sharp knife, trim away any excess fat or skin
- Cut each thigh into 1-inch cubes (about bite-sized pieces)
- Try to make all pieces roughly the same size for even cooking
- TIP: If the chicken is too soft to cut cleanly, place it in the freezer for 15 minutes to firm up
- WARNING: Always wash hands thoroughly after handling raw chicken
- Mix the marinade
- In a large mixing bowl, measure and add:
- 2 tablespoons Shaoxing wine (or dry sherry)
- 1 tablespoon soy sauce
- 1 teaspoon sugar
- ½ teaspoon white pepper
- ¼ teaspoon five-spice powder
- Peel and mince 2 cloves of garlic:
- Cut off the hard end of each clove
- Peel off the papery skin
- Place the flat side of your knife on the clove and press down to crush it slightly
- Mince the crushed garlic into tiny pieces
- Add to the bowl
- Peel and grate 1 teaspoon fresh ginger:
- Use a spoon to scrape off the skin
- Grate using the small holes of a box grater or a microplane
- Measure 1 teaspoon and add to the bowl
- Whisk everything together until the sugar completely dissolves (about 30 seconds)
- TIP: Make sure everything is well mixed before adding the chicken
- In a large mixing bowl, measure and add:
- Marinate the chicken
- Add the cut chicken pieces to the marinade bowl
- Use clean hands or tongs to toss and coat each piece thoroughly
- Cover the bowl with plastic wrap
- Let it sit at room temperature for at least 10 minutes (or refrigerate for up to 4 hours for more flavor)
- TIP: Don’t skip the marinating time – it’s essential for flavor development
- WARNING: Never leave raw chicken at room temperature for more than 30 minutes
- Prepare the dredging mixture
- In a medium bowl, measure and add:
- ½ cup cornstarch
- ¼ cup all-purpose flour
- ½ teaspoon baking powder
- 1 teaspoon salt
- Whisk thoroughly to combine and break up any lumps
- The mixture should look uniform in color
- TIP: For extra flavor, you can add ¼ teaspoon of garlic powder to this mix
- In a medium bowl, measure and add:
- Prepare your aromatics
- Thinly slice 4 cloves of garlic
- Slice 1 small red chili into thin rings (remove seeds for less heat)
- Rinse ¼ cup Thai basil leaves if using, and pat dry
- Chop 3 green onions into ½-inch pieces, separating white and green parts
- Place all aromatics on a small plate, keeping them separate
- TIP: Preparing these ahead of time prevents burning when you need to work quickly
Cooking Phase
- Heat the oil
- Place a Dutch oven or heavy pot on the stove
- Add 4 cups of vegetable oil (the oil should be about 2-3 inches deep)
- Turn heat to medium-high
- Insert a deep-fry or candy thermometer on the side of the pot
- Heat until oil reaches exactly 325°F (this will take about 5-7 minutes)
- TIP: If you don’t have a thermometer, test by dropping a small piece of bread in the oil – it should sizzle gently and gradually turn golden in about 60 seconds
- WARNING: Never leave heating oil unattended, and keep a pot lid nearby to cover in case of fire
- First fry (par-cooking)
- While the oil heats, drain chicken pieces from marinade using a slotted spoon
- Place about one-third of the chicken pieces in the dredging mixture
- Gently toss to coat each piece completely
- Shake off excess coating by gently bouncing pieces in a mesh strainer or on a wire rack
- Once oil reaches 325°F, carefully add the first batch of chicken piece by piece
- Use a long-handled slotted spoon or spider strainer to prevent oil splatter
- Fry for exactly 3 minutes, occasionally stirring gently with your slotted spoon to prevent sticking
- The chicken should be light golden brown but not fully browned
- Remove each piece with the slotted spoon, allowing excess oil to drip back into the pot
- Place on paper towel-lined plate to drain
- Repeat with remaining chicken in two more batches
- TIP: Between batches, remove any floating bits of coating with your slotted spoon
- WARNING: Watch for oil splatter and never drop chicken in from a height
- Monitor oil temperature
- Check oil temperature between batches
- Allow oil to return to 325°F before adding the next batch
- If temperature drops too low, your chicken won’t crisp properly
- If temperature rises too high, the coating will burn before the chicken cooks through
- TIP: Regulate your heat source as needed to maintain consistent temperature
- WARNING: If oil starts smoking, it’s too hot – carefully reduce heat immediately
- Second fry (crisping)
- After all batches have been par-fried once, increase oil temperature to 350°F
- Once temperature is reached, add ALL the chicken back into the oil
- This time, fry for just 2-3 minutes until deeply golden and audibly crispy
- Stir gently to ensure even browning
- The chicken should now be a rich golden brown color
- Remove all pieces and place on fresh paper towels to drain
- Immediately sprinkle with a pinch of salt while still hot
- TIP: This second fry is what creates that restaurant-quality crispiness that stays crunchy
- WARNING: The second fry goes quickly, so watch carefully to prevent burning
- Flash-fry aromatics
- Carefully pour out most of the oil, leaving just 2 tablespoons in the pot
- Reduce heat to medium
- Add the sliced garlic and chili
- Stir continuously for 30 seconds until fragrant but not browned
- If using Thai basil leaves, add them now and stir for 10 seconds until crisp
- Add white parts of green onions
- Sprinkle with ¼ teaspoon white pepper and a pinch of salt
- TIP: This step happens very quickly – have all aromatics ready and move fast
- WARNING: Garlic burns easily, so keep it moving constantly
Finishing Steps
- Combine and serve
- Return all the crispy chicken to the pot with the aromatics
- Turn off the heat completely
- Quickly toss everything together for 15-20 seconds using a wooden spoon or tongs
- The residual heat will help the flavors meld without overcooking
- Transfer everything to a serving dish immediately
- Sprinkle with the green parts of your chopped green onions
- Serve right away while still hot and crispy
- TIP: Don’t let the chicken sit in the hot pot too long or it will lose its crunch
- WARNING: The serving dish will be very hot – use oven mitts if needed
- Final presentation
- For authentic presentation, serve with small bamboo skewers for easy eating
- Garnish with extra Thai basil leaves if desired
- A small dish of white pepper mixed with salt makes a nice dipping option
- TIP: This dish pairs perfectly with steamed rice and a simple vegetable like stir-fried bok choy
Troubleshooting
| Problem | Solution |
|---|---|
| Chicken not crispy enough | Oil wasn’t hot enough; ensure 350°F for second fry |
| Coating falls off during frying | Didn’t drain marinade well enough; pat chicken drier before dredging |
| Chicken tastes too salty | Reduce salt in dredge mixture or final seasoning |
| Chicken undercooked inside | Cut a piece open to check; if pink, return all pieces to oil for 1-2 more minutes |
| Oil smoking during cooking | Temperature too high; reduce heat immediately and wait for temp to drop |
| Garlic or aromatics burnt | Heat was too high or cooked too long; keep stirring constantly and work quickly |
| Coating too thick or doughy | Shook off excess coating insufficiently; use lighter touch when dredging |
Variations & Substitutions
Spicy Version
Add 1 teaspoon of crushed red pepper flakes to your dredging mix and double the amount of fresh chili for a spicier kick.
Gluten-Free Option
Replace all-purpose flour with rice flour and use tamari instead of soy sauce. Double-check that your five-spice powder is gluten-free.
Lighter Version
Use boneless, skinless chicken breast cut into cubes. You can also air-fry at 400°F for 8 minutes, spray with a little oil, then air-fry for another 2-3 minutes until crispy.
Flavor Twists
- Lemon Pepper: Add 1 tablespoon lemon zest to the final toss
- Garlic Parmesan: Sprinkle with 2 tablespoons grated parmesan after frying
- Sweet & Sour: Serve with a side of sweet chili sauce for dipping
- Curry Twist: Add 1 teaspoon curry powder to your dredging mix
Storage & Reheating
- Refrigeration:
- Allow chicken to cool completely before storing
- Place in an airtight container with paper towels at the bottom to absorb moisture
- Refrigerate for up to 3 days
- Keep aromatics stored with the chicken for best flavor
- Freezing:
- Freeze in a single layer on a baking sheet first, then transfer to a freezer-safe bag
- Remove as much air as possible
- Can be frozen for up to 1 month
- Label with date and contents
- Reheating:
- Oven method (best): Preheat oven to 375°F, spread chicken on a baking sheet, and heat for 8-10 minutes until crispy and heated through
- Air fryer: 375°F for 3-4 minutes
- Stovetop: Heat 1 tablespoon oil in a skillet and stir-fry for 2-3 minutes until hot
- Avoid microwave as it makes the coating soggy and ruins the texture
Safety Notes & Tips
- Oil Safety:
- Never leave hot oil unattended
- Keep a lid nearby to smother flames if needed
- Don’t fill your pot more than halfway with oil
- Have a fire extinguisher accessible in your kitchen
- Food Safety:
- Always use a meat thermometer to ensure chicken reaches 165°F internally
- Wash hands thoroughly after handling raw chicken
- Use separate cutting boards for meat and other ingredients
- Don’t reuse marinades that have touched raw chicken
- Oil Disposal:
- Let oil cool completely before handling
- Strain through a fine-mesh sieve to remove food particles
- Pour into a sealable container and dispose according to local regulations
- Never pour oil down the drain as it can cause clogs
Pro Tips for Perfect Ta Chien Chicken
- Meat selection: Thighs work best as they stay juicier than breast meat
- Double-dredge option: For extra crispiness, dip chicken in egg wash, then dredge, then repeat
- Oil freshness: Don’t reuse oil too many times as it can impart off-flavors
- Timing matters: This dish is best served immediately after cooking
- Serving suggestion: Pair with steamed rice and stir-fried vegetables for a complete meal
- Authentic touch: Fresh Thai basil truly makes a difference in the final flavor
- Heat management: Maintaining proper oil temperature is the key to success
- Practice makes perfect: Don’t be discouraged if your first attempt isn’t perfect – frying skills improve with practice