Prep Time: 15 minutes | Cook Time: 45 minutes | Total Time: 1 hour | Servings: 4
Key Takeaways
- This copycat Texas Roadhouse Chili matches the signature restaurant flavor with its secret spice blend
- Ready in just 1 hour with common pantry ingredients
- Perfect for meal prep – this Texas Roadhouse Chili tastes even better the next day
- Customize heat level from mild to extra spicy
Why You’ll Love This Texas Roadhouse Chili
Ever craved that rich, hearty Texas Roadhouse Chili but didn’t want to leave home? This recipe solves that problem.
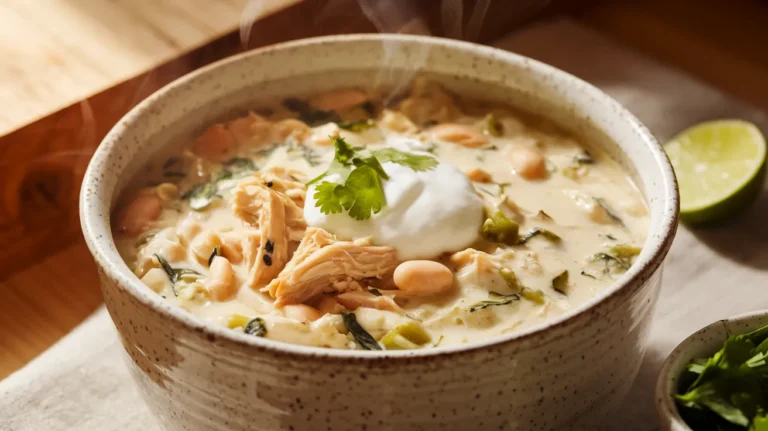
Our Texas Roadhouse Chili brings that restaurant quality right to your kitchen. With a perfect balance of beef, beans, and spices, you’ll create a bowl that rivals the original. If you enjoy this recipe, you might also want to try my White Chicken Chili for a lighter alternative.
This Texas Roadhouse Chili recipe serves four people generously and takes just one hour from start to finish. Perfect for weeknight dinners or weekend gatherings.
Nutrition Facts (Per Serving)
| Nutrient | Amount |
|---|---|
| Calories | 380 |
| Protein | 28g |
| Carbohydrates | 32g |
| Fiber | 9g |
| Fat | 16g |
| Sodium | 820mg |
Equipment & Ingredients
Kitchen Tools
| Tool | Purpose |
|---|---|
| Large Dutch oven or pot (5-6 quart) | Main cooking vessel |
| Wooden spoon | Stirring and breaking up meat |
| Measuring cups (1 cup, ½ cup, ¼ cup) | Measuring liquids and larger ingredients |
| Measuring spoons (1 Tbsp, 1 tsp, ½ tsp, ¼ tsp) | Measuring spices and smaller amounts |
| Sharp chef’s knife | Chopping vegetables |
| Cutting board | Food preparation surface |
| Can opener | Opening canned ingredients |
| Colander/strainer | Draining and rinsing beans |
| Timer | Tracking cooking times |
| Ladle | Serving the chili |
Ingredients List
| Ingredient | Amount | Note |
|---|---|---|
| Ground beef (80/20) | 1½ pounds | Higher fat content adds flavor |
| Yellow onion | 1 medium | Finely diced (about 1 cup) |
| Green bell pepper | 1 medium | Diced (about ¾ cup) |
| Garlic cloves | 3 | Minced (about 1 tablespoon) |
| Tomato paste | 2 tablespoons | Adds richness |
| Kidney beans | 1 (15 oz) can | Drained and rinsed |
| Pinto beans | 1 (15 oz) can | Drained and rinsed |
| Diced tomatoes | 1 (14.5 oz) can | Undrained |
| Beef broth | 2 cups | Low sodium preferred |
| Chili powder | 3 tablespoons | Adjust for heat preference |
| Ground cumin | 1 tablespoon | For earthy flavor |
| Paprika | 1 teaspoon | For color and flavor |
| Oregano | 1 teaspoon | Dried |
| Cayenne pepper | ¼ teaspoon | Adjust for heat level |
| Brown sugar | 1 tablespoon | Balances acidity |
| Salt | 1 teaspoon | To taste |
| Black pepper | ½ teaspoon | Freshly ground |
| Vegetable oil | 1 tablespoon | For sautéing |
Optional Toppings
- Shredded cheddar cheese
- Sour cream
- Diced red onion
- Sliced jalapeños
- Fresh cilantro
- Lime wedges
Possible Substitutions
- Ground beef: Turkey or plant-based meat alternative for lighter options
- Kidney/pinto beans: Black beans or navy beans work well
- Beef broth: Vegetable broth for a vegetarian version (with plant-based meat)
- Brown sugar: Honey or maple syrup can substitute
- Fresh garlic: 1 teaspoon garlic powder
Ultra-Detailed Step-by-Step Instructions for Beginners
Preparation Phase (15 minutes)
- Setting up your workspace
- Clear your countertop to have plenty of room to work
- Place cutting board in the center of your workspace
- Position trash can or bowl for scraps nearby
- Wash your hands thoroughly with soap and water
- Gather all ingredients
- Take out all ingredients from refrigerator and pantry
- Place them on your counter grouped by when you’ll use them
- Check that you have everything listed in the ingredients section
- Prepare measuring tools
- Set out all measuring cups and spoons
- Have a small bowl ready for pre-measuring spices
- Make sure you have a larger bowl for mixed spices
- Prepare spice mixture
- In a small bowl, combine:
- 3 tablespoons chili powder
- 1 tablespoon ground cumin
- 1 teaspoon paprika
- 1 teaspoon dried oregano
- ¼ teaspoon cayenne pepper
- 1 teaspoon salt
- ½ teaspoon black pepper
- Mix well with a spoon until fully combined
- Set aside within reach of your cooking area
- In a small bowl, combine:
- Prepare the vegetables
- For the onion:
- Place onion on cutting board
- Cut off both ends with knife
- Cut in half from top to bottom
- Peel off the outer skin layers
- Place flat side down on cutting board
- Make vertical cuts about ¼-inch apart
- Then make horizontal cuts to create ¼-inch dice
- Transfer diced onion to a small bowl
- For the bell pepper:
- Place pepper on cutting board
- Cut off the top where the stem is
- Cut pepper in half from top to bottom
- Remove white ribs and seeds with your fingers or a spoon
- Place flat side down and slice into ¼-inch strips
- Turn and cut across strips to create ¼-inch dice
- Transfer diced pepper to the bowl with onion
- For the garlic:
- Place garlic cloves on cutting board
- Place flat side of knife on each clove and press firmly to crush
- Peel off the skin
- Mince garlic by making very fine cuts in multiple directions
- Transfer minced garlic to a separate small bowl (it will be added later)
- For the onion:
- Prepare the canned ingredients
- Open can of diced tomatoes with can opener
- Leave undrained in the can until needed
- Open can of kidney beans with can opener
- Pour into colander in sink
- Rinse with cold water until water runs clear
- Let drain while you continue prep
- Open can of pinto beans with can opener
- Pour into colander with kidney beans
- Rinse with cold water
- Let drain thoroughly
- Open tomato paste
- Have tablespoon ready for measuring
- Open can of diced tomatoes with can opener
- Measure remaining ingredients
- Measure 2 cups beef broth in measuring cup
- Measure 1 tablespoon brown sugar
- Measure 1 tablespoon vegetable oil
- Set all measured ingredients within easy reach of stove
Cooking Phase (45 minutes)
- Prepare your cooking vessel
- Place Dutch oven or large pot on appropriate-sized burner
- The pot should be at least 5-6 quarts to prevent overflow
- Make sure the pot is clean and completely dry
- Heat the pot and oil
- Turn burner to medium-high heat
- Add 1 tablespoon vegetable oil to pot
- Wait until oil is shimmering but not smoking (about 1-2 minutes)
- Beginner tip: If oil starts smoking, remove pot from heat briefly, lower temperature, and continue
- Brown the ground beef (10 minutes)
- Add 1½ pounds ground beef to hot oil
- Beginner tip: Break larger chunks into smaller pieces as you add to pot
- Let beef cook without stirring for 2 minutes to develop color
- Using wooden spoon, break beef into smaller pieces (aim for marble-sized chunks)
- Continue cooking, stirring occasionally, until no pink remains (about 6-8 minutes total)
- Important beginner tip: Do NOT drain the fat – it contains flavor!
- Visual cue: Beef should be brown throughout with no visible pink
- Add onions and peppers (5 minutes)
- Add diced onions and bell peppers to the browned beef
- Stir well to combine
- Cook for 4-5 minutes, stirring every minute
- Visual cue: Onions should become translucent (see-through) and soft
- Beginner tip: If vegetables are browning too quickly, reduce heat to medium
- Add garlic (1 minute)
- Add minced garlic to pot
- Stir continuously for 30-60 seconds
- Beginner warning: Garlic burns easily and becomes bitter, so watch carefully!
- Visual/smell cue: Garlic should become fragrant but not brown
- Add tomato paste and spices (3 minutes)
- Add 2 tablespoons tomato paste to pot
- Stir constantly for 1 minute, coating beef and vegetables
- Visual cue: The mixture will take on a deeper red color
- Add your premixed spice blend to the pot
- Stir continuously for 1-2 minutes to toast spices
- Beginner tip: Toasting spices releases oils and intensifies flavor
- Visual cue: Mixture will look thick and well-coated with spices
- Add liquids and remaining ingredients (5 minutes)
- Pour in 2 cups beef broth
- Using wooden spoon, scrape bottom of pot vigorously
- Beginner tip: This scraping releases flavorful browned bits (fond) stuck to pot
- Add can of diced tomatoes with juice
- Stir to combine
- Add drained and rinsed beans (kidney and pinto)
- Stir gently to incorporate without mashing beans
- Add 1 tablespoon brown sugar
- Stir again to combine all ingredients evenly
- Visual cue: Mixture should be soupy with a medium-thick consistency
- Bring to proper temperature (5 minutes)
- Increase heat to high
- Stir occasionally until mixture begins to bubble
- Visual cue: Look for several bubbles breaking surface throughout pot
- Beginner tip: This is not a full rolling boil but active bubbling
- Simmer the chili properly (20-25 minutes)
- Once bubbling, reduce heat to low
- The surface should show gentle, occasional bubbling
- Cover pot with lid
- Set timer for 20 minutes
- Stir every 5 minutes to prevent sticking
- Beginner tips:
- If chili seems too thick, add ¼ cup water or broth
- If chili seems too thin, remove lid and continue simmering
- Taste test after 15 minutes (be careful, it’s hot!)
- Visual cue: Chili is ready when it has thickened slightly and flavors have melded
- Final seasoning adjustments (2-3 minutes)
- After simmering, turn off heat
- Taste chili carefully (it’s hot!)
- Seasoning guide for beginners:
- If needs more depth: add ¼ teaspoon cumin
- If needs more saltiness: add ¼ teaspoon salt at a time
- If needs more kick: add ⅛ teaspoon cayenne
- If needs more sweetness: add ½ teaspoon brown sugar
- Stir well after each addition and taste again
- Let chili rest for 5 minutes before serving
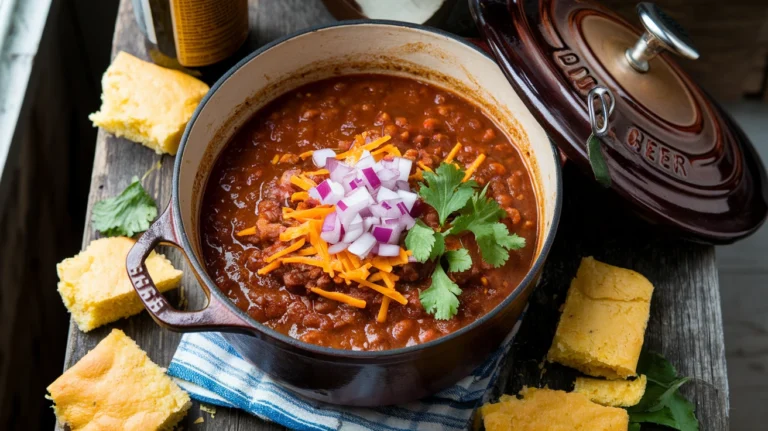
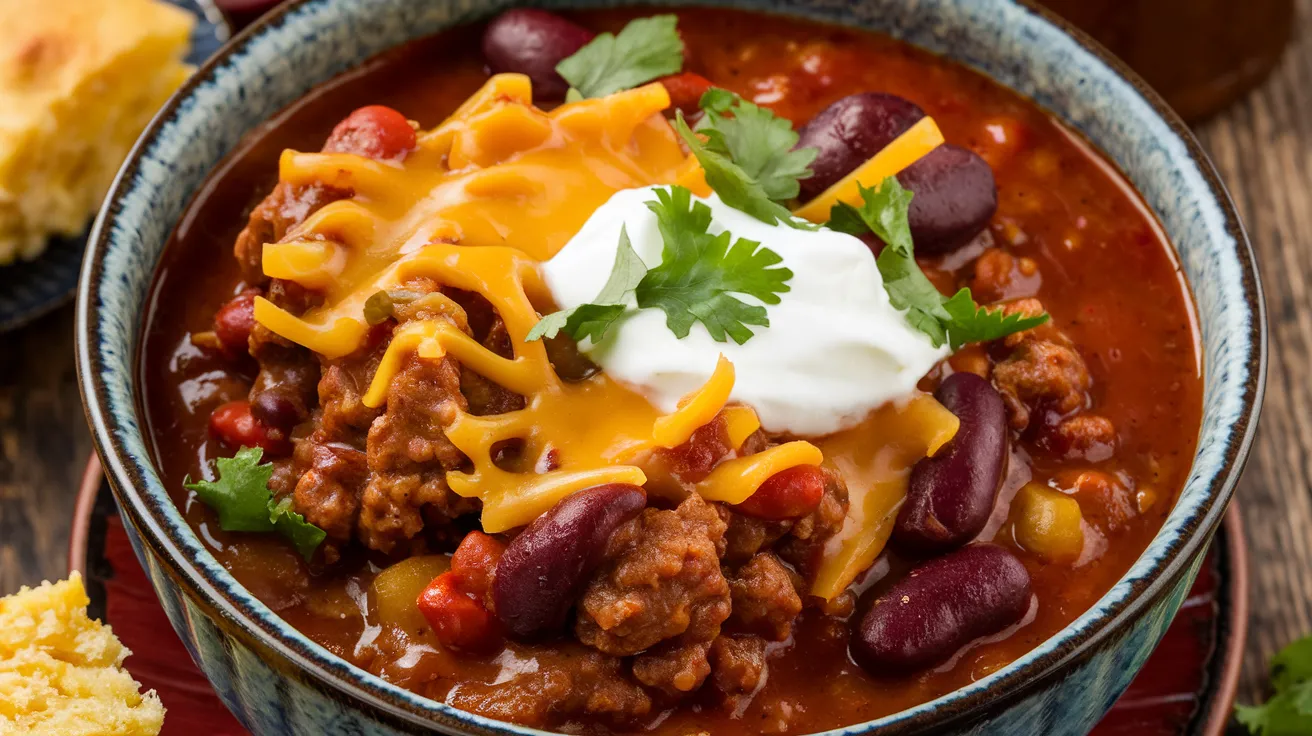
Serving Your Texas Roadhouse Chili
- Prepare serving bowls and toppings
- While the Texas Roadhouse Chili is in final resting phase, gather serving bowls
- Beginner tip: Warm bowls by filling with hot water, then emptying before serving
- Prepare optional toppings in separate small bowls:
- Shred cheese if needed
- Chop cilantro if using
- Dice red onion if using
- Slice jalapeños if using
- Portion sour cream into serving bowl
- Cut lime into wedges if using
- Serve the Texas Roadhouse Chili properly
- Using ladle, portion chili into warmed bowls
- Beginner tip: Fill bowls about ⅔ full to leave room for toppings
- Allow each person to add desired toppings
- Serving suggestion: Best with cornbread on the side
- Flavor pairing: For an exciting flavor combination, serve with a side of Sweet Chili Sauce for drizzling

Troubleshooting Common Issues
Too Spicy
- Add a tablespoon of sour cream directly to the pot
- Serve with extra cheese and sour cream
- Add another tablespoon of brown sugar to balance heat
- Beginner fix: A splash of heavy cream or half-and-half can quickly reduce heat
Too Thick
- Add beef broth ¼ cup at a time until desired consistency
- Stir well after each addition before adding more
- Beginner tip: Chili thickens as it cools, so it’s okay if it seems slightly thin in the pot
Too Thin
- Simmer uncovered for 5-10 more minutes, stirring frequently
- Beginner thickening method: Mix 1 tablespoon cornstarch with 1 tablespoon cold water in a separate small bowl until smooth, then stir into chili and simmer for 2 minutes
Bland Flavor
- Add more salt ¼ teaspoon at a time, tasting between additions
- Boost with 1 teaspoon Worcestershire sauce
- Try a dash of hot sauce or more chili powder
- Beginner tip: Add a teaspoon of apple cider vinegar to brighten flavors
Burnt Bottom
- Do NOT scrape the burnt portion
- Carefully transfer non-burnt chili to a clean pot
- Continue cooking at lower heat
- Prevention tip for beginners: Use a heavy-bottomed pot and stir frequently
Variations & Substitutions
Vegetarian Version
Replace beef with 2 cups chopped mushrooms and an extra can of beans. Use vegetable broth instead of beef broth.
How to prepare mushrooms:
- Clean mushrooms with damp paper towel (don’t wash)
- Chop into small pieces similar to ground beef size
- Cook longer (about 10 minutes) to release moisture
Extra Meaty Version
Add ½ pound ground pork or ½ cup chopped bacon with the beef.
If using bacon:
- Cut into small pieces before cooking
- Cook bacon first until fat renders
- Then add ground beef and continue recipe
Three-Bean Variation
Add 1 can of black beans along with the kidney and pinto beans.
Preparation note:
- Drain and rinse the additional can of beans
- Add with other beans in step 14
- May need to add extra ¼ cup liquid
No-Bean Texas Style
Skip the beans entirely and add an extra ½ pound of ground beef.
Adjustment notes:
- Increase chili powder to 4 tablespoons
- Reduce simmer time to 15-20 minutes
Spicy Lovers Version
Double the cayenne and add 1 diced jalapeño with seeds.
How to prepare jalapeño safely:
- Wear disposable gloves if available
- Cut off stem end
- Slice in half lengthwise
- Keep seeds and white ribs for extra heat
- Dice finely
- Add with bell peppers in step 11
- Wash hands thoroughly afterward
- Avoid touching eyes or face
Storing and Reheating Texas Roadhouse Chili
Refrigerator Storage
- Allow Texas Roadhouse Chili to cool completely before refrigerating (no more than 2 hours at room temperature)
- Transfer to airtight containers with lids
- Fill containers leaving ½-inch space at top
- Label container with date
- Keeps for 3-4 days
- Beginner storage tip: Divide into meal-sized portions before storing
Freezer Storage
- Cool Texas Roadhouse Chili completely before freezing
- Use freezer-safe containers or heavy-duty freezer bags
- Remove as much air as possible from bags
- Leave ½-inch headspace in containers for expansion
- Label with content and date
- Keeps for up to 3 months
- Beginner freezing tip: Freeze flat in bags for quicker thawing
- Time-saving tip: For busy weeknights, check out my Slow Cooker White Chicken Chili that you can make ahead and freeze in portions just like this Texas Roadhouse Chili
Detailed Reheating Instructions
Stovetop Reheating (recommended method):
- Remove chili from refrigerator
- Transfer to saucepan
- Add 2-3 tablespoons water or broth
- Cover with lid
- Heat over medium-low heat
- Stir every 2 minutes
- Heat until internal temperature reaches 165°F (about 5-7 minutes)
- Beginner tip: If chili sticks to pan, lower heat and add a splash more liquid
Microwave Reheating:
- Transfer portion to microwave-safe bowl
- Cover loosely with microwave-safe lid or paper towel
- Heat on medium power (70%) for 2 minutes
- Stir thoroughly
- Continue heating in 30-second intervals, stirring between each
- Heat until internal temperature reaches 165°F
- Beginner microwave tip: Let stand for 1 minute before eating as hot spots may exist
Reheating From Frozen:
- Thaw overnight in refrigerator (safest method)
- Or thaw using microwave defrost function
- Once thawed, follow refrigerated reheating instructions
- Beginner warning: Never thaw at room temperature for safety reasons
Safety Notes & Tips
Food Safety
- Ground beef must reach internal temperature of 160°F
- Use separate cutting boards for meat and vegetables
- Wash hands thoroughly after handling raw meat
- Never leave chili at room temperature for more than 2 hours
- Always use clean utensils when serving
- Beginner safety tip: If unsure if chili is still good, remember “when in doubt, throw it out”
Time-Saving Tips
- Chop vegetables the day before and refrigerate in sealed containers
- Pre-measure spice blend and store in small container
- Use pre-chopped frozen onions and peppers
- Make double batch and freeze half for later
Beginner-Friendly Cooking Tips
- Read entire recipe before starting
- Prepare all ingredients before turning on heat (mise en place)
- Set multiple timers if needed
- Keep a kitchen towel nearby for spills
- Taste as you go (after beef is fully cooked)
- Have extra broth on hand in case you need to adjust consistency
Dietary Considerations
- Gluten-free: Ensure all canned items and broth are certified gluten-free
- Lower sodium: Use no-salt-added beans and tomatoes, reduce added salt
- Lower fat: Use 93% lean ground beef or turkey, drain after browning
- Dairy-free: Skip cheese and sour cream toppings or use non-dairy alternatives
Final Chef’s Tips
- Let chili sit off heat for 5 minutes before serving to allow flavors to settle
- Chili tastes even better the next day after flavors have melded
- Serve with warm cornbread for the authentic Texas Roadhouse experience
- For deepest flavor, make a day ahead and reheat
- Adjust liquid based on desired thickness – Texas Roadhouse chili is medium-thick
- Beginner success tip: For your first time, follow the recipe exactly before experimenting with variations