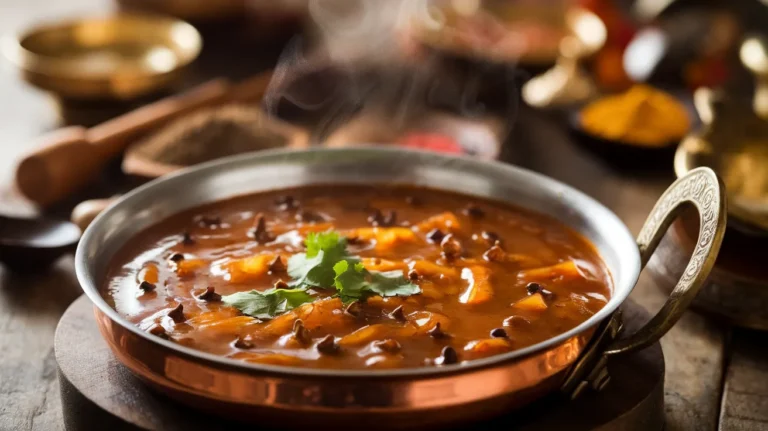
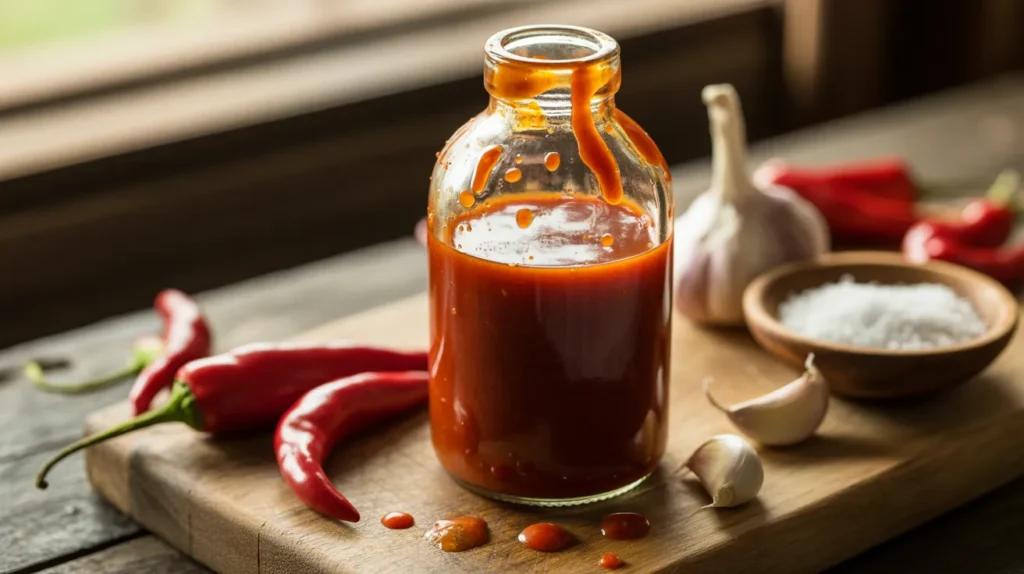
There’s nothing quite like the bold, tangy kick of a Thai sriracha sauce fermented chili garlic recipe made completely from scratch. This bright red sauce packs layers of heat, sweetness, and that deep, complex flavor you only get from real fermentation. Once you make this Thai sriracha sauce fermented chili garlic recipe at home, store-bought bottles will never feel the same again.
SERVES: 4 | PREP: 20 MIN | FERMENT: 3–7 DAYS | COOK: 15 MIN | TOTAL: 3–7 DAYS + 35 MIN
What Makes This Thai Sriracha Sauce Different?
Most people know sriracha from the famous American squeeze bottle. But the real original comes straight from Si Racha, a coastal town in Thailand.
The Thai version is thinner, brighter, and less vinegary. It gets its deep flavor from fermentation — a simple, ancient process where salt draws natural sugars out of the chilies and garlic.
That slow fermentation is the secret. It gives this Thai sriracha sauce a savory, almost umami-rich backbone that no quick-blend sauce can copy.
Ingredients
Fermentation Base
| Ingredient | Amount |
|---|---|
| Fresh red Fresno chilies (or Thai red chilies), stems removed | 500g (about 4 cups) |
| Garlic cloves, peeled | 10 large cloves |
| Fine sea salt | 2 teaspoons |
For Cooking the Sauce
| Ingredient | Amount |
|---|---|
| White distilled vinegar | 3 tablespoons |
| Granulated white sugar | 2 tablespoons |
| Water | ¼ cup |
| Fish sauce (optional but recommended) | 1 teaspoon |
Step-by-Step Instructions
Phase 1: Prepare and Ferment the Chilies
Step 1 — Wash your chilies and garlic well. Rinse 500g of fresh red chilies under cold running water. Shake off the excess water. Remove the green stems by pinching them off. You don’t need to remove the seeds — they add heat and help fermentation. Peel all 10 garlic cloves.
🛡️ Safety Tip: Wear food-safe gloves when handling this many chilies. The capsaicin oil can burn your skin and eyes for hours after handling.
Step 2 — Roughly chop everything together. Place the chilies and garlic on a cutting board. Give everything a rough chop — you’re not trying to mince them. Pieces about 1 cm (½ inch) wide are perfect. This helps the salt penetrate faster and speeds up fermentation.
Step 3 — Mix with salt in a clean jar. Add all the chopped chilies and garlic into a clean 1-liter (32 oz) glass jar. Pour in 2 teaspoons of fine sea salt. Use a clean spoon to mix everything well. The salt will immediately start drawing out liquid from the chilies.
Why salt? Salt creates an environment where good, healthy bacteria can thrive. These bacteria break down the natural sugars in the chilies, creating that signature sour, complex flavor of fermented hot sauce.
Step 4 — Pack the jar tightly and cover loosely. Press the chili mixture down firmly into the jar. You want to pack it tight so the chilies stay submerged under their own liquid as much as possible. Cover the jar with a piece of cheesecloth or a loose lid — not airtight. Fermentation produces gas that needs to escape.
Step 5 — Let it ferment at room temperature. Place your jar somewhere at room temperature (21–26°C / 70–79°F). Keep it out of direct sunlight. Leave it to ferment for 3 to 7 days.
What to expect: After Day 1, you’ll see some liquid pooling at the bottom. By Day 2 or 3, small bubbles will appear — this is a great sign! It means fermentation is active. By Day 5–7, the color deepens and the smell turns pleasantly tangy and sour.
Step 6 — Stir once daily. Every day, use a clean spoon to stir the mixture and press the chilies back down under the liquid. This prevents mold from forming on top. If you see a tiny bit of white film on the very surface, scrape it off — this is usually harmless kahm yeast, not mold. Mold will look fuzzy and green or black. If that appears, discard and start again.
Phase 2: Blend the Fermented Mixture
Step 7 — Check your fermented chili mixture. After 3–7 days, your mixture should smell tangy, garlicky, and sharp. The chilies will look slightly softened and the color will be a deeper red-orange. Taste a tiny bit — it should be sour and salty with good heat. If you want more sourness, let it go another day or two.
Step 8 — Add the mixture to a blender. Pour the entire contents of your jar — chilies, garlic, and all the liquid — into a high-powered blender or food processor. Add ¼ cup of water to help it blend smoothly.
Step 9 — Blend until very smooth. Blend on high speed for 60–90 seconds. Stop and scrape down the sides halfway through. You want a very smooth, uniform paste with no large chili or garlic chunks remaining.
No blender? You can use an immersion blender directly in a deep bowl. It takes a little longer but works well.
Step 10 — Strain the blended sauce. Place a fine-mesh strainer over a medium saucepan. Pour the blended sauce through the strainer. Use the back of a spoon to push as much liquid through as possible. Discard the dry solids left in the strainer. You should have a smooth, bright sauce in your pan.
Phase 3: Cook the Sauce
Step 11 — Add your finishing ingredients. Into the strained sauce in the saucepan, add 3 tablespoons of white vinegar, 2 tablespoons of sugar, and 1 teaspoon of fish sauce (if using). Stir well to combine before turning on the heat.
Skipping fish sauce? The sauce is still delicious without it. Just add an extra small pinch of salt to compensate.
Step 12 — Bring to a gentle simmer. Place the saucepan over medium heat. Stir constantly as it heats up. Once you see small bubbles starting to form around the edges, reduce the heat to low-medium. You want a gentle, steady simmer — not a rolling boil.
Step 13 — Cook and reduce for 10–12 minutes. Let the sauce cook uncovered for 10–12 minutes, stirring every 1–2 minutes. The sauce will thicken slightly and the color will deepen to a beautiful, glossy red.
Visual cue: The sauce is ready when it coats the back of a spoon and a line drawn through it holds for 2–3 seconds.
Step 14 — Taste and adjust the balance. Remove the pan from heat. Taste your Thai sriracha sauce.
- Too spicy? Add 1 teaspoon more sugar.
- Too sweet? Add ½ teaspoon more vinegar.
- Too thick? Stir in 1 tablespoon of warm water at a time.
- Needs more depth? Add another drop of fish sauce.
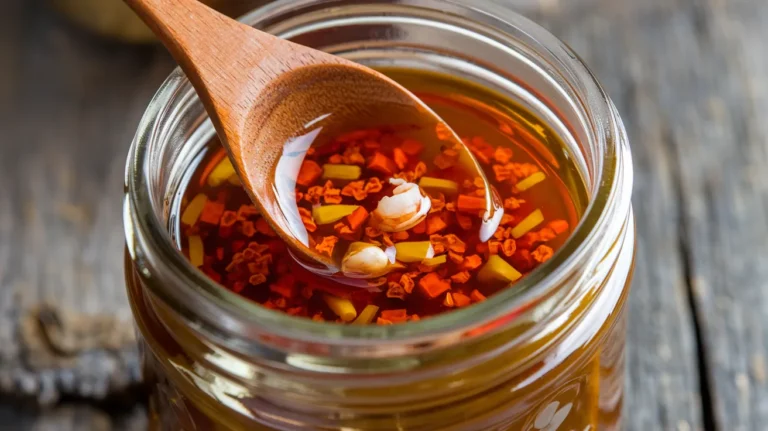
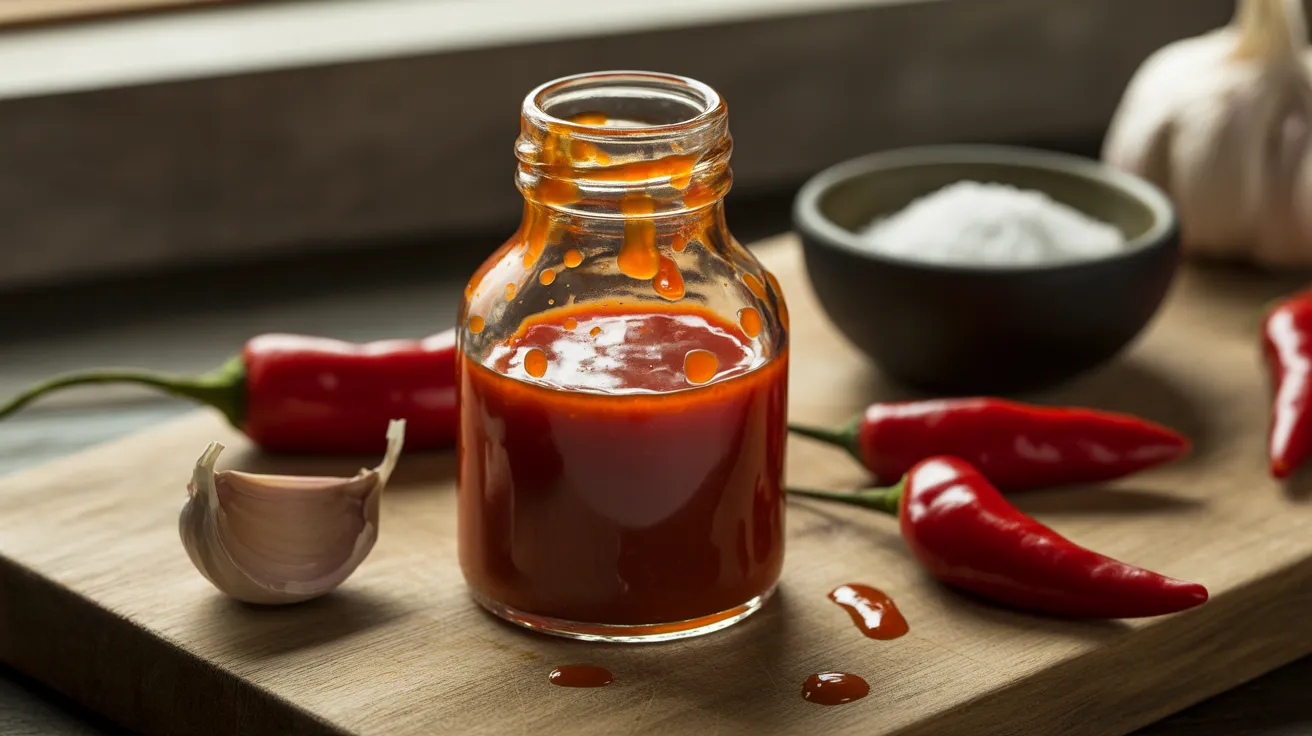
Step 15 — Cool completely before bottling. Let the sauce cool in the pan for 15–20 minutes at room temperature before pouring it into a clean glass bottle or jar. Never pour hot sauce into a cold glass jar — it can crack.
Chef’s Notes
1. Choose your chili wisely. Fresno chilies give this Thai sriracha sauce fermented chili garlic recipe a fruity, medium heat. Thai red chilies bring serious heat. Mix the two — 75% Fresno, 25% Thai red — for the best balance of flavor and fire.
2. Salt is everything. Use fine sea salt, not iodized table salt. Iodine in table salt can slow or harm fermentation. Sea salt or kosher salt only.
3. The longer the ferment, the richer the flavor. Three days makes a bright, fresh-tasting sauce. Seven days makes a deeply complex, almost earthy sauce. Try both and see which you prefer.
4. Clean tools matter more than you think. Any trace of soap or dirty residue on your jar or spoon can introduce bad bacteria. Wash everything in hot water and let it air dry fully before starting.
Nutrition Information (Per Serving — 2 tablespoons)
| Nutrient | Amount |
|---|---|
| Calories | 28 kcal |
| Carbohydrates | 6g |
| Protein | 0.5g |
| Total Fat | 0.2g |
| Sodium | 290mg |
| Sugar | 4g |
| Vitamin C | 35% DV |
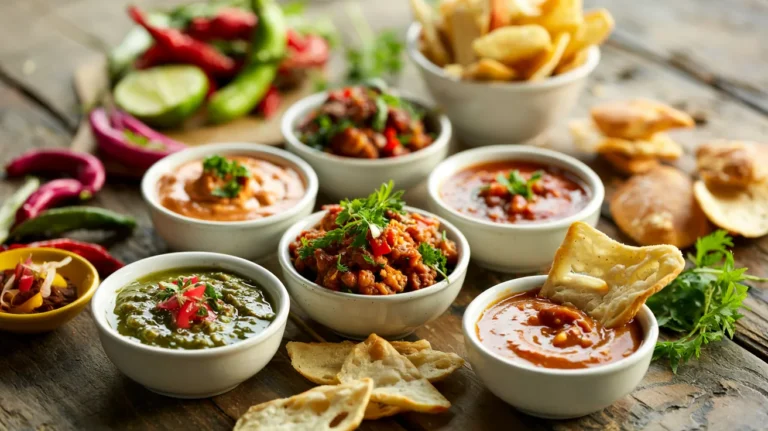
Recipe Variations
1. Garlic-Forward Version
Double the garlic to 20 cloves for a sauce with deep, roasted garlic richness. This version works beautifully as a dipping sauce for grilled chicken or pork. Pair it alongside our Thai fish sauce dipping sauce with lime and garlic for a full Thai condiment spread at your next dinner party.
2. Smoky Chipotle-Thai Fusion
Replace 100g of the fresh red chilies with canned chipotle peppers in adobo. Skip the fermentation step — the adobo sauce acts as your acidic element. Add 1 teaspoon of smoked paprika to the cooking stage. The result is a smoky, complex sauce with a Thai soul.
3. Extra-Sweet Mango Sriracha
During the cooking stage, blend in ½ cup of ripe mango chunks. Add an extra 1 tablespoon of sugar to balance the tartness. This fruity version is perfect over grilled shrimp or used as a spring roll dipping sauce.
4. Mild Family-Friendly Version
Use all Fresno chilies and remove half the seeds before fermenting. This cuts the heat significantly while keeping all the flavor. Kids and heat-sensitive guests can enjoy this version without any tears. You can bookmark the full Thai sriracha sauce fermented chili garlic recipe to come back to the original any time.
Storage & Reheating
Refrigerator: Store your finished sauce in a clean, sealed glass bottle in the fridge. It keeps well for up to 3 months.
Freezer: Pour the sauce into an ice cube tray and freeze. Once frozen, pop the cubes into a zip-lock bag. Keeps for up to 6 months. Pull out a cube or two whenever you need some sauce.
Signs it has gone bad: If the sauce smells sour beyond its usual tang, looks cloudy gray (not red), or grows visible mold, discard it. A properly stored sauce should smell sharp and garlicky.
No reheating needed. This sauce is used straight from the fridge or at room temperature. Heating it repeatedly breaks down the bright flavor.
Troubleshooting Guide
Problem 1: My ferment smells bad — like rotting vegetables. This usually means the temperature was too warm (above 30°C / 86°F) or the jar wasn’t clean. Discard the batch and start fresh. Keep your ferment in a cooler spot in your kitchen.
Problem 2: No bubbles after 3 days. Your kitchen may be too cold. Move the jar somewhere slightly warmer — like on top of your refrigerator, which radiates a small amount of heat. Give it one more day. If still no activity, add a pinch more salt and wait.
Problem 3: The sauce is too thick after cooking. Stir in warm water, 1 tablespoon at a time, until you reach the consistency you want. A good Thai sriracha sauce should pour easily from a bottle but still coat food well.
Problem 4: The sauce separated in the bottle. This is completely normal with homemade hot sauce — no preservatives means natural separation. Simply shake the bottle well before each use.
Problem 5: My sauce isn’t spicy enough. Fresh chili heat varies by season and growing conditions. If your batch turned out mild, blend in ½ teaspoon of dried red chili flakes during the cooking stage and simmer for an extra 3 minutes.
Equipment Essentials
- 1-liter (32 oz) wide-mouth glass jar — for fermenting
- High-powered blender or food processor — for smooth texture
- Fine-mesh strainer — to remove solids
- Medium saucepan — for cooking the sauce
- Wooden spoon or silicone spatula — for stirring
- Glass bottles with tight-fitting lids — for storing
- Food-safe gloves — for handling chilies
- Kitchen scale — for accurate chili measurement
Budget alternative: No fine-mesh strainer? Use a nut milk bag or two layers of cheesecloth over a bowl.
Shopping List
Produce Section
- Fresh red Fresno chilies — 500g
- Garlic — 1 bulb (you need 10 large cloves)
Condiments & Pantry Aisle
- White distilled vinegar — 1 small bottle
- Granulated white sugar — from your pantry
- Fish sauce — 1 small bottle (Thai brand like Tiparos or Megachef)
Baking / Spices Aisle
- Fine sea salt or kosher salt — 1 small bag
Housewares Section (if needed)
- Wide-mouth glass jar — 1-liter size
- Cheesecloth or fine-mesh strainer
5 Success Secrets for This Thai Sriracha Sauce Fermented Chili Garlic Recipe
1. Start with the freshest chilies you can find. Bright red, firm, and shiny chilies ferment the best. Avoid soft, wrinkled, or pale chilies — they have less natural sugar and won’t ferment as actively.
2. Never rush the fermentation. The magic in this fermented chili garlic recipe happens slowly. Rushing to only 1–2 days means you miss the flavor development. Three days minimum, seven days for the best results.
3. Keep everything below the brine. During fermentation, chilies floating above the liquid can grow surface mold. Press them down every day without fail. A small ziplock bag filled with water placed on top works great as a weight.
4. Blend when the sauce is fully cooled. Always blend at room temperature or cooler — never while the mixture is hot. Hot liquid in a blender creates pressure and can cause dangerous spills or burns.
5. Let the finished sauce rest for 24 hours before using. After cooking and bottling, give your Thai sriracha sauce one full day in the fridge before tasting it. The flavors mellow, balance, and come together beautifully overnight.
Making this Thai sriracha sauce fermented chili garlic recipe from scratch is a genuinely satisfying project. The fermentation process feels like real cooking — patient, traditional, and deeply rewarding. Once you taste the difference between homemade and store-bought, you’ll be making a new batch before the first bottle runs out.