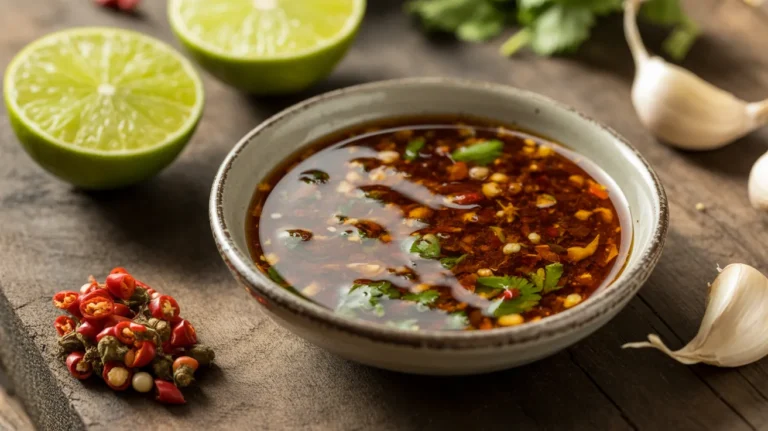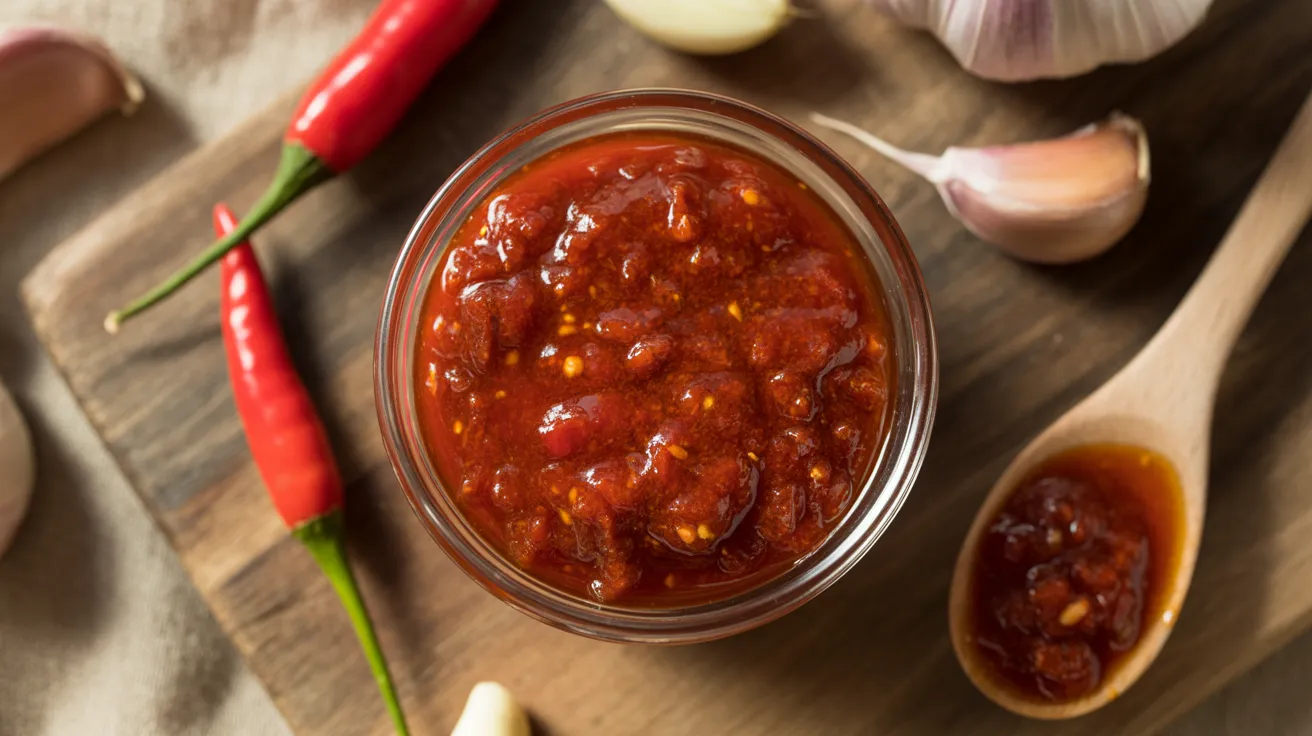
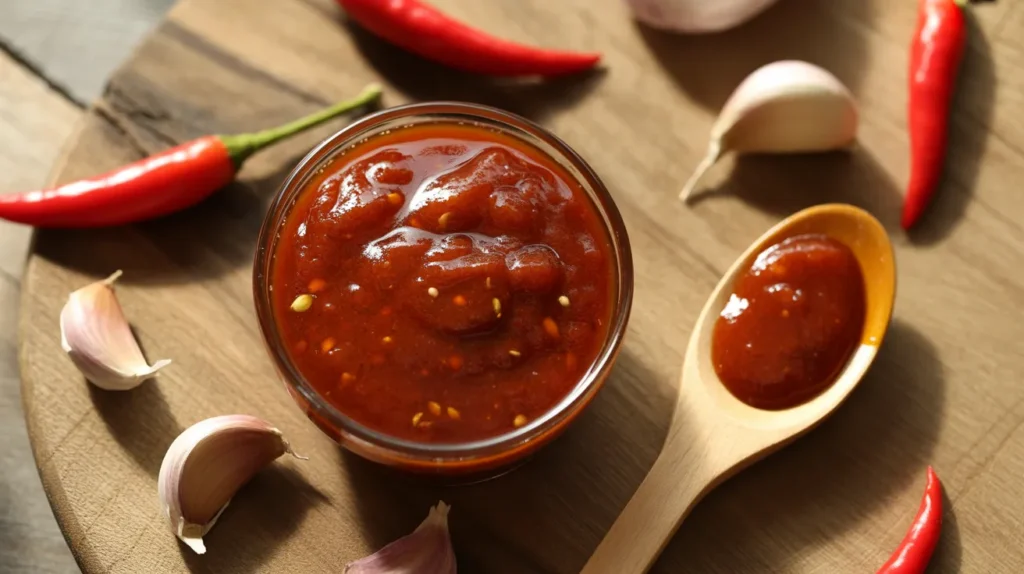
This Thai sweet chili sauce nam jim gai recipe is the bold, glossy dipping sauce you’ve been missing from your kitchen. Sweet, tangy, and just spicy enough, this Thai sweet chili sauce nam jim gai recipe takes less than 20 minutes and beats anything from a bottle — every single time.
SERVES: 4 | PREP: 10 MIN | COOK: 8 MIN | TOTAL: 18 MIN
What Is Nam Jim Gai?
Nam Jim Gai means “chicken dipping sauce” in Thai. But don’t let the name fool you.
This sauce goes on everything — grilled chicken, spring rolls, fried tofu, dumplings, and fresh vegetables. Once you make it at home, the store-bought version will never taste right again.
Ingredients for Thai Sweet Chili Sauce Nam Jim Gai Recipe
Main Sauce Ingredients
| Ingredient | Amount |
|---|---|
| Fresh red chilies (Fresno or Thai) | 6 medium |
| Garlic cloves | 4 large |
| White sugar | ½ cup |
| Rice vinegar | ⅓ cup |
| Water | ⅓ cup |
| Salt | ½ tsp |
| Cornstarch | 1½ tsp |
| Cold water (for slurry) | 1 tbsp |
Optional Add-Ins
| Ingredient | Amount |
|---|---|
| Fish sauce | 1 tsp |
| Lime juice | 1 tsp |
Step-by-Step Instructions
Phase 1 — Prepare Your Ingredients (5 minutes)
Step 1: Gather and wash your chilies. Rinse 6 fresh red chilies under cold running water. Pat them completely dry with a paper towel. Wet chilies can splatter when you chop them and change how your sauce tastes.
Step 2: Remove the chili stems. Hold each chili firmly on your cutting board. Slice off the green stem end with a sharp knife. You only need to remove the very top — don’t cut away the red flesh.
Step 3: Decide on your heat level. Look inside the chili. The white seeds and the white membrane running down the center are the hottest parts.
- Want mild sauce? Scrape out all the seeds and white membrane with a small spoon.
- Want medium heat? Remove half the seeds.
- Want spicy sauce? Leave everything in.
This step matters a lot for beginners. Start mild — you can always add more heat next time.
Step 4: Roughly chop the chilies. Cut each chili into 3–4 rough chunks. They don’t need to be perfect — they go into a blender next. Set them aside on your cutting board.
Step 5: Peel and prep the garlic. Smash 4 large garlic cloves with the flat side of your knife. The skin will pop right off. This shortcut saves you time. Discard the papery skins.
Phase 2 — Blend the Base (2 minutes)
Step 6: Add chilies and garlic to a blender or food processor. Drop your chopped chilies and smashed garlic into a small blender or food processor. If you only have a large blender, that works fine too — the sauce will just splash a little more.
Step 7: Pulse until finely minced. Pulse the blender 8–10 times in short bursts. You want the mixture finely minced — not a smooth paste. Small visible pieces of chili and garlic give the finished sauce its classic look and texture.
Stop and scrape down the sides with a rubber spatula after every few pulses. This makes sure everything chops evenly.
Safety tip: Never run a blender with hot liquid. The steam builds pressure and can pop the lid off. Always blend cold or room-temperature ingredients.
Phase 3 — Cook the Sauce (8 minutes)
Step 8: Combine your liquids and sugar in a saucepan. Pour ⅓ cup rice vinegar, ⅓ cup water, and ½ cup white sugar into a small saucepan. Add ½ tsp salt. Stir everything together until the sugar starts to dissolve.
Step 9: Add the chili-garlic mixture. Scrape the minced chili and garlic from the blender straight into the saucepan. Stir to combine. The mixture will look quite liquidy right now — that’s completely normal.
Step 10: Bring the mixture to a medium boil. Place the saucepan over medium heat. Stir every 30 seconds as it heats up. After about 3–4 minutes, you’ll see small bubbles forming around the edges. That means it’s coming to a boil.
Once it reaches a rolling boil, reduce the heat to medium-low. Let it simmer gently for 3 minutes. You’ll notice the color deepen to a brighter red and the smell will become fragrant and sweet.
Step 11: Make your cornstarch slurry. While the sauce simmers, mix 1½ tsp cornstarch with 1 tbsp cold water in a small bowl. Stir until completely smooth with no lumps. This is called a slurry — it’s what makes your sauce thick and glossy instead of watery.
Why cold water? Hot water cooks the cornstarch before it hits the sauce, creating lumps. Always use cold water for slurries.
Step 12: Add the slurry to the saucepan. With the sauce still simmering on medium-low, pour the cornstarch slurry in slowly while stirring constantly. Don’t stop stirring or the cornstarch can clump at the bottom.
Step 13: Watch the sauce thicken. Within 30–60 seconds of adding the slurry, the sauce will visibly thicken. It should coat the back of a spoon and look glossy. If you drag your finger across the back of the spoon, the line should hold.
If the sauce still looks thin after 60 seconds, make a second small slurry (1 tsp cornstarch + 2 tsp cold water) and add it in.
Step 14: Remove from heat. As soon as the sauce reaches your desired thickness, take the saucepan completely off the heat. The sauce will continue to thicken slightly as it cools.
Step 15: Add fish sauce and lime juice (optional). For a more authentic Thai flavor, stir in 1 tsp fish sauce and 1 tsp fresh lime juice while the sauce is still warm. These two ingredients add depth and brightness that sugar and vinegar alone can’t match.
Phase 4 — Cool and Store (5 minutes)
Step 16: Let the sauce cool to room temperature. Pour the finished sauce into a clean glass jar or bowl. Let it sit uncovered at room temperature for 5 minutes. The sauce will thicken just a little more as it cools.
Step 17: Taste and adjust seasoning. Dip a clean spoon into the cooled sauce. Taste it carefully.
- Too sweet? Add a small splash of rice vinegar.
- Not sweet enough? Stir in 1 tsp sugar while still slightly warm.
- Not spicy enough? Add a pinch of red pepper flakes.
- Too thick? Stir in 1 tsp warm water at a time until you reach the right consistency.
Step 18: Transfer to a clean jar and serve. Pour your finished Thai sweet chili sauce nam jim gai into a clean glass jar with a tight lid. It’s ready to serve right away.
Chef’s Notes
Use fresh chilies for the best color. Dried red pepper flakes can work in a pinch, but fresh Fresno or Thai chilies give the sauce its signature bright red color. The fresh garlic also matters — jarred minced garlic has a flat flavor that shows in the finished product.
Rice vinegar is non-negotiable. White distilled vinegar is much sharper and will overpower the other flavors. Rice vinegar has a gentle, slightly sweet acidity that works perfectly in this Thai sweet chili sauce nam jim gai recipe.
Don’t rush the cooking time. Cooking the sauce for a full 3 minutes before adding the slurry lets the raw garlic flavor mellow and the sugar caramelize slightly. Skipping this step gives you a sharp, harsh-tasting sauce.
The sauce darkens slightly as it cools. Don’t panic if your sauce looks a bit pale right after cooking. It will deepen to that classic amber-red color as it comes to room temperature.
Nutrition Information (Per Serving)
Based on 2 tablespoons per serving
| Nutrient | Amount |
|---|---|
| Calories | 48 kcal |
| Carbohydrates | 12g |
| Sugar | 11g |
| Protein | 0g |
| Fat | 0g |
| Sodium | 185mg |
| Fiber | 0g |
Nutrition values are estimates. Adding fish sauce increases sodium by approximately 35mg per serving.
Variations
Mango Nam Jim Gai Blend ¼ cup ripe mango with the chilies and garlic before cooking. The mango adds a tropical sweetness and makes the sauce even smoother. This version pairs beautifully with grilled shrimp or fresh summer rolls.
Pineapple Sweet Chili Sauce Replace 2 tbsp of the water with 2 tbsp pineapple juice. The natural enzymes in pineapple juice give the sauce a brighter, fruitier tang. Try it as a dipping sauce for coconut shrimp.
Extra Garlic Version Double the garlic to 8 cloves for a bolder, more pungent sauce. This version works especially well with plain steamed chicken breast or grilled tofu. If you love big garlic flavor, try pairing this with a homemade Thai Sriracha sauce for a seriously impressive Thai condiment spread at your next dinner party.
Low-Sugar Nam Jim Gai Reduce the sugar to ¼ cup and add 1 tbsp honey instead. Honey has a lower glycemic impact and adds a floral note that works well with the chili heat. The sauce will be slightly less thick — add an extra ¼ tsp cornstarch to compensate.
Storage and Reheating
Refrigerator Storage Pour cooled sauce into a clean glass jar with a tight lid. Store in the refrigerator for up to 3 weeks. The flavor actually improves after 24 hours as the garlic and chili have time to meld together.
Freezer Storage Pour the sauce into ice cube trays and freeze until solid. Transfer the frozen cubes into a zip-lock freezer bag. Frozen sauce keeps well for up to 3 months. Thaw overnight in the refrigerator before using.
Reheating Warm cold sauce in a small saucepan over low heat, stirring gently. Add 1 tsp water if the sauce has thickened too much in the refrigerator. Do not microwave in a sealed jar.
Signs the Sauce Has Gone Bad Discard the sauce if you see any mold, smell anything fermented or off, or notice the color has turned brown. Fresh sauce should smell bright, sweet, and garlicky.
Troubleshooting
Problem 1: My sauce is too thin and watery. You need more cornstarch. Mix 1 tsp cornstarch with 1 tbsp cold water and bring the sauce back to a simmer. Stir in the slurry and cook for another 60 seconds. Repeat if needed.
Problem 2: My sauce has lumps in it. Lumps mean the cornstarch hit the sauce unevenly. Next time, make sure the slurry is completely smooth before adding it, and pour it in slowly while stirring. To fix the current batch, pour the sauce through a fine mesh strainer and discard the lumps.
Problem 3: The sauce tastes too sour. You added too much vinegar or cooked it too quickly. Stir in 1 tsp sugar at a time until the balance is right. The sweetness cuts through the acidity quickly.
Problem 4: My sauce tastes flat and bland. You probably need more salt. Add ¼ tsp salt and stir well. Flat flavor also happens when you use old chilies — always use fresh ones for this recipe. A small splash of fish sauce can also wake up a dull batch instantly.
Problem 5: The sauce turned out too spicy. Remove the seeds from the chilies next time. For this batch, stir in 1 extra tbsp sugar and 1 tbsp water to dilute the heat. Adding a small amount of unseasoned rice (like ¼ cup cooked and blended) can also absorb some of the capsaicin.
Equipment Essentials
- Small blender or food processor — for mincing the chilies and garlic
- Small saucepan (1–2 quart) — for cooking the sauce
- Rubber spatula — for scraping the blender and stirring
- Small mixing bowl — for making the cornstarch slurry
- Glass jar with tight lid — for storing the finished sauce
- Fine mesh strainer — optional, for a smoother final texture
No blender? Mince the chilies and garlic by hand with a sharp knife. The texture will be slightly chunkier but the flavor will be identical. Some people actually prefer the hand-chopped version for its rustic look.
Shopping List
Produce Section
- Fresh red Fresno or Thai chilies (6 medium)
- Garlic (1 head — you’ll use 4 cloves)
- Lime (1, if using)
Pantry / Dry Goods Aisle
- White sugar (small bag)
- Cornstarch (small box)
- Salt
International or Asian Foods Aisle
- Rice vinegar
- Fish sauce (small bottle, optional)
5 Success Secrets for Thai Sweet Chili Sauce Nam Jim Gai Recipe
- Always taste before serving. Every batch of chilies has a different heat level. Tasting as you go is the most important skill in this recipe.
- Let it cool before judging the thickness. The sauce thickens by up to 30% as it drops to room temperature. Don’t add extra cornstarch until the sauce has fully cooled.
- Use the freshest chilies you can find. Bright, firm chilies with no soft spots make the best sauce. Old or wrinkled chilies make dull-colored, flat-tasting sauce.
- Make a double batch. This sauce takes the same amount of work whether you make one jar or two. A second jar stays fresh in the fridge for three weeks and is ready any time you need it. You can also bookmark this Thai sweet chili sauce nam jim gai recipe to come back to it whenever your jar runs low.
- Keep the heat at medium-low after the boil. High heat scorches the sugar and turns your sauce bitter. Gentle simmering gives you a clean, bright flavor every time.
Made this recipe? Leave a comment below and let me know how it turned out. Did you go mild or keep all the seeds in? I want to hear about it.