Prep Time: 15 minutes | Chill Time: 1 hour | Total Time: 1 hour 15 minutes | Serves: 4 people
Key Takeaways:
- This authentic Greek tzatziki comes together in just 15 minutes of active prep time
- Master the crucial cucumber-draining technique for thick, restaurant-quality sauce
- Make ahead and store for up to 4 days – perfect for meal prep
- Customize with mix-ins like fresh herbs or roasted garlic for endless variations
The Secret to Perfect Tzatziki Every Time
Ever tried making tzatziki at home only to end up with a watery, bland sauce that hardly resembles what you’ve enjoyed at your favorite Greek restaurant?
We’ve all been there.
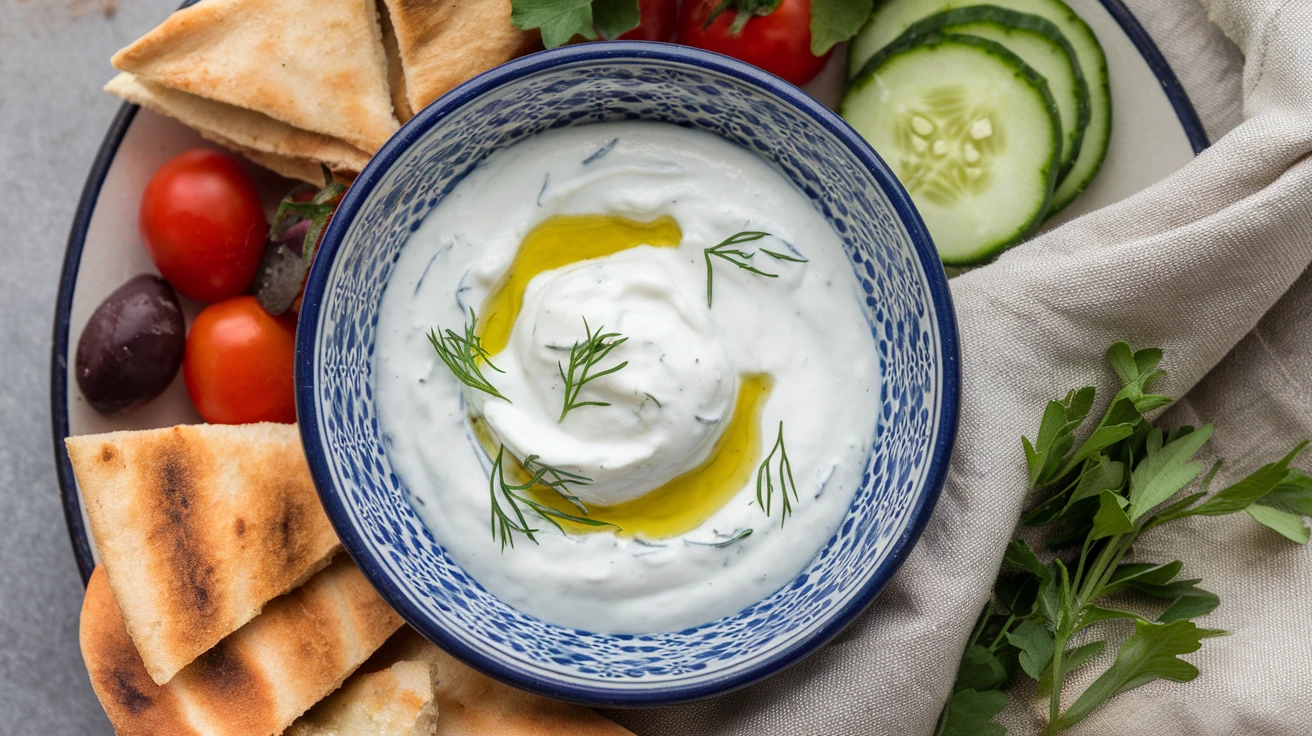
The good news? Creating restaurant-quality tzatziki sauce at home is much easier than you might think. This foolproof recipe delivers a thick, creamy sauce with the perfect balance of cucumber, garlic, and tangy yogurt every single time.
Whether you’re serving it with grilled meats, as a dip for fresh vegetables, or as part of a Mediterranean spread, this tzatziki recipe will quickly become a staple in your kitchen repertoire.
Nutrition Facts
| Nutrient | Amount per Serving |
|---|---|
| Calories | 68 |
| Total Fat | 5g |
| Saturated Fat | 3g |
| Cholesterol | 10mg |
| Sodium | 320mg |
| Total Carbohydrates | 3g |
| Dietary Fiber | 0.5g |
| Sugars | 2g |
| Protein | 4g |
Nutrition values are approximate and based on 1/4 cup serving size.
What You’ll Need
Ingredients
| Ingredient | Amount | Notes |
|---|---|---|
| Greek yogurt (full-fat) | 2 cups | For best results, use thick Greek yogurt |
| English cucumber | 1 medium | Approximately 8 inches long |
| Fresh garlic | 3 cloves | Minced finely |
| Fresh dill | 2 tablespoons | Chopped (or 2 teaspoons dried) |
| Fresh lemon juice | 1 tablespoon | About half a lemon |
| Extra virgin olive oil | 1 tablespoon | Plus extra for drizzling |
| White wine vinegar | 1 teaspoon | Adds brightness |
| Salt | 1/2 teaspoon | Kosher or sea salt preferred |
| Black pepper | 1/4 teaspoon | Freshly ground |
Equipment List
| Tool | Purpose |
|---|---|
| Box grater or food processor | For grating cucumber |
| Fine mesh strainer or cheesecloth | For draining cucumber |
| Mixing bowl | For combining ingredients |
| Garlic press (optional) | For mincing garlic |
| Measuring spoons | For accurate measurements |
| Sharp knife | For chopping herbs |
| Cutting board | For prep work |
| Airtight container | For storage |
Ingredient Substitutions
Can’t find exactly what you need? Here are some simple swaps:
- Greek Yogurt: Substitute with plain regular yogurt that’s been strained through cheesecloth for 2-3 hours
- Fresh Dill: Replace with 1 tablespoon fresh mint or parsley
- White Wine Vinegar: Substitute with rice vinegar or additional lemon juice
- English Cucumber: Use 2 Persian cucumbers instead
- Fresh Garlic: Substitute with 1/2 teaspoon garlic powder in a pinch (though fresh is much better)
Step-by-Step Instructions for Beginners
Preparation Phase (15 minutes)
- Setting up your workspace:
- Clear your countertop to create a comfortable working area
- Wash your hands thoroughly with soap and warm water
- Place all equipment and measuring tools within easy reach
- Read through the entire recipe before starting
- Prepare your cucumber:
- Place the cucumber on your cutting board
- Rinse it thoroughly under cold running water, rubbing gently with your hands to remove any dirt
- Pat dry with a clean kitchen towel or paper towel
- Cut off both ends of the cucumber using your sharp knife
- Stand the cucumber on one flat end and cut it in half from top to bottom (lengthwise)
- Look at the center of each half – you’ll see seeds in the middle forming a line
- Using a small spoon (a teaspoon works well), gently scrape along this line to remove all seeds
- BEGINNER TIP: Removing seeds is crucial as they contain extra moisture that can make your tzatziki watery
- Grate the cucumber:
- Hold your box grater firmly on your cutting board with your non-dominant hand
- Hold a cucumber half in your dominant hand, skin side against the large holes
- Push the cucumber down along the grater using firm, even pressure
- Continue until you’ve grated all the cucumber flesh, being careful of your fingers as you get close to the end
- SAFETY TIP: Keep your fingers away from the grater holes and consider using a food processor if you’re concerned about grating your fingers
- Remove excess moisture from cucumber:
- Set a fine-mesh strainer over a bowl to catch the liquid
- Transfer all grated cucumber into the strainer
- Sprinkle 1/4 teaspoon salt evenly over the grated cucumber
- Using a spoon, gently mix the salt through the cucumber
- Let this sit for exactly 10 minutes (set a timer) – the salt draws out water from the cucumber
- After 10 minutes, use the back of a large spoon to press down firmly on the cucumber
- Press several times in different spots to extract as much liquid as possible
- Alternatively, place the salted cucumber in a clean kitchen towel, gather the edges, and twist tightly over the sink to squeeze out liquid
- BEGINNER TIP: Don’t skip this step! Removing excess moisture is the #1 secret to thick, restaurant-quality tzatziki
- Prepare the garlic:
- Place a garlic clove on your cutting board
- Place the flat side of your knife on top of the clove
- Using the heel of your hand, press down firmly on the knife to crush the garlic
- The skin should now be easy to remove – peel it off completely
- Repeat with the remaining cloves
- Finely chop the peeled garlic by rocking your knife back and forth through it multiple times
- Continue chopping until the garlic pieces are very small (about the size of grains of rice)
- BEGINNER TIP: If you have a garlic press, you can use it instead of chopping – simply place the peeled clove in the press and squeeze over your bowl
- Prepare the fresh dill:
- Rinse the dill under cold water
- Gently pat dry with a paper towel
- Place the dill on your cutting board
- Using your knife, cut off and discard any thick stems
- Gather the dill into a small pile
- Rock your knife back and forth through the pile, chopping it finely
- Measure 2 tablespoons of the chopped dill
- BEGINNER TIP: Fresh herbs add bright flavor, but if you only have dried dill, use just 2 teaspoons as dried herbs are more concentrated
- Prepare the lemon juice:
- Roll a fresh lemon on the countertop while pressing down with your palm (this helps release more juice)
- Cut the lemon in half across the center
- Hold one half over a small bowl, cut side up
- Squeeze firmly while cupping your other hand underneath to catch any seeds
- Measure exactly 1 tablespoon of juice
- BEGINNER TIP: If seeds fall into your juice, remove them with a spoon before adding to your tzatziki
Assembly Steps (5 minutes)
- Combine base ingredients:
- Place a medium mixing bowl on your countertop
- Measure 2 cups of Greek yogurt and add it to the bowl
- Using a silicone spatula or wooden spoon, spread the yogurt evenly in the bowl
- Add all the drained cucumber to the yogurt
- Add all the minced garlic
- Using your spatula or spoon, gently fold all ingredients together with a circular motion
- Continue mixing until the cucumber and garlic are evenly distributed throughout
- BEGINNER TIP: Folding is a gentle technique where you scoop under ingredients and turn them over – avoid rigorous stirring which can thin the texture
- Add flavoring ingredients:
- Sprinkle the chopped dill evenly over the mixture
- Measure and add 1 tablespoon of fresh lemon juice
- Measure and add 1 tablespoon of extra virgin olive oil
- Measure and add 1 teaspoon of white wine vinegar
- Measure and add 1/2 teaspoon of salt
- Measure and add 1/4 teaspoon of black pepper
- Gently fold everything together until all ingredients are evenly incorporated
- BEGINNER TIP: When measuring liquids, place your measuring spoon over the bowl to catch any spills
- Adjust seasoning:
- Take a clean spoon and taste a small amount of the tzatziki
- Think about the balance of flavors – is it tangy enough? Salty enough? Does it need more garlic?
- If needed, add more salt, pepper, or lemon juice in small amounts (1/4 teaspoon at a time)
- Mix well and taste again after each addition
- BEGINNER TIP: It’s always easier to add more seasoning than to fix something that’s over-seasoned
Chilling Phase (1 hour)
- Rest and chill:
- Cover the bowl with plastic wrap or a lid
- If using plastic wrap, press it directly onto the surface of the tzatziki to prevent a skin from forming
- Place the covered bowl in the refrigerator
- Chill for at least 1 hour, preferably 2 hours or overnight
- BEGINNER TIP: The flavors develop and meld during this resting time – don’t skip it! The garlic flavor will mellow and integrate beautifully
Serving Steps
- Final preparation:
- Remove tzatziki from the refrigerator about 10 minutes before serving
- Peel back the plastic wrap or remove the lid
- You may notice some liquid has separated – this is normal
- Using a clean spoon, stir the tzatziki well to recombine any separated liquid
- Transfer to a clean serving bowl if desired
- Create a small well in the center using the back of a spoon
- Drizzle 1 teaspoon of extra virgin olive oil into the well
- Sprinkle a pinch of additional fresh dill on top for garnish (optional)
- BEGINNER TIP: Always use a clean spoon to serve tzatziki to prevent contamination and extend its shelf life
Troubleshooting
Problem: My tzatziki is too watery
- Solution: Make sure you’ve thoroughly drained the cucumber. If already made, place a coffee filter or cheesecloth in a strainer, add the tzatziki, and let it drain in the refrigerator for 30 minutes to remove excess liquid.
- Prevention: Next time, squeeze the cucumber more aggressively and let it drain longer before adding to the yogurt.
Problem: The garlic flavor is too strong
- Solution: If you haven’t yet combined all ingredients, rinse the minced garlic under cold water for 10 seconds to mellow the flavor. If already mixed, add an extra 1/2 cup of yogurt to dilute the garlic flavor.
- Prevention: Garlic flavor mellows over time, so making tzatziki a day ahead can help balance the flavor.
Problem: I can see large chunks of cucumber in my tzatziki
- Solution: Use a fork to mash any large pieces of cucumber against the side of the bowl.
- Prevention: Grate the cucumber using the smaller holes on your grater for a finer texture.
Problem: The tzatziki tastes bland
- Solution: Add more salt in 1/8 teaspoon increments, tasting between additions. Add an extra 1/2 teaspoon of lemon juice or white wine vinegar for more tang.
- Prevention: Let the tzatziki chill longer next time—flavors develop and intensify during refrigeration.
Problem: The texture is too thick
- Solution: Stir in 1-2 tablespoons of cold water until you reach your desired consistency.
- Prevention: Don’t over-drain your cucumber if you prefer a slightly thinner tzatziki.
Variations & Substitutions
Want to customize your tzatziki? Try these delicious variations:
- Herb Lover’s Tzatziki: Add 1 tablespoon each of chopped fresh mint and parsley along with the dill for a more complex herb flavor.
- Roasted Garlic Tzatziki: Replace fresh garlic with 4-5 cloves of roasted garlic for a mellower, sweeter flavor. Learn how to perfectly pair this with other Mediterranean and Latin sauces for a complete flavor experience.
- Spicy Tzatziki: Add 1/4 teaspoon red pepper flakes or a small minced jalapeño (seeds removed) for a touch of heat that balances the coolness of the yogurt.
- Lemon-Zest Tzatziki: Add 1 teaspoon of fresh lemon zest for bright citrus notes that wake up the flavor profile.
- Dairy-Free Option: Substitute Greek yogurt with coconut yogurt or cashew-based yogurt. Note that the texture and flavor will be different but still delicious.
- Extra-Thick Restaurant Style: Use Greek yogurt that has been strained again through cheesecloth for 2 hours in the refrigerator for an ultra-thick, luxurious texture.
Storage & Reheating
Storage:
- Transfer any leftover tzatziki to an airtight container with a tight-fitting lid
- Press plastic wrap directly onto the surface before putting the lid on to prevent a skin from forming
- Store in the refrigerator for up to 4 days
- The flavors actually improve after 24 hours as they have time to meld together
- Stir well before serving as some separation may occur
Freezing:
- Tzatziki does not freeze well due to the cucumber and yogurt content
- The texture becomes watery and grainy when thawed
- For best quality, make fresh batches rather than freezing
Make-Ahead Tips:
- Prepare up to 2 days before serving for optimal flavor
- If making ahead for a party, you might want to add the garlic closer to serving time for a fresher taste
- For meal prep, make a double batch on Sunday to enjoy throughout the week
Safety Notes & Tips
- Food Safety: Always refrigerate tzatziki promptly and don’t leave it at room temperature for more than 2 hours
- Cross-Contamination: Use clean utensils when serving to prevent introducing bacteria that could spoil your tzatziki
- Storage Container: Glass containers are best for storing tzatziki as they won’t absorb odors or stain
- Serving Temperature: Always serve tzatziki chilled for the best flavor and food safety
- Signs of Spoilage: Discard tzatziki if you notice any pink or gray discoloration, unusual smell, or mold
- Garlic Warning: Raw garlic can sometimes turn blue-green when combined with acidic ingredients – this is a harmless chemical reaction and doesn’t affect taste or safety
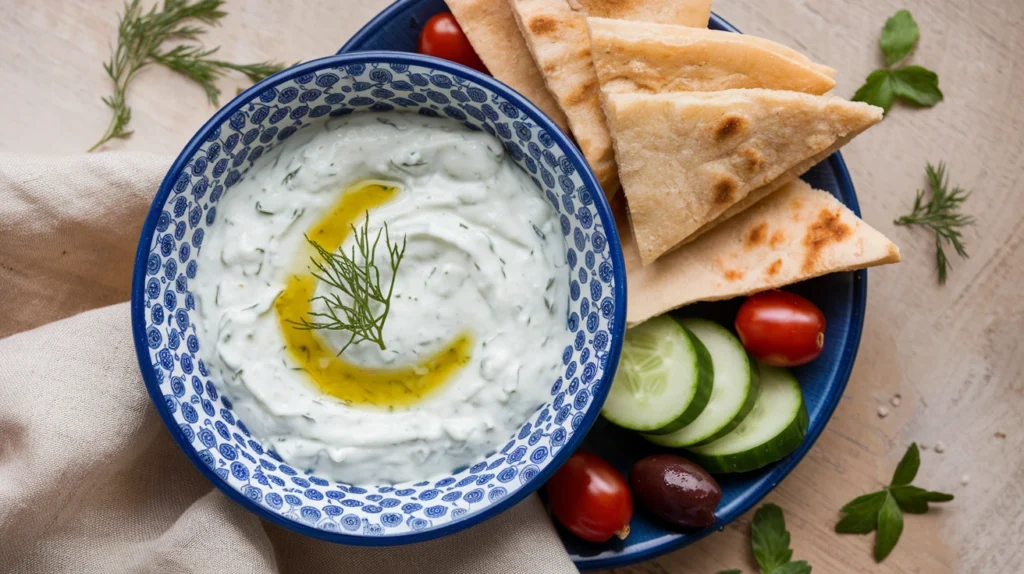
Serving Suggestions
Tzatziki is incredibly versatile and pairs beautifully with many dishes. Here are some perfect pairings:
- As a Dip: Serve with warm pita bread triangles, fresh vegetable sticks (cucumber, carrot, bell pepper), or pita chips
- With Grilled Meats: Dollop onto grilled lamb, chicken souvlaki, or beef kebabs
- On Gyros or Wraps: Spread inside pita sandwiches, wraps, or use as a sauce for falafel
- On Baked Potatoes: Use as a cooling, tangy alternative to sour cream
- With Falafel: The cool yogurt sauce balances the spiced fritters perfectly
- Alongside Spicy Dishes: Helps cool the palate with spicy dishes like curry or chili
- With Grain Bowls: Adds creamy texture to Mediterranean-inspired grain bowls with quinoa or bulgur
- As a Salad Dressing: Thin with a bit of olive oil and drizzle over tomato-cucumber salad
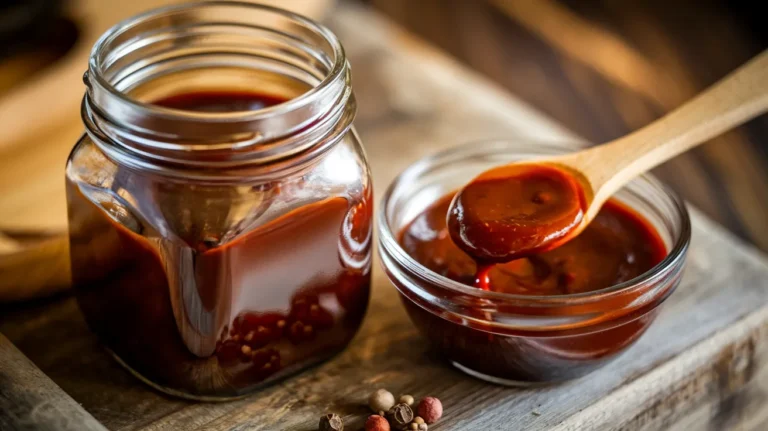
For an exceptional Mediterranean feast, try pairing your homemade tzatziki with amogio sauce for a complementary flavor experience that will truly elevate your meal.
Final Chef’s Notes
The key to exceptional tzatziki lies in two crucial steps: properly draining the cucumber and allowing time for the flavors to develop in the refrigerator. Don’t rush these steps!
For special occasions, consider making a double batch – it disappears quickly, and guests always ask for the recipe. The extra effort of using fresh ingredients makes all the difference between good tzatziki and great tzatziki.
Remember that this sauce gets better with time. If you can make it a day ahead, the flavors will have time to meld and develop into something truly magical.
Homemade tzatziki is not just a condiment – it’s a celebration of fresh, simple ingredients that come together to create something truly special. Enjoy!