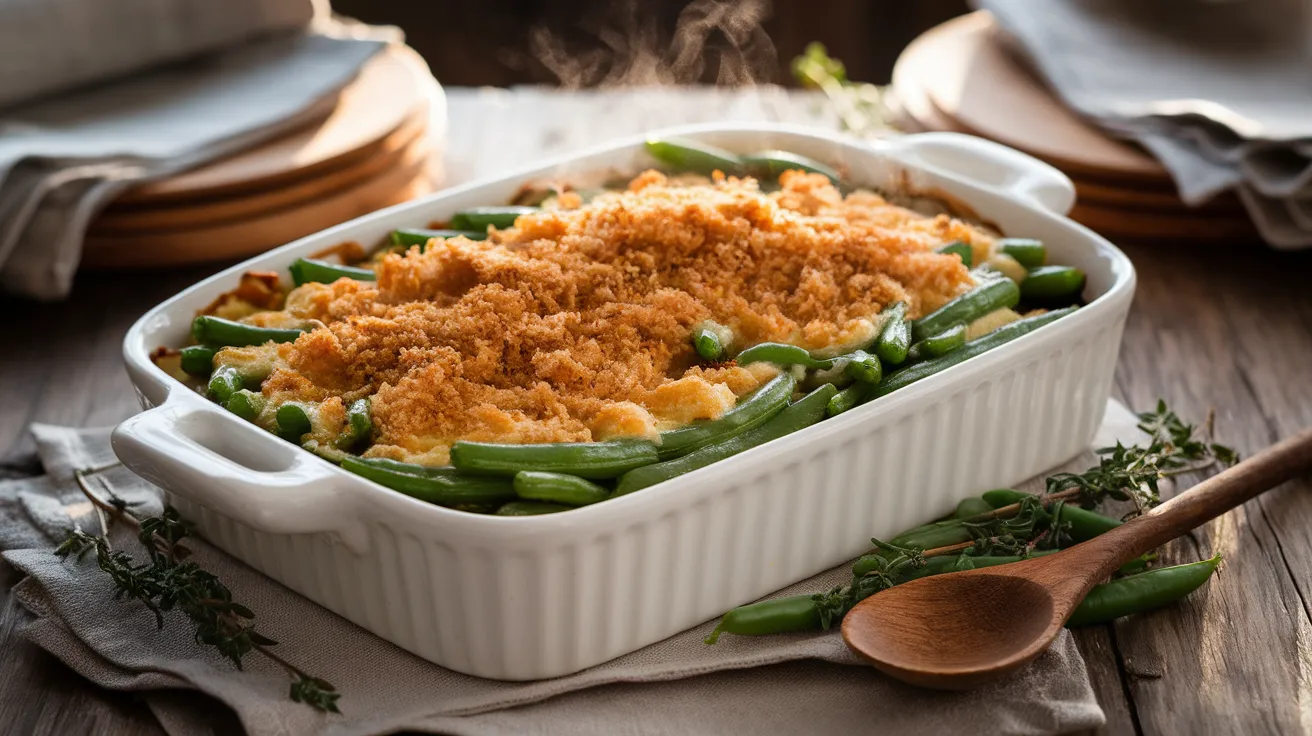
This vegan green bean casserole transforms the classic holiday dish into a plant-based masterpiece that’s creamy, flavorful, and completely dairy-free. Perfect for Thanksgiving dinner or any cozy family meal, this vegan green bean casserole delivers all the comfort you crave with fresh ingredients and a crispy onion topping that’ll have everyone asking for seconds.
Recipe Info
SERVES: 4 | PREP: 20 MIN | COOK: 25 MIN | TOTAL: 45 MIN
Ingredients
Fresh Vegetables
| Ingredient | Amount |
|---|---|
| Fresh green beans, trimmed | 2 lbs |
| Yellow onion, sliced | 1 medium |
| Mushrooms, sliced | 8 oz |
| Garlic cloves, minced | 3 cloves |
Creamy Base
| Ingredient | Amount |
|---|---|
| Cashew cream or coconut milk | 1 cup |
| Vegetable broth | ½ cup |
| Nutritional yeast | 3 tbsp |
| All-purpose flour | 2 tbsp |
| Soy sauce | 1 tbsp |
| Lemon juice | 1 tsp |
Crispy Topping
| Ingredient | Amount |
|---|---|
| Panko breadcrumbs | ½ cup |
| Fried onions (store-bought) | ½ cup |
| Olive oil | 2 tbsp |
| Salt and pepper | To taste |
Detailed Beginner’s Instructions for Vegan Green Bean Casserole
Phase 1: Essential Prep Work (10 minutes)
1. Preheat Your Oven Properly: Turn your oven dial to 375°F (190°C) and wait for the preheat light to turn off or beep to sound. This usually takes 10-15 minutes. If you have an oven thermometer, place it inside to double-check the temperature. The correct temperature is crucial – too hot will burn the topping before the inside heats through, too cool will make everything soggy.
2. Prepare Your Boiling Water Station: Fill your largest pot (at least 4-quart capacity) with water until it’s about ¾ full. Add 2 tablespoons of salt – this seems like a lot, but it’s essential for flavoring the beans and keeping them bright green. Place the pot on your stovetop’s largest burner and turn heat to high. Cover with a lid to speed up the boiling process. While waiting, prepare your ice bath.
3. Set Up an Ice Bath: Fill a large mixing bowl with cold tap water, then add 2-3 cups of ice cubes. This ice bath is your secret weapon for stopping the cooking process instantly. Without it, your green beans will continue cooking from residual heat and become mushy. Keep this bowl near your stovetop for quick access.
4. Properly Trim Green Beans: Hold each green bean and snap off the stem end (the thicker, tougher end). You can leave the pointed tail end – it’s tender and edible. For uniform cooking, cut beans into 2-inch pieces using a sharp knife. Line them up in small batches and cut through several at once to save time. Uniform pieces ensure everything cooks at the same rate.
Phase 2: Perfect Green Bean Blanching (8 minutes)
5. Test for Proper Boil: Your water should be at a rolling boil – this means large bubbles constantly breaking the surface, not just small bubbles around the edges. If you’re unsure, drop a small piece of green bean in; it should immediately start bubbling around it. Only proceed when you have a proper rolling boil.
6. Add Beans Carefully: Remove the lid from your pot (tilt it away from you to avoid steam burns). Add all the green beans at once to the boiling water. Don’t add them gradually or the water temperature will drop too much. The water will stop boiling momentarily – this is normal. Stir once with a long-handled spoon to separate any beans that stick together.
7. Time the Blanching Precisely: Start your timer the moment the water returns to a boil, not when you added the beans. Cook for exactly 3-4 minutes. At 3 minutes, test one bean – it should be bright green and slightly tender but still have a noticeable crunch. If it’s too firm, cook 1 more minute. Never go beyond 4 minutes total.
8. Execute the Ice Bath Transfer: Using a large slotted spoon or spider strainer, quickly lift all the beans from the boiling water and immediately plunge them into your ice bath. Work fast – every second counts to stop the cooking process. Stir the beans in the ice water to ensure even cooling. Let them sit for 2-3 minutes until completely cool to the touch.
9. Drain Thoroughly: Pour the beans and ice water through a large colander or strainer. Shake the colander to remove excess water, then spread the beans on clean kitchen towels or paper towels. Pat them completely dry – any remaining water will make your vegan green bean casserole watery and prevent proper browning.
Phase 3: Building the Creamy Vegan Base (12 minutes)
10. Heat Oil to Perfect Temperature: Place a large skillet (at least 12-inch) over medium heat. Add 1 tablespoon olive oil and swirl to coat the bottom. To test if it’s ready, flick a tiny drop of water into the pan – it should sizzle immediately but not violently. If it pops aggressively, lower the heat slightly. The oil should shimmer but never smoke.
11. Sauté Onions to Golden Perfection: Add your sliced onions to the heated oil. They should sizzle gently when they hit the pan. Spread them out in a single layer and let them cook without stirring for 2 minutes first – this allows them to develop color. Then stir every minute for 3-4 more minutes total until they’re translucent and lightly golden. Don’t rush this step by raising the heat or they’ll burn on the outside while staying raw inside.
12. Add Mushrooms at the Right Moment: Add sliced mushrooms and minced garlic to the pan with the onions. The mushrooms will release moisture immediately – this is normal. Cook for 3-4 minutes, stirring every minute. You’ll know they’re done when they’ve shrunk to about half their original size and the moisture has mostly evaporated. The pan should sound like sizzling, not boiling.
13. Create the Flour Base (Roux): Sprinkle the 2 tablespoons flour evenly over the vegetables. Using a wooden spoon, stir constantly for exactly 1 minute. This step, called making a roux, cooks out the raw flour taste and creates the thickening base for your sauce. The mixture will look pasty – this is correct. Don’t skip this timing or your sauce will taste like raw flour.
14. Add Liquids Gradually: Here’s where many beginners make mistakes. Pour in just ¼ cup of the cashew cream first, whisking constantly. The mixture will look lumpy initially – keep whisking vigorously. Once smooth, add the remaining cashew cream and vegetable broth slowly, whisking continuously. If you add liquid too fast, you’ll get lumps that are hard to remove.
15. Season the Sauce Properly: Add nutritional yeast, soy sauce, and lemon juice. Stir well and taste the sauce with a clean spoon. It should be creamy, slightly thick (like heavy cream consistency), and well-seasoned. Add salt and pepper gradually – start with ½ teaspoon salt and ¼ teaspoon pepper, then adjust. The sauce should coat the back of a spoon but still pour easily.
Phase 4: Assembly and Baking Your Vegan Green Bean Casserole (15 minutes)
16. Prepare Your Baking Dish: Lightly grease a 9×13 inch baking dish with olive oil or cooking spray. Make sure to get the corners and sides – this prevents sticking and makes cleanup easier. If you don’t have this exact size, use any 3-quart baking dish, but adjust cooking time by 2-3 minutes if using a deeper dish.
17. Combine Ingredients Thoughtfully: Add the dried green beans to the skillet with your creamy sauce. Using two large spoons or clean hands, gently toss everything together until every bean is coated with sauce. Don’t be aggressive – you want to coat, not mash. Transfer this mixture to your prepared baking dish and spread it evenly with a spatula.
18. Create the Perfect Crispy Topping: In a medium bowl, combine panko breadcrumbs, fried onions, 1 tablespoon olive oil, ½ teaspoon salt, and ¼ teaspoon pepper. Mix with a fork until the oil is evenly distributed and the mixture feels slightly moist but not soggy. This oil coating is what creates the golden, crispy top that makes this vegan green bean casserole so irresistible.
19. Apply Topping for Maximum Crispiness: Sprinkle the breadcrumb mixture evenly over the entire surface of your casserole. Don’t press it down or pack it – loose topping gets much crispier. Use your fingers to distribute it evenly, making sure you can still see some of the green bean mixture underneath. The topping should look like a light, even blanket.
20. Bake to Golden Perfection: Place the dish in your preheated oven on the center rack. Set a timer for 12 minutes initially. Check at this point – the edges should be bubbling and the top should be starting to turn golden. If it needs more time, continue baking for 2-3 more minutes until the topping is golden brown and the edges are actively bubbling. Total baking time should be 12-15 minutes.
21. Rest Before Serving: Remove the vegan green bean casserole from the oven and let it rest on your stovetop or a cooling rack for 5 minutes. This crucial step allows the sauce to thicken slightly from the residual heat and makes serving much neater. The internal temperature should reach 165°F if you have a food thermometer.
Chef’s Notes for Perfect Vegan Green Bean Casserole
• Cashew Cream Alternative: Can’t find cashew cream? Soak ¾ cup raw cashews in hot water for 30 minutes, then blend with ¾ cup fresh water until completely smooth. This homemade version works perfectly and is often fresher than store-bought options.
• Make-Ahead Magic: Assemble your entire vegan green bean casserole through step 19, then cover tightly with foil and refrigerate for up to 24 hours. When ready to bake, add 5 extra minutes to the cooking time since you’re starting from cold.
• Mushroom Variety: Experiment with different mushroom types like cremini, shiitake, or baby bellas for deeper, more complex flavors. Each variety adds its own unique taste to the casserole.
• Texture Control: If your sauce seems too thick during cooking, add the reserved bean blanching water 1 tablespoon at a time until you reach the perfect consistency.
Nutrition Information (Per Serving)
- Calories: 285
- Protein: 8g
- Carbohydrates: 22g
- Fat: 18g
- Fiber: 6g
- Sodium: 420mg
Creative Vegan Green Bean Casserole Variations
Mediterranean Style
Replace mushrooms with sun-dried tomatoes and add fresh herbs like thyme and oregano. Top with toasted pine nuts instead of fried onions for a sophisticated twist.
Asian-Inspired Version
Add 1 tablespoon sesame oil to the sauce and top with toasted sesame seeds and crispy shallots. Serve alongside our vegan lasagna recipe for an international feast.
Smoky BBQ Style
Include 1 teaspoon smoked paprika in the sauce and add diced bell peppers with the mushrooms for extra sweetness and smoky flavor.
Holiday Herb Edition
Mix fresh sage, rosemary, and thyme into the breadcrumb topping. Perfect with our vegan gravy for a complete Thanksgiving dinner.
Storage & Reheating Your Vegan Green Bean Casserole
Refrigerator Storage: Cover leftover vegan green bean casserole tightly with plastic wrap or foil and refrigerate for up to 4 days. The flavors actually develop and improve overnight, making leftovers even more delicious.
Freezing Instructions: Freeze the assembled but unbaked casserole for up to 3 months. Wrap tightly in plastic wrap, then foil. Thaw completely in the refrigerator overnight before baking, and add 10 extra minutes to the original cooking time.
Reheating Method: Cover with foil and reheat at 350°F for 15-20 minutes until heated through. Remove foil for the last 5 minutes to re-crisp the topping and restore that perfect texture contrast.
Individual Portions: Reheat single servings in the microwave for 1-2 minutes, though the oven method maintains much better texture and crispiness.

Troubleshooting Your Vegan Green Bean Casserole
Problem: Watery Casserole Solution: This usually happens from inadequately dried beans. Always drain blanched beans thoroughly and pat completely dry with towels. If your sauce seems thin, simmer it longer in the skillet before combining with beans.
Problem: Soggy Topping Solution: Ensure your casserole base isn’t too wet before adding topping. Use less oil in breadcrumbs if they clump together, and never press the topping down – loose topping crisps better.
Problem: Bland Flavor Solution: Season each component separately. The blanching water needs salt, the sauce needs both salt and acid (lemon juice), and the topping needs seasoning too. Taste and adjust at every step.
Problem: Overcooked Green Beans Solution: Blanch for only 3 minutes maximum and use the ice bath immediately. Remember, beans continue cooking in the oven, so they should still have bite after blanching.
Problem: Lumpy Sauce Solution: Add liquid gradually while whisking constantly. If lumps form despite your efforts, strain the sauce through a fine-mesh sieve before combining with vegetables.
Equipment Essentials
• Large pot (4+ quarts) for blanching beans • 9×13 inch baking dish for final assembly • Large skillet (12-inch) for sautéing vegetables • Slotted spoon or spider for transferring beans • Whisk for smooth sauce preparation • Sharp knife for precise vegetable prep • Large cutting board with good grip • Measuring cups and spoons • Large mixing bowl for ice bath
Organized Shopping List
Produce Section
- 2 lbs fresh green beans
- 1 medium yellow onion
- 8 oz mushrooms (any variety)
- 1 head fresh garlic
- 1 fresh lemon
Pantry Items
- All-purpose flour
- Panko breadcrumbs
- Extra virgin olive oil
- Sea salt and black pepper
- Nutritional yeast
- Low-sodium soy sauce
Refrigerated/Specialty
- Cashew cream or full-fat coconut milk
- Low-sodium vegetable broth
- French’s fried onions (crispy topping aisle)
Expert Success Secrets
1. Perfect Blanching Technique: The key to great texture in your vegan green bean casserole is proper blanching. Drop beans into rapidly boiling salted water and start timing immediately. Under-blanched beans stay tough; over-blanched beans turn to mush.
2. Sauce Consistency Mastery: Your cream sauce should coat a spoon but still pour smoothly. Test by dipping a spoon in the sauce – it should cling but drip off in a steady stream, not in chunks or too quickly.
3. Even Distribution Method: Toss green beans with sauce using two large spoons or very clean hands. Every bean should be evenly coated for consistent flavor throughout your casserole.
4. Topping Technique: Scatter the breadcrumb mixture loosely rather than pressing it down. Packed toppings steam instead of crisping, ruining the textural contrast that makes this dish special.
5. Temperature Control: Use an oven thermometer to verify accuracy. Inconsistent temperature is the #1 cause of casserole failures – too hot burns the topping before the inside heats; too cool makes everything soggy and unappetizing.
This beginner-friendly vegan green bean casserole proves that plant-based cooking doesn’t mean sacrificing flavor, comfort, or tradition. With detailed instructions and foolproof techniques, you’ll create a creamy, satisfying dish that even non-vegans will love. The combination of perfectly tender beans, rich cashew cream sauce, and golden crispy topping makes this vegan green bean casserole the star of any holiday table.