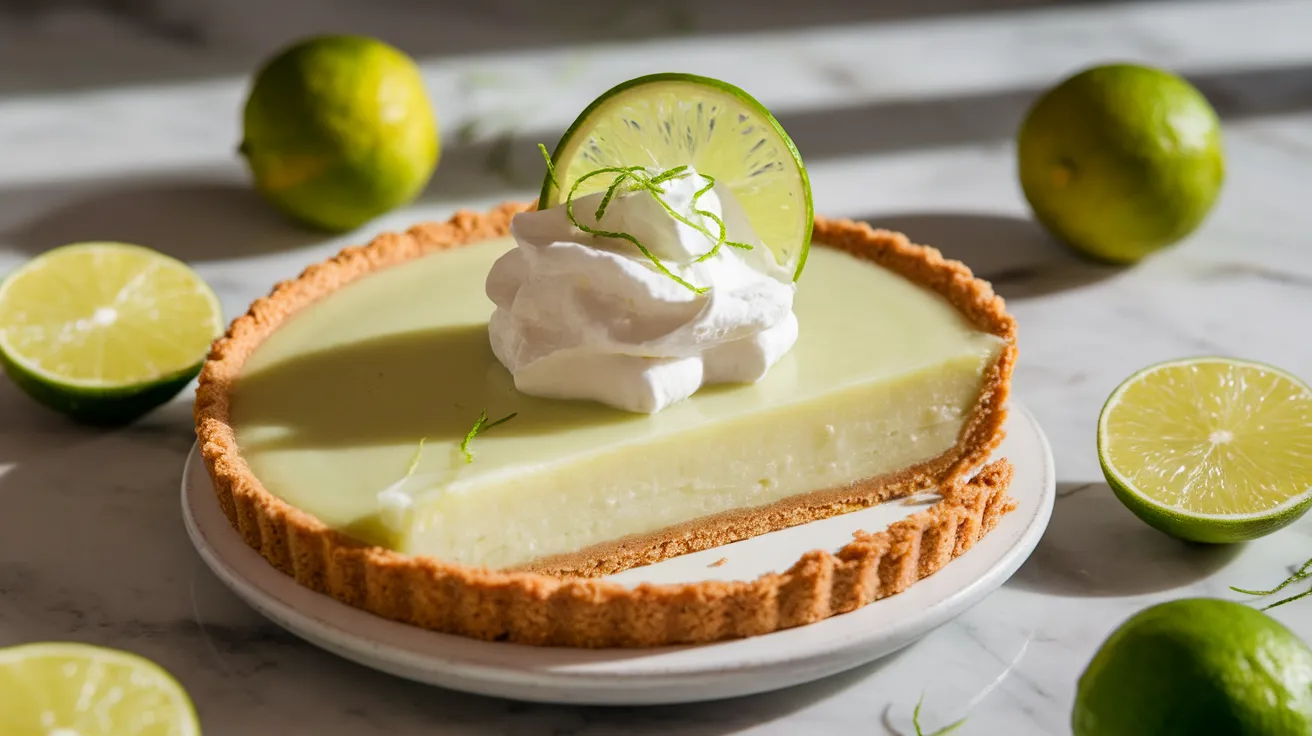
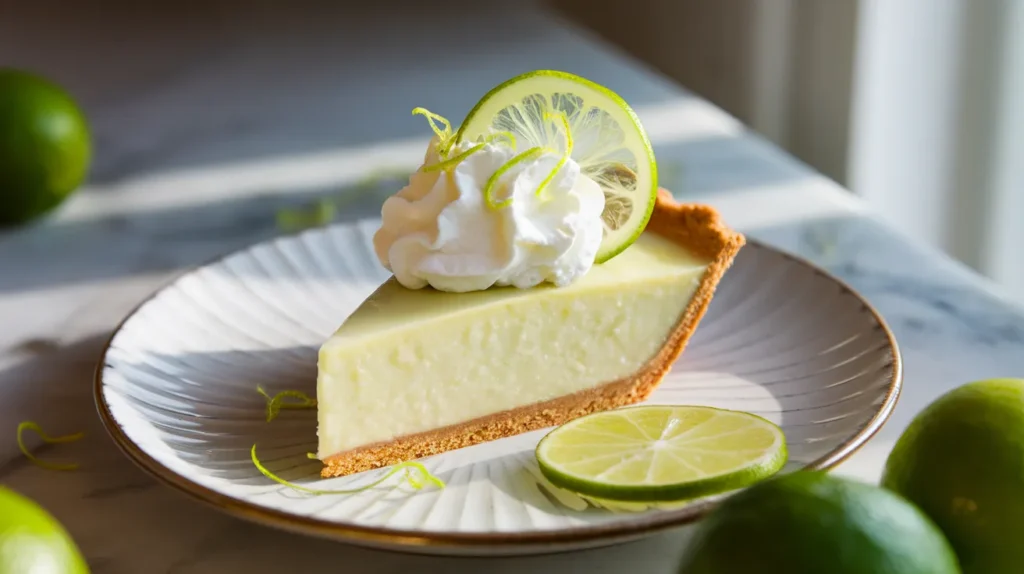
This vegan key lime pie delivers all the tangy, creamy perfection you crave without any dairy or eggs. With a crispy graham cracker crust and silky lime filling, this vegan key lime pie proves plant-based desserts can be every bit as indulgent as traditional versions. Perfect for beginners, this recipe breaks down every step so you’ll create a stunning dessert on your first try.
Recipe Info Bar
SERVES: 4 | PREP: 20 MIN | COOK: 25 MIN | TOTAL: 45 MIN
Ingredients
For the Crust:
| Ingredient | Amount |
|---|---|
| Graham crackers (vegan) | 1½ cups crushed |
| Coconut oil, melted | 3 tablespoons |
| Maple syrup | 2 tablespoons |
| Salt | ¼ teaspoon |
For the Filling:
| Ingredient | Amount |
|---|---|
| Cashews, soaked | 1 cup |
| Coconut cream (thick part) | ½ cup |
| Fresh key lime juice | ⅓ cup |
| Key lime zest | 2 tablespoons |
| Maple syrup | ⅓ cup |
| Coconut oil, melted | 2 tablespoons |
| Vanilla extract | 1 teaspoon |
| Salt | ⅛ teaspoon |
For Topping:
| Ingredient | Amount |
|---|---|
| Coconut whipped cream | 1 cup |
| Key lime zest | 1 tablespoon |
| Lime slices | 4 thin slices |
Detailed Step-by-Step Vegan Key Lime Pie Instructions
Phase 1: Preparing Your Workspace and Oven (5 minutes)
- Set your oven to 350°F and let it fully preheat. This takes about 15 minutes. You’ll know it’s ready when the oven stops making heating sounds and the temperature light turns off. The correct temperature ensures your crust bakes evenly without burning the edges or staying soggy in the center.
- Gather all your equipment before starting. You’ll need: a 9-inch pie pan, food processor (or rolling pin and plastic bag), measuring cups and spoons, mixing bowls, high-speed blender, and rubber spatula. Having everything ready prevents mistakes and makes the process smooth.
- Line your workspace with parchment paper. This makes cleanup easier and gives you a clean surface to work on. Place your pie pan on the parchment paper so you can easily transfer it to the oven later.
Phase 2: Creating the Perfect Crust (15 minutes)
- Measure exactly 1½ cups of vegan graham crackers. Break them into rough pieces first – don’t worry about being precise here. If you can’t find vegan graham crackers, check the ingredient list carefully as many contain honey. Look for brands like Nabisco Original or Keebler Original.
- Crush crackers using your preferred method.
- Food processor method: Add broken crackers to food processor. Pulse in 3-second bursts about 15-20 times until you have fine, uniform crumbs. Stop and check texture – you want fine crumbs, not powder.
- Rolling pin method: Place crackers in a sturdy zip-lock bag, seal tightly, and roll over them with a rolling pin. Keep rolling until crumbs are uniform and fine. This takes about 5 minutes of rolling.
- Melt coconut oil to liquid consistency. Measure 3 tablespoons of solid coconut oil into a microwave-safe bowl. Microwave in 15-second intervals, stirring between each interval, until completely liquid. Don’t overheat – it should be warm, not hot. If it’s too hot, let it cool for 2 minutes before using.
- Combine all crust ingredients in a large mixing bowl. Add your crushed graham crackers, the melted coconut oil, 2 tablespoons maple syrup, and ¼ teaspoon salt. Mix everything with a large spoon or your clean hands until evenly combined.
- Test the mixture consistency. Grab a handful and squeeze it firmly. It should hold together like wet sand and not crumble apart. If it’s too dry and won’t stick together, add melted coconut oil 1 teaspoon at a time. If it’s too wet and sticky, add more crushed crackers.
- Press mixture into your 9-inch pie pan methodically. Start by placing all the mixture in the center of the pan. Using your fingers, press the mixture outward from the center, working your way up the sides. Press firmly – loose crust will fall apart later. Use the bottom of a measuring cup to press down the bottom for an even surface. The crust should be about ¼ inch thick everywhere.
- Create clean, even edges around the rim. Use your fingers to press and shape the crust edges so they’re uniform all around the pan. The crust should come right to the top edge of the pan but not hang over.
- Bake the crust for exactly 12 minutes. Set a timer – this timing is crucial. The edges should be light golden brown when done. If your crust browns too quickly, reduce heat to 325°F. Remove from oven and let cool completely on a wire rack for at least 15 minutes before adding filling.
Phase 3: Preparing Cashews and Equipment (10 minutes)
- Drain your soaked cashews completely. Pour them into a fine-mesh strainer and rinse with cold water. Pat them completely dry with paper towels – any excess water will make your vegan key lime pie filling grainy instead of smooth. The cashews should have doubled in size and feel soft when pressed.
- Prepare your high-speed blender. Make sure the blender jar is completely clean and dry. Any residue will affect the taste of your filling. If you don’t have a high-speed blender, a food processor works but requires more time and scraping down the sides.
- Measure coconut cream carefully. Open your chilled can of full-fat coconut milk. Scoop out only the thick, white cream from the top – you need exactly ½ cup. Save the liquid part for smoothies or other recipes. The cream should be thick enough to almost stand on its own.
Phase 4: Creating Silky Smooth Filling (15 minutes)
- Start by blending cashews alone. Add only the drained cashews to your blender. Blend on high speed for 30 seconds, stop and scrape down sides with a rubber spatula, then blend another 30 seconds. Repeat this process until the cashews become a fine, powdery paste with no chunks visible.
- Add coconut cream gradually while blending. With the blender running on medium speed, slowly pour in the coconut cream through the top opening. This gradual addition prevents the mixture from seizing up. Blend for 1 full minute until completely smooth and creamy.
- Juice your key limes properly. Roll each lime on the counter while pressing down firmly – this breaks down the internal membranes and releases more juice. Cut limes in half and juice them over a fine-mesh strainer to catch seeds. You need exactly ⅓ cup of juice, which usually takes 6-8 key limes.
- Zest limes before juicing them. Using a microplane or fine grater, carefully grate only the green outer skin of the limes. Avoid the white pith underneath as it’s bitter. You need 2 tablespoons of zest – this adds incredible flavor to your vegan key lime pie.
- Add lime juice and zest to the blender. Pour in your fresh lime juice and add the zest. Blend on high speed for 45 seconds. The mixture will be quite tart at this point – that’s exactly what you want for authentic vegan key lime pie flavor.
- Incorporate remaining ingredients one at a time. Add maple syrup first and blend for 30 seconds. The mixture should taste slightly sweeter than your target since flavors mellow when chilled. Add the melted (but cooled) coconut oil, vanilla extract, and salt. Blend everything for 2 full minutes until impossibly smooth.
- Taste and adjust the filling. Using a clean spoon, taste the mixture. It should be tart, sweet, and creamy. If too tart, add maple syrup 1 tablespoon at a time. If not tart enough, add lime juice 1 tablespoon at a time. Remember, the flavor will be less intense once chilled.
Phase 5: Assembly and Setting (20 minutes active, 4+ hours chilling)
- Strain the filling for ultimate smoothness. Pour the blended filling through a fine-mesh strainer into a clean bowl. Use a rubber spatula to press the mixture through the strainer. This removes any tiny lumps for professional-quality texture.
- Pour filling into the completely cooled crust. The crust must be room temperature or the warm filling will make it soggy. Pour the filling slowly into the center of the crust, then use a rubber spatula to spread it evenly to the edges. The filling should come almost to the top of the crust.
- Remove air bubbles for a smooth surface. Gently tap the pie pan on your counter 3-4 times. This brings air bubbles to the surface. Use a toothpick to pop any visible bubbles, then smooth the surface with an offset spatula or the back of a spoon.
- Cover properly for chilling. Place plastic wrap directly on the surface of the filling to prevent a skin from forming. Then cover the entire pie with aluminum foil. This double covering prevents the pie from absorbing other flavors in your refrigerator.
- Chill for minimum 4 hours, preferably overnight. The pie needs this time to set properly. Don’t try to cut it before 4 hours or the filling will be too soft. Overnight chilling creates the perfect firm texture that slices cleanly.
Phase 6: Final Touches and Serving
- Prepare coconut whipped cream just before serving. Remove your chilled coconut cream from the fridge. Using an electric mixer or whisk, whip the cream until light and fluffy peaks form. This takes about 2-3 minutes with an electric mixer. Add a touch of maple syrup if you want it sweetened.
- Create professional garnishes. Wash and dry your remaining limes. Use a sharp knife to cut 4 very thin lime slices for garnish. Use a microplane to create fresh lime zest. These fresh garnishes make your vegan key lime pie look restaurant-quality.
- Slice with proper technique. Remove pie from refrigerator 10 minutes before serving. Use a sharp knife dipped in warm water between each cut. Wipe the knife clean between slices. This creates clean, beautiful slices that showcase all your hard work.
- Serve with final flourishes. Place each slice on a chilled plate. Add a dollop of coconut whipped cream, sprinkle with fresh lime zest, and place a lime slice on the side. Your homemade vegan key lime pie is now ready to impress everyone at the table.
Chef’s Notes for Perfect Vegan Key Lime Pie
• Cashew soaking shortcut: No time to soak overnight? Cover cashews with boiling water for 30 minutes – they’ll blend just as smoothly for your vegan key lime pie.
• Key lime vs. regular lime: Key limes create more authentic flavor, but regular limes work beautifully too. Use the same measurements for either variety.
• Texture perfection: Blend filling for at least 2 full minutes in a high-speed blender. This creates the impossibly smooth texture that makes this vegan key lime pie restaurant-quality.
• Make-ahead magic: This pie actually improves after 24 hours in the fridge. The flavors marry beautifully, making it perfect for entertaining.
Nutrition Per Serving
- Calories: 385
- Protein: 8g
- Carbohydrates: 32g
- Fat: 26g
- Fiber: 3g
- Sugar: 18g
Creative Vegan Key Lime Pie Variations
Chocolate Key Lime Twist
Add 2 tablespoons cocoa powder to the filling for a rich chocolate-lime combination. This variation pairs wonderfully with vegan chocolate covered strawberries as an elegant dessert spread.
Coconut Lime Paradise
Replace half the cashews with coconut butter and add ¼ cup shredded coconut to the filling. Garnish with toasted coconut flakes for extra tropical flair.
Vanilla Bean Enhancement
Split and scrape 1 vanilla bean into the filling instead of extract. The tiny black specks create visual appeal and intense vanilla flavor that complements the lime beautifully.
Mini Pie Individual Portions
Divide mixture among 4 individual tart pans for personal-sized desserts. Perfect for dinner parties and portion control – bake crusts for just 8 minutes instead.
Storage & Reheating Guidelines
Refrigerator Storage
Store covered pie in refrigerator for up to 5 days. Use plastic wrap directly on surface to prevent skin forming, then cover entire pie with foil.
Freezing Instructions
Freeze whole pie for up to 2 months. Wrap tightly in plastic wrap, then aluminum foil. Thaw overnight in refrigerator before serving – texture remains perfect.
Serving Temperature
Serve slightly chilled but not ice-cold. Remove from fridge 15 minutes before serving for optimal creamy texture and full flavor development.
Troubleshooting Common Vegan Key Lime Pie Issues
Problem: Grainy, Not Smooth Filling
Solution: Your cashews weren’t soaked long enough or blender isn’t powerful enough. Soak cashews 6+ hours and blend for full 3 minutes, scraping sides frequently.
Problem: Filling Won’t Set Properly
Solution: Too much liquid was added. Next time, use only thick coconut cream (not the liquid) and ensure coconut oil was melted but not hot when added.
Problem: Crust Falls Apart When Slicing
Solution: Crust mixture was too dry. Add melted coconut oil 1 teaspoon at a time until mixture holds together when squeezed firmly.
Problem: Pie Tastes Too Tart
Solution: Different limes have varying acidity levels. Balance with additional maple syrup, 1 tablespoon at a time, blending well after each addition.
Problem: Filling Separates or Curdles
Solution: Ingredients were at different temperatures. Ensure all ingredients are room temperature except chilled coconut cream before blending.
Equipment Essentials
• 9-inch pie pan (glass or ceramic works best) • High-speed blender or food processor (essential for smooth texture) • Fine-mesh strainer (for perfectly smooth filling) • Offset spatula (for professional-looking surface) • Measuring cups and spoons (accuracy matters in baking) • Mixing bowls (various sizes for different components)
Shopping List by Store Section
Baking Aisle
- Vegan graham crackers
- Maple syrup
- Vanilla extract
- Salt
Refrigerated Section
- Canned full-fat coconut milk
- Fresh key limes (or regular limes)
Bulk/Natural Foods
- Raw cashews
- Coconut oil
Produce Section
- Fresh limes for garnish
- Additional key limes if making fresh juice
Success Secrets for Perfect Vegan Key Lime Pie
- Soak cashews overnight for the silkiest texture possible. This single step transforms your vegan key lime pie from good to extraordinary.
- Chill coconut milk cans overnight before opening. This separates cream from liquid perfectly, ensuring thick, stable filling.
- Taste and adjust sweetness before chilling. Flavors mellow significantly once cold, so the mixture should taste slightly sweeter than your target.
- Use parchment paper overhang in pie pan for easiest removal. This simple trick prevents sticking and creates clean, professional edges.
- Slice with warm, clean knife dipped in hot water between cuts. This technique ensures perfect, bakery-quality slices every single time.
This vegan key lime pie proves that plant-based desserts can be every bit as satisfying as traditional versions. The combination of tangy lime filling and buttery crust creates a dessert that even non-vegans will absolutely love. For your next gathering, pair this with vegan vanilla cupcakes for a complete plant-based dessert table that’ll impress everyone.