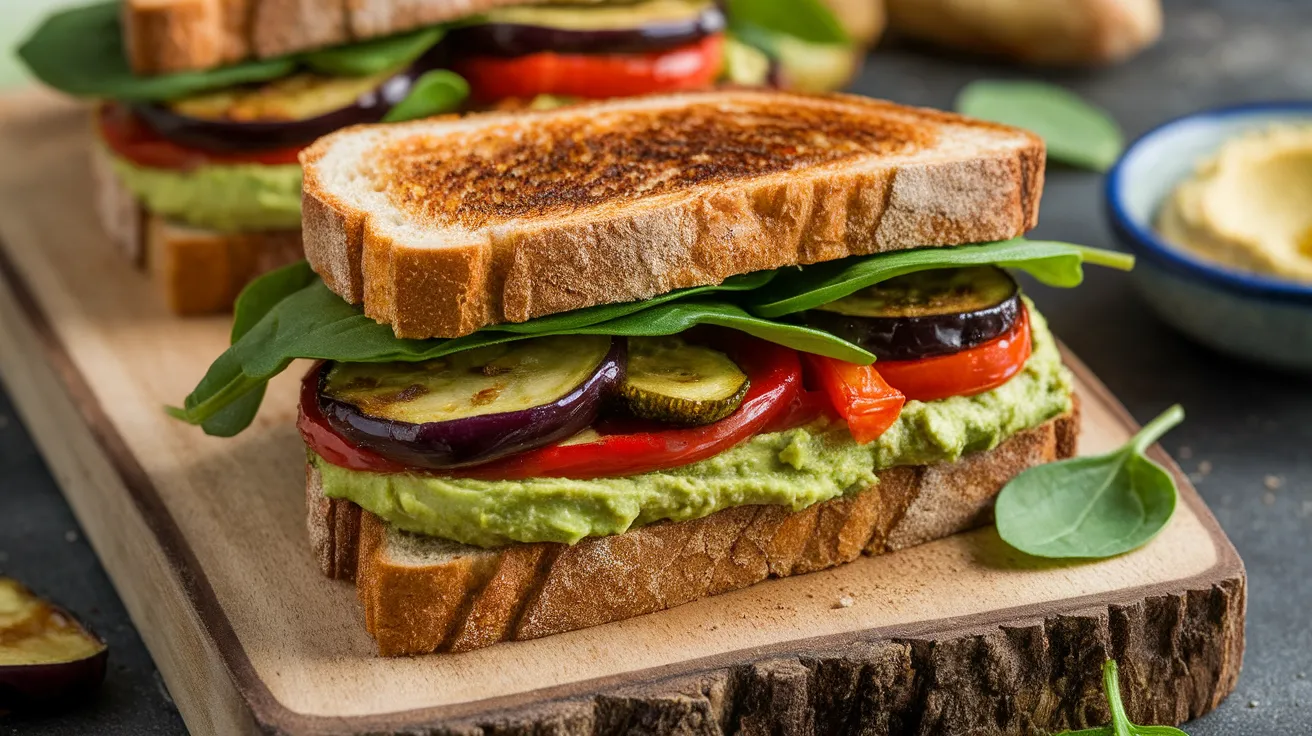
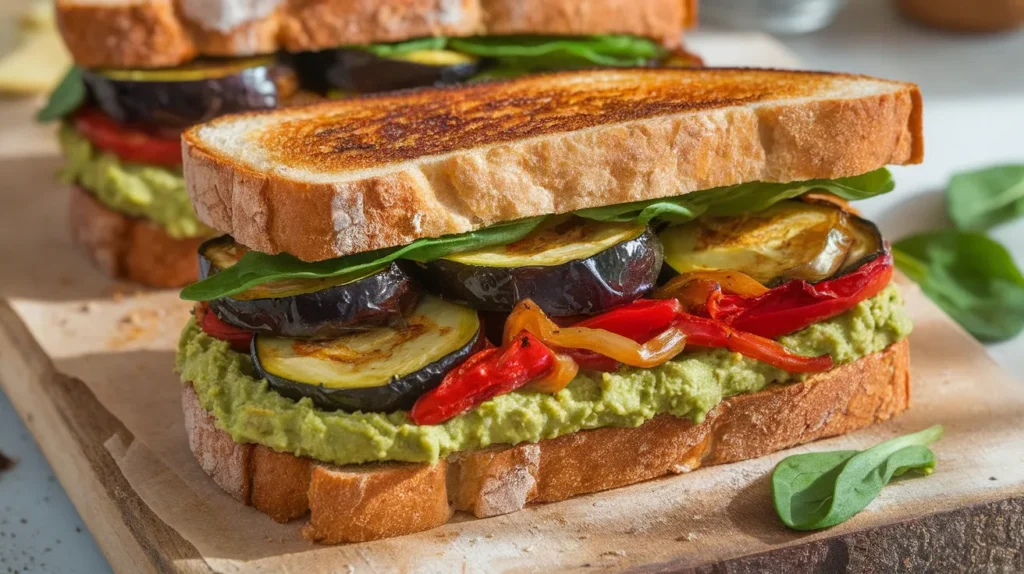
This vegan sandwich combines perfectly roasted vegetables with creamy spreads for an unforgettable plant-based experience. Our step-by-step vegan sandwich guide makes it simple for beginners to create restaurant-quality results at home every time.
Recipe Info Bar
SERVES: 4 | PREP: 20 MIN | COOK: 25 MIN | TOTAL: 45 MIN
Ingredients
For the Roasted Vegetables
| Ingredient | Amount |
|---|---|
| Red bell peppers | 2 large, sliced |
| Zucchini | 1 medium, sliced rounds |
| Red onion | 1 medium, sliced |
| Eggplant | 1 small, sliced rounds |
| Olive oil | 3 tablespoons |
| Salt | 1 teaspoon |
| Black pepper | ½ teaspoon |
| Garlic powder | 1 teaspoon |
For the Spreads & Assembly
| Ingredient | Amount |
|---|---|
| Sourdough bread | 8 thick slices |
| Ripe avocados | 2 large |
| Hummus | ½ cup |
| Vegan mayo | ¼ cup |
| Dijon mustard | 2 tablespoons |
| Fresh spinach | 2 cups |
| Tomatoes | 2 large, sliced |
| Lemon juice | 2 tablespoons |
Complete Vegan Sandwich Instructions for Beginners
Phase 1: Kitchen Setup and Preparation (10 minutes)
Step 1: Set Up Your Workspace Start by clearing your counter space and gathering all ingredients. Place a cutting board near your sink for easy vegetable washing. Position your knife, measuring cups, and mixing bowls within arm’s reach. This organization prevents confusion during cooking.
Step 2: Preheat and Prepare Baking Equipment Turn your oven to 425°F (220°C) and let it preheat for at least 10 minutes while you prep. Take out two large baking sheets – they should be big enough that vegetables won’t overlap. Line each sheet completely with parchment paper, leaving slight overhangs for easy lifting later.
Step 3: Wash All Vegetables Thoroughly Rinse bell peppers, zucchini, eggplant, and onion under cold running water. Pat each vegetable completely dry with paper towels or clean kitchen towels. Wet vegetables won’t roast properly – they’ll steam instead and become mushy.
Step 4: Master the Vegetable Cuts For bell peppers: Cut off the top and bottom, remove seeds and white parts, then slice into ½-inch wide strips. For zucchini and eggplant: Slice into ¼-inch thick rounds using a ruler if needed for consistency. For red onion: Cut in half through the root, peel off outer skin, then slice into ¼-inch thick half-moons. Keep pieces uniform so they cook evenly.
Step 5: Prepare the Avocado Spread Cut avocados in half by running your knife around the pit. Twist halves apart and remove pits carefully. Scoop flesh into a small bowl using a spoon. Add lemon juice immediately and mash with a fork until mostly smooth but still slightly chunky. Add a pinch of salt and mix. Cover with plastic wrap pressed directly onto surface to prevent browning.
Phase 2: Roasting the Vegetables (25 minutes)
Step 6: Season the Vegetables Properly Place all cut vegetables in your largest mixing bowl. Drizzle olive oil over everything – start with 2 tablespoons and add more if needed. Sprinkle salt, pepper, and garlic powder evenly over vegetables. Using clean hands, toss everything together for 2-3 minutes until every piece glistens with oil and seasoning.
Step 7: Arrange for Perfect Roasting Divide seasoned vegetables between your two prepared baking sheets. Spread them in single layers with small gaps between pieces – overcrowding creates steam and prevents the golden browning we want. Place thicker pieces like eggplant toward the center where heat is most intense.
Step 8: Roast with Timing Precision Slide both pans into your preheated oven, placing one on the middle rack and one slightly lower. Set a timer for 12 minutes. At the 12-minute mark, remove pans and flip each piece of vegetable using tongs or a spatula. This ensures even browning on both sides.
Step 9: Complete the Roasting Process Return pans to oven and roast for another 8-13 minutes. Start checking at 8 minutes – vegetables are done when edges are golden brown and centers are tender when pierced with a fork. Bell peppers should have light char marks, and eggplant should be creamy inside. Remove from oven and let cool for 5 minutes.
Phase 3: Bread Preparation and Spread Assembly (8 minutes)
Step 10: Toast Bread to Perfection While vegetables cool, toast your 8 bread slices until golden brown and crispy on both sides. Use a toaster set to medium-high or a toaster oven at 400°F for 2-3 minutes per side. The bread should sound hollow when tapped – this indicates it’s crispy enough to hold up to moist fillings.
Step 11: Create the Tangy Mayo Spread In a small bowl, combine vegan mayo and Dijon mustard. Whisk together until completely smooth and uniform in color. This spread adds tangy flavor that complements the roasted vegetables. Taste and adjust – add more mustard for tang or more mayo for creaminess.
Step 12: Apply Base Spreads Strategically Take 4 slices of toasted bread and spread hummus evenly across each slice, leaving a small border around edges. Use about 2 tablespoons per slice. On the remaining 4 slices, spread the mayo-mustard mixture using the same technique. These will be your top pieces.
Phase 4: Perfect Vegan Sandwich Assembly (7 minutes)
Step 13: Create the Foundation Layer On each hummus-spread slice, place a generous handful of fresh spinach leaves. Press them gently into the hummus so they stick and won’t slide around. The spinach acts as a moisture barrier protecting your bread while adding fresh flavor and nutrition.
Step 14: Layer Roasted Vegetables Strategically Start with eggplant slices as your base vegetable layer – they’re sturdy and won’t slide. Add 3-4 pieces per sandwich, slightly overlapping. Next, add zucchini rounds in a single layer, followed by bell pepper strips arranged in the same direction. Top with red onion pieces distributed evenly.
Step 15: Add Fresh Elements Place 2-3 tomato slices on each sandwich, lightly salting them before adding. The salt draws out excess moisture and intensifies flavor. Spread a generous layer of your prepared avocado mash over the tomatoes, creating a creamy element that holds everything together.
Step 16: Complete Your Vegan Sandwich Carefully place the mayo-spread bread slices on top of each sandwich, spread-side down. Press gently but firmly to help all layers adhere. The sandwich should feel sturdy but not compressed.
Step 17: Cut and Serve Properly Using a sharp serrated knife, cut each vegan sandwich diagonally from corner to corner. Use a gentle sawing motion rather than pressing straight down – this prevents squishing and keeps layers intact. Clean your knife between cuts for the neatest presentation.
Professional Chef’s Notes for Vegan Sandwich Success
Temperature Management: Always let roasted vegetables cool to room temperature before assembling your vegan sandwich. Hot vegetables create steam that makes bread soggy and can cause burns during handling.
Make-Ahead Strategy: Roast vegetables up to 3 days in advance and store covered in the refrigerator. Bring to room temperature before using, or warm gently in a 300°F oven for 5 minutes.
Bread Selection Matters: Choose artisan sourdough or whole grain breads with sturdy crusts. Avoid soft sandwich breads that can’t support the weight of this hearty vegan sandwich.
Moisture Control Secret: After slicing tomatoes, lay them on paper towels and sprinkle with salt. Let sit for 10 minutes, then pat dry. This removes excess water that could make your sandwich soggy.
Nutrition Information Per Serving
- Calories: 485
- Protein: 12g
- Carbohydrates: 52g
- Fat: 26g
- Fiber: 14g
- Sodium: 680mg
Creative Vegan Sandwich Variations
Mediterranean-Style Version: Replace avocado with roasted red pepper tapenade and add fresh basil leaves. Include Kalamata olives for briny flavor that pairs beautifully with roasted vegetables, similar to the complex flavors in our vegan ramen recipes.
High-Protein Power Sandwich: Add grilled tempeh or seasoned chickpea patties between the vegetable layers. Marinate protein in soy sauce and garlic for 30 minutes before cooking alongside your vegetables.
Spicy Southwest Style: Mix chipotle peppers in adobo sauce into your mayo spread and add fresh cilantro, jalapeño slices, and black beans. This creates a warming, satisfying meal that rivals our comforting vegan soup dishes.
Italian Garden Version: Use basil pesto instead of hummus and add sun-dried tomatoes with fresh mozzarella-style vegan cheese. Drizzle with balsamic glaze before serving.
Storage and Reheating Guide
Refrigerator Storage: Wrap completed sandwiches tightly in plastic wrap or parchment paper. Store for up to 2 days – the bread will soften slightly but flavors improve overnight.
Component Storage: Keep roasted vegetables in airtight containers for up to 5 days. Store spreads separately in small containers with tight-fitting lids.
Reheating Instructions: For best results, warm assembled sandwiches in a panini press for 2-3 minutes or in a covered skillet over medium-low heat for 4 minutes per side.
Freezing Guidelines: Freeze roasted vegetables only (without bread or spreads) for up to 3 months. Thaw overnight in refrigerator and pat completely dry before using.
Beginner’s Troubleshooting Guide
Problem: Soggy Bread Solution: Ensure vegetables are completely cooled and tomatoes are salted and drained. Toast bread until very crispy and use spinach as a moisture barrier.
Problem: Vegetables Are Mushy Solution: Cut vegetables thicker (½-inch instead of ¼-inch) and reduce cooking time by 5 minutes. Increase oven temperature to 450°F for better caramelization.
Problem: Bland Flavor Throughout Solution: Season each component separately and taste as you go. Don’t skip salting tomatoes, and ensure roasted vegetables are well-seasoned before cooking.
Problem: Sandwich Falls Apart When Eating Solution: Use sturdy bread, press layers together firmly during assembly, and insert toothpicks in quarters before cutting. Wrap tightly in parchment paper for portable eating.
Problem: Uneven Vegetable Cooking Solution: Cut all pieces uniformly using a ruler if necessary. Rotate baking sheets halfway through cooking and avoid overcrowding pans.
Essential Equipment List
- 2 large rimmed baking sheets (18×13 inches ideal)
- Sharp chef’s knife (8-10 inches for easy vegetable cutting)
- Large mixing bowl (at least 4-quart capacity)
- Serrated bread knife for clean sandwich slicing
- Measuring cups and spoons for accurate ingredient portions
- Cutting board (wood or plastic, large enough for safe cutting)
- Kitchen tongs for flipping vegetables safely
Organized Shopping List
Fresh Produce Section
- Red bell peppers (2 large, firm and bright)
- Zucchini (1 medium, no soft spots)
- Red onion (1 medium, firm with dry skin)
- Eggplant (1 small, glossy and heavy for size)
- Ripe avocados (2 large, yield to gentle pressure)
- Fresh baby spinach (5-ounce container)
- Large tomatoes (2 firm but ripe)
- Fresh lemon (1 whole for juice)
Pantry and Condiment Aisles
- Extra virgin olive oil
- Plain or roasted red pepper hummus
- Vegan mayonnaise (refrigerated section)
- Dijon mustard
- Kosher salt, black pepper, garlic powder
Bakery Department
- Artisan sourdough bread (1 loaf, day-old works well)
Five Essential Success Secrets
- Salt vegetables immediately after cutting and let sit for 5 minutes before tossing with oil. This draws out moisture and concentrates flavors, preventing watery sandwiches that lose their structure.
- Test doneness with multiple methods – vegetables should be fork-tender but still hold their shape, with golden edges and slight caramelization. Taste-test a piece from each variety to ensure proper cooking.
- Cool completely before assembly – hot vegetables release steam that creates soggy bread and diluted flavors. Room temperature components blend better and create more stable sandwiches.
- Layer with intention – place sturdiest ingredients on bottom (eggplant, zucchini) and most delicate on top (tomatoes, avocado). This prevents crushing and maintains structural integrity throughout eating.
- Rest before cutting – let assembled sandwiches sit for 5 minutes before slicing. This allows spreads to set slightly and flavors to meld, making cleaner cuts and better-tasting results.